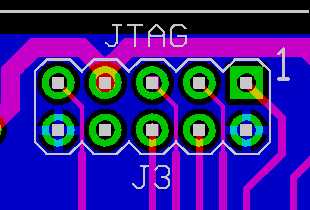
The picture at right shows the layout of a JTAG ICE connector on a target system. Pin 1 is located near the edge of the board, which is at the top of the picture. This means that the ECROS Technology AVR ICE-Cube can be plugged directly onto the header and will hang over the edge of the board, not blocking access to any components on the board. If you do not want the connector to be at the board edge or you need it mounted the other way round, with pin 1 on the inside, there are two choices. You can make sure that there is nothing under the ICE-Cube outline that is tall or to which you need access and still plug it directly onto the header. Alternatively, you can plug the ICE-Cube into its cable adapter and run a ribbon cable to your target system.
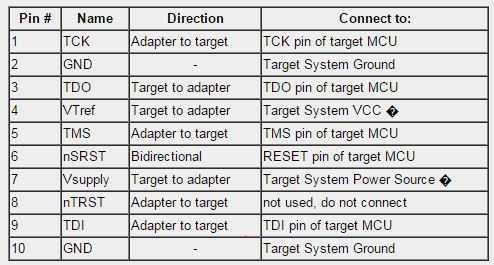
Connect the header pins as follows:
AVR JTAG ICE - Target System Design
原文:http://www.cnblogs.com/tifnan2015/p/4760591.html