让我们一起开启一个项目来学习Spring框架吧。在你开始使用Spring写你的第一个例子之前,你必须确保你已经按我上一篇那么说的 安装好了 Spring 的所需环境条件。
好吧。让我们开始写一个简单的应用程序 并 让它输出 "Hello World!"
第一步就是新建一个普通的Java项目,具体的操作为 File -> New -> Project ,给你的项目命名为 HelloSpring

项目新建完成后,你的项目视图应该是这样的:

我们把Spring-framework和 common loggin 的类库都添加到我们的项目中。右键你的项目名称,在弹出框中选择 Build Path -> Configure Build Path 视图如下:
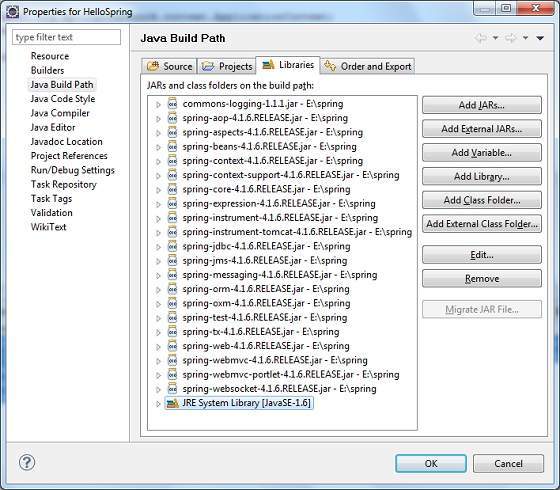
现在开始添加 依赖的类库,点击Libraries Tab项下面的 Add External JARs按钮 添加SPring的核心jar包 和 Common Logging 的
commons-logging-1.1.1
spring-aop-4.1.6.RELEASE
spring-aspects-4.1.6.RELEASE
spring-beans-4.1.6.RELEASE
spring-context-4.1.6.RELEASE
spring-context-support-4.1.6.RELEASE
spring-core-4.1.6.RELEASE
spring-expression-4.1.6.RELEASE
spring-instrument-4.1.6.RELEASE
spring-instrument-tomcat-4.1.6.RELEASE
spring-jdbc-4.1.6.RELEASE
spring-jms-4.1.6.RELEASE
spring-messaging-4.1.6.RELEASE
spring-orm-4.1.6.RELEASE
spring-oxm-4.1.6.RELEASE
spring-test-4.1.6.RELEASE
spring-tx-4.1.6.RELEASE
spring-web-4.1.6.RELEASE
spring-webmvc-4.1.6.RELEASE
spring-webmvc-portlet-4.1.6.RELEASE
spring-websocket-4.1.6.RELEASE
选中HelloSpring 的src 右键 New -> Package. 起名叫com.tutorialspoint
接下来 在com.tutorialspoint package包下 新建 HelloWorld.java and MainApp.java
HelloWorld.java 文件中内容如下:
package com.tutorialspoint;

public class HelloWorld {
   private String message;

   public void setMessage(String message){
      this.message  = message;
   }

   public void getMessage(){
      System.out.println("Your Message : " + message);
   }
}
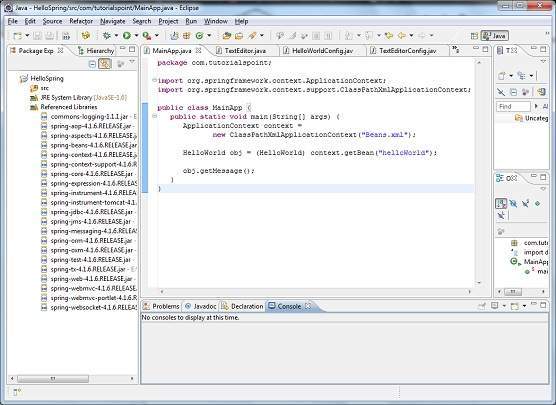
MainApp.java 文件中的内容如下:
ackage com.tutorialspoint;

import org.springframework.context.ApplicationContext;
import org.springframework.context.support.ClassPathXmlApplicationContext;

public class MainApp {
   public static void main(String[] args) {
      ApplicationContext context =
             new ClassPathXmlApplicationContext("Beans.xml");
      HelloWorld obj = (HelloWorld) context.getBean("helloWorld");
      obj.getMessage();
   }
}
第一步 那里我们使用Spring框架的ClassPathXmlApplicationContext(). 这个API加载了bean的配置信息,它负责创建和初始化 里面的bean
第二步 我们使用了ApplicationContext对象的getBean方法来获取定义在Beans.xml中的一个对象。获取到这个对象之后,我们就可以使用这个对象的方法和属性了。
你需要新建一个配置bean的xml文件 来集中创建你的bean.这个文件需要创建在 src 目录下

通常,开发者喜欢把这个文件名 定义为 Beans.xml,但是你也可以起别的名称.
Beans.xml 通过为不同的Bean定义唯一的ID 来控制对象的创建以及赋值 或者其他操作。比如使用下面的文件 你可以给"message"这个变量赋值为 "Hello World".
<?xml version="1.0" encoding="UTF-8"?>
<beans xmlns="http://www.springframework.org/schema/beans"
    xmlns:xsi="http://www.w3.org/2001/XMLSchema-instance"
    xsi:schemaLocation="http://www.springframework.org/schema/beans
    http://www.springframework.org/schema/beans/spring-beans-3.0.xsd">
   <bean id="helloWorld" class="com.tutorialspoint.HelloWorld">
       <property name="message" value="Hello World!"/>
   </bean>
</beans>
当Spring 应用加载到内存中时,框架会确保所有的配置文件中的<bean>标签中的ID是唯一的,你可以使用<property> 标签来给不同的对象设置相应的属性。
Your Message : Hello World!
原文:http://my.oschina.net/httpssl/blog/514493