最近手头项目需要用到一个上位机,需要在上位机上实现远程访问及视频监控。其中视频监控采用了网上资料较多的mjpg_streamer进行视频处理。在使用中遇到许多坑也一并记录下来。
首先安装依赖环境和检测环境,装全点没坏处:)
sudo apt-get install subversion
sudo apt-get install libv4l-dev
sudo apt-get install libjpeg8-dev
sudo apt-get install imagemagick
sudo apt-get install fswebcam
sudo apt-get install v4l-utils
sudo apt-get install build-essential make
安装完成后,开始下载代码并进行编译
cd ~/
mkdir code
cd code
svn co https://svn.code.sf.net/p/mjpg-streamer/code/mjpg-streamer/
cd mjpg-streamer/mjpg-streamer
make USE_LIBV4L2=true clean all
sudo make DESTDIR=/usr install
执行完sudo make DESTDIR=/usr install 后信息如下:
mjpg-streamer# sudo make DESTDIR=/usr install
install --mode=755 mjpg_streamer /usr/bin
install --mode=644 input_uvc.so output_file.so output_udp.so output_http.so input_testpicture.so input_file.so /usr/lib/
install --mode=755 -d /usr/www
install --mode=644 -D www/* /usr/www
如遇编译失败再装下面的依赖包,有的人说要下依赖包重新编译,具体是否好用未测试,发现有这个方法就不用做那么多事了
sudo apt-get install libjpeg-dev
现在就可以进行测试了:
# ls /dev/video*
/dev/video0
# fswebcam -v
--- Opening /dev/video0...
Trying source module v4l2...
/dev/video0 opened.
src_v4l2_get_capability,87: /dev/video0 information:
src_v4l2_get_capability,88: cap.driver: "uvcvideo"
src_v4l2_get_capability,89: cap.card: "USB2.0 UVC WebCam"
src_v4l2_get_capability,90: cap.bus_info: "usb-sw-ehci-1"
src_v4l2_get_capability,91: cap.capabilities=0x04000001
src_v4l2_get_capability,92: - VIDEO_CAPTURE
src_v4l2_get_capability,103: - STREAMING
No input was specified, using the first.
src_v4l2_set_input,181: /dev/video0: Input 0 information:
src_v4l2_set_input,182: name = "Camera 1"
src_v4l2_set_input,183: type = 00000002
src_v4l2_set_input,185: - CAMERA
src_v4l2_set_input,186: audioset = 00000000
src_v4l2_set_input,187: tuner = 00000000
src_v4l2_set_input,188: status = 00000000
src_v4l2_set_pix_format,520: Device offers the following V4L2 pixel formats:
src_v4l2_set_pix_format,533: 0: [0x56595559] ‘YUYV‘ (YUV 4:2:2 (YUYV))
src_v4l2_set_pix_format,533: 1: [0x47504A4D] ‘MJPG‘ (MJPEG)
Using palette MJPEG
Adjusting resolution from 384x288 to 320x240.
src_v4l2_set_mmap,672: mmap information:
src_v4l2_set_mmap,673: frames=4
src_v4l2_set_mmap,722: 0 length=153600
src_v4l2_set_mmap,722: 1 length=153600
src_v4l2_set_mmap,722: 2 length=153600
src_v4l2_set_mmap,722: 3 length=153600
--- Capturing frame...
verify_jpeg_dht,94: Inserting DHT segment into JPEG frame.
Captured frame in 0.00 seconds.
--- Processing captured image...
There are unsaved changes to the image.
mjpg_streamer -i "/usr/lib/input_uvc.so -d /dev/video0 -r 320x240  -f 15" -o "/usr/lib/output_http.so  -w /usr/www"
mjpg_streamer -i "/usr/lib/input_uvc.so -d /dev/video0 -r 640x480  -f 15" -o "/usr/lib/output_http.so  -w /usr/www"
mjpg_streamer -i "/usr/lib/input_uvc.so -d /dev/video0 -r 640x480  -f 25" -o "/usr/lib/output_http.so  -w /usr/www"
mjpg_streamer -i "/usr/lib/input_uvc.so -d /dev/video0 -r 1024x768 -f 15" -o "/usr/lib/output_http.so  -w /usr/www"
mjpg_streamer -i "/usr/lib/input_uvc.so -d /dev/video0 -r 1024x768 -f 30" -o "/usr/lib/output_http.so  -w /usr/www"
结果
MJPG Streamer Version: svn rev: 3:172
 i: Using V4L2 device.: /dev/video0
 i: Desired Resolution: 640 x 480
 i: Frames Per Second.: 15
 i: Format............: MJPEG
。。。。。。
 o: www-folder-path...: /usr/www/
 o: HTTP TCP port.....: 8080
 o: username:password.: disabled
 o: commands..........: enabled
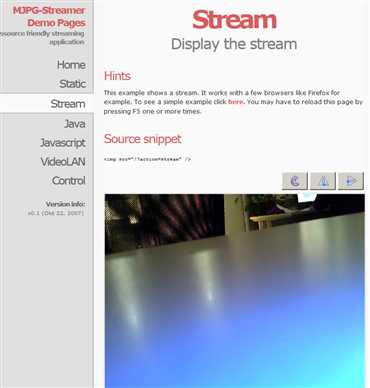
访问(注意用FireFox或chrome,其它浏览器支持不是很好),看到下面的就对了:
http://ip:8080 (这个端口取决于你的设置 -p 如果未设置默认为8080)
参数:
-i : uses input_uvc.so (the USB Webcam) as input
-o : output_http.so for the output (sending the images to a Web server
-w : the directory, which has the HTML, CSS, and JS files:   /usr/local/www
You can cancel the stream by pressing Ctrl+C.  If you want to experiment with some other options, some are listed below:

-b : runs in the background
-p : set a default port instead of the default 8080
-c : prompts for username:password
-yYUYV : enables YUYV format and disables MJPEG mode
-f : framerate (in seconds)
遇到的问题:
1、CPU居高不下:
两种原因:(1)参数内加入了 -y 开启了 yuv模式,我测试结果是一个CPU跑到了90% ,可以看到程序启动后的信息:
(2)摄像头不支持mjpeg,这样的话CPU也会居高不下。采用上面的fswebcam -v进行检测,如果不支持mjpeg的话就不要用了
i: Format............: MJPEG 如果不是这个就是有可能你带Y参数或是摄像头不支持
2、找不到网页
路径问题,在参数 -w后面跟的要么应该指向你建立的code文件夹下的www目录或是编译过程结果中的目录,我的结果显示的是/var/www
3、其它机器访问不了默认端口:
检测系统默认安装的ufw是否已启动,启动的话先关了再试
基本上就这很多了:)
转载请注明:http://www.cnblogs.com/forrestsun/p/4995083.html
原文:http://www.cnblogs.com/forrestsun/p/4995083.html