#import <UIKit/UIKit.h>
@interface AppDelegate : UIResponder <UIApplicationDelegate>
@property (strong, nonatomic) UIWindow *window;
@end
#import "AppDelegate.h"
#import "NewHypnosister.h"
@interface AppDelegate ()
@end
@implementation AppDelegate
- (BOOL)application:(UIApplication *)application didFinishLaunchingWithOptions:(NSDictionary *)launchOptions
{
self.window = [[UIWindow alloc]initWithFrame:[[UIScreen mainScreen]bounds]];
self.window.rootViewController = [[UIViewController alloc]init];
CGRect firstFrame = self.window.bounds;
NewHypnosister *firstView = [[NewHypnosister alloc]initWithFrame:firstFrame];
[self.window addSubview:firstView];
self.window.backgroundColor = [UIColor whiteColor];
[self.window makeKeyAndVisible];
return YES;
}
@end
#import <UIKit/UIKit.h>
@interface NewHypnosister : UIView
@end
#import "NewHypnosister.h"
@implementation NewHypnosister
- (instancetype)initWithFrame:(CGRect)frame
{
self = [super initWithFrame:frame];
if (self){
self.backgroundColor = [UIColor clearColor];
}
return self;
}
- (void)drawRect:(CGRect)rect
{
CGRect bounds = self.bounds;
CGPoint center;
center.x = (bounds.origin.x + bounds.size.width)/2.0;
center.y = (bounds.origin.y + bounds.size.height)/2.0;
float maxRadius = hypot(bounds.size.width, bounds.size.height)/2.0;
UIBezierPath *path = [[UIBezierPath alloc]init];
for (float currentRadius = maxRadius; currentRadius > 0; currentRadius -= 20.0) {
[path moveToPoint:CGPointMake(center.x + currentRadius, center.y)];
[path addArcWithCenter:center
radius:currentRadius
startAngle:0.0
endAngle:M_PI*2.0
clockwise:YES];
}
path.lineWidth = 10.0;
[[UIColor lightGrayColor] setStroke];
[path stroke];
//设置阴影
CGContextRef currentContext = UIGraphicsGetCurrentContext();
void CGContextShadow(CGContextRef context, CGSize offSet, CGFloat blur);
CGContextSetShadow(currentContext, CGSizeMake(4, 7), 3);
//绘制三角形,顶点(bounds.origin.x + bounds.size.width/2.0, bounds.origin.y),底边为bounds底边
UIBezierPath *myPath = [UIBezierPath bezierPath];
CGPoint myPoint[3];
myPoint[0] = CGPointMake(bounds.origin.x + bounds.size.width/2.0, bounds.origin.y);
myPoint[1] = CGPointMake(bounds.origin.x, bounds.origin.y + bounds.size.height);
myPoint[2] = CGPointMake(bounds.origin.x + bounds.size.width, bounds.origin.y + bounds.size.height);
//绘制三角形
[myPath moveToPoint:myPoint[0]];
[myPath addLineToPoint:myPoint[1]];
[myPath addLineToPoint:myPoint[2]];
[myPath stroke];
//保存剪切三角形及设置颜色渐变
CGContextSaveGState(currentContext);
[myPath addClip];
CGFloat locations[2] = {0.0, 1.0};
CGFloat components[8] = {0.0, 1.0, 0.0, 1.0,//起始颜色为黄色
1.0, 1.0, 0.0, 1.0};//终止颜色为绿色
CGColorSpaceRef colorspace = CGColorSpaceCreateDeviceRGB();
CGGradientRef gradient = CGGradientCreateWithColorComponents(colorspace, components, locations, 2);
CGPoint startPoint = myPoint[0];
CGPoint endPoint = myPoint[2];
CGContextDrawLinearGradient(currentContext, gradient, startPoint, endPoint, 0);
CGGradientRelease(gradient);
CGColorSpaceRelease(colorspace);
CGContextRestoreGState(currentContext);
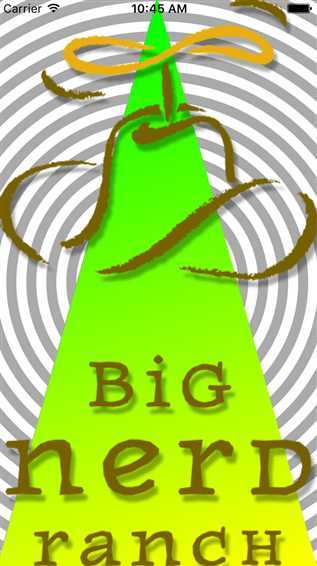
UIImage *logoImage = [UIImage imageNamed:@"logo.png"];
[logoImage drawInRect:rect];
}
@end
原文:http://www.cnblogs.com/zjxsd/p/5088059.html