这一部分的代码逻辑关系是这样的:
以上代码是设备被移除和设备状态有更新时候的处理,那么新设备该怎么处理呢?毕竟一开始设备都是新的,这个才是关键点。
326 private void updateDevices(ArrayList<Device> newList) {
...
395 // at this point we should still have some new devices in newList, so we
396 // process them.
397 for (Device newDevice : newList) {
398 // add them to the list
399 mDevices.add(newDevice);
400 mServer.deviceConnected(newDevice);
401
402 // start monitoring them.
403 if (AndroidDebugBridge.getClientSupport()) {
404 if (newDevice.isOnline()) {
405 startMonitoringDevice(newDevice);
406 }
407 }
408
409 // look for their build info.
410 if (newDevice.isOnline()) {
411 devicesToQuery.add(newDevice);
412 }
413 }
414 }
415
416 // query the new devices for info.
417 for (Device d : devicesToQuery) {
418 queryNewDeviceForInfo(d);
419 }
420 }
421 newList.clear();
422 }
代码8-4-6 DeviceMonitor - updateDevices处理新增加设备
这里我们先重点看405行startMonitoringDevice:
509 private boolean startMonitoringDevice(Device device) {
510 SocketChannel socketChannel = openAdbConnection();
511
512 if (socketChannel != null) {
513 try {
514 boolean result = sendDeviceMonitoringRequest(
socketChannel, device);
515 if (result) {
516
517 if (mSelector == null) {
518 startDeviceMonitorThread();
519 }
520
521 device.setClientMonitoringSocket(socketChannel);
522
523 synchronized (mDevices) {
524 // always wakeup before doing the register. The synchronized block
525 // ensure that the selector won‘t select() before the end of this block.
526 // @see deviceClientMonitorLoop
527 mSelector.wakeup();
528
529 socketChannel.configureBlocking(false);
530 socketChannel.register(mSelector, SelectionKey.OP_READ, device);
531 }
532
533 return true;
534 }
535 }
... //省略错误处理代码
}
代码8-4-7 DeviceMonitor - startMonitoringDevice
514行首先给ADB服务器发送监听请求获得所有可调试的应用进程PID列表:
674 private boolean sendDeviceMonitoringRequest(SocketChannel socket, Device device)
675 throws TimeoutException, AdbCommandRejectedException, IOException {
676
677 try {
678 AdbHelper.setDevice(socket, device);
679
680 byte[] request = AdbHelper.formAdbRequest("track-jdwp"); //$NON-NLS-1$
681
682 AdbHelper.write(socket, request);
683
684 AdbResponse resp = AdbHelper.readAdbResponse(socket, false /* readDiagString */);
685
686 if (!resp.okay) {
687 // request was refused by adb!
688 Log.e("DeviceMonitor", "adb refused request: " + resp.message);
689 }
690
691 return resp.okay;
692 }
...//省略错误处理代码
}
代码8-4-8 DeviceMonitor - sendDeviceMonitoringRequest
其实这段代码和上面的“代码8-4-5 DeviceMonitor - sendDeviceListMonitoringRequest”是类似的,只是发送是要在678行先把连接切换到目标监控设备(AdbHelper.setDevice方法将在下一章进行想尽描述)以及最后发送的命令变成是”track-jdwp”命令而已。最终这个命令其实等同于你在命令调用ADB命令行客户端发送命令”adb jdwp”,返回来的就是所有可调式应用进程的PID,请看以下输出结果示例,其与上图8-4-1中DDMS的Devices模块打印的进程PID是一致的:
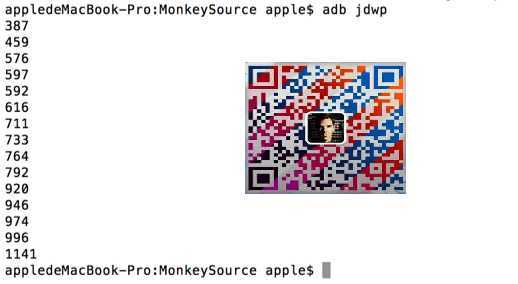
图 8-4-2 adb jdwp 命令输出
获取到设备里面运行的可调试进程PID列表后,大家应该也可以想到下一步动作就是为每一个PID,也就是为每一个进程的vm虚拟机创建一个客户端线程来通过JDWP协议监控调试了,这也就是为什么DDMS能够动态获得每个进程的动态信息的原因了。
进程VM虚拟机监控代码分析到这里在本书中应该就算差不多了,如果再往下分析的话就需要去分析DDMS更多的知识以及JDWP协议相关的东西了,毕竟这不是我们这本书的重点,所以分析到这里让大家对DDMS工作原理有个基本认知就好了,再往下分析一大堆不相关代码就有走题和凑字数的嫌疑了。
这里我们根据上面承诺的,还是要看看“代码8-4-6 DeviceMonitor - updateDevices处理新增加设备”中481行对新增加的设备是如何通过调用“queryNewDeviceForInfo”这个方法来获取基本信息的,获取的又是什么信息:
442 private void queryNewDeviceForInfo(Device device) {
443 // TODO: do this in a separate thread.
444 try {
445 // first get the list of properties.
446 device.executeShellCommand(
“getprop”,
447 new GetPropReceiver(device));
448
449 queryNewDeviceForMountingPoint(device,
“EXTERNAL_STORAGE”);
450 queryNewDeviceForMountingPoint(device,
“ANDROID_DATA”);
451 queryNewDeviceForMountingPoint(device,
“ANDROID_ROOT”);
452
453 // now get the emulator Virtual Device name (if applicable).
454 if (device.isEmulator()) {
455 EmulatorConsole console = EmulatorConsole.getConsole(device);
456 if (console != null) {
457 device.setAvdName(console.getAvdName());
458 console.close();
459 }
460 }
461 }
...//省略错误处理部分代码
}
代码8-4-9 DeviceMonitor - queryNewDeviceForInfo
这个方法所做的事情就是:
获取完系统属性后,我们就要看下新设备的文件系统的那几个挂载点是怎么获得的了,我们进入到对应方法:
483 private void queryNewDeviceForMountingPoint(final Device device, final String name)
484 throws TimeoutException, AdbCommandRejectedException, ShellCommandUnresponsiveException, IOException
485 {
486 device.executeShellCommand("echo $" + name,
new MultiLineReceiver()
487 {
488 public boolean isCancelled() {
489 return false;
490 }
491
492 public void processNewLines(String[] lines)
493 {
494 for (String line : lines) {
495 if (!line.isEmpty())
496 {
497 device.setMountingPoint(name, line);
498 }
499 }
500 }
501 });
502 }
代码8-4-10 DeviceMonitor - queryNewDeviceForMountingPoint
这个跟上面的发送getprop命令有类似的地方,只是命令换了”adb shell $name”和返回值处理类是重新实现的而已,但原理都一样。这里$name换成上面调用方法形参对应的”EXTERNAL_STORAGE”,”ANDROID_DATA”和“ANDROID_ROOT”就行了,以下就是本人通过命令行执行的效果:
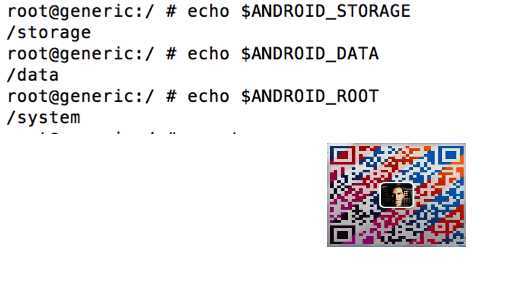
图8-4-4 挂载点
最后把这个几个挂载点保存起来到Device实例的mMountpoints这个映射表里面:
67 private final Map<String, String> mMountPoints = new HashMap();
...
783 void setMountingPoint(String name, String value) {
784 this.mMountPoints.put(name, value);
785 }
代码8-4-11 Device - setMountingPoint
老李推荐: 第8章4节《MonkeyRunner源码剖析》MonkeyRunner启动运行过程-启动AndroidDebugBridge 4
原文:http://www.cnblogs.com/poptest/p/5089562.html