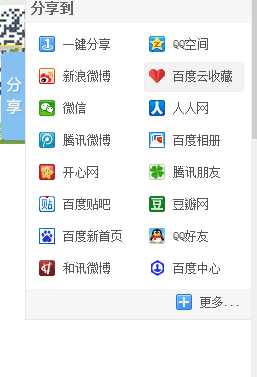
很多网页中都能看到侧边分享栏或工具栏,如这样:

大致就是页面只呈现分享那个蓝色的小矩形,当鼠标移入或点击的时候,里面的内容会呈现出来。下面用DIV来代替图片实现一下。
首先设置DIV的样式:先写一个包含内容的大DIV,id设为div1,在其内部加入一个div。想让它始终在页面出现position设为fixed,不然就设为absolute。其内部DIV也设为绝对定位,并根据高度调整距离,使整体显示美观些,最终代码:

 1 <!DOCTYPE html>
 2 <html lang="en">
 3 <head>
 4     <meta charset="UTF-8">
 5     <title>Document</title>
 6     <style>
 7         *{
 8             margin:0px;
 9             padding:0px;
10         }
11         #div1{
12             width:150px;
13             height:200px;
14             background-color:gray;
15             position:absolute;
16         }
17         #div1>div{
18             width:20px;
19             height:60px;
20             border-top-right-radius:10px;
21             border-bottom-right-radius:10px;
22             background-color:red;
23             position:absolute;
24             right:-20px;
25             top:70px;
26             line-height:30px;
27         }
28     </style>
29 </head>
30 <body>
31     <div id=‘div1‘>
32         <div>工具</div>
33     </div>
34 </body>
35 </html>
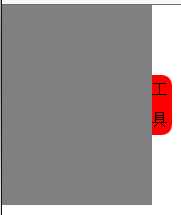
效果图:
让灰色区域隐藏起来好办,给DIV1添加一个left:-150px即可。而通过给其添加移入移出事件和定时器setInterval可实现移入出现移出隐藏的功能。初步代码如下:

 1 <!DOCTYPE html>
 2 <html lang="en">
 3 <head>
 4     <meta charset="UTF-8">
 5     <title>Document</title>
 6     <style>
 7         *{
 8             margin:0px;
 9             padding:0px;
10         }
11         #div1{
12             width:150px;
13             height:200px;
14             background-color:gray;
15             position:absolute;
16             left:-150px;
17         }
18         #div1>div{
19             width:20px;
20             height:60px;
21             border-top-right-radius:10px;
22             border-bottom-right-radius:10px;
23             background-color:red;
24             position:absolute;
25             right:-20px;
26             top:70px;
27             line-height:30px;
28         }
29     </style>
30     <script>
31         window.onload=function(){
32             var oDiv=document.getElementById(‘div1‘);
33             var trigger;
34
35             oDiv.onmouseover=function(){
36                 clearInterval(trigger);
37                 trigger=setInterval(function(){
38                     oDiv.style.left=oDiv.offsetLeft+10+‘px‘;
39                 },30);
40             };
41             oDiv.onmouseout=function(){
42                 clearInterval(trigger);
43                 trigger=setInterval(function(){
44                     oDiv.style.left=oDiv.offsetLeft-10+‘px‘;
45                 },30);
46             };
47         };
48     </script>
49 </head>
50 <body>
51     <div id=‘div1‘>
52         <div>工具</div>
53     </div>
54 </body>
55 </html>
可以发现确实移入右移移出左移了,接下来加上一个距离的限制:

 1 <!DOCTYPE html>
 2 <html lang="en">
 3 <head>
 4     <meta charset="UTF-8">
 5     <title>Document</title>
 6     <style>
 7         *{
 8             margin:0px;
 9             padding:0px;
10         }
11         #div1{
12             width:150px;
13             height:200px;
14             background-color:gray;
15             position:absolute;
16             left:-150px;
17         }
18         #div1>div{
19             width:20px;
20             height:60px;
21             border-top-right-radius:10px;
22             border-bottom-right-radius:10px;
23             background-color:red;
24             position:absolute;
25             right:-20px;
26             top:70px;
27             line-height:30px;
28         }
29     </style>
30     <script>
31         window.onload=function(){
32             var oDiv=document.getElementById(‘div1‘);
33             var trigger;
34
35             oDiv.onmouseover=function(){
36                 clearInterval(trigger);
37                 trigger=setInterval(function(){
38                     if(oDiv.offsetLeft<0){
39                         oDiv.style.left=oDiv.offsetLeft+10+‘px‘;
40                     }
41                 },30);
42             };
43             oDiv.onmouseout=function(){
44                 clearInterval(trigger);
45                 trigger=setInterval(function(){
46                     if(oDiv.offsetLeft>-150){
47                         oDiv.style.left=oDiv.offsetLeft-10+‘px‘;
48                     }
49                 },30);
50             };
51         };
52     </script>
53 </head>
54 <body>
55     <div id=‘div1‘>
56         <div>工具</div>
57     </div>
58 </body>
59 </html>
这样子看起来已经实现需要的功能了,重要的几点:
1:两个事件函数开头需要清除定时器,避免定时器一直工作。
2:offsetLeft为当前元素距离定位左边的距离,向右移动就不断加大,向左移动就不断减小。
3:定时器后面的参数为函数执行的时间间隔,单位为毫秒,与单位时间移动的像素配合控制移动的效果,间隔越短像素越低视觉效果越平滑。
对于代码本身,有很多可以优化的地方,比如两个函数都有类似的部分,可以合并,对于这两段:

 1             oDiv.onmouseover=function(){
 2                 clearInterval(trigger);
 3                 trigger=setInterval(function(){
 4                     if(oDiv.offsetLeft<0){
 5                         oDiv.style.left=oDiv.offsetLeft+10+‘px‘;
 6                     }
 7                 },30);
 8             };
 9             oDiv.onmouseout=function(){
10                 clearInterval(trigger);
11                 trigger=setInterval(function(){
12                     if(oDiv.offsetLeft>-150){
13                         oDiv.style.left=oDiv.offsetLeft-10+‘px‘;
14                     }
15                 },30);
16             };
发现除了他们的移动方向和判断移动方向的位置以外别的完全一致,这样可通过给一个函数传递参数的方式来让代码变的更简洁。
最终如下:

 1 <!DOCTYPE html>
 2 <html lang="en">
 3 <head>
 4     <meta charset="UTF-8">
 5     <title>Document</title>
 6     <style>
 7         *{
 8             margin:0px;
 9             padding:0px;
10         }
11         #div1{
12             width:150px;
13             height:200px;
14             background-color:gray;
15             position:absolute;
16             left:-150px;
17         }
18         #div1>div{
19             width:20px;
20             height:60px;
21             border-top-right-radius:10px;
22             border-bottom-right-radius:10px;
23             background-color:red;
24             position:absolute;
25             right:-20px;
26             top:70px;
27             line-height:30px;
28         }
29     </style>
30     <script>
31         window.onload=function(){
32             var oDiv=document.getElementById(‘div1‘);
33             var trigger;
34
35             oDiv.onmouseover=function(){
36                 moveone(0,10);
37             };
38             oDiv.onmouseout=function(){
39                 moveone(-150,-10);
40             };
41
42             function moveone(target,speed){
43                 clearInterval(trigger);
44                 trigger=setInterval(function(){
45                     if(oDiv.offsetLeft==target){
46                         clearInterval(trigger);
47                     }
48                     else{
49                         oDiv.style.left=oDiv.offsetLeft+speed+‘px‘;
50                     }
51                 },30);
52             }
53         };
54     </script>
55 </head>
56 <body>
57     <div id=‘div1‘>
58         <div>工具</div>
59     </div>
60 </body>
61 </html>
原文:http://www.cnblogs.com/xuezhen/p/5224852.html