wpf 前台绘制圆弧很简单,如:<Path x:Name="path_data" Stroke="#FFE23838" StrokeThickness="1" Data="M 100,0 A 50,100 0 0 0 100,200"></Path>
注解:M 起始点 (100,0) A 尺寸(X50,Y100半径) 圆弧旋转角度值(0) 优势弧的标记(否,弧角度小于180) 正负角度标记(0 逆时针画圆) 结束点(100,200)
所以画出的图形为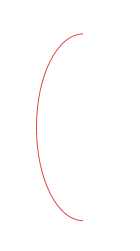
由于项目需要,需要在后台动态绘制圆弧,切入点ArcSegment,一步步摸索出绘制方法。
ArcSegment(Point point, Size size, double rotationAngle, bool isLargeArc, SweepDirection sweepDirection, bool isStroked);
由于Point是结束点,需要定义起始点StartPoint,尝试还真有这个属性,后台绘制就出来了。代码如下
Path path = new Path();
PathGeometry pathGeometry = new PathGeometry();
ArcSegment arc = new ArcSegment(new Point(100, 200), new Size(50, 100), 0, false, SweepDirection.Counterclockwise, true);
PathFigure figure = new PathFigure();
figure.StartPoint = new Point(100, 0);
figure.Segments.Add(arc);
pathGeometry.Figures.Add(figure);
path.Data = pathGeometry;
path.Stroke = Brushes.Orange;
canvas.Children.Add(path);
原文:http://www.cnblogs.com/rainchao/p/5762058.html