原文:How To Write Mobile-first CSS
作者:
译者:huansky
构建响应式网站是今天前端开发人员必备的技能。 当我们谈论响应式网站时,移动优先这个词立刻就会浮现。
我们知道从移动优先的角度设计的重要性。 不幸的是,关于移动优先的配置方法很少提及。
今天,我想和大家分享一下移动优先的样式方法,为什么它会更好,以及如何运用它的魔力。
注意:如果您正在学习使用Susy构建响应式布局,本文将非常有用。
让我们了解移动优先和桌面优先之间的差异,然后再深入探讨为什么移动优先方法更好。
移动优先的样式方法意味着样式首先应用于移动设备。 高级样式和其他覆盖更大的屏幕然后通过媒体查询添加到样式表。
这种方法使用 min-width 媒体查询。
这里有一个简单的例子:
// This applies from 0px to 600px
body {
  background: red;
}

// This applies from 600px onwards
@media (min-width: 600px) {
  body {
    background: green;
  }
}
在上面的例子中, <body> 将具有红色背景在 600px 以下。 它的背景变成了绿色在 600px 及以上。
另一方面,桌面首先的样式方法意味着样式首先应用于桌面设备。 然后通过媒体查询将较小屏幕的高级样式和覆盖添加到样式表中。
这种方法使用 max-width 媒体查询。
这里有一个简单的例子:
// This applies from 600px onwards
body {
  background: green;
}

// This applies from 0px to 600px
@media (max-width: 600px) {
  body {
    background: red;
  }
}
<body>将有绿色所有宽度的背景颜色。 如果屏幕低于600像素,背景颜色将变为红色。
较大屏幕的代码通常比较小屏幕的代码更复杂。 这就是为什么编码移动优先有助于简化您的代码。
考虑一种情况,你有一个网站的内容侧栏布局。 .content 占据了100%的宽度在移动端,桌面上占 66%。
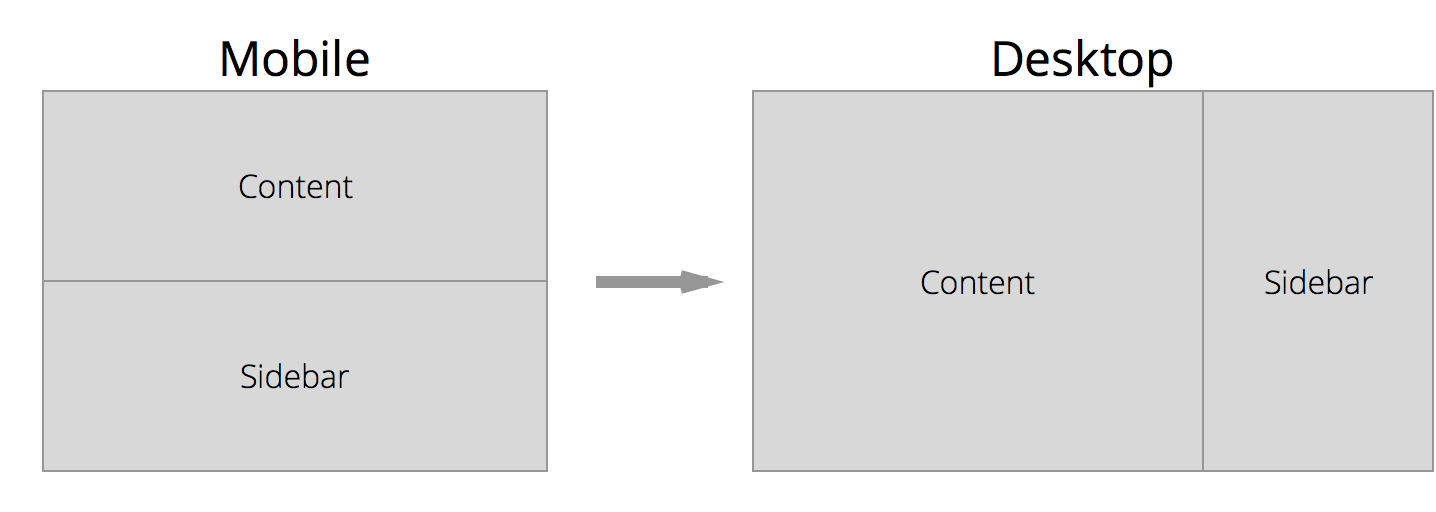
大多数时候,我们可以依靠默认属性来为较小屏幕设置内容样式。 在这种情况下,一个 <div> 默认情况下具有100%的宽度。
如果我们使用移动优先方法,Sass 代码将是:
.content {
  // Properties for smaller screens.
  // Nothing is required here because we can use the default styles

  // Properties for larger screens
  @media (min-width: 800px) {
    float: left;
    width: 60%;
  }
}
如果我们改用桌面优先,大多数时间,我们将不得不修复较小视口的默认属性。 Sass代码的相同结果是:
.content {
  // Properties for larger screens.
  float: left;
  width: 60%;

  // Properties for smaller screens.
  // Note that we have to write two default properties to make the layout work
  @media (max-width: 800px) {
    float: none;
    width: 100%;
  }
}
通过这个例子,我们节省了两行代码和几秒钟来思考CSS。 想象一下,如果你在一个更大的网站上工作,这将节省你多少时间和精力。
大多数时候的 min-width 的查询就足以帮助你编写一个网站。 然而也存在这样的实例,组合使用 min-width 和 max-width 查询有助于减少复杂度,而这通过单一的 min-width 查询是不可能达到的。
让我们来探讨一些这样实例。
Max-width 查询开始发挥作用,当你想样式一定的视区大小以下的限制。 min-width 和 max-width 两者的结合 ,将有助于约束两个不同的视口尺寸之间的样式。
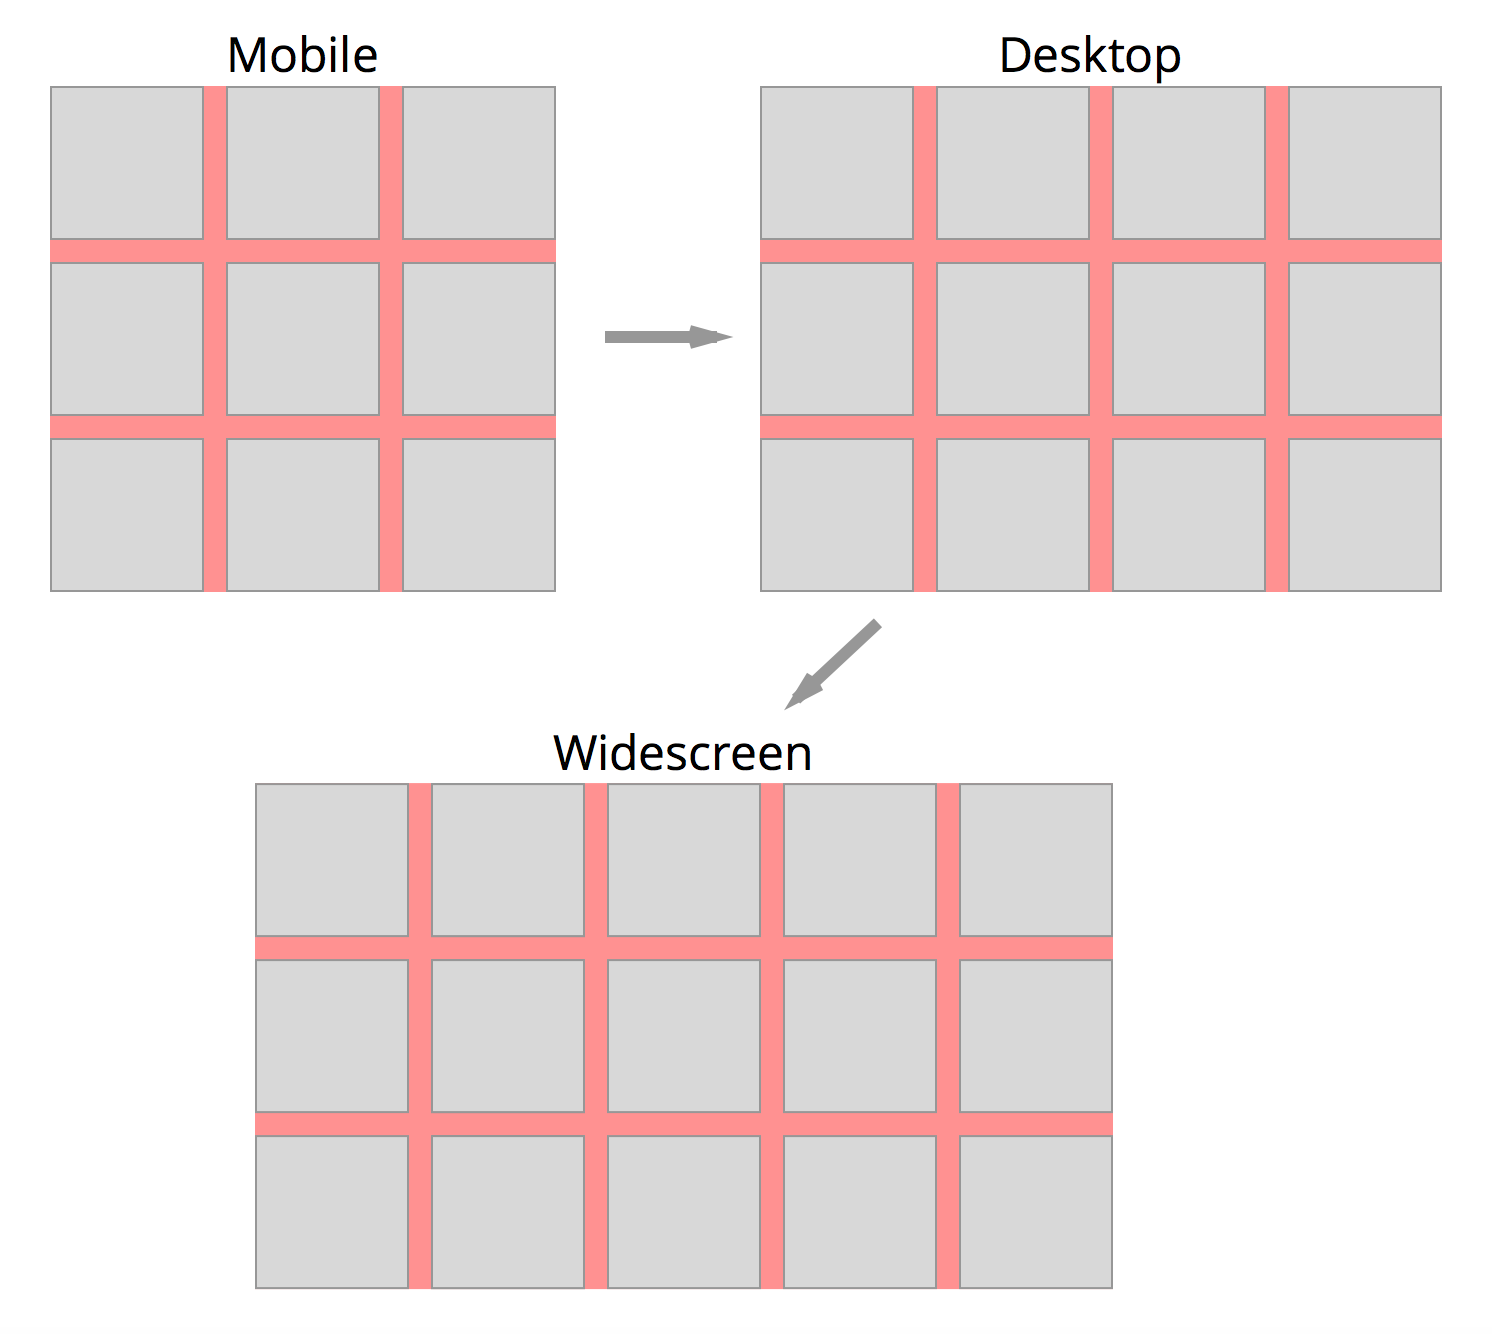
考虑一个相册缩略图的情况。 此图库在较小视口上连续显示3个缩略图,在较大视口上连续显示4个项目。
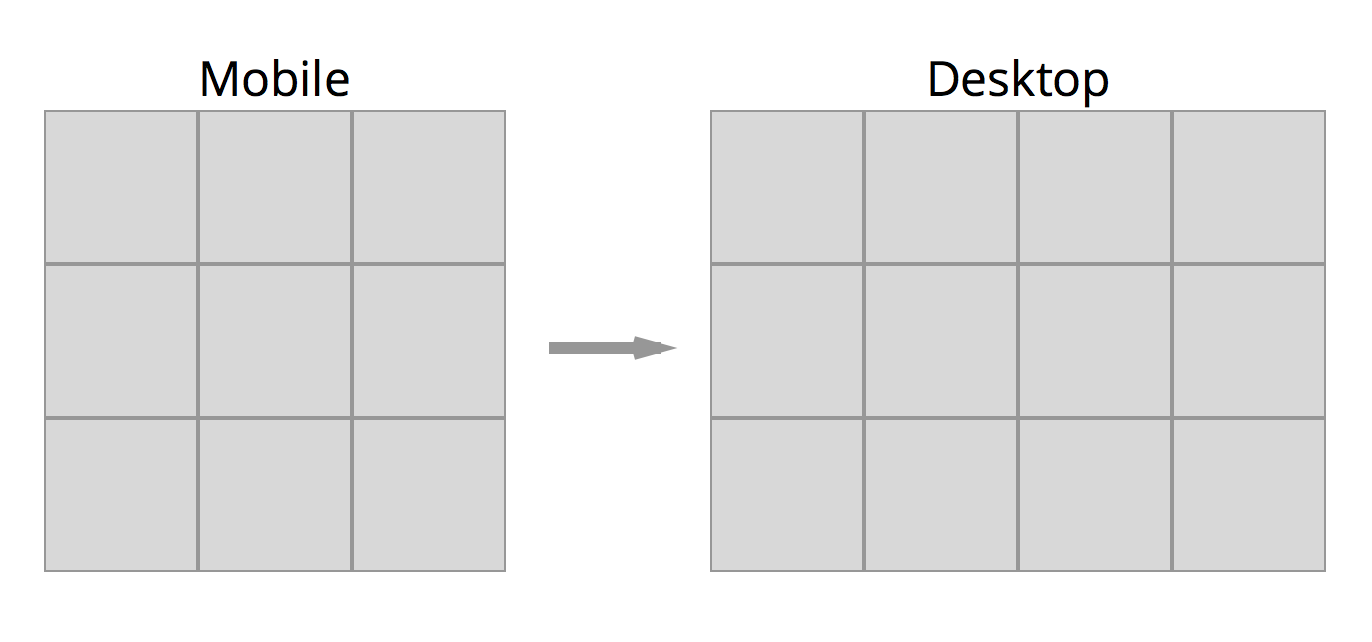
因为每个项目之间没有空格,所以它很简单:
.gallery__item {
  float: left;
  width: 33.33%;
  @media (min-width: 800px) {
    width: 25%;
  }
}
如果每个项目中有空格,它就会变得很复杂。
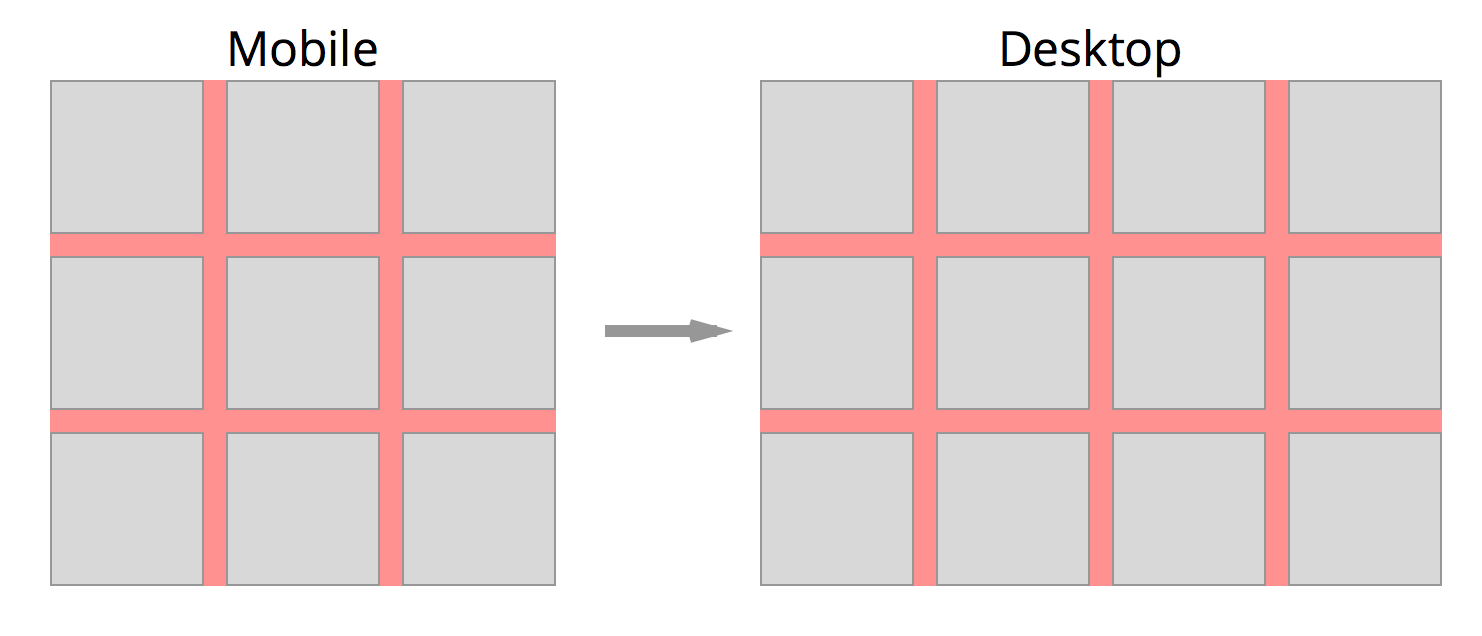
假设这些空格占据了宽度的5%:
.gallery__item {
  float: left;
  width: 30%;
  margin-right 5%;
  margin-bottom: 5%;
}
我们也将不得不设计最后的(第3项)的 margin-right 为0,以确保它不会被推下到下一列。
.gallery__item {
  float: left;
  width: 30%;
  margin-right 5%;
  margin-bottom: 5%;
  &:nth-child(3n) {
    margin-right: 0;
  }
}
此代码还必须适用于行中有四个项目的情况。 如果我们根据最小宽度查询我们上面...
.gallery__item {
  float: left;
  width: 30%;
  margin-right 5%;
  margin-bottom: 5%;
  &:nth-child(3n) {
    margin-right: 0;
  }

  @media (min-width: 800px) {
    width: 21.25%; // (100% - 15%) / 4
    &:nth-child (4n) {
      margin-right: 0;
    }
  }
}
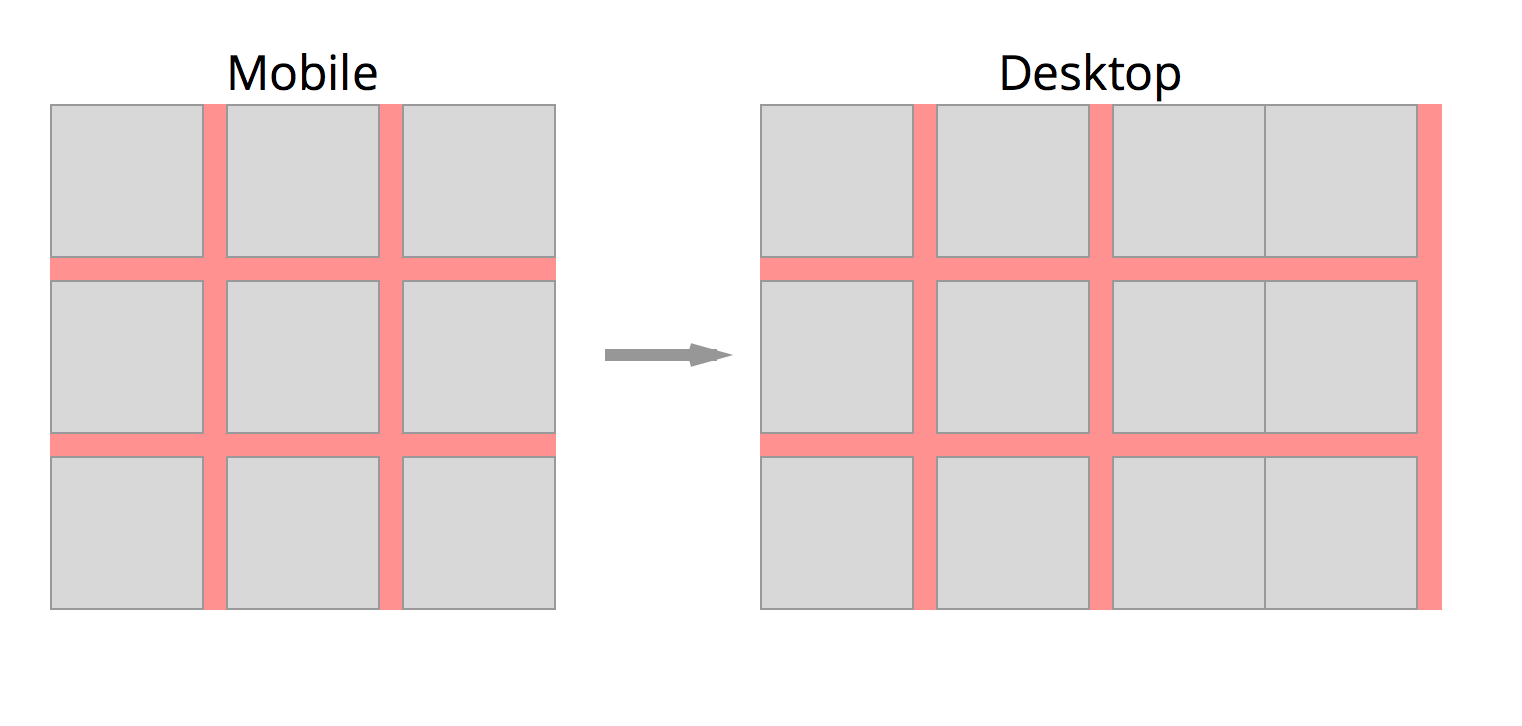
不能正常工作的原因是因为我们指定了每个第3项的 margin-right 为 0。 此属性将级联到更大的视口,并打破我们想要的模式。
我们可以修复每个3的倍数的项目的 margin-right 属性为 5%:
.gallery__item {
  // ...
  @media (min-width: 800px) {
    // ...
    &:nth-child (3n) {
      margin-right: 5%;
    }
    &:nth-child(4n) {
      margin-right: 0%;
    }
  }
}
这并不是一个非常好的办法,因为我们要重复使用 margin-right:5% margin-right,如果我们使用更大的显示屏幕就不得不做改变。
我们应该保持代码尽可能DRY(不知道怎么翻译)。
更好的方法来约束 nth-child(3n) 是在应有的视口中使用 max-width 查询。
.gallery__item {
  float: left;
  margin-right: 5%;
  margin-bottom: 5%;
  @media (max-width: 800px) {
    width: 30%;
    &:nth-child(3n) {
      margin-right: 0;
    }
  }

  @media (min-width: 800px) {
    width: 21.25%; // (100% - 15%) / 4
    &:nth-child (4n) {
      margin-right: 0;
    }
  }
}

这是可行的,因为 max-width 将其限制在800像素内,这样其他饰扣下就不会受影响。
现在想象一下,如果你有一个更大的视口,你想在画廊中每行显示5项。 这时,min 和 max-width 查询就会一起使用。
.gallery__item {
  float: left;
  margin-right: 5%;
  margin-bottom: 5%;
  @media (max-width: 800px) {
    width: 30%;

    &:nth-child(3n) {
      margin-right: 0;
    }
  }

  // combining both min-width and max-width queries
  @media (min-width: 800px) and (max-width: 1200px) {
    width: 21.25%; // (100% - 15%) / 4
    &:nth-child (4n) {
      margin-right: 0;
    }
  }

  @media (min-width: 1200px){
    width: 16%; // (100% - 20%) / 5
    &:nth-child (5n) {
      margin-right: 0;
    }
  }
}
那些在 Webucator 的家伙都非常善良,自愿搞一个视频来总结这个博客帖子。 所以如果视频是你的事,请检查这一点。
Min-width 媒体查询是非常有用的,当涉及到设计响应式网站的时候,因为它降低了代码的复杂性。通过上面的例子,你可以看到 Min-width 查询不可能解决每一个问题。 有时添加 max-width 查询到您的样式表来会使事情变得更加方便。
原文:http://www.cnblogs.com/huansky/p/6095854.html