长话短说了,笔者在网上找了个JS插件。可以轻松实现图片拖拽,正确排序。
下面这段JS代码应该是sortable的代码。读者也可以自己在网上下载Js包。

/*
 * HTML5 Sortable jQuery Plugin
 * http://farhadi.ir/projects/html5sortable
 *
 * Copyright 2012, Ali Farhadi
 * Released under the MIT license.
 */
(function ($) {
    var dragging, placeholders = $();
    $.fn.sortable = function (options) {
        options = options || {};
        return this.each(function () {
            if (/^enable|disable|destroy$/.test(options)) {
                var items = $(this).children($(this).data(‘items‘)).attr(‘draggable‘, options == ‘enable‘);
                options == ‘destroy‘ && items.add(this)
                    .removeData(‘connectWith‘).removeData(‘items‘)
                    .unbind(‘dragstart.h5s dragend.h5s selectstart.h5s dragover.h5s dragenter.h5s drop.h5s‘);
                return;
            }
            var index, items = $(this).children(options.items), connectWith = options.connectWith || false;
            var placeholder = $(‘<‘ + items[0].tagName + ‘ class="sortable-placeholder">‘);
            var handle = options.handle, isHandle;
            items.find(handle).mousedown(function () {
                isHandle = true;
            }).mouseup(function () {
                isHandle = false;
            });
            $(this).data(‘items‘, options.items)
            placeholders = placeholders.add(placeholder);
            if (connectWith) {
                $(connectWith).add(this).data(‘connectWith‘, connectWith);
            }
            items.attr(‘draggable‘, ‘true‘).bind(‘dragstart.h5s‘, function (e) {
                if (handle && !isHandle) {
                    return false;
                }
                isHandle = false;
                var dt = e.originalEvent.dataTransfer;
                dt.effectAllowed = ‘move‘;
                //dt.setData(‘Text‘, ‘dummy‘);
                dragging = $(this).addClass(‘sortable-dragging‘);
                index = dragging.index();
            }).bind(‘dragend.h5s‘, function () {
                dragging.removeClass(‘sortable-dragging‘).fadeIn();
                placeholders.detach();
                if (index != dragging.index()) {
                    items.parent().trigger(‘sortupdate‘);
                }
                dragging = null;
            }).not(‘a[href], img‘).bind(‘selectstart.h5s‘, function () {
                this.dragDrop && this.dragDrop();
                return false;
            }).end().add([this, placeholder]).bind(‘dragover.h5s dragenter.h5s drop.h5s‘, function (e) {
                if (!items.is(dragging) && connectWith !== $(dragging).parent().data(‘connectWith‘)) {
                    return true;
                }
                if (e.type == ‘drop‘) {
                    e.stopPropagation();
                    placeholders.filter(‘:visible‘).after(dragging);
                    return false;
                }
                e.preventDefault();
                e.originalEvent.dataTransfer.dropEffect = ‘move‘;
                if (items.is(this)) {
                    dragging.hide();
                    $(this)[placeholder.index() < $(this).index() ? ‘after‘ : ‘before‘](placeholder);
                    placeholders.not(placeholder).detach();
                }
                return false;
            });
        });
    };
})(jQuery);
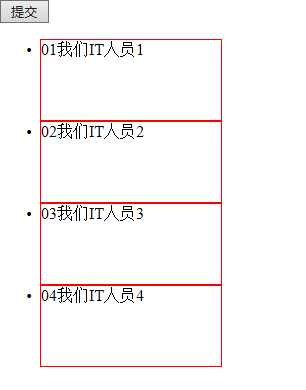
前台页面简单的做个小Demo,网页布局
<body>
    <input type="button" name="name" value="提交" id="btnsb"/>
    <ul id="songListEdit">
        <li>
            @*<img src="~/Images/add_img.png" />*@
            <span class="num">01</span><span class="title">我们IT人员1</span>
        </li>
        <li>
            @*<img src="~/Images/delete_blue.png" />*@
            <span class="num">02</span><span class="title">我们IT人员2</span>
        </li>
        <li>

            @*<img src="~/Images/profile_small.jpg" />*@
            <span class="num">03</span><span class="title">我们IT人员3</span>
        </li>
        <li>
            @*<img src="~/Images/ewm_1.png" />*@
            <span class="num">04</span><span class="title">我们IT人员4</span>
        </li>
    </ul>
</body>
接下来就是自己写的js代码了
function changeNum() {
            $("#songListEdit li").each(function () {
                var indexNum = $("#songListEdit li").index(this);
                var a = (indexNum + 1) > 9 ? (indexNum + 1) : ("0" + (indexNum + 1))
               // $(this).find(".num").text(a)
            })
        }
        $(function () {
            $(‘#songListEdit‘).sortable().bind(‘sortupdate‘, function () {
                changeNum();
            });
            $("#btnsb").click(function () {
                $("#songListEdit li").each(function (index, itme) {
                    alert($(this).find(".num").text() + "--" + $(this).find(".title").text() + "--" + $("#songListEdit li").index(this));
                });
            })
        });
index下标从0开始,后面显示的排序依次是0,1,2,3
最后拖动排序的结果点击提交就一目了然。
OK,结束。供大家在图片拖拽方面参考
原文:http://www.cnblogs.com/hmYao/p/6340612.html
