SpringMVC属于SpringFrameWork的后续产品,已经融合在SpringWebFlow里面。Spring框架提供了构建Web应用程序的全功能MVC模块。使用Spring可插入的MVC架构,可以选择是使用内置的SpringWeb框架还可以是Struts这样的Web框架。
开始写springmvc的 hello world 来进一步了解。
1.所需要的jar包
spring-core-4.x.x.RELEASE.jar
spring-beans-4.x.x.RELEASE.jar
spring-web-4.x.x.RELEASE.jar
spring-webmvc-4.x.x.RELEASE.jar
spring-context-4.x.x.RELEASE.jar
spring-aop-4.x.x.RELEASE.jar
spring-expression-4.x.x.RELEASE.jar
commons-logging-1.X.jar
2.配置web.xml
需要配置一个servlet,这和我们以前学的配置方法基本一致,具体请看配置文件代码。
<?xml version="1.0" encoding="UTF-8"?>
<web-app xmlns:xsi="http://www.w3.org/2001/XMLSchema-instance"
    xmlns="http://java.sun.com/xml/ns/javaee"
    xsi:schemaLocation="http://java.sun.com/xml/ns/javaee http://java.sun.com/xml/ns/javaee/web-app_2_5.xsd"
    id="WebApp_ID" version="2.5">
    <!-- 配置springmvc核心的servlet  DispatherServlet -->
    <servlet>
        <servlet-name>helloSpringmvc</servlet-name>
        <servlet-class>org.springframework.web.servlet.DispatcherServlet</servlet-class>
        <!-- 如果不加以初始化,默认指定的配置文件位置
            是/web-inf/<servlet-name>-servlet.xml(helloSpringmvc-servlet.xml)
         -->
        <init-param>
            <param-name>contextConfigLocation</param-name>
            <param-value>classpath:helloSpringmvc.xml</param-value>
        </init-param>
        <!-- 加载顺序,这里我们设置成第一个 -->
        <load-on-startup>1</load-on-startup>
    </servlet>

    <servlet-mapping>
        <servlet-name>helloSpringmvc</servlet-name>
        <url-pattern>/</url-pattern>
    </servlet-mapping>
</web-app>
3.编写handler
package com.home.springmvc;
import org.springframework.stereotype.Controller; import org.springframework.web.bind.annotation.RequestMapping; /** * 此类是:springMVC控制类@Controller * * @author hpc * @2017年2月16日下午4:34:10 */ //请务必在你的控制类上加上该注解 @Controller public class HelloWorld { // 如果请求是/helloSpringmvc就会进入到该方法进行请求处理 @RequestMapping("/helloSpringmvc")// @RequestMapping的value默认值就是"/helloSpringmvc"
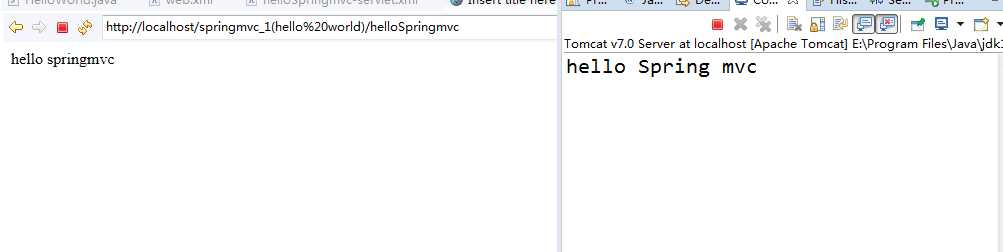
public String helloWorld() {
System.out.println("hello Spring mvc");
return "success";// 这里默认是指转发到这个页面
}
}
4.编写springmvc配置文件
<?xml version="1.0" encoding="UTF-8"?>
<beans xmlns="http://www.springframework.org/schema/beans"
    xmlns:xsi="http://www.w3.org/2001/XMLSchema-instance" xmlns:context="http://www.springframework.org/schema/context"
    xmlns:mvc="http://www.springframework.org/schema/mvc"
    xsi:schemaLocation="http://www.springframework.org/schema/beans http://www.springframework.org/schema/beans/spring-beans.xsd
        http://www.springframework.org/schema/context http://www.springframework.org/schema/context/spring-context-4.0.xsd
        http://www.springframework.org/schema/mvc http://www.springframework.org/schema/mvc/spring-mvc-4.0.xsd">
    <!-- 扫描指定的类 -->
    <context:component-scan base-package="com.home.springmvc" />
    <!-- 配置视图解析器: 如何把 handler 方法返回值解析为实际的物理视图 -->
    <bean
        class="org.springframework.web.servlet.view.InternalResourceViewResolver">
        <!-- 给请求路径加上前缀 -->
        <property name="prefix" value="/WEB-INF/jsp/"></property>
        <!-- 给请求路径加上后缀 -->
        <property name="suffix" value=".jsp"></property>
    </bean>

</beans>
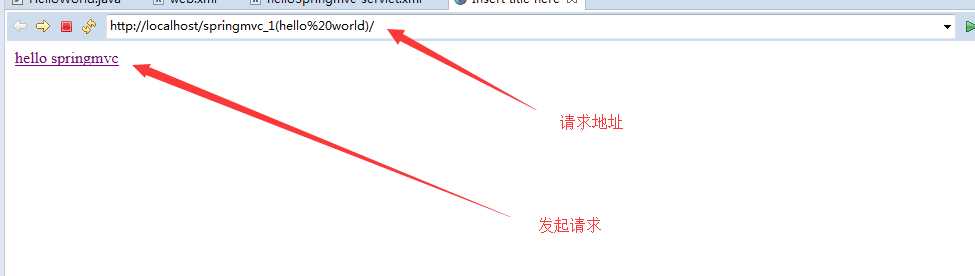
5.编写jsp页面和请求成功或跳转的页面
5.1 index.jsp
<%@ page language="java" contentType="text/html; charset=UTF-8"
    pageEncoding="UTF-8"%>
<!DOCTYPE html PUBLIC "-//W3C//DTD HTML 4.01 Transitional//EN" "http://www.w3.org/TR/html4/loose.dtd">
<html>
<head>
<meta http-equiv="Content-Type" content="text/html; charset=UTF-8">
<title>Insert title here</title>
</head>
<body>
    <a href="helloSpringmvc">hello springmvc</a>
  <!-- 当你点击请求就会找到与RequestMapping的value值一样的那个方法,进行处理-->

</body>
</html>
5.2 success.jsp
<%@ page language="java" contentType="text/html; charset=UTF-8"
    pageEncoding="UTF-8"%>
<!DOCTYPE html PUBLIC "-//W3C//DTD HTML 4.01 Transitional//EN" "http://www.w3.org/TR/html4/loose.dtd">
<html>
<head>
<meta http-equiv="Content-Type" content="text/html; charset=UTF-8">
<title>Insert title here</title>
</head>
<body>hello springmvc
</body>
</html>
6.结果
原文:http://www.cnblogs.com/mohehpc/p/6475619.html