下载安装文件
Node.js安装包及源码下载地址为:https://nodejs.org/en/download/。

32 位安装包下载地址 : https://nodejs.org/dist/v4.4.3/node-v4.4.3-x86.msi
64 位安装包下载地址 : https://nodejs.org/dist/v4.4.3/node-v4.4.3-x64.msi
本文实例以 v0.10.26 版本为例,其他版本类似, 安装步骤:
步骤 1 : 双击下载后的安装包 v0.10.26,如下所示:
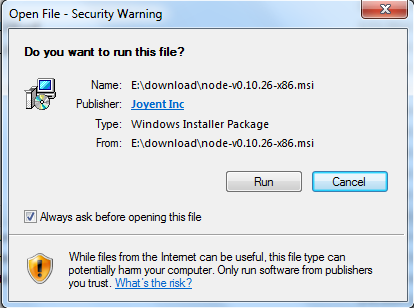
3 : 点击以上的Run(运行),将出现如下界面:
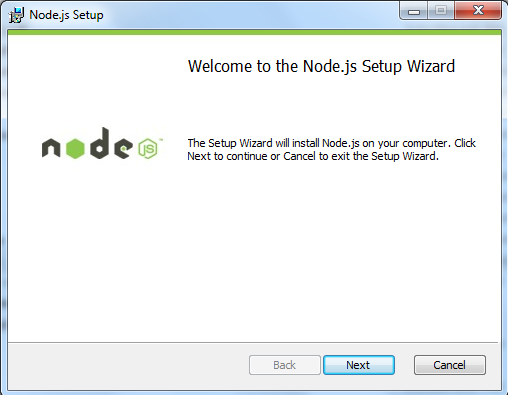
4 : 勾选接受协议选项,点击 next(下一步) 按钮 :

5 : Node.js默认安装目录为 "C:\Program Files\nodejs\" , 你可以修改目录,并点击 next(下一步):

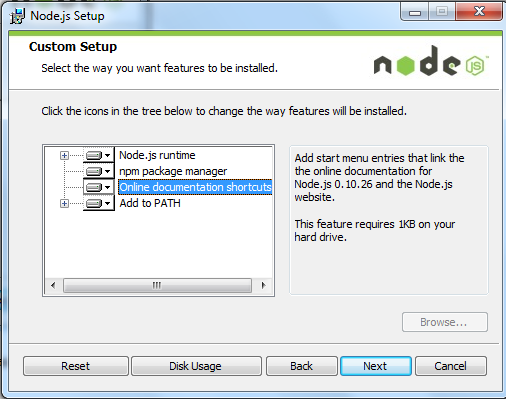
6 : 点击树形图标来选择你需要的安装模式 , 然后点击下一步 next(下一步)
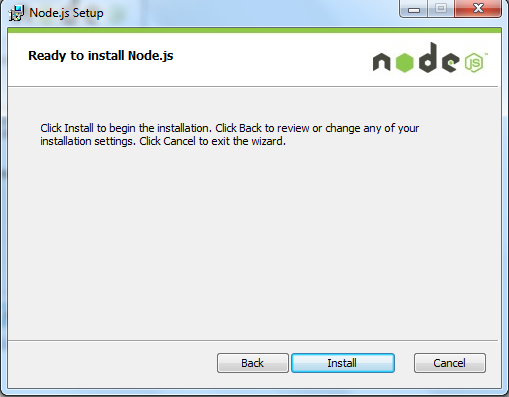
7:点击 Install(安装) 开始安装Node.js。你也可以点击 Back(返回)来修改先前的配置。 然后并点击 next(下一步):
安装过程:

8 点击 Finish(完成)按钮退出安装向导。

检测PATH环境变量是否配置了Node.js,点击开始=》运行=》输入"cmd" => 输入命令"path",输出如下结果:
PATH=C:\oraclexe\app\oracle\product\10.2.0\server\bin;C:\Windows\system32;
C:\Windows;C:\Windows\System32\Wbem;C:\Windows\System32\WindowsPowerShell\v1.0\;
c:\python32\python;C:\MinGW\bin;C:\Program Files\GTK2-Runtime\lib;
C:\Program Files\MySQL\MySQL Server 5.5\bin;C:\Program Files\nodejs\;
C:\Users\rg\AppData\Roaming\npm
我们可以看到环境变量中已经包含了C:\Program Files\nodejs\
检查Node.js版本

在c:Program Files\nodejs文件下你会看到npm,直接使用npm安装环境就可以了
原文:http://www.cnblogs.com/xiaofenguo/p/6492049.html