Once you download the source code that is attached to the article you should have the following three projects:
For a starting point I recommend a code view of Demo\MainForm.cs. This form implements most of the operations you can think of when it comes to WebCam access. First is the iteration through the WebCams hooked up to the computer:
private
void MainForm_Load(object
sender, EventArgs e){ if
(!DesignMode) { comboBoxCameras.Items.Clear(); foreach
(Camera cam in
CameraService.AvailableCameras) comboBoxCameras.Items.Add(cam); if
(comboBoxCameras.Items.Count > 0) comboBoxCameras.SelectedIndex = 0; }} |
The CameraService class you see in the code is
contained in the WebCamWrapper project and is the main wrapper over the main
class CameraMethods that is the only class implemented in
the C++ WebCamLib
project.CameraService exposes AvailableCameras as
a list of Camera classes that contain the logic for a
certain WebCam. Once the user makes a choice of camera, you’ll obviously want to
start the capture:
private
CameraFrameSource _frameSource;private
static Bitmap _latestFrame;private
void btnStart_Click(object
sender, EventArgs e){ if
(_frameSource != null
&& _frameSource.Camera == comboBoxCameras.SelectedItem) return; thrashOldCamera(); startCapturing();} |
_frameSource is the variable in which we’ll save the
currently selected Camera. Touchless developers decided not to
tie their capture source exclusively to WebCam (good choice obviously) so they
made a generic IFrameSourceinterface
that CameraFrameSource implements… and that’s how this
class ended up as a container instead of theCamera class
directly. The rest of the code is pretty self-explanatory – if we select the
same frame source, we’ll just exit; if not we will thrash the old camera and
start a new one. Onto the startCapturing method:
private
void startCapturing(){ try { Camera c = (Camera)comboBoxCameras.SelectedItem; setFrameSource(new
CameraFrameSource(c)); _frameSource.Camera.CaptureWidth = 320; _frameSource.Camera.CaptureHeight = 240; _frameSource.Camera.Fps = 20; _frameSource.NewFrame += OnImageCaptured; pictureBoxDisplay.Paint += new
PaintEventHandler(drawLatestImage); _frameSource.StartFrameCapture(); } catch
(Exception ex) { comboBoxCameras.Text = "Select A Camera"; MessageBox.Show(ex.Message); }}private
void setFrameSource(CameraFrameSource cameraFrameSource){ if
(_frameSource == cameraFrameSource) return; _frameSource = cameraFrameSource;}private
void drawLatestImage(object
sender, PaintEventArgs e){ if
(_latestFrame != null) { e.Graphics.DrawImage(_latestFrame, 0, 0, _latestFrame.Width, _latestFrame.Height); }}public
void OnImageCaptured(Touchless.Vision.Contracts.IFrameSource frameSource, Touchless.Vision.Contracts.Frame frame, double
fps){ _latestFrame = frame.Image; pictureBoxDisplay.Invalidate();} |
We start off by fetching the selected Camera from
the ComboBox which we then use to create and set
theCameraFrameSource. Lines after that influence the capture
parameters (be sure to remember these three lines as we will be getting back to
them later) and after that we have a subscription to two events.
The first event, NewFrame, is raised whenever WebCamLib
captures an image from the WebCam. As you can see, we save that image into a
local variable _latestFrame and from there you can do any
additional image processing you like. The second event is just a fancy (and more
efficient) way of saying pictureBoxDisplay.Image =
frame.Image. For some reason, setting
the Image property on a PictureBox too often causes
flicker and we obviously do not want that – instead we resort to invalidating
the PictureBox and then handling its paint event to draw
the current image from the WebCam.
Now that all that is implemented, we
just StartFrameCapture and enjoy the view from our
WebCam. Try it out – press F5 and then click the ‘Start’ button once the Form
loads up.
When you grow tired of watching yourself, simply close the form. Once you are
back in Visual Studio, check out thethrashOldCamera method
(that is utilized from
the Form_Closing and btnStop_Click methods
also):
private
void thrashOldCamera(){ if
(_frameSource != null) { _frameSource.NewFrame -= OnImageCaptured; _frameSource.Camera.Dispose(); setFrameSource(null); pictureBoxDisplay.Paint -= new
PaintEventHandler(drawLatestImage); }} |
Well, nothing too fancy – we unsubscribe from the two mentioned events, set
the _frameSource variable to null, and
call Dispose on Camera so that the
C++ WebCamLib can perform cleanup operations.
Believe it or not – that’s it. There is nothing more critical to explain or implement in order to use images from your WebCam in C#. The extra code that exists in MainForm.cs is just there for saving the current image:
private
void btnSave_Click(object
sender, EventArgs e){ if
(_frameSource == null) return; Bitmap current = (Bitmap)_latestFrame.Clone(); using
(SaveFileDialog sfd = new
SaveFileDialog()) { sfd.Filter = "*.bmp|*.bmp"; if
(sfd.ShowDialog() == DialogResult.OK) { current.Save(sfd.FileName); } } current.Dispose();} |
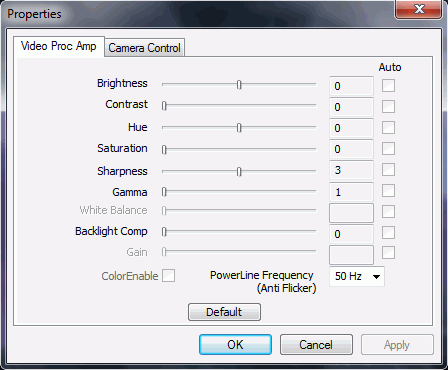
And bringing up the configuration dialog:
private
void btnConfig_Click(object
sender, EventArgs e){ // snap camera if
(_frameSource != null) _frameSource.Camera.ShowPropertiesDialog();} |

As you can see from the code – the implementation is pretty easy and clean (unlike some other approaches that use WIA, obscure DLLs, clipboard, or hard disk for saving images, etc.), meaning that there are not many problems. Actually, currently there is only one problem I can identify. You remember these three lines?
_frameSource.Camera.CaptureWidth = 320;
_frameSource.Camera.CaptureHeight = 240;
_frameSource.Camera.Fps = 20;
Well, it turns out that they are not working as advertised. First, let’s talk
about FPS. If we dive into the Camera class (line 254)
here is what we will see (the method that gets called after an image is captured
from the webcam):
private
void ImageCaptured(Bitmap bitmap){ DateTime dtCap = DateTime.Now; // Always save the bitmap lock
(_bitmapLock) { _bitmap = bitmap; } // FPS affects the callbacks only if
(_fpslimit != -1) { if
(_dtLastCap != DateTime.MinValue) { double
milliseconds = ((dtCap.Ticks - _dtLastCap.Ticks) / TimeSpan.TicksPerMillisecond) * 1.15; if
(milliseconds + _timeBehind >= _timeBetweenFrames) { _timeBehind = (milliseconds - _timeBetweenFrames); if
(_timeBehind < 0.0) { _timeBehind = 0.0; } } else { _timeBehind = 0.0; return; // ignore the frame } } } if
(OnImageCaptured != null) { var
fps = (int)(1 / dtCap.Subtract(_dtLastCap).TotalSeconds); OnImageCaptured.Invoke(this, new
CameraEventArgs(bitmap, fps)); } _dtLastCap = dtCap;} |
Even if you just glanced at the method, you probably saw that most of it is dedicated to calculating the time between frames and ditching the frame if it came too soon. Which is not too bad, I guess – controlling the frame rate on C# level rather than on hardware level will probably not kill you.
But what about finding out the other two lines, which influence the size of the captured image, also not working (line 235 in Camera.cs)?
private
void CaptureCallbackProc(int
dataSize, byte[] data){ // Do the magic to create a bitmap int
stride = _width * 3; GCHandle handle = GCHandle.Alloc(data, GCHandleType.Pinned); var
scan0 = (int)handle.AddrOfPinnedObject(); scan0 += (_height - 1) * stride; var
b = new
Bitmap(_width, _height, -stride, PixelFormat.Format24bppRgb, (IntPtr)scan0); b.RotateFlip(_rotateFlip); // Copy the image using the Thumbnail function to also resize if needed var
copyBitmap = (Bitmap)b.GetThumbnailImage(_width, _height, null, IntPtr.Zero); //var copyBitmap = (Bitmap)b.Clone(); // Now you can free the handle handle.Free(); ImageCaptured(copyBitmap);} |
As you can see, the image size is actually faked. Majority of cameras I’ve
tested out will tend to return images in the 640x480 size. Which is fine in most
cases – if you need a smaller
image, b.GetThumbnailImage will allow you to easily
resize it. However, if you wish a higher resolution image, you are stuck and
that’s not a good thing.
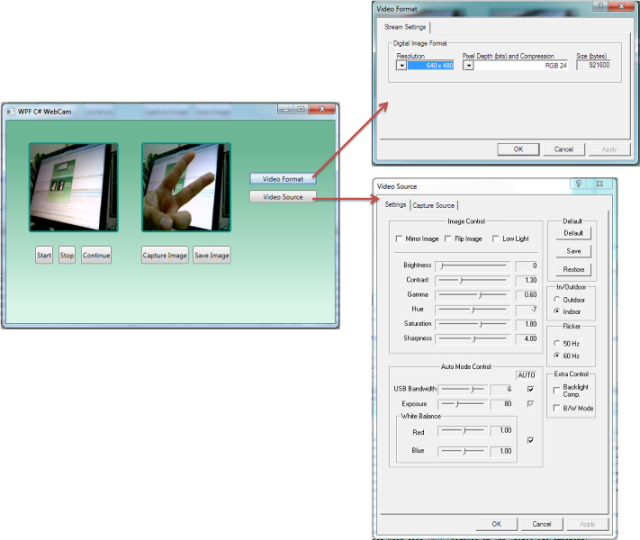
So, anyone from the C++ world is more than welcome to help with this. The following links I’ve read gave me the impression that all that’s needed to be done is somehow invoke the Video Format window in C++, the same way we are now invoking the Video Source Configuration window (for setting Brightness, Contracts, etc):
CameraMethods class.
源码下载地址: Source
C# 使用摄像头拍照 支持Win7 64位,布布扣,bubuko.com
原文:http://www.cnblogs.com/tuyile006/p/3756649.html