转 https://oracle-base.com/articles/vm/oracle-cloud-database-as-a-service-dbaas-create-service?utm_source=tuicool&utm_medium=referral
This article provides a run through of creating a new DBaaS service on the Oracle Cloud.
Related articles.
Before you start, you are going to need a key pair for authentication to your service.
$ ssh-keygen -b 2048 -t rsa -f myOracleCloudKey
$ chmod 600 myOracleCloudKey*
Enter and confirm the passphrase when prompted. You will be asked to upload the public key during the service creation.
If you have any problems, or need instructions for using PuTTYgen on Windows, check out the documentation here.
Log into your Oracle Cloud "My Services" dashboard. Scroll down to the "Oracle Database Cloud Service" section and click either the title, or the "Open Service Console" link.
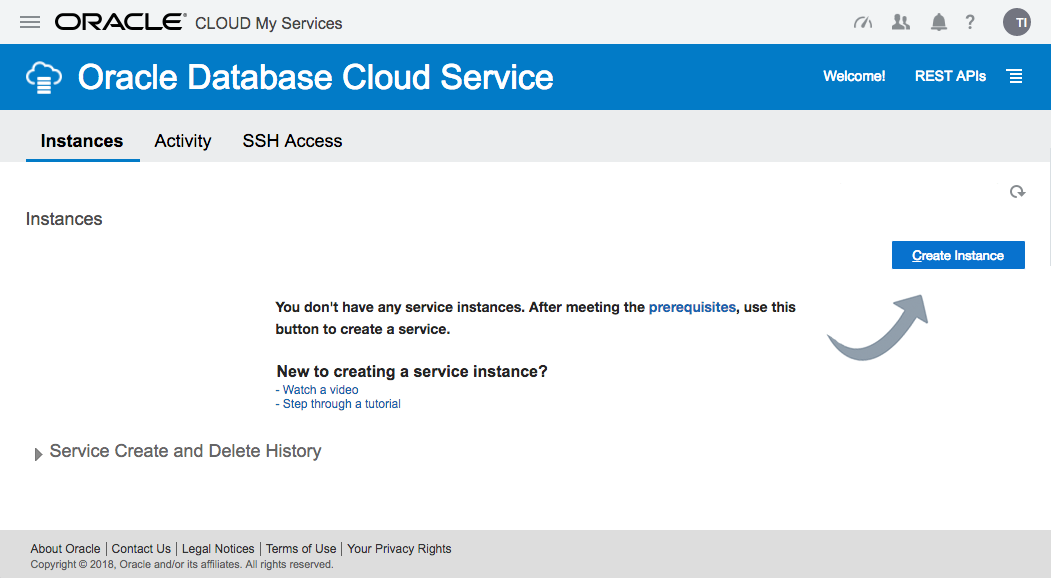
On the "Oracle Database Cloud Service" page, click the "Create Service" button.
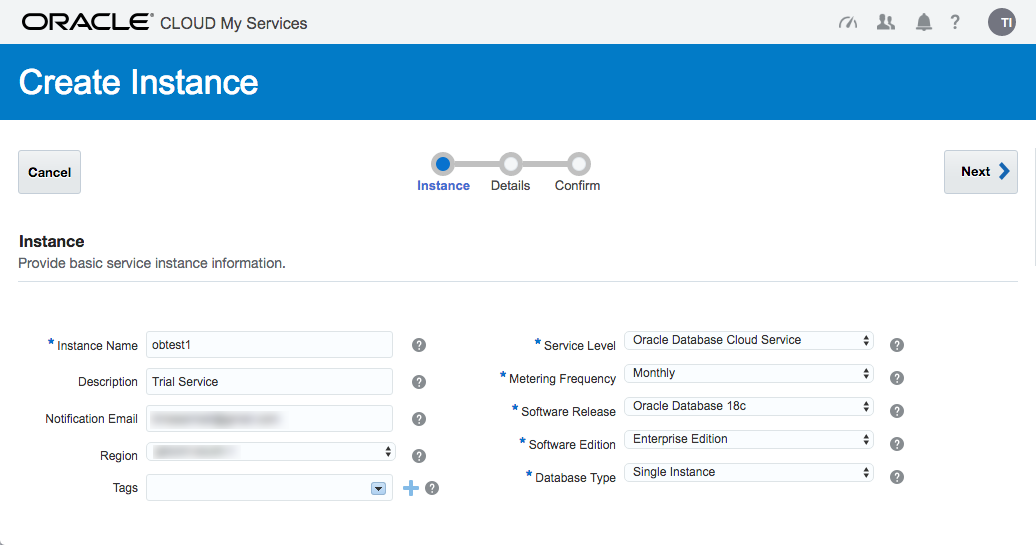
The next page allows you to enter the following details about the service.
Once you are happy with your choices, click the "Next" button.
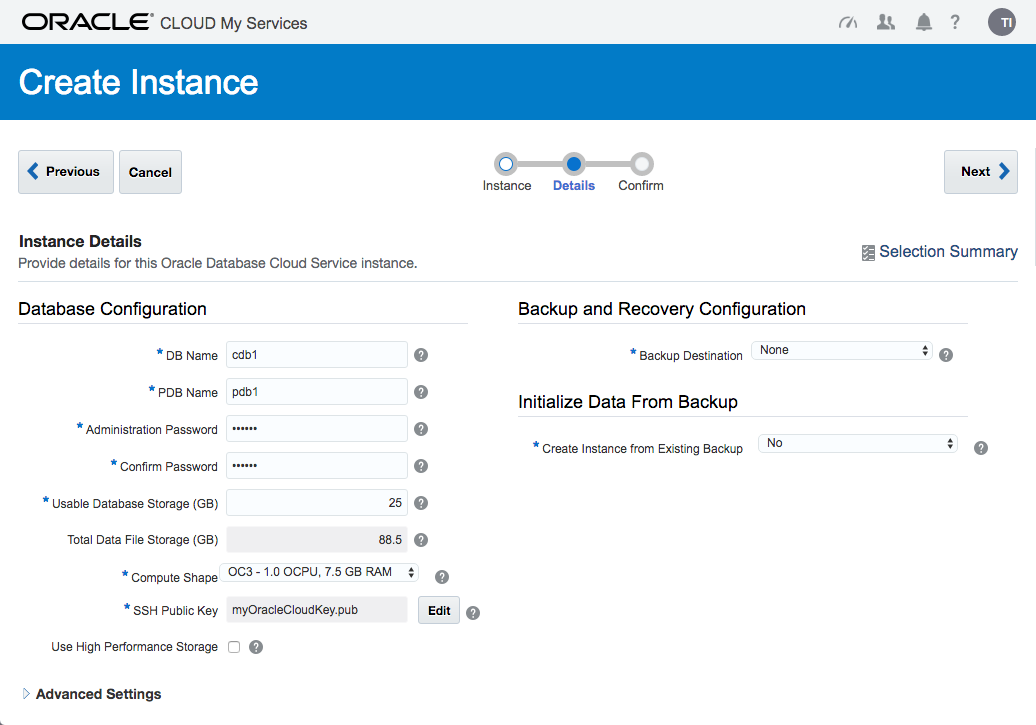
Enter the service details. The shape determines the number of virtual CPUs and memory associated with the service, so pick a shape that is relevant to your performance needs. Enter the database configuration details. Pick the backup configuration appropriate to your system. When you are happy with the configuration, click the "Next" button.
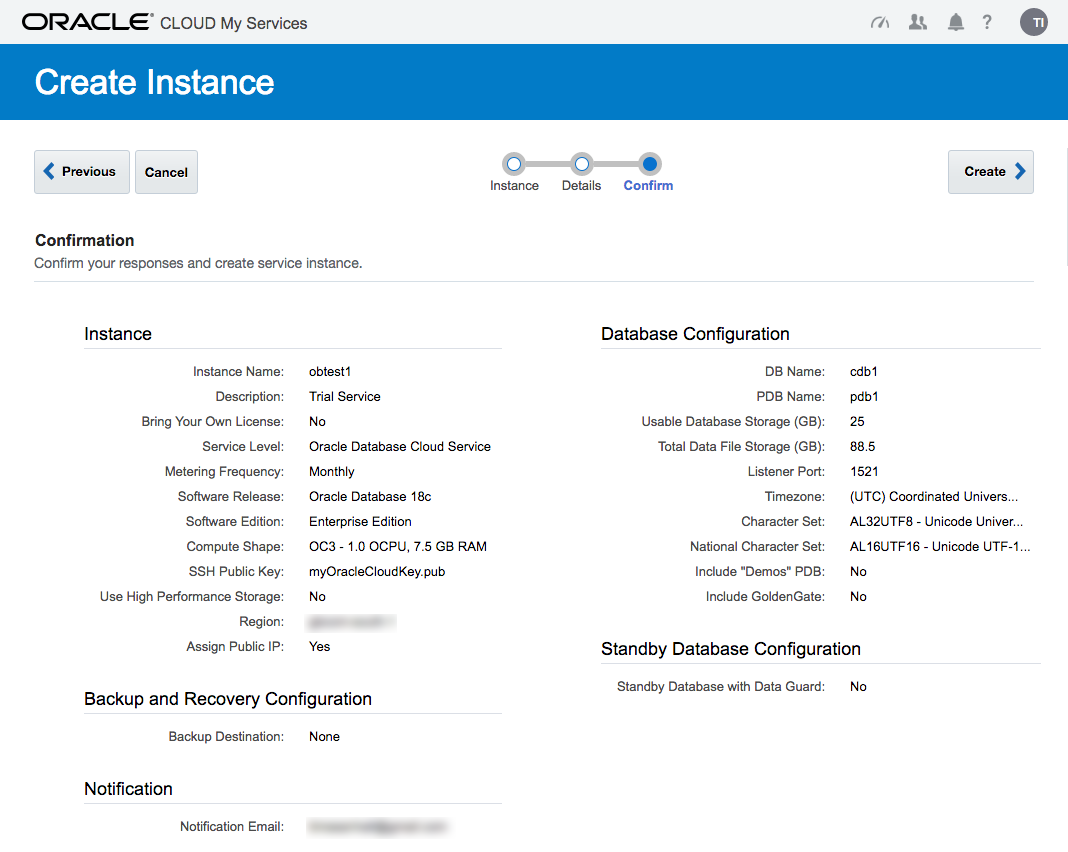
If you are happy with the service setting listed on the "Confirmation" screen, click the "Create" button.
Wait while the new service is created. The progress is shown under the status.
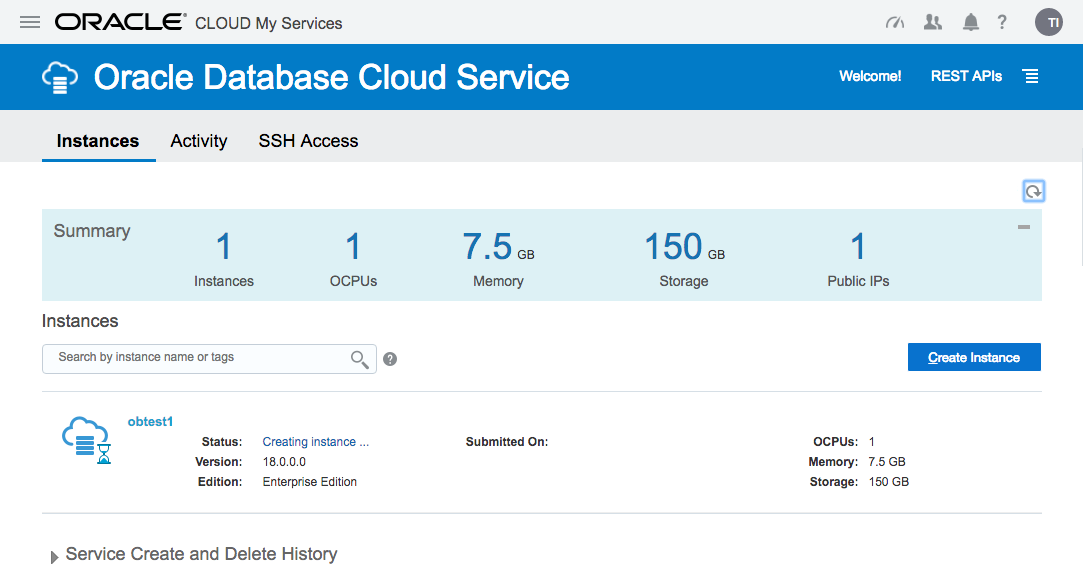
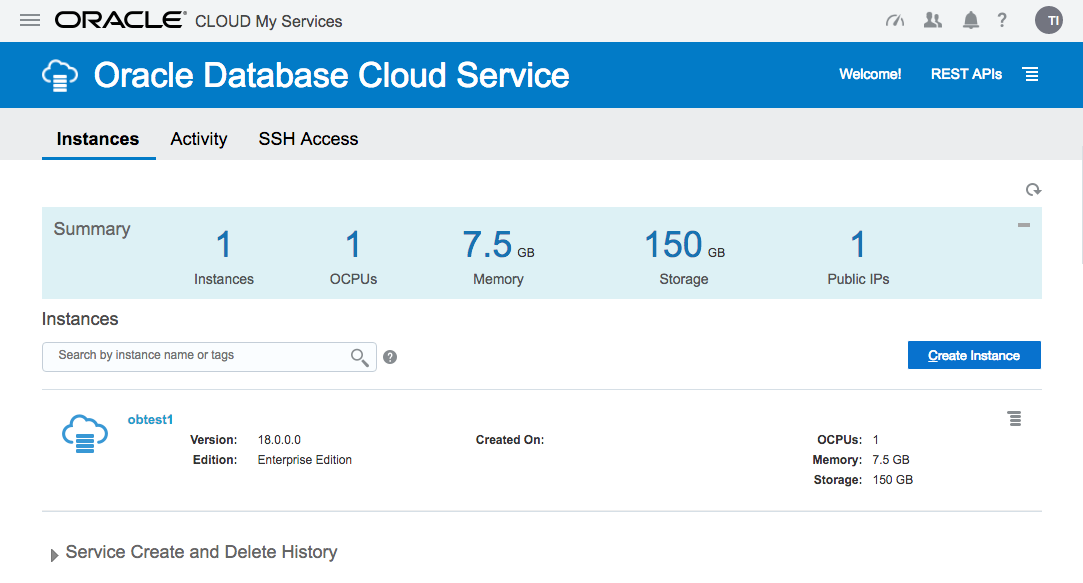
Once complete, the status disappears.
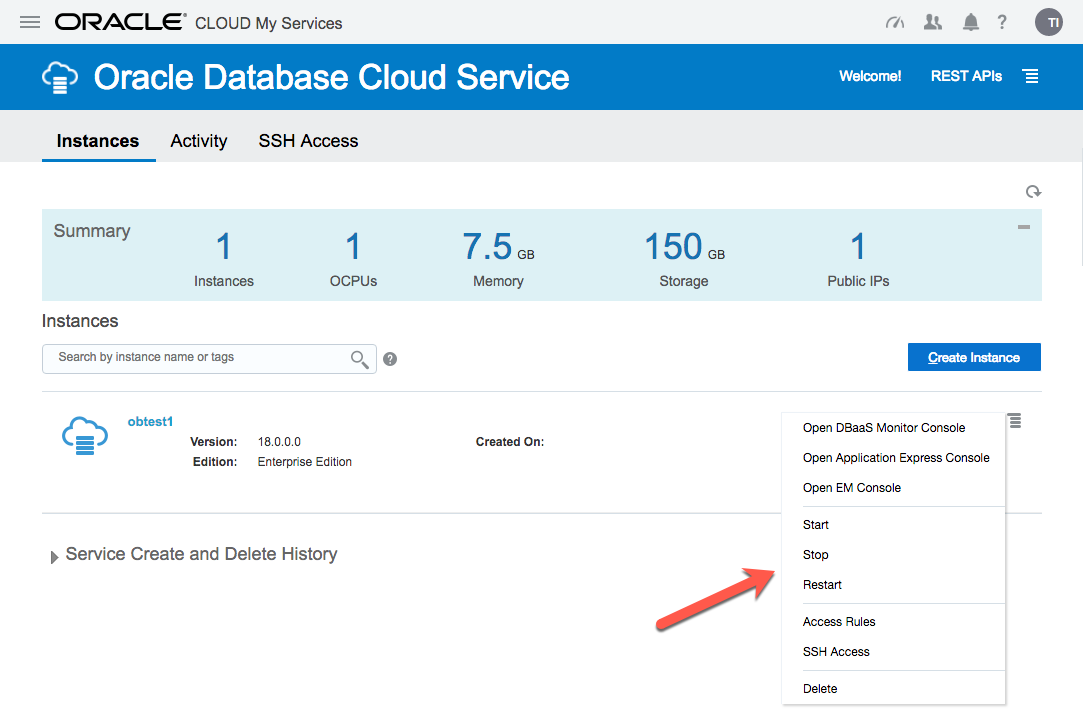
The service hamburger allows you to navigate to a number of management tools. You will need to amend the firewall rules to access these.
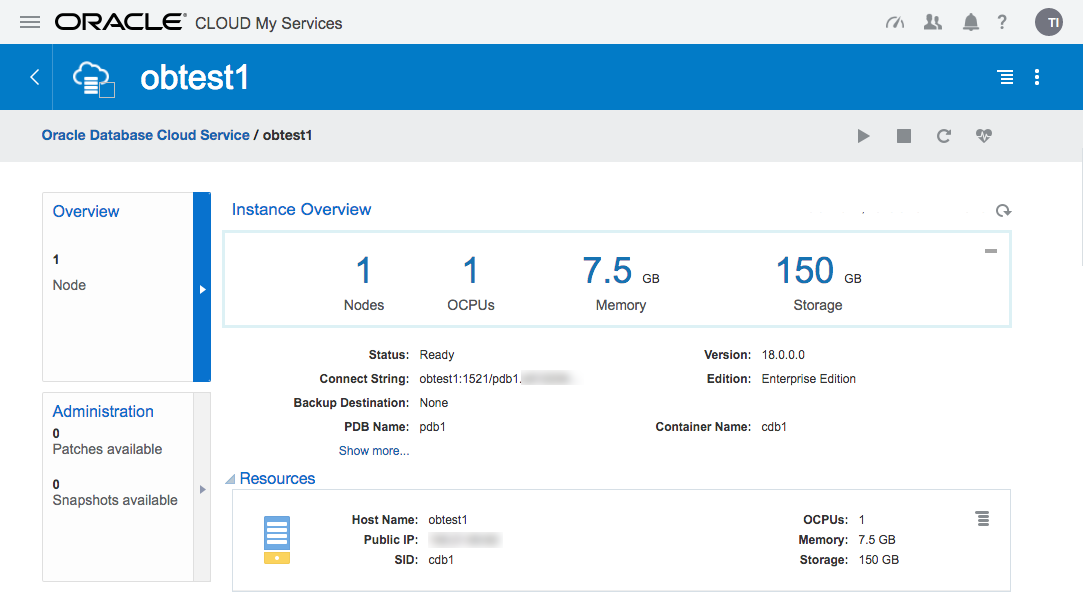
Click on the service name to drill down into the service. The detail page gives basic information about the service, including the public IP address and the database connection string.
The hamburger gives you basic management operations (Start, Stop, Restart, Scale Up/Down) for the service.
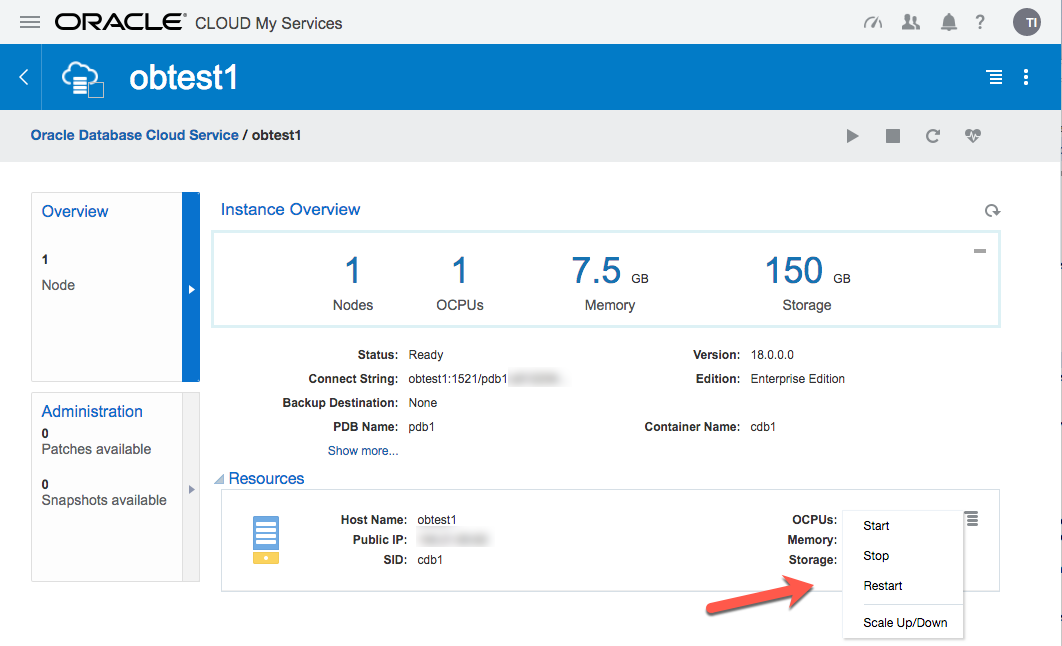
If there are any patches available for your database, they will be displayed in the "Administration" section.
Most of the time you will probably be connecting to the "oracle" operating system user. You do this by specifying your private key and connect to the "oracle" user on the public IP address from your service detail page.
$ ssh -i ./myOracleCloudKey oracle@123.123.123.123

[oracle@obtest1 ~]$
Once connected, you can do all the usual stuff.
[oracle@obtest1 ~]$ sqlplus / as sysdba

SQL*Plus: Release 12.2.0.1.0 Production on Tue Nov 8 09:44:42 2016

Copyright (c) 1982, 2016, Oracle.  All rights reserved.


Connected to:
Oracle Database 12c Enterprise Edition Release 12.2.0.1.0 - 64bit Production

SQL> ALTER SESSION SET CONTAINER = pdb1;

Session altered.

SQL> CREATE USER test IDENTIFIED BY test;

User created.

SQL> GRANT CREATE SESSION TO test;

Grant succeeded.

SQL>
If you need to perform any tasks as root, you must connect to the "opc" user and run them using "sudo".
$ ssh -i ./myOracleCloudKey opc@123.123.123.123
-bash-4.1$ sudo vi /etc/hosts
The DBaaS services are run under the Oracle Compute Cloud (IaaS). This has it‘s own firewall configuration, allowing you to limit access to your services. By default, all endpoints except SSH are disabled. There are a number of predefined "Security Rules" to open up the assorted endpoints, but they typically open the endpoints to public, which is rather risky. Instead, you should define custom rules, opening access to ports from specific machines.
You should now be able to connect to the database from the specified IP address.
You will need to do a similar process for the other tools you want to connect to, like APEX, DB Express etc.
The "sqlnet.ora" file on the server contains the following entries, so any connections to the server are encrypted using Native Network Encryption by default.
SQLNET.ENCRYPTION_SERVER = required
SQLNET.CRYPTO_CHECKSUM_TYPES_SERVER = (SHA1)
SQLNET.CRYPTO_CHECKSUM_SERVER = required
ENCRYPTION_WALLET_LOCATION = (SOURCE=(METHOD=FILE)(METHOD_DATA=(DIRECTORY=/u01/app/oracle/admin/cdb1/tde_wallet)))
SQLNET.ENCRYPTION_TYPES_SERVER = (AES256, AES192, AES128)
NAMES.DIRECTORY_PATH = (TNSNAMES, EZCONNECT)
SQLNET.WALLET_OVERRIDE = FALSE
SQLNET.EXPIRE_TIME = 10
SSL_VERSION = 1.0
WALLET_LOCATION = (SOURCE=(METHOD=FILE)(METHOD_DATA=(DIRECTORY=/u01/app/oracle/admin/cdb1/db_wallet)))
SQL*Net access is disabled by default, but you can enable it as described above. Once enabled, create a local "tnsnames.ora" entry as follows. The connection details are available from your service detail screen.
pdb1_oc=
  (DESCRIPTION=
    (ADDRESS=
      (PROTOCOL=TCP)
      (HOST=123.123.123.123)
      (PORT=1521)
    )
    (CONNECT_DATA=
      (SERVICE_NAME=pdb1.my-identity.oraclecloud.internal)
    )
  )
Now you can connect to the database.
C:\>sqlplus test/test@pdb1_oc

SQL*Plus: Release 11.2.0.3.0 Production on Wed Aug 26 14:40:23 2015

Copyright (c) 1982, 2011, Oracle.  All rights reserved.


Connected to:
Oracle Database 12c Enterprise Edition Release 12.2.0.1.0 - 64bit Production

test@cdb1>
Alternatively, connect using the EZconnect URL.
C:\>sqlplus test/test@123.123.123.123:1521/pdb1.my-identity.oraclecloud.internal

SQL*Plus: Release 11.2.0.3.0 Production on Wed Aug 26 14:42:31 2015

Copyright (c) 1982, 2011, Oracle.  All rights reserved.


Connected to:
Oracle Database 12c Enterprise Edition Release 12.2.0.1.0 - 64bit Production

SQL>
DBaaS Monitor: https://123.123.123.123/dbaas_monitor/
Username: dbaas_monitor
Password: (set during installation)

APEX: https://123.123.123.123/ords/pdb1
Workspace: INTERNAL
Username : ADMIN
Password : (set during installation)

Glassfish: https://123.123.123.123:4848/common/index.jsf
Username : admin
Password : (set during installation)

DB Express : https://123.123.123.123:5500/em
For more information see:
原文:http://www.cnblogs.com/feiyun8616/p/6618777.html