route---‘路由’
ajax的弊端:
1.ajax请求不会留下history记录
2.用户无法直接通过url进入应用中的指定页面(保存书签,分享朋友?)
3.ajax不利于SEO
前端路由的实现原理是什么?
#哈希 也叫锚点,通过使用锚点实现页面刷新但不跳转。
html5中的history API
route可以说是angular的一大重点。 route可以实现局部页面无刷新跳转(相当于页面里嵌套了页面)
ng官方提供了一套路由 ng-route
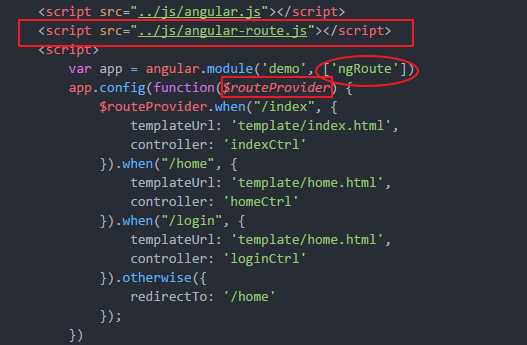
1.引入外部文件:angular-route.js 2.把ngRoute模块注入到主模块 3.使用config函数 注入$routeProvider服务 4.在需要载入页面的地方 加上ng-view
$routeProvider的方法:
when(‘url’, {//code}) 该对象的属性有template/templateUrl--文件地址 controller:‘控制器名称’ url表示拼接在网址后头 #!url
otherwise({//code}) 该方法表示默认的页面 ,接收一个对象,该对象有个属性redirectTo 表示从重定向
需要注意的是:当设置了controller选项时,主控制器就不能用在 标签含有属性ng-view里面了。
<body ng-app="app">
    <div ng-controller="myCtrl">
        <a href="#!/index">index</a>
        <a href="#!/home">home</a>
        <div ng-view>

        </div>
    </div>
</body>
    <script src="./js/angular.js"></script>
    <script src="./js/angular-route.js"></script>
    <script>
        var app = angular.module(‘app‘, [‘ngRoute‘]);
        app.controller(‘myCtrl‘, function($scope){
            $scope.name = ‘dk‘;
        })
        app.config(function($routeProvider){
            $routeProvider.when(‘/index‘,{
                templateUrl:‘./temp/index.html‘,
                controller: ‘indexCtrl‘
            }).when(‘/home‘, {
                templateUrl: ‘./temp/home.html‘
            }).otherwise(‘/index‘, {
                templateUrl:‘./temp/index.html‘,
                controller: ‘indexCtrl‘
            })
        });
        app.controller(‘indexCtrl‘, function($scope){
            $scope.name = ‘jjk‘
        })
    </script>
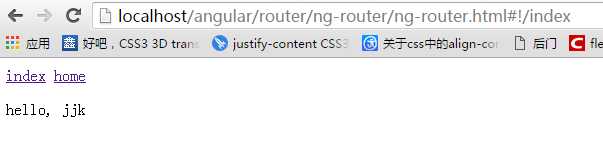
在chrome中显示:
从外部引入angular-route.js 但无法进行深层次嵌套,这时,可以选用第3方插件:angular-ui-route.js
用ng制作的spa(单页面应用)经常有路由嵌套、路由平行的情况
第一种情况:页面嵌套
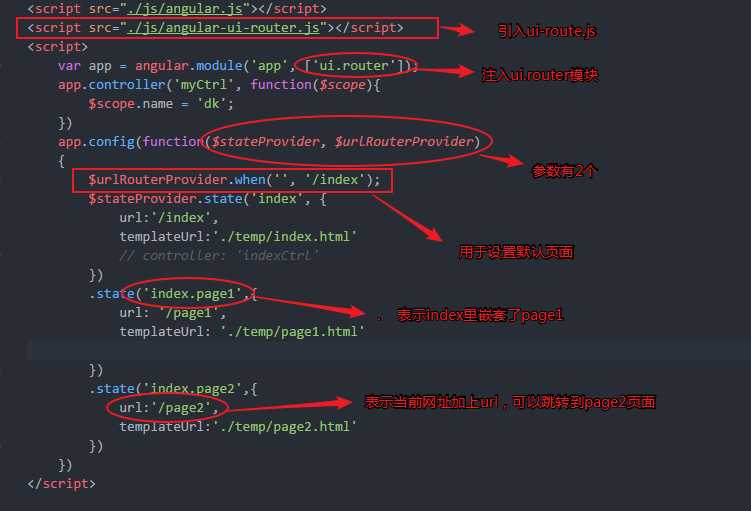
<body ng-app="app">
    <div ng-controller="myCtrl">
        <a href="#!/index">index</a>
        <div ui-view style="border:1px solid green">

        </div>
    </div>
</body>
<script src="./js/angular.js"></script>
<script src="./js/angular-ui-router.js"></script>
<script>
    var app = angular.module(‘app‘, [‘ui.router‘]);
    app.controller(‘myCtrl‘, function($scope){
        $scope.name = ‘dk‘;
    })
    app.config(function($stateProvider, $urlRouterProvider)
    {
        $urlRouterProvider.when(‘‘, ‘/index‘);
        $stateProvider.state(‘index‘, {
            url:‘/index‘,
            templateUrl:‘./temp/index.html‘
            // controller: ‘indexCtrl‘
        })
        .state(‘index.page1‘,{
            url: ‘/page1‘,
            templateUrl: ‘./temp/page1.html‘

        })
        .state(‘index.page2‘,{
            url:‘/page2‘,
            templateUrl:‘./temp/page2.html‘
        })
    })
</script>
上面的代码中:
$urlRouterProvider.when(‘‘, ‘/index‘); 表示默认页面
url 表示在当前网址的基础上加上url
同样可以有controller选项。
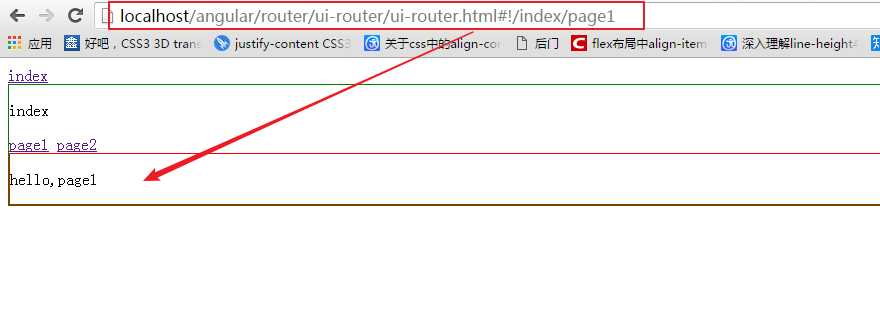
在chrome中显示:
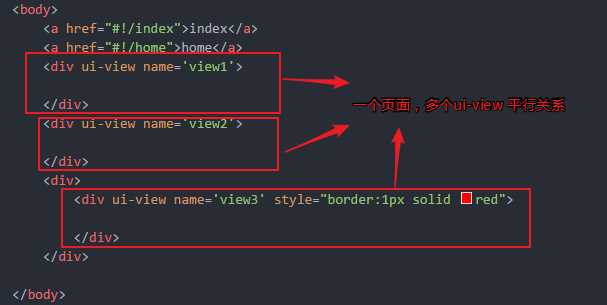
第2种情况:多个ui-view存在同一个页面,互为平行关系。
body部分:
script部分:
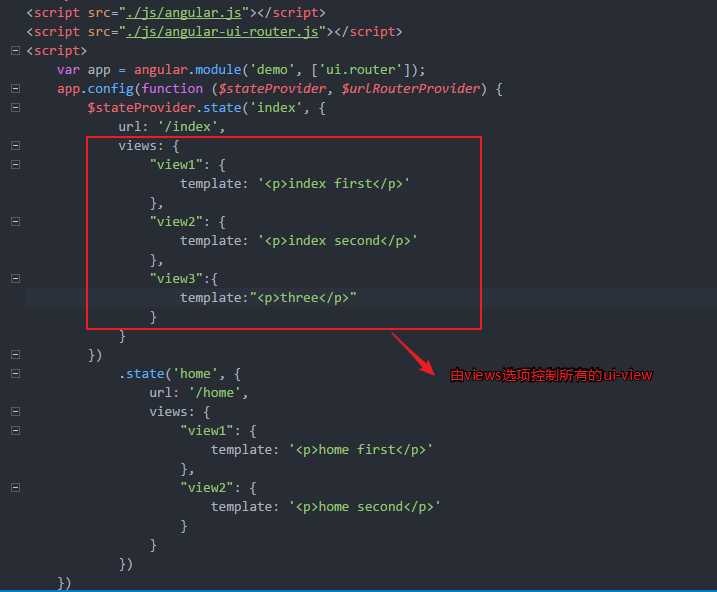
可以看出:给ui-view所在的标签一个name属性,由views选项控制所有的ui-view就可以实现一个页面多个视图。
<body>
    <a href="#!/index">index</a>
    <a href="#!/home">home</a>
    <div ui-view name=‘view1‘>

    </div>
    <div ui-view name=‘view2‘>

    </div>
    <div>
        <div ui-view name=‘view3‘ style="border:1px solid red">

        </div>
    </div>

</body>
<script src="./js/angular.js"></script>
<script src="./js/angular-ui-router.js"></script>
<script>
    var app = angular.module(‘demo‘, [‘ui.router‘]);
    app.config(function ($stateProvider, $urlRouterProvider) {
        $stateProvider.state(‘index‘, {
            url: ‘/index‘,
            views: {
                "view1": {
                    template: ‘<p>index first</p>‘
                },
                "view2": {
                    template: ‘<p>index second</p>‘
                },
                "view3":{
                    template:"<p>three</p>"
                }
            }
        })
            .state(‘home‘, {
                url: ‘/home‘,
                views: {
                    "view1": {
                        template: ‘<p>home first</p>‘
                    },
                    "view2": {
                        template: ‘<p>home second</p>‘
                    }
                }
            })
    })
</script>

</html>
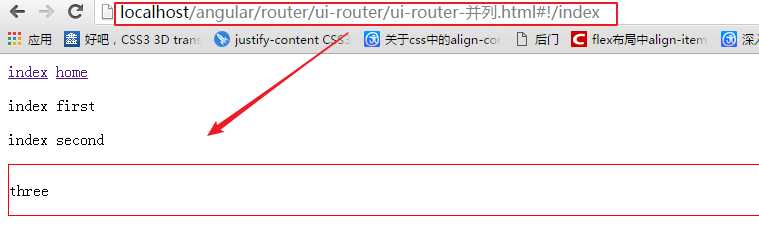
在chrome中显示:
路由传参:在我们平时做的页面跳转都会传参,如:https://i.cnblogs.com/EditPosts.aspx?postid=6556246&update=1, postid=6556246&update=1就是参数。那路由又是如何实现传参的呢?
在url选项中: ‘/index/:id’ id即为参数 如果设置了参数 凡是页面/index/hot、/index/news之类的 hot news均表示参数而不是指第2层ui-view。
一般在a标签里 实现路由跳转 有2种写法:
1. <a href="#/index/hot"></a> hot为参数
2. 使用ui-sref
<a ui-sref="index({id:hot})">show index</a> index表示 路由的名字 ({id:hot})表示参数
监控路由的变化:
监控路由的变化有一般有2种方式
1. 路由状态发生改变时,可以通过监听‘ $stateChangeStart ‘、‘ $stateChangeSuccess ‘、‘ $stateChangeError ‘等事件
监控路由是在run阶段,通过注入$rootScope服务,使用$on监听这些事件。
$stateChangeStart 表示 路由状态开始改变 注意此时url还未改变了,视图还未更新。
$stateChangeSuccess表示 路由状态改变完成,此时url已经改变了,视图仍没有更新。
$stateChangeError 表示 路由状态改变错误。
var app = angular.module(‘app‘, [‘ui.router‘, ‘routers‘, ‘directives‘, ‘controllers‘, ‘ionic‘]);
// app.controller(‘appCtrl‘,function($scope){
//     $scope.tab = ‘jjk‘;
// })
监听路由变化
app.run([‘$rootScope‘, ‘$http‘, function ($rootScope,$http) {
    $rootScope.$on(‘$stateChangeSuccess‘, function (event, toState, toParams, fromState, fromParams) {
        console.log(event);
        console.log(toState);
        console.log(toParams);
        console.log(fromState);
        console.log(fromParams);
        console.log($rootScope.tab);
        if (toState.name = ‘home.list‘) {

                $http({
                    url: "https://cnodejs.org/api/v1/topics",
                    method: ‘GET‘,
                    params: {
                        limit: 10,
                        page: 1,
                        tab: toParams.id
                    }
                }).then(function (res) {
                    // console.log(res.data);
                    if (res.data.success) {
                        $rootScope.news = res.data.data;
                        console.log($rootScope.news);
                    }
                })
            }
        }
    )
}])
注入$rootScope服务,监听$stateChangeSuccess
$rootScope.$on(‘$stateChangeSuccess‘, function (event, toState, toParams, fromState, fromParams){//code}
请使用手机"扫一扫"x
原文:http://www.cnblogs.com/first-time/p/6556246.html