边沿检测采用Candy算法,比较经典,opencv自带
Candy算法的原理可以参见这篇博文:http://www.tuicool.com/articles/Y3q2Mf
整个流程是这样的:
示例代码如下:
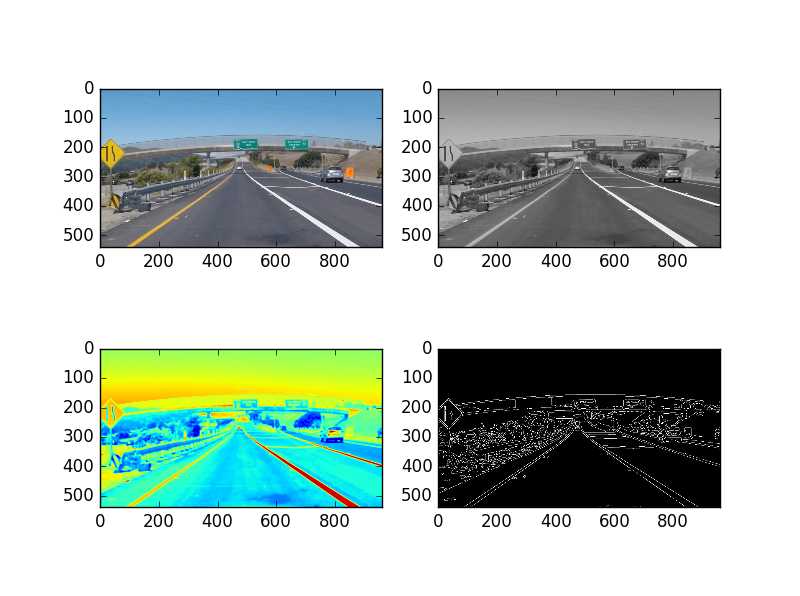
#! usr/bin/python
#coding=utf-8
#doing all the relevant imports
import matplotlib.pyplot as plt
import matplotlib.image as mpimg
import numpy as np
import cv2

image = mpimg.imread(‘exit-ramp.jpg‘)
gray = cv2.cvtColor(image,cv2.COLOR_RGB2GRAY)
# Define a kernel size for Gaussian smoothing / blurring
# Note: this step is optional as cv2.Canny() applies a 5x5 Gaussian internally
kernel_size = 5
blur_gray = cv2.GaussianBlur(gray,(kernel_size,kernel_size),10)
# Define parameters for Canny and run it
# NOTE: if you try running this code you might want to change these!
low_threshold = 1
high_threshold = 60
edges = cv2.Canny(blur_gray, low_threshold, high_threshold)

# Display the image

plt.subplot(221)
plt.imshow(image)
plt.subplot(222)
plt.imshow(gray,cmap=‘gray‘)
plt.subplot(223)
plt.imshow(blur_gray)
plt.subplot(224)
plt.imshow(edges, cmap=‘Greys_r‘)
plt.show()
运行结果:
原文:http://www.cnblogs.com/vvzvv/p/7124131.html