很久都没写博客了,从今天开始会记录一些学习的心得/过程。现在对学习iOS的兴趣也越来越浓。微信小程序的开发已经告一段落,目前会对产品进行代码改进和功能优化。
第一个iOS应该从今天开始诞生,这两天刚开始接触一些iOS的语法,OC对象的概念还没有完全熟悉,感觉很全新。
//
// ViewController.m
// more
//
// Created by vjia on 2017/8/1.
// Copyright ? 2017年 vjia. All rights reserved.
//
#import "ViewController.h"
#import "UIKit/UIkit.h"
@interface ViewController (){
UITextField *_txtUserName;//声明控件变量
UITextField *_txtPassword;
}
@end
@implementation ViewController
- (void)viewDidLoad {
[super viewDidLoad];
[self LoadLoginForm];//在当前对象中加载
}
- (void)didReceiveMemoryWarning {
[super didReceiveMemoryWarning];
// Dispose of any resources that can be recreated.
}
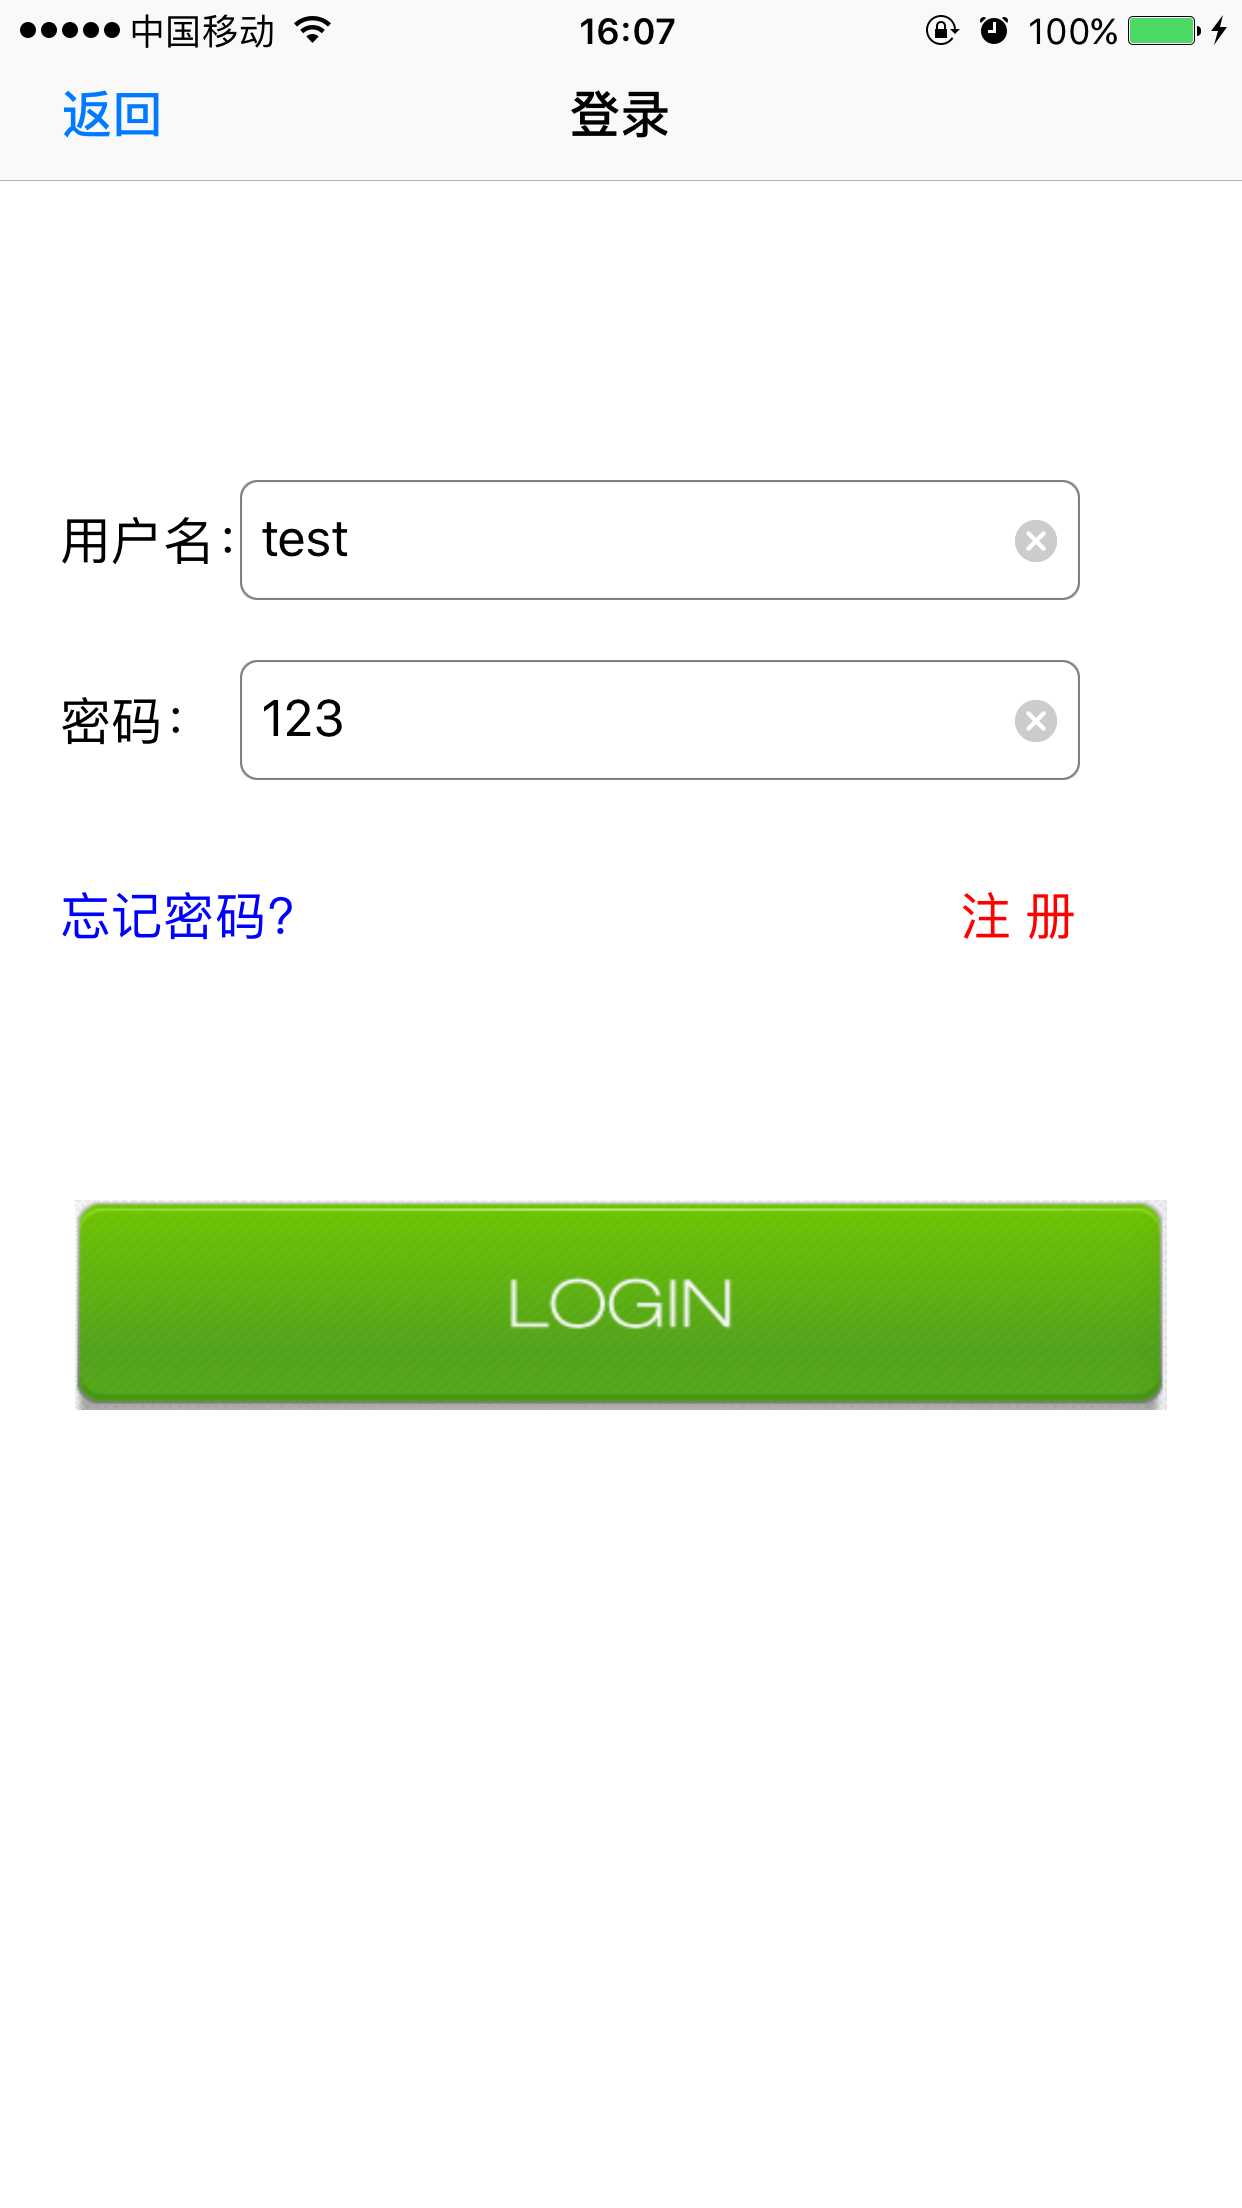
-(void)LoadLoginForm{//实例化加载控件
UILabel *lbUserName=[[UILabel alloc] initWithFrame:CGRectMake(20, 160, 100, 40)];//绘制文本框大小
lbUserName.text=@"用户名:";//设置文本框文字
[self.view addSubview:lbUserName];
_txtUserName=[[UITextField alloc] initWithFrame:CGRectMake(80, 160, 280, 40)];//绘制文本框大小
[_txtUserName setBorderStyle:UITextBorderStyleRoundedRect];//设置边框样式
_txtUserName.layer.borderColor=[[UIColor grayColor] CGColor];//设置边框的颜色
_txtUserName.layer.borderWidth=0.7f;//设置边框宽度
_txtUserName.layer.cornerRadius=6.0f;//设置圆角边框大小
_txtUserName.placeholder=@"请输入用户名";
_txtUserName.clearButtonMode=UITextFieldViewModeAlways;//文本框右侧总是显示删除角标
[self.view addSubview:_txtUserName];//将控件加入当前的view中
UILabel *lbPassWord=[[UILabel alloc] initWithFrame:CGRectMake(20, 220, 100,40)];
lbPassWord.text=@"密码:";
[self.view addSubview:lbPassWord];
_txtPassword=[[UITextField alloc] initWithFrame:CGRectMake(80, 220, 280, 40)];
[_txtPassword setBorderStyle:UITextBorderStyleRoundedRect];
_txtPassword.layer.borderColor=[[UIColor grayColor] CGColor];
_txtPassword.layer.borderWidth=0.7f;
_txtPassword.layer.cornerRadius=6.0f;
_txtPassword.placeholder=@"请输入密码";
_txtPassword.clearButtonMode=UITextFieldViewModeAlways;
[self.view addSubview:_txtPassword];
UILabel *lbForget=[[UILabel alloc] initWithFrame:CGRectMake(20, 280, 100, 50)];
lbForget.text=@"忘记密码?";
[lbForget setTextColor:[UIColor blueColor]];
[self.view addSubview:lbForget];
UILabel *lbReg=[[UILabel alloc]initWithFrame:CGRectMake(320, 280, 100, 50)];
lbReg.text=@"注 册";
[lbReg setTextColor:[UIColor redColor]];//设置字体的颜色
[self.view addSubview:lbReg];
CGRect rect=[[UIScreen mainScreen] bounds];//获取主屏幕对象
CGSize size=rect.size;//屏幕大小
CGFloat width=size.width;//宽度
UIButton *btnLogin=[UIButton buttonWithType:UIButtonTypeCustom];//如果按钮需要自定义背景图片 按钮必须设置成自定义模式 否则会看见蓝色的图标
btnLogin.frame=CGRectMake(0,400, width, 80+10);
//[btnLogin setBackgroundColor:[UIColor redColor]];//设置背景颜色为红色
[btnLogin setTitleColor:[UIColor whiteColor] forState:UIControlStateNormal];
[btnLogin setTitle:@"登 录" forState:UIControlStateNormal];
[btnLogin.self addTarget:self action:@selector(login) forControlEvents:UIControlEventTouchUpInside];
[btnLogin setImage:[UIImage imageNamed:@"SourceBundle.bundle/login"] forState:UIControlStateNormal];//引用资源文件中的图片作为背景图
[btnLogin setImageEdgeInsets:UIEdgeInsetsMake(0, 25, 20, 25)];
[self.view addSubview:btnLogin];
UINavigationBar *navigationbar=[[UINavigationBar alloc] initWithFrame:CGRectMake(0, 0, width, 50+10)];//绘制导航
[self.view addSubview:navigationbar];//加入到当前的view中
UINavigationItem *navitem=[[UINavigationItem alloc] initWithTitle:@"登录"];//创建导航内容并设置标题
UIBarButtonItem *barbutton=[[UIBarButtonItem alloc] initWithTitle:@"返回" style:UIBarButtonItemStyleDone target:self action:@selector(login)];//在导航栏上创建一个按钮 文字为返回 加入触发事件的方法
navitem.leftBarButtonItem=barbutton;//按钮显示在导航栏的左侧
[navigationbar pushNavigationItem:navitem animated:NO];//将导航栏显示出来
}
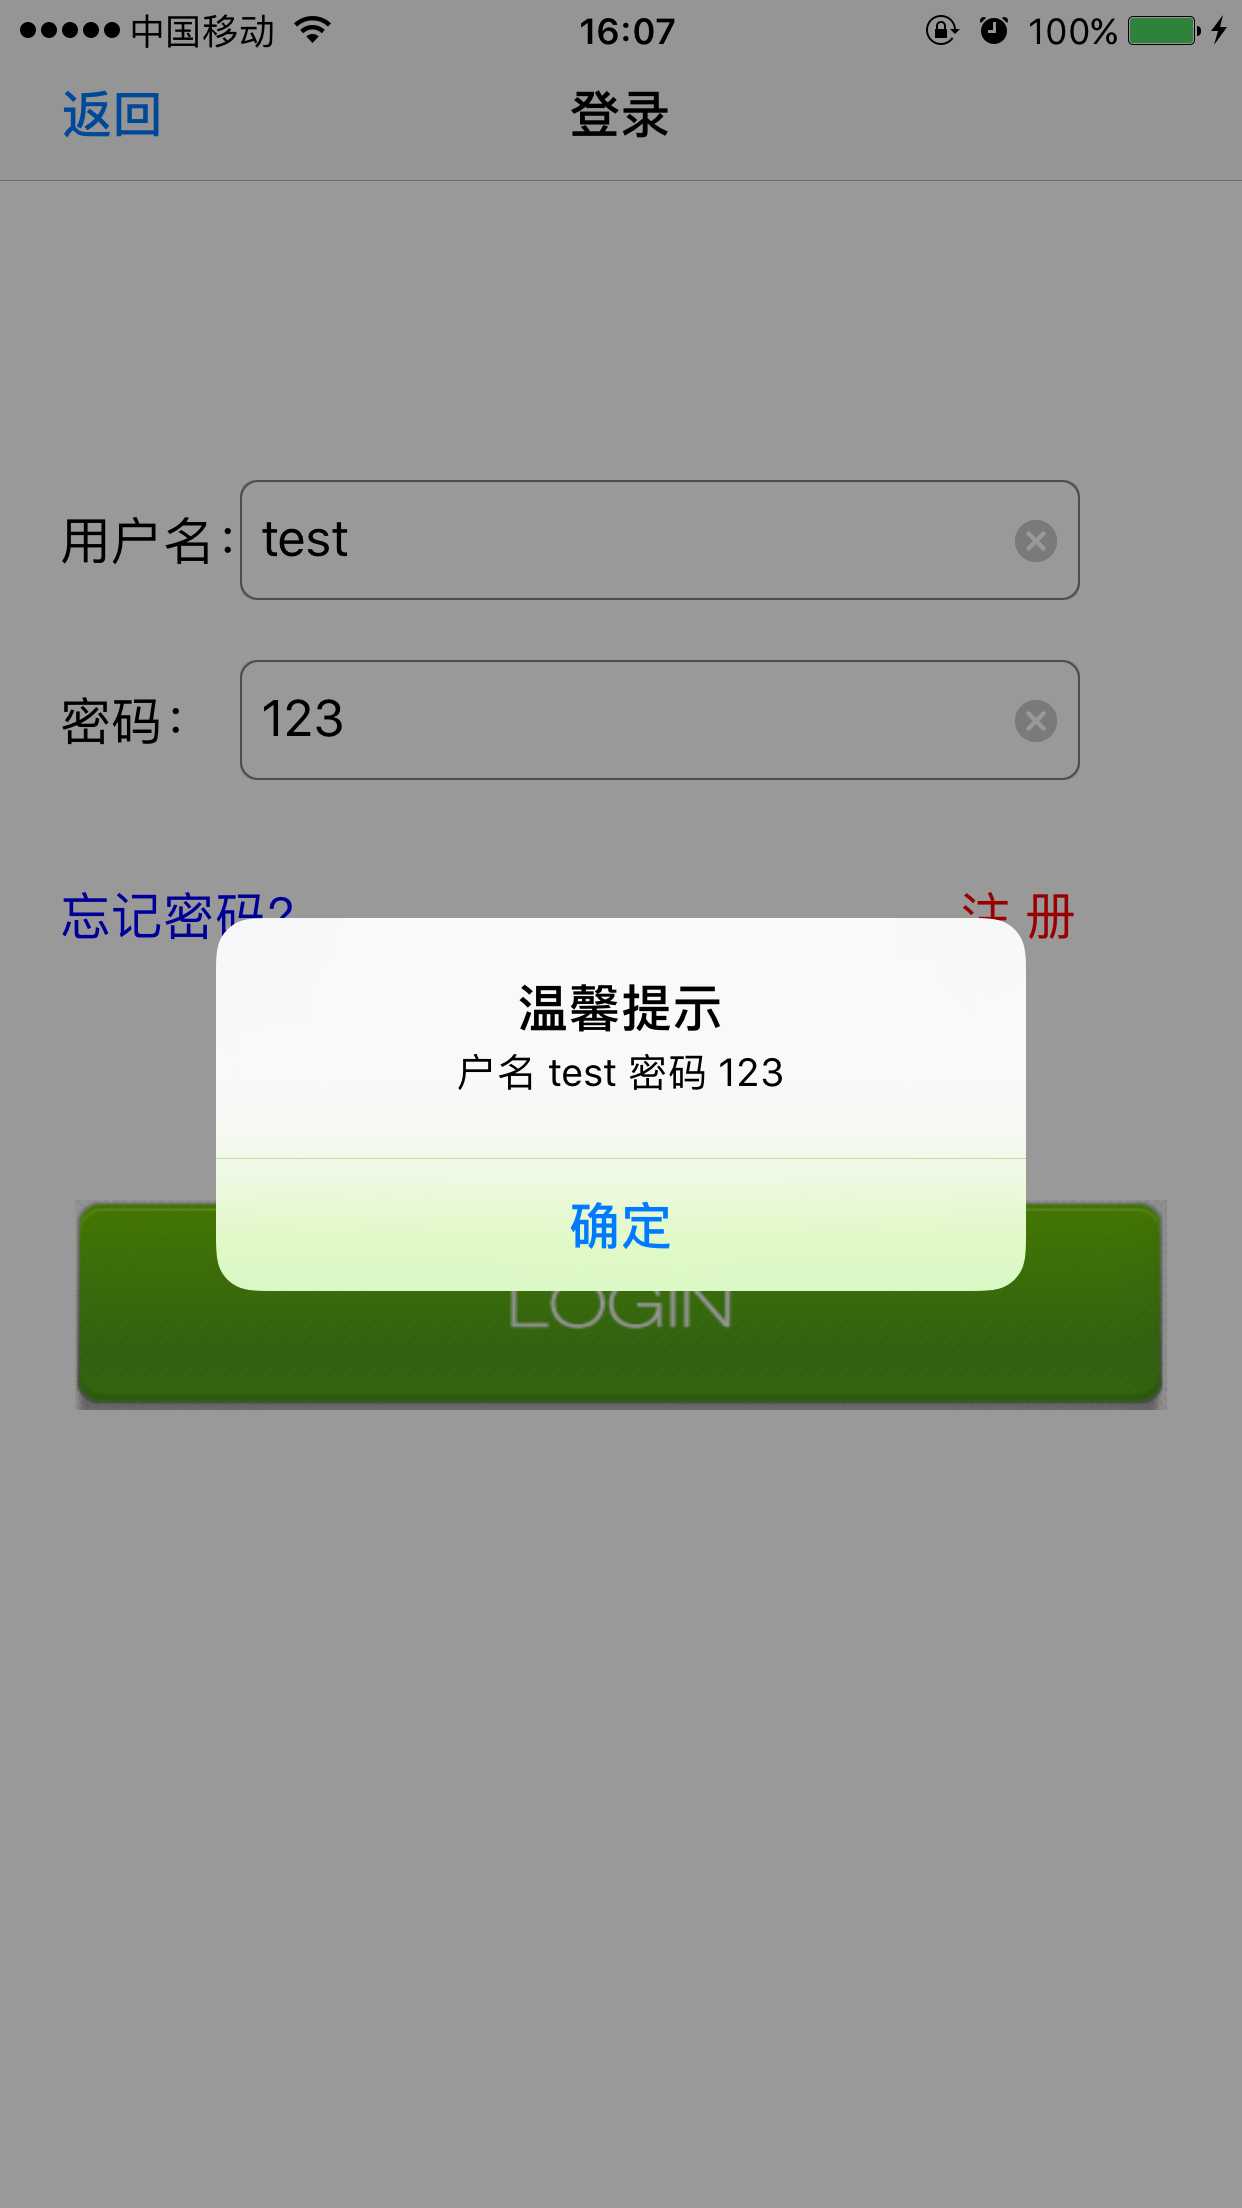
-(void)login{//登录方法
NSString *message=[NSString stringWithFormat:@"户名 %@ 密码 %@",_txtUserName.text,_txtPassword.text];//声明一个string类型的变量 并接收文本框的输入的内容
UIAlertView *alert=[[UIAlertView alloc] initWithTitle:@"温馨提示" message:message delegate:nil cancelButtonTitle:@"确定" otherButtonTitles: nil];//初始化弹窗
[alert show];//弹出模态窗体提示
}
@end
相关的说明已经在注释里面写了。感觉这种方式刚开始学可能编写代码会相对繁琐,后面应该会很好理解的。还有一种方式是拖控件来实现,这种会相对简单些。
小白一个,仅记录学习的心得与分析学习的过程。
原文:http://www.cnblogs.com/vjia/p/7274915.html