一、创建目录:
mkidr -p playbook/{files,templates}
二、自定义index.html文件
$ vim playbook/templates/index.html.j2
---------------------------------------------------------->
<html>
<head>
<title>Welcome to ansible</title>
<body>
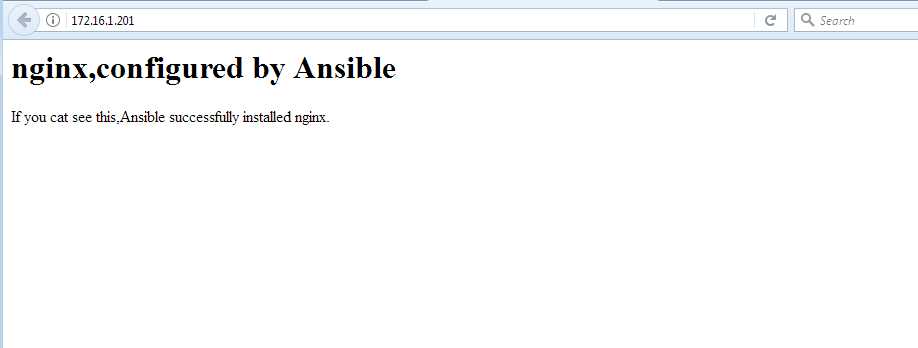
<h1>nginx,configured by Ansible</h1>
<p>If you cat see this,Ansible successfully installed nginx.</p>
</body>
</head>
</html>
三、配置web_nginx.yml
$ vim playbook/web_nginx.yml
--------------------------------------------->
- hosts: 172.16.1.201                          //目标主机
  remote_user: root                           //远程主机用户
  tasks:
  - name: install epel-release                     //centos安装nginx前,需先安装epel-release
    command: yum install epel-release -y
  - name: install libselinux-python                  //利用ansible copy 文件需安装此包
    command: yum install libselinux-python -y
  - name: install nginx
    command: yum install nginx -y
  - name: copy html
    copy: src="templates/index.html.j2" dest="/usr/share/nginx/html/index.html"      //copy自定义html到指定目录
    tags: html
    notify:
    - server restart
  - name: server start
    service: name=nginx state=started enabled=true        //启动并设置开机启动服务
  handlers:
  - name: server restart
    service: name=nginx state=restarted
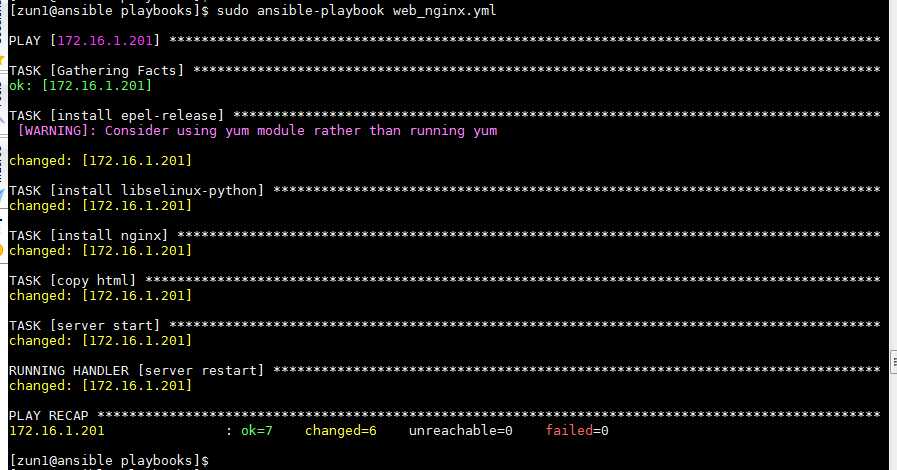
四、执行配置文件web_nginx.yml
$ ansible-playbook web_nginx.yml
结果如下图
运行http://172.16.1.201查看结果
原文:http://www.cnblogs.com/jefflee168/p/7284803.html