本系列是基于React Native版本号0.44.3写的。RN支持CSS中的布局属性,因此可以使用CSS布局属性,这里就不详细地讲解了,这篇文章的重点主要是讲述一下RN中的Flex布局。
borderBottomWidth number 底部边框宽度
borderLeftWidth number 左边框宽度
borderRightWidth number 右边框宽度
borderTopWidth number 顶部边框宽度
borderWidth number 边框宽度
border<Bottom|Left|Right|Top>Color 各方向边框的颜色,<>表示连着一起,例如borderBottomColor
borderColor 边框颜色width number
height numbermargin number 外边距
marginBottom number 下外边距
marginHorizontal number 左右外边距
marginLeft number 左外边距
marginRight number 右外边距
marginTop number 上外边距
marginVertical number 上下外边距注意marginRight和width冲突,如果设置了width,marginRight无效。
padding number 内边距
paddingBottom number 下内边距
paddingHorizontal number 左右内边距
paddingLeft number 做内边距
paddingRight number 右内边距
paddingTop number 上内边距
paddingVertical number 上下内边距这里想跟大家介绍一下网页中的盒子模型布局,看图说明一切: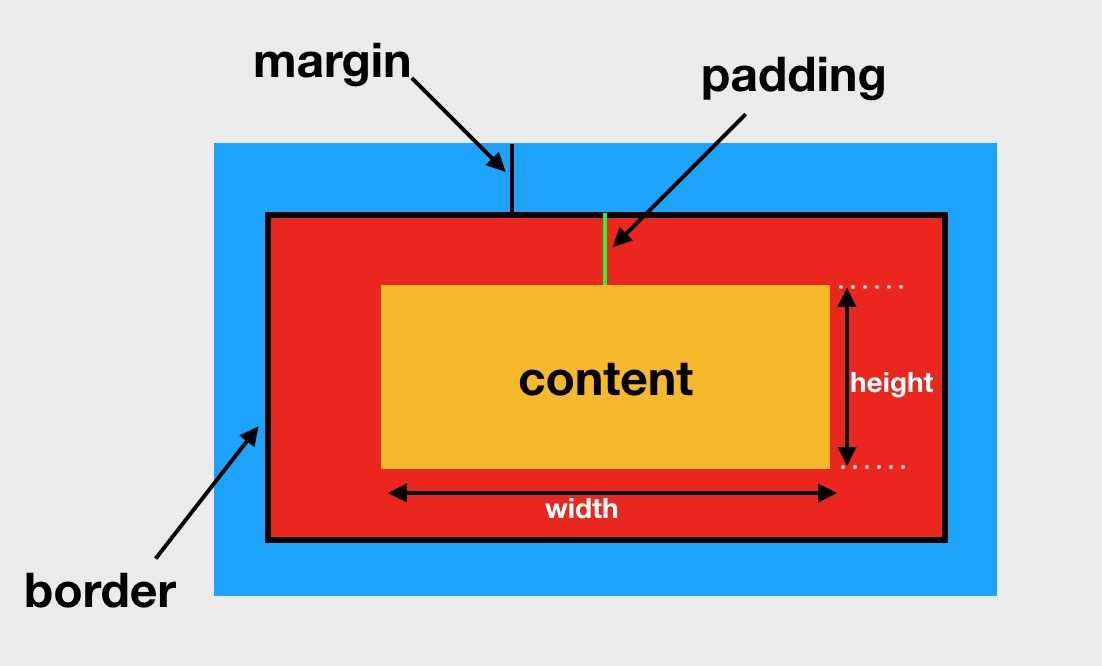
边缘
left number 左边缘
right number 右边缘
top number 上边缘
bottom number 下边缘
定位
通过left、right、top、bottom边缘属性进行定位。absolute:绝对定位,参照父控件位置定位relative:相对定位,参照当前控件原始位置定位
使用RN开发,一般都采用Flex布局,使用这套布局就非常快。
Flex布局又叫弹性布局,会把组件看成一个容器,它的所有子组件都是它容器中的成员,通过Flex,就能迅速布局子成员。
Flex中有两个重要的概念就是:主轴和侧轴侧轴:决定子组件与主轴垂直的方向
flexDirection:决定子组件主轴的方向,水平或者竖直flexDirection共有4个值,在RN中默认是column。
row:主轴水平方向,从左往右。依次排列
row-reverse:主轴水平方向,从右往左。依次排列
column:主轴竖直方向,从上往下。依次排列
column-reverse:主轴竖直方向,从下往上。依次排列
代码演练:
export default class RNDemoOne extends Component {
  render() {
    return (
      <View style={styles.container}>
          <Text style={styles.baseTextStyle}>1</Text>
          <Text style={styles.baseTextStyle}>2</Text>
          <Text style={styles.baseTextStyle}>3</Text>
          <Text style={styles.baseTextStyle}>4</Text>
      </View>
    );
  }
}

const styles = StyleSheet.create({
  container: {
      flex: 1,
      backgroundColor: ‘#F5FCFF‘,
      flexDirection: ‘row‘
  },

    baseTextStyle: {
      height: 50,
      width: 50,
        fontSize: 15,
        backgroundColor: ‘#FF3333‘,
        margin: 20,
        textAlign: ‘center‘,
    }
});
效果图:
row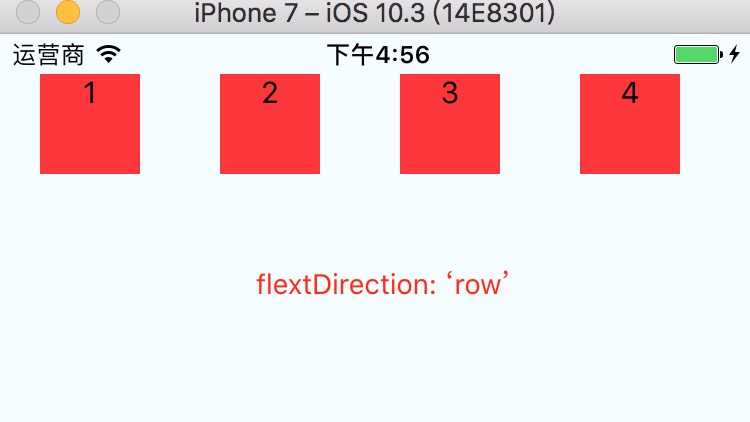
row-reverse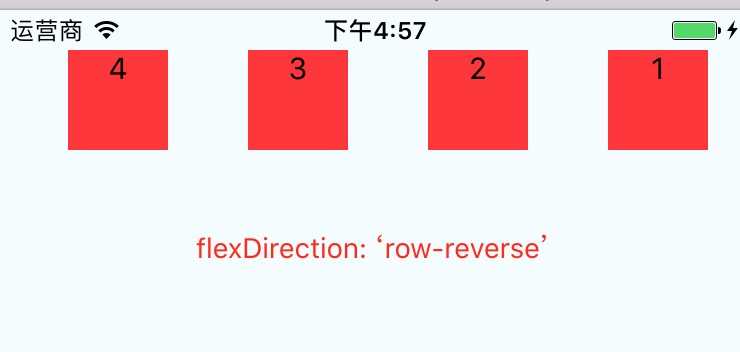
column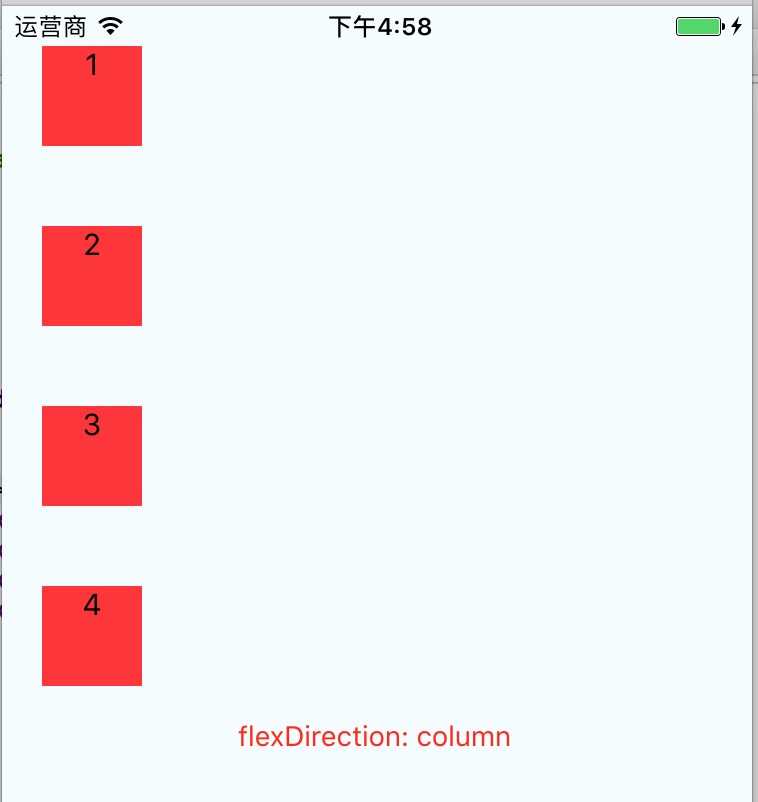
column-reverse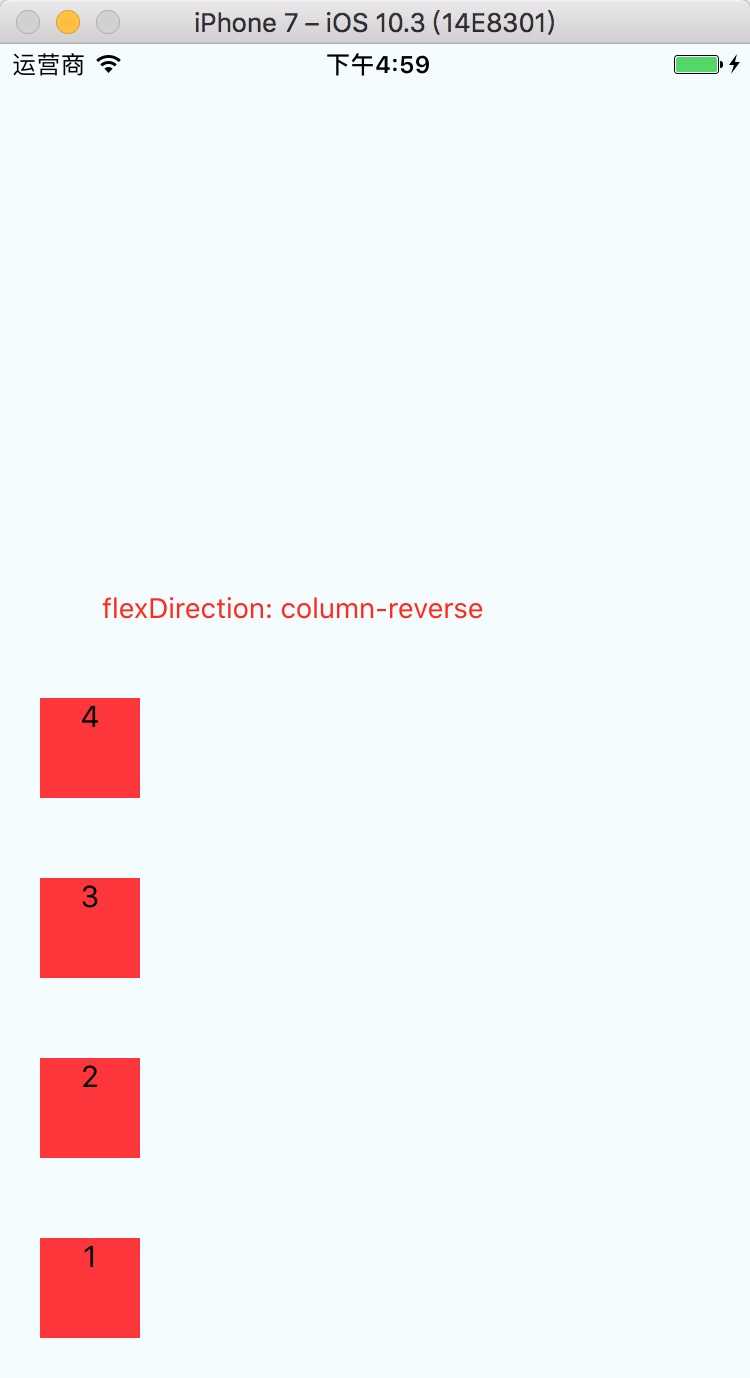
flexWrap决定子控件在父视图类是否允许多行排列。flexWrap共有两个值,默认为nowrapnowrap 组件排列在一行,可能导致溢出
wrap 组件在一行显示不下时,会换行将上述代码中<Text></Text>组件的宽度改为 75 。
效果:
nowrap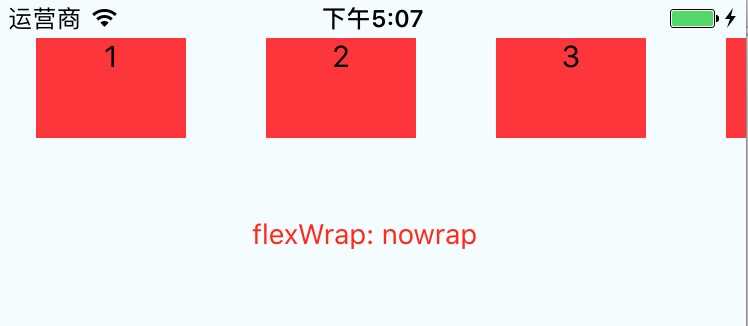
wrap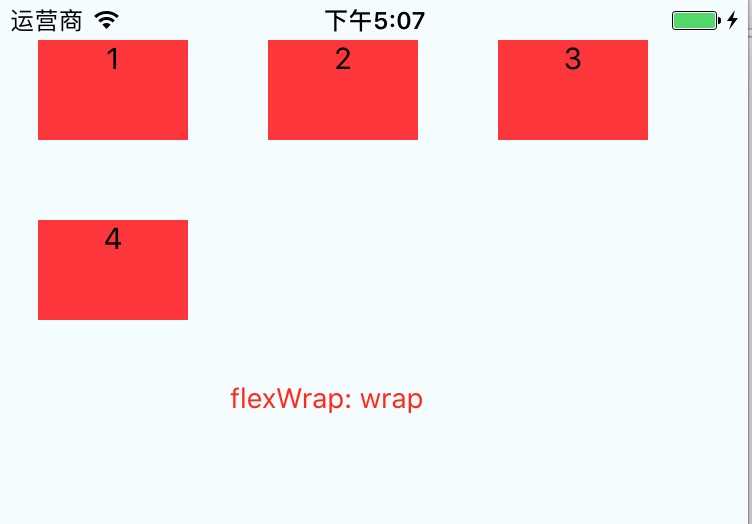
justifyContent设置主轴子组件具体布局,是靠左,还是居中等。justifyContent共有5个值,默认为flex-startflex-start: 子组件向主轴起点对齐,如果主轴水平,从左开始,如果主轴竖直,从上开始。
flex-end: 子组件向主轴终点对齐,如果主轴水平,从右开始,如果主轴竖直,从下开始。
center: 居中显示,注意:并不是让某一个子组件居中,而是整体效果居中。
space-between: 均匀分配,相邻元素间距相同。起点和终点靠边
space-around: 均匀分配,相邻元素间距相同。起点和终点间距是组件间间距的一半。代码演练:
export default class RNDemoOne extends Component {
  render() {
    return (
      <View style={styles.container}>
          <Text style={styles.baseTextStyle}>1</Text>
          <Text style={styles.baseTextStyle}>2</Text>
          <Text style={styles.baseTextStyle}>3</Text>
          <Text style={styles.baseTextStyle}>4</Text>
      </View>
    );
  }
}

const styles = StyleSheet.create({
  container: {
      flex: 1,
      backgroundColor: ‘#F5FCFF‘,
      flexDirection: ‘row‘,
      flexWrap: ‘wrap‘,
      justifyContent: ‘flex-start‘
  },

    baseTextStyle: {
      height: 50,
      width: 50,
        fontSize: 15,
        backgroundColor: ‘#FF3333‘,
        marginTop: 20,
        textAlign: ‘center‘,
    }
});
效果:
flex-start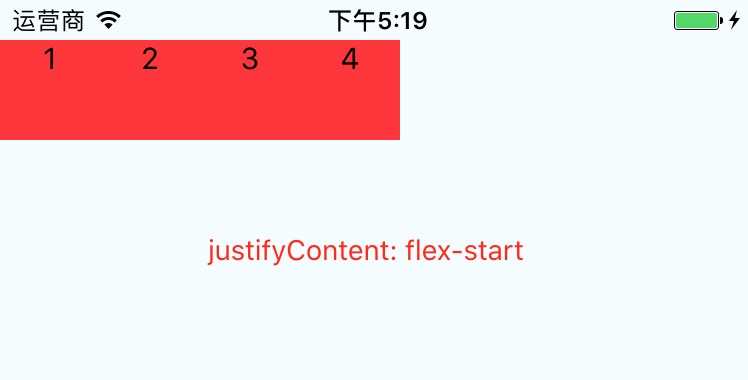
flex-end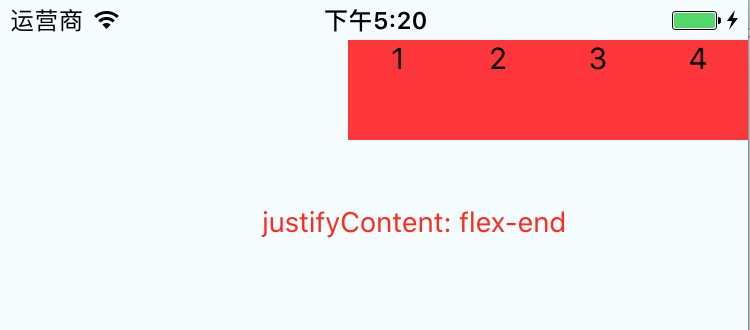
center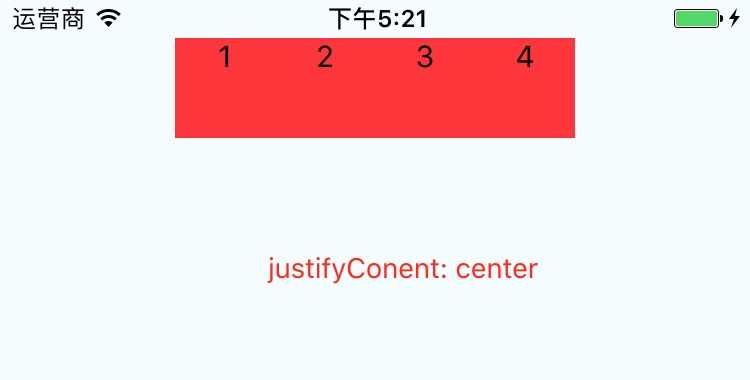
space-between
space-around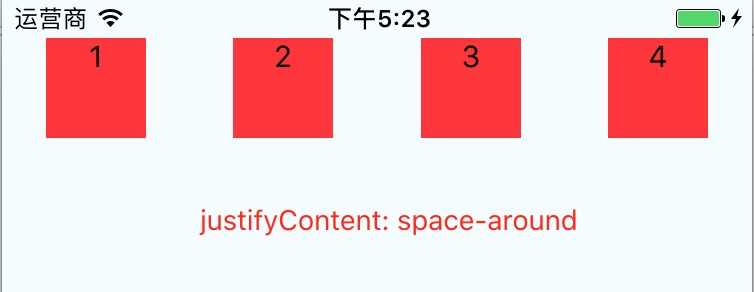
alignItems决定子组件侧轴方向上的布局alignItems共有4个值,默认为stretchflex-start: 侧轴方向上起点对齐
flex-end: 侧轴方向上终点对齐
center: 子组件侧轴居中
stretch: 子组件在侧轴方向被拉伸到与容器相同的高度或宽度注意点:如果指定了宽或者高,这stretch对应的地方不能拉伸,比如指定了高度,这stretch在高度上就是那个指定的值。(由于贴了太多图,这里就不贴图了,各位可以自己编写代码运行看看效果。??)
alignSelf:自己定义自己的侧轴布局,用于一个组件设置
alignItems的时候,可以设置alignSelf,自己定义自己的侧轴布局alignSelf共有5个值,默认为auto
auto:继承它的父容器的alignItems属性。如果没有父容器则为 "stretch"
flex-start:子组件向侧轴起点对齐
flex-end:子组件向侧轴终点对齐
center:子组件在侧轴居中
stretch:子组件在侧轴方向被拉伸到与容器相同的高度或宽度
代码演练:
export default class RNDemoOne extends Component {
  render() {
    return (
      <View style={styles.container}>
          <Text style={[styles.baseTextStyle, {alignSelf: ‘flex-start‘}]}>1</Text>
          <Text style={styles.baseTextStyle}>2</Text>
          <Text style={styles.baseTextStyle}>3</Text>
          <Text style={styles.baseTextStyle}>4</Text>
      </View>
    );
  }
}

const styles = StyleSheet.create({
  container: {
      flex: 1,
      backgroundColor: ‘#F5FCFF‘,
      flexDirection: ‘row‘,
      flexWrap: ‘wrap‘,
      justifyContent: ‘space-around‘,
      alignItems: ‘center‘
  },

    baseTextStyle: {
      height: 50,
      width: 50,
        fontSize: 15,
        backgroundColor: ‘#FF3333‘,
        marginTop: 20,
        textAlign: ‘center‘,
    }
});flex:决定子控件在主轴中占据几等分flex:任意数字,所有子控件flex相加,自己flex占总共的多少,就有多少宽度代码演练:
export default class RNDemoOne extends Component {
  render() {
    return (
      <View style={styles.container}>
          <Text style={[styles.baseTextStyle, styles.text1Style]}>1</Text>
          <Text style={[styles.baseTextStyle, styles.text2Style]}>2</Text>
          <Text style={[styles.baseTextStyle, styles.text3Style]}>3</Text>
          <Text style={[styles.baseTextStyle, styles.text4Style]}>4</Text>
      </View>
    );
  }
}

const styles = StyleSheet.create({
  container: {
      flex: 1,
      backgroundColor: ‘#F5FCFF‘,
      flexDirection: ‘row‘,
      flexWrap: ‘wrap‘,
      justifyContent: ‘space-around‘,
      alignItems: ‘center‘
  },

    baseTextStyle: {
      // height: 50,
      // width: 50,
        fontSize: 15,
        backgroundColor: ‘#FF3333‘,
        marginTop: 20,
        textAlign: ‘center‘,
    },

    text1Style: {
        flex: 1,
        backgroundColor: ‘red‘
    },

    text2Style: {
        flex: 1,
        backgroundColor: ‘orange‘
    },
    text3Style: {
        flex: 2,
        backgroundColor: ‘yellow‘
    },

    text4Style: {
        flex: 1,
        backgroundColor: ‘blue‘
    },
});如果发现有错误的地方,欢迎各位指出,谢谢!
原文:http://www.cnblogs.com/yujihaia/p/7425867.html