
Maintenance (Admin) -> Settings (Admin) -> 选择 Packages 标签 -> 选择 "Language Support" 底下的选项 "Chinese,Japanese, Korean" -> 应用
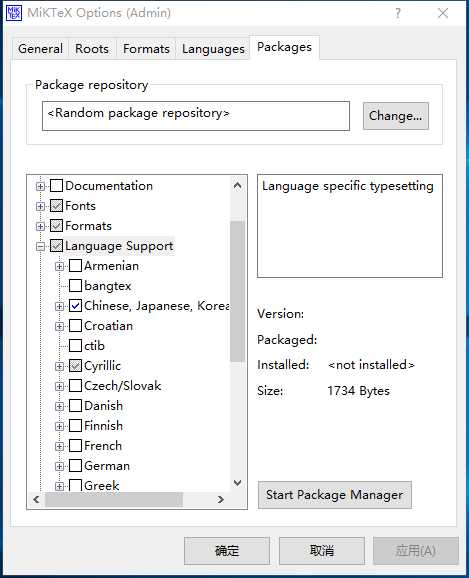
接下来就是打开命令窗口(以管理員身份执行)"
initexmf -u
initexmf --edit-config-file updmap
此时会出现一个笔记本,我们就要输入要启用的字型了:
%% T1 font configuration settings. See the MiKTeX manual for help.
Map cwmu.map
Map cwku.map
Map cwfsu.map
Map cwhbu.map
Map cwyu.map
保存,关闭,接着在控制台输入命令:
initexmf --mkmaps
然后就又是等待 ,命令完成后,就大功告成了
用文本编辑器打开article.tplx (\Python27\Lib\site-packages\nbconvert\templates\latex\),修改为
\documentclass{ctexart}
将ipynb编译为tex
ipython nbconvert --to latex Example.ipynb
编译tex,生成pdf
xelatex Example.tex
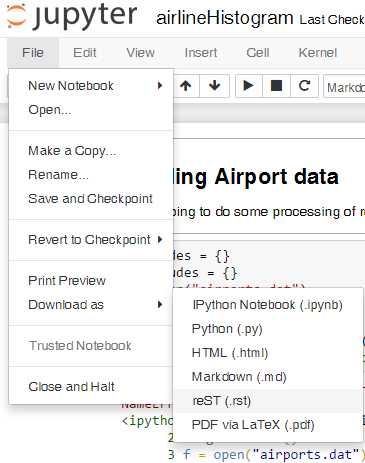
ipynb2pdf.py

# coding:utf-8
import sys
import os
import re
import shutil
notebook = sys.argv[1]
texFile = notebook.replace(‘.ipynb‘,‘.tex‘)
# 1.convert .ipynb to latex file .tex
# 将ipynb文件转为tex文件
print ‘1. convert ‘ + notebook + ‘ to ‘ + texFile
print ‘------ \n‘
os.system(r‘jupyter nbconvert --to latex ‘ + notebook)
print ‘convert over‘
# 2. add Chinese support by adding the string below
# 加入引用的包使支持中文(直接转换中文会丢失)
# \usepackage{fontspec, xunicode, xltxtra}
# \setmainfont{Microsoft YaHei}
# \usepackage{ctex}
print ‘2. add Chinese support to .tex file‘
print ‘------‘
file = open(texFile,‘r‘)
str_file = file.read()
strinfo = re.compile(‘(documentclass[\d\D]+\{article\})‘)  #查找的字符line0
m=re.findall(strinfo,str_file)
if len(m) == 0:
    print r‘can not find documentclass[**pt]{article}‘
    sys.exit(1)
str_file = strinfo.sub(‘\\1 \n \\usepackage{fontspec, xunicode, xltxtra} \n \\setmainfont{Microsoft YaHei} \r \\usepackage{ctex}‘,str_file)  #  替换的字符line1
file.close()
file = open(texFile,‘w‘)
file.write(str_file)
file.close()
print ‘add Chinese support successed‘
# 3. convert .tex to .pdf by xelatex
# 使用xelatex命令编译.tex文件得到pdf
print  ‘3. convert tex to pdf‘
print ‘------‘
os.system(‘xelatex ‘ + texFile)
print  ‘convert pdf successed‘
# 4. delete the auxiliary files
# 清理生成的中间文件
# change there if latex file is needed
print ‘4. delete auxiliary files‘
print ‘------‘
os.remove(notebook.replace(‘.ipynb‘,‘.aux‘))
os.remove(notebook.replace(‘.ipynb‘,‘.log‘))
os.remove(notebook.replace(‘.ipynb‘,‘.out‘))
# change there if latex file is needed
os.remove(notebook.replace(‘.ipynb‘,‘.tex‘))
if os.path.isdir(notebook.replace(‘.ipynb‘,‘_files‘)):
    shutil.rmtree(notebook.replace(‘.ipynb‘,‘_files‘))
print ‘delete auxiliary files successed‘
python ipynb2pdf.py Example.ipynb
也转换成可执行文件后使用
pip install pyinstaller
pyinstaller -F ipynb2pdf.py
ipynb2pdf.exe Example.ipynb
Windows + Jupyter notebook + miktex + pandoc 输出 pdf
原文:http://www.cnblogs.com/xuanyuyt/p/7471316.html
