最近做了外包,都是工程专业术语,前期熟悉项目看文档看的挺累的,闲暇时间自己学习一下Spring Cloud,找点乐趣.
就有了下面的小项目.
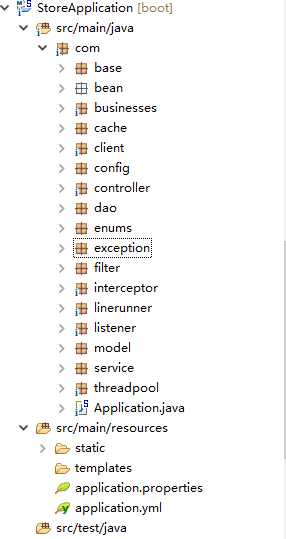
本项目是一个Spring boot项目.
一、nginx做LB
二、前后分离通过JSON交互数据
三、Controller层使用适配器
四、Service层很常规
五、缓存使用ehcache
六、dao层使用JPA简化开发
七、连接池使用dbcp2
八、redis缓存
九、WebMvcConfigurerAdapter拦截器
十、CommandLineRunner启动任务加载基础数据
十一、ApplicationListener监听器
十二、数据库使用mysql
十三、线程池用来执行task定时任务
十四、统一异常处理
下面通过代码示例,演示该项目
1,nignx编译安装与增加openssl模块随后单独整理
2,SpringBoot通过@RestController默认返回json数据
3,使用适配器是为了方便业务类开发规范,@PathVariable注解获取请求路径中的参数,通过WebCpplicationContext获取业务类Bean示例
package com.controller;

import java.lang.reflect.InvocationTargetException;
import java.lang.reflect.Method;
import java.util.HashMap;
import java.util.Map;

import org.springframework.beans.factory.annotation.Autowired;
import org.springframework.context.annotation.Scope;
import org.springframework.web.bind.annotation.PathVariable;
import org.springframework.web.bind.annotation.RequestMapping;
import org.springframework.web.bind.annotation.RestController;
import org.springframework.web.context.WebApplicationContext;

import com.base.BaseController;
import com.base.StringTools;
import com.businesses.BaseBusiness;

@RestController
@Scope("prototype")
@RequestMapping("/adapter")
public class AdapterController extends BaseController {

    @Autowired
    WebApplicationContext context;

    @RequestMapping("/{businessName}/{methodName}")
    public void executeAPI( @PathVariable String businessName,
            @PathVariable String methodName) throws Exception {
        Map<String, Object> map = new HashMap<String, Object>();
        String status = "0";
        String message = "success";
        String excep = "";
        businessName += "BusinessImpl";
        String request_json = null;
        try {
            request_json = StringTools.getStreamString(request.getInputStream());
            BaseBusiness business = (BaseBusiness) context
                    .getBean(businessName);
            Method method = null;
            Object result = null;
            method = business.getClass().getMethod(methodName, String.class);
            result = method.invoke(business, request_json);
            map.put("result", result);

        } catch (InvocationTargetException e) {
            message = e.getTargetException().getMessage();
            status = "500";
            excep = e.getTargetException().getMessage();
            log.error("excuteAPI Exception...", e);
            //此处设置后台全局异常处理使用
            //throw new RuntimeException();
        } catch (Exception e) {
            status = "500";
            message = e.getMessage();
            excep = e.getMessage();
            log.error("excuteAPI Exception...", e);
            //此处设置后台全局异常处理使用
            //throw new RuntimeException();
        }
        map.put("status", status);
        map.put("message", message);
        map.put("message_detail", excep);
        super.ajaxResponse(map);
    }
}
4,Business(Service)实现比较常规,是具体的业务实现
接口

package com.businesses;

import com.base.CommonException;
import com.bean.base.BaseResponse;

public interface MemberBusiness extends BaseBusiness{
    void addMember(String reqJson)throws CommonException;

    BaseResponse loginMember(String reqJson)throws CommonException;

    BaseResponse findMemberById(String reqJson)throws CommonException;
}
实现类
package com.businesses.impl;

import javax.servlet.http.HttpSession;

import org.springframework.beans.BeanUtils;
import org.springframework.beans.factory.annotation.Autowired;
import org.springframework.stereotype.Component;

import com.base.CommonException;
import com.base.GsonTools;
import com.bean.base.BaseResponse;
import com.bean.request.MemberFindById;
import com.bean.request.MemberLoginRequest;
import com.bean.request.MemberSaveRequest;
import com.bean.response.MemberResponse;
import com.businesses.MemberBusiness;
import com.dao.MemberRepository;
import com.enums.Constants;
import com.model.Member;

@Component("memberBusinessImpl")
public class MemberBusinessImpl implements MemberBusiness{

    @Autowired
    MemberRepository memberRepository;

    @Autowired
    BaseBusinessImpl baseBusinessImpl;
    @Override
    public void addMember(String reqJson) throws CommonException {
        MemberSaveRequest saveReq = GsonTools.str2T(reqJson, MemberSaveRequest.class);
        Member member= new Member();
        BeanUtils.copyProperties(saveReq, member);
        memberRepository.save(member);
    }

    @Override
    public BaseResponse loginMember(String reqJson) throws CommonException {
        MemberLoginRequest loginReq = GsonTools.str2T(reqJson, MemberLoginRequest.class);
        BaseResponse resp = new BaseResponse();
        Member member = memberRepository.findByMobile(loginReq.getMobile());
        if(member == null) {
            throw new CommonException(Constants.STRING_MOBILE_ERROR);
        }
        if(!member.getPassword().equals(loginReq.getPassword())) {
            throw new CommonException(Constants.STRING_PASSW_ERROR);
        }
        HttpSession session = baseBusinessImpl.getSession();
        session.setAttribute("member", member);
        resp.setFalg(true);
        resp.setMsg(Constants.STRING_LOGIN_SUCCESS);
        return resp;
    }


    @Override
    public BaseResponse findMemberById(String reqJson) throws CommonException {
        MemberFindById req = GsonTools.str2T(reqJson, MemberFindById.class);
        MemberResponse resp = new MemberResponse();
        Member member = memberRepository.findById(req.getId());
        if(null == member) {
            throw new CommonException("信息不存在,请核实后再查询");
        }
        resp.setMember(member);
        return resp;
    }

}
5,6JPA与二级缓存
JPA主要是实现JpaRepository接口,可以直接通过类似ByName一样查询语句自动实现查询
二级缓存是通过@CacheConfig(cacheNames = "memberCache"),@Cacheable实现的,这里要注意在Application启动类上添加@EnableCache注解告诉应用启用缓存
package com.dao;

import org.springframework.cache.annotation.CacheConfig;
import org.springframework.cache.annotation.Cacheable;
import org.springframework.data.jpa.repository.JpaRepository;

import com.model.Member;
@CacheConfig(cacheNames = "memberCache")
public interface MemberRepository extends JpaRepository<Member,Long>{
    @Cacheable
    Member findByMobile(String mobile);

    @Cacheable
    Member findById(Long id);
}
7,dbcp2连接池,在properties配置文件中配置
#dbcp2连接配置
spring.datasource.type=org.apache.commons.dbcp2.BasicDataSource
#初始化连接数量,默认值0
spring.datasource.dbcp2.initial-size=10
#最大空闲连接:连接池中容许保持空闲状态的最大连接数量,超过的空闲连接将被释放,如果设置为负数表示不限制,默认值8
spring.datasource.dbcp2.max-idle=20
#最小空闲连接:连接池中容许保持空闲状态的最小连接数量,低于这个数量将创建新的连接,如果设置为0则不创建,默认值0
spring.datasource.dbcp2.min-idle=10
#最大等待时间:当没有可用连接时,连接池等待连接被归还的最大时间(以毫秒计数),超过时间则抛出异常,如果设置为-1表示无限等待
spring.datasource.dbcp2.max-wait-millis=-1
#连接池创建的连接的默认的TransactionIsolation状态.
spring.datasource.dbcp2.default-transaction-isolation=1
#连接池创建的连接的默认的auto-commit状态
spring.datasource.dbcp2.default-auto-commit=true
#连接池创建的连接的默认的read-only状态. 如果没有设置则setReadOnly方法将不会被调用.(某些驱动不支持只读模式,比如:Informix)
spring.datasource.dbcp2.default-read-only=false

#指明是否在从池中取出连接前进行检验,如果检验失败,则从池中去除连接并尝试取出另一个.
#注意: 设置为true后如果要生效,validationQuery参数必须设置为非空字符串
spring.datasource.dbcp2.test-on-borrow=false

#指明连接是否被空闲连接回收器(如果有)进行检验.如果检测失败,则连接将被从池中去除.
#注意: 设置为true后如果要生效,validationQuery参数必须设置为非空字符串
spring.datasource.dbcp2.test-while-idle=true
#在空闲连接回收器线程运行期间休眠的时间值,以毫秒为单位.如果设置为非正数,则不运行空闲连接回收器线程
spring.datasource.dbcp2.time-between-eviction-runs-millis=-1
#在每次空闲连接回收器线程(如果有)运行时检查的连接数量
spring.datasource.dbcp2.num-tests-per-eviction-run=5
8,redis缓存配置
1 . 下载Redis
目前,最新的Redist版本为3.0,使用wget下载,命令如下:
# wget http://download.redis.io/releases/redis-3.0.4.tar.gz

2 . 解压Redis
下载完成后,使用tar命令解压下载文件:
# tar -xzvf redis-3.0.4.tar.gz

3 . 编译安装Redis
切换至程序目录,并执行make命令编译:
# cd redis-3.0.4
# make
执行安装命令
# make install
make install安装完成后,会在/usr/local/bin目录下生成下面几个可执行文件,它们的作用分别是:
redis-server:Redis服务器端启动程序
redis-cli:Redis客户端操作工具。也可以用telnet根据其纯文本协议来操作
redis-benchmark:Redis性能测试工具
redis-check-aof:数据修复工具
redis-check-dump:检查导出工具

4 . 配置Redis
复制配置文件到/etc/目录:
# cp redis.conf /etc/
为了让Redis后台运行,一般还需要修改redis.conf文件:
vi /etc/redis.conf
修改daemonize配置项为yes,使Redis进程在后台运行:
daemonize yes

5 . 启动Redis
配置完成后,启动Redis:
# cd /usr/local/bin
# ./redis-server /etc/redis.conf

7 . Redis配置参数
在 前面的操作中,我们用到了使Redis进程在后台运行的参数,下面介绍其它一些常用的Redis启动参数:
daemonize:是否以后台daemon方式运行
pidfile:pid文件位置
port:监听的端口号
timeout:请求超时时间
loglevel:log信息级别
logfile:log文件位置
databases:开启数据库的数量
save * *:保存快照的频率,第一个*表示多长时间,第三个*表示执行多少次写操作。在一定时间内执行一定数量的写操作时,自动保存快照。可设置多个条件。
rdbcompression:是否使用压缩
dbfilename:数据快照文件名(只是文件名)
dir:数据快照的保存目录(仅目录)
appendonly:是否开启appendonlylog,开启的话每次写操作会记一条log,这会提高数据抗风险能力,但影响效率。
appendfsync:appendonlylog如何同步到磁盘。三个选项,分别是每次写都强制调用fsync、每秒启用一次fsync、不调用fsync等待系统自己同步
9,拦截器我们通过实现WebMvcConfigurerAdapter,具体的拦截器功能在下面,执行的时机也在代码中详细标注了
package com.interceptor;

import org.springframework.context.annotation.Configuration;
import org.springframework.web.servlet.config.annotation.InterceptorRegistry;
import org.springframework.web.servlet.config.annotation.WebMvcConfigurerAdapter;
//添加拦截器,设置拦截范围,排除拦截范围
@Configuration
public class InterceptorHandler extends WebMvcConfigurerAdapter {
    public void addInterceptors(InterceptorRegistry registry) {
        registry.addInterceptor(new CustomInterceptor())
            .addPathPatterns("/**")
            .excludePathPatterns("/adapter/member/addMember");
    }
}
package com.interceptor;

import static java.lang.System.out;
import javax.servlet.http.HttpServletRequest;
import javax.servlet.http.HttpServletResponse;

import org.springframework.web.servlet.HandlerInterceptor;
import org.springframework.web.servlet.ModelAndView;

public class CustomInterceptor implements HandlerInterceptor{

    @Override
    public boolean preHandle(HttpServletRequest request, HttpServletResponse response, Object handler)
            throws Exception {
        //controller之前执行
        out.println("--------CustomInterceptor-------before Controller--------");
        return true;
    }

    @Override
    public void postHandle(HttpServletRequest request, HttpServletResponse response, Object handler,
            ModelAndView modelAndView) throws Exception {
        //controller之后view之前执行
        out.println("--------CustomInterceptor-------after Controller  And  before  modelAndView--------");
    }

    @Override
    public void afterCompletion(HttpServletRequest request, HttpServletResponse response, Object handler, Exception ex)
            throws Exception {
        //view渲染以后执行
        out.println("--------CustomInterceptor-------after modelAndView-----------");
    }

}
10,在项目中我们经常需要把数据在启动时加载到jvm中或redis中,我们可以使用CommandLineRunner启动任务加载基础数据@Order(1)是在有多个自定义CommandLineRunner时指定加载顺序的.
package com.linerunner;

import java.util.List;

import org.springframework.beans.factory.annotation.Autowired;
import org.springframework.boot.CommandLineRunner;
import org.springframework.core.annotation.Order;
import org.springframework.stereotype.Component;

import com.client.RedisClient;
import com.dao.MemberRepository;
import com.model.Member;

@Component
@Order(1)
public class CustomCommandLineRunner implements CommandLineRunner {

    @Autowired
    MemberRepository memberRepository;

    @Autowired
    private RedisClient redisClinet;

    @Override
    public void run(String... arg0) throws Exception {
        System.out.println("--------第一个看看什么时候执行-----------");

        List<Member> list = memberRepository.findAll();
        for (Member member : list) {
            redisClinet.set(member.getId().toString(), member.getMobile());
            System.out.println("redis 服务器获取到    --- " + redisClinet.get(member.getId().toString()));
        }
    }

}
11,监听器ApplicationListener
package com.listener;


import org.springframework.beans.factory.annotation.Autowired;
import org.springframework.boot.context.event.ApplicationEnvironmentPreparedEvent;
import org.springframework.context.ApplicationListener;
import org.springframework.web.context.WebApplicationContext;

public class CustomApplicationListener implements ApplicationListener<ApplicationEnvironmentPreparedEvent>{

    @Autowired
    WebApplicationContext wac;

    @Override
    public void onApplicationEvent(ApplicationEnvironmentPreparedEvent event) {
        System.out.println("---------启动前的listener-----------");
    }


}
12,mysql数据库,说下乱码解决吧,一般出现乱码,先查看查看workspace编码-->前台页面传过来的数据是否乱码-->数据库是否乱码 数据库出现乱码的话在my.ini中设置一下
[mysqld]设置项下的character-set-server=utf8,一般是此处问题
13,线程池用来执行task定时任务,线程池明天详细补充一下吧.
14,统一异常处理(当然要体验这个的话要在AdapterController把注解注释掉哦)
package com.exception;

import javax.servlet.http.HttpServletResponse;

import org.springframework.web.bind.annotation.ExceptionHandler;
import org.springframework.web.bind.annotation.RestControllerAdvice;

import com.bean.response.ExceptionResponse;

@RestControllerAdvice
public class GlobalExceptionHandler {

    @ExceptionHandler(RuntimeException.class)
    public ExceptionResponse exceptionHandler(RuntimeException e, HttpServletResponse response) {
        ExceptionResponse resp = new ExceptionResponse();
        resp.setCoed("100");
        resp.setMessage("全局异常处理");
        return resp;
    }

}
15,RedisClient
package com.client;

import org.apache.log4j.Logger;
import org.springframework.beans.factory.annotation.Autowired;
import org.springframework.stereotype.Component;

import redis.clients.jedis.Jedis;
import redis.clients.jedis.JedisPool;

@Component
public class RedisClient {

    Logger log = Logger.getLogger(RedisClient.class);

    @Autowired
    private JedisPool jedisPool;

    public void set(String key, String value) {
        try(Jedis jedis =jedisPool.getResource()) {
            jedis.set(key, value);
        } catch(Exception e) {
            log.error("jedisPoll 存储数据   出错了  ....", e);
        }
    }

    public String get(String key) throws Exception  {

        try(Jedis jedis =jedisPool.getResource()) {
            return jedis.get(key);
        } catch(Exception e) {
            log.error("jedisPoll 存储数据   出错了  ....", e);
            return null;
        }
    }
}
补充
配置文件加载顺序
//1命令行参数。
//2properties
//yml
//昂,还需要研究一下,待补充
详细配置文件
spring.datasource.url=jdbc:mysql://localhost:3306/store?useUnicode=true&characterEncoding=utf-8
spring.datasource.username=root
spring.datasource.password=123456
spring.datasource.driver-class-name=com.mysql.jdbc.Driver
#自动更新表结构,保留数据
spring.jpa.properties.hibernate.hbm2ddl.auto=update
spring.jpa.properties.hibernate.show_sql=true
spring.thymeleaf.cache=false

#dbcp2连接配置
spring.datasource.type=org.apache.commons.dbcp2.BasicDataSource
#初始化连接数量,默认值0
spring.datasource.dbcp2.initial-size=10
#最大空闲连接:连接池中容许保持空闲状态的最大连接数量,超过的空闲连接将被释放,如果设置为负数表示不限制,默认值8
spring.datasource.dbcp2.max-idle=20
#最小空闲连接:连接池中容许保持空闲状态的最小连接数量,低于这个数量将创建新的连接,如果设置为0则不创建,默认值0
spring.datasource.dbcp2.min-idle=10
#最大等待时间:当没有可用连接时,连接池等待连接被归还的最大时间(以毫秒计数),超过时间则抛出异常,如果设置为-1表示无限等待
spring.datasource.dbcp2.max-wait-millis=-1
#连接池创建的连接的默认的TransactionIsolation状态.
spring.datasource.dbcp2.default-transaction-isolation=1
#连接池创建的连接的默认的auto-commit状态
spring.datasource.dbcp2.default-auto-commit=true
#连接池创建的连接的默认的read-only状态. 如果没有设置则setReadOnly方法将不会被调用.(某些驱动不支持只读模式,比如:Informix)
spring.datasource.dbcp2.default-read-only=false

#指明是否在从池中取出连接前进行检验,如果检验失败,则从池中去除连接并尝试取出另一个.
#注意: 设置为true后如果要生效,validationQuery参数必须设置为非空字符串
spring.datasource.dbcp2.test-on-borrow=false

#指明连接是否被空闲连接回收器(如果有)进行检验.如果检测失败,则连接将被从池中去除.
#注意: 设置为true后如果要生效,validationQuery参数必须设置为非空字符串
spring.datasource.dbcp2.test-while-idle=true
#在空闲连接回收器线程运行期间休眠的时间值,以毫秒为单位.如果设置为非正数,则不运行空闲连接回收器线程
spring.datasource.dbcp2.time-between-eviction-runs-millis=-1
#在每次空闲连接回收器线程(如果有)运行时检查的连接数量
spring.datasource.dbcp2.num-tests-per-eviction-run=5
Redis配置
package com.config;
import org.springframework.beans.factory.annotation.Autowired;
import org.springframework.beans.factory.annotation.Qualifier;
import org.springframework.beans.factory.annotation.Value;
import org.springframework.context.annotation.Bean;
import org.springframework.context.annotation.Configuration;

import redis.clients.jedis.JedisPool;
import redis.clients.jedis.JedisPoolConfig;

@Configuration
public class RedisConfiguration {

    @Bean(name= "jedis.pool")
    @Autowired
    public JedisPool jedisPool(@Qualifier("jedis.pool.config") JedisPoolConfig config,
                @Value("${jedis.pool.host}")String host,
                @Value("${jedis.pool.port}")int port) {
        return new JedisPool(config, host, port);
    }

    @Bean(name= "jedis.pool.config")
    public JedisPoolConfig jedisPoolConfig (@Value("${jedis.pool.config.maxTotal}")int maxTotal,
                                @Value("${jedis.pool.config.maxIdle}")int maxIdle,
                                @Value("${jedis.pool.config.maxWaitMillis}")int maxWaitMillis) {
        JedisPoolConfig config = new JedisPoolConfig();
        config.setMaxTotal(maxTotal);
        config.setMaxIdle(maxIdle);
        config.setMaxWaitMillis(maxWaitMillis);
        config.setTestOnBorrow(false);
        config.setTestOnReturn(false);
        return config;
    }

}
昂,好乱,好晚了,睡觉睡觉,明天晚上再整理
后续会做动静分离,应用拆分,容错机制,高可用注册中心,哇,还有很长的啊....
原文:http://www.cnblogs.com/loginloading/p/7599729.html
