安装logstash,elasticsearch,kibana三件套,搜索程序一般由索引链及搜索组件组成。
索引链功能的实现需要按照几个独立的步骤依次完成:检索原始内容、根据原始内容来创建对应的文档、对创建的文档进行索引。
搜索组件用于接收用户的查询请求并返回相应结果,一般由用户接口、构建可编程查询语句的方法、查询语句执行引擎及结果展示组件组成。
Elasticsearch是个开源分布式搜索引擎,它的特点有:分布式,零配置,自动发现,索引自动分片,索引副本机制, restful 风格接口,多数据源,自动搜索负载等。
Logstash 是一个完全开源的工具,他可以对你的日志进行收集、分析,并将其存储供以后使用(如,搜索)。
kibana也是一个开源和免费的工具,他Kibana 可以为 Logstash 和 ElasticSearch 提供的日志分析友好的 Web 界面,可以帮助您汇总、分析和搜索重要数据日志
1、安装java:
[root@cml3 elasticsearch-5.6.3]# yum install -y *jdk*
2、配置访问最大文件数:
[root@node2 src]# cat/etc/security/limits.conf
* soft nofile 65536
* hard nofile 131072
* soft nproc 2048
* hard nproc 4096
2、在解压目录下创建,log,data文件目录:
[root@cml3elasticsearch-5.6.3]# mkdir data
[root@cml3elasticsearch-5.6.3]# mkdir log
[root@cml3elasticsearch-5.6.3]# mkdir logs ##有时候没有这个目录就自己手动创建
3、修改elastic.yaml:监听主机
[root@cml3 elasticsearch-5.6.3]# vimconfig/elasticsearch.yml
node.name: cml3
network.host: 192.168.5.104
discovery.zen.minimum_master_nodes: 1 ##因为我这里演示的是在一台机器上安装(所以节点改为1)
4、创建elastic用户用来开启elasticsearch
[root@cml3 elasticsearch-5.6.3]# useraddelastic
[root@cml3 elasticsearch-5.6.3]# ls
bin config data lib LICENSE.txt log logs modules NOTICE.txt plugins README.textile
##有时候会小了目录自己手动创建上就可以了:
[root@cml3 logs]# ll
total 4
-rw-rw-r-- 1 elastic elastic 0 Nov 3 19:52 elasticsearch_deprecation.log
-rw-rw-r-- 1 elastic elastic 0 Nov 3 19:52 elasticsearch_index_indexing_slowlog.log
-rw-rw-r-- 1 elastic elastic 0 Nov 3 19:52 elasticsearch_index_search_slowlog.log
##因为5.0的版本为了安全不能使用root用户启动所以给elasticsearch-5.6.3目录下elastic(可以自定义用户)的用户权限
##开启haed:插件:
http.cors.enabled:true
http.cors.allow-origin:"*"
##开启的时候会有以下错误:
OpenJDK 64-Bit Server VM warning: If the number of processors is expected to increase from one, then you should conf...CThreads=N
OpenJDK 64-Bit Server VM warning: INFO: os::commit_memory(0x0000000085330000, 2060255232, 0) failed; error=‘Cannot a ...‘(errno=12)
##解决方法:
意思是内存不够,加大内存重启就可以了!
##有时候还会出现以下错误:
[elastic@cml3 bin]$ ./elasticsearch
Exception in thread "main"2017-11-03 20:38:47,194 main ERROR No log4j2 configuration file found. Usingdefault configuration: logging only errors to the console. Set system property‘log4j2.debug‘ to show Log4j2 internal initialization logging.
2017-11-03 20:38:47,646 main ERROR Couldnot register mbeans java.security.AccessControlException: access denied("javax.management.MBeanTrustPermission" "register")
##解决方法:直接安装几个log4j包就ok啦
[root@cml3 elasticsearch-5.6.3]# yuminstall -y log4j*
5、启动elastic:直接用curl访问9200端口成功即可
[root@cml3 elasticsearch-5.6.3]# netstat-ntlp
Active Internet connections (only servers)
tcp6 0 0 192.168.5.104:9200 :::* LISTEN 3749/java
tcp6 0 0 192.168.5.104:9300 :::* LISTEN 3749/java
1、介绍:
在以往的es版本有一个非常好用的插件叫head,可以方便的查看索引,集群等相关状态:
5.0之后head安装支持目前只是支持插件的方式:
2、创建存放这个插件的目录:
#mkdir head ##随意目录下创建就行
#cd head
#git clonegit://github.com/mobz/elasticsearch-head.git
#cd elasticsearch-head
yum install -y npm* ##缺少npm就直接安装就ok了
#npm install ##这个步骤下载包都是国外地址所以安装起来比较慢
#npm install -g grunt-cli
#grunt server
3、监听端口为localhost,可以修改配置文件:
[root@controller head]# cdelasticsearch-head/
[root@controller elasticsearch-head]#vim Gruntfile.js
做如下修改:
server: {
options: {
port: 9100,
hostname: ‘0.0.0.0‘, #####添加这句。
base: ‘.‘,
keepalive: true
}
}
}
修改es配置文件添加如下:
[root@controllerconfig]# vim elasticsearch.yml
http.cors.enabled:true
http.cors.allow-origin:"*"
#####然后重启es服务
4、启动head插件,然后访问web的ip与端口即可:
#gruntserver
##就可以看到我们相关索引的状态,分片集群等相关操作都可以在上面完成:
1、下载解压logstash:
下载地址: https://artifacts.elastic.co/downloads/logstash/logstash-5.6.3.tar.gz
[root@cml3 src]# tar -xflogstash-5.6.3.tar.gz
2、创建conf的目录
[root@cml3 ~]# mkdir /logstash/
[root@cml3 logstash]# viminput_flter_output.conf
input {
file{
path=> "/usr/local/nginx/logs/cml.log" ##nginx生成日志的目录
type=> "cml" ##索引的类型
start_position=> "beginning" ##一开始就输入原来的日志信息
}
stdin{}
}
filter{
grok {
match => {
"message" =>"(?<remote_IP>\d+.\d+.\d+.\d+)\s-\s-\s\[(?<DATA>\d+/\w+/\d+:\d+:\d+:\d+)[[:space:]](?<time_zone>\+\d+)\]\s\"(?<action>\w+)%{URIPATHPARAM:request} (?<Version>\w+/\d+.\d+)\"\s(?<status>\w+)\s(?<web_size>\w+)\s\"(?<check>\S+)\"\s"
##自定义grok
}
}
}
output{
elasticsearch{
action=> "index"
hosts=> "192.168.5.104:9200" ##输出到elasticsearch上面
index=> "log-%{+yyyy.MM.dd}" ##生成一个log-时间的索引
}
stdout {codec=>rubydebug} ##在终端上输出方便检测
}
[root@cml3 logstash]# /usr/local/src/logstash-5.6.3/bin/logstash-f input_flter_output.conf
1、下载安装kibana:
[root@cml3 logstash]# cd /usr/local/src/
[root@cml3 src]# wget https://artifacts.elastic.co/downloads/kibana/kibana-5.6.3-x86_64.rpm
[root@cml3 src]# rpm -ivhkibana-5.6.3-x86_64.rpm
2、修改kibana配置文件:
[root@controller config]# vim kibana.yml
server.host: "192.168.63.246"
elasticsearch.url: http://192.168.63.246:9200
elasticsearch.username: "elastic"
elasticsearch.password: "changeme ##x-pack默认超级用户的登录密码(es和kibana两个的超级管理员账号密码都一样,这里我就为了方便不使用密码用户登录了。)
3、启动kibana
[root@cml3 src]# systemctl start kibana
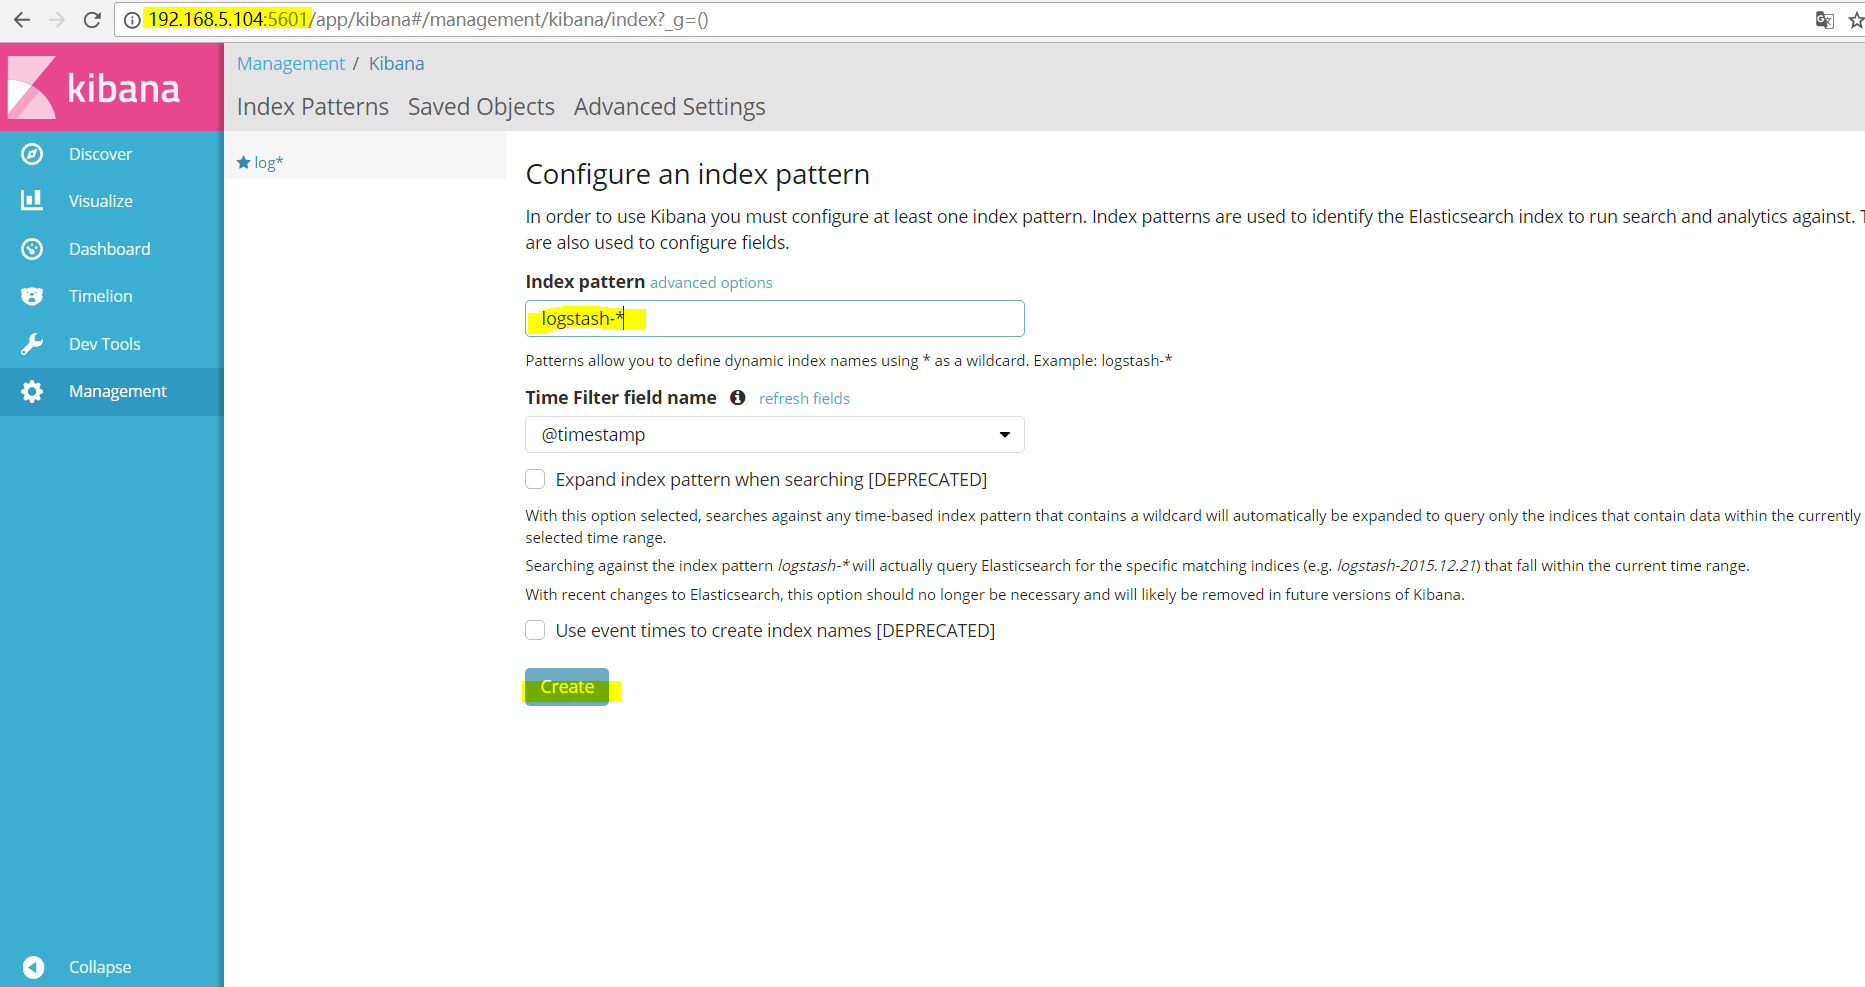
浏览器输入http://IP:5601配置input_flter_output.conf文件定义的索引。(图形化配置kibana)
##点击Discover选择log*索引就可以看到日志的数据出来了。
##点击仪表板然后创建一个仪表盘:
##接下来就是创建一个图表
##这里就可以定义自己想要的图表了:
##我比较喜欢看柱形图,选择自己的索引:
##最终可以出来的结果(我添加了request项是访问的url)也可以是客户端的IP
本文出自 “第一个legehappy51cto博客” 博客,请务必保留此出处http://legehappy.blog.51cto.com/13251607/1979030
CentOS7使用Elasticsearch+ Logstash+kibana快速搭建日志分析平台
原文:http://legehappy.blog.51cto.com/13251607/1979030