最小化安装 Centos 7.3 x86_64操作系统的虚拟机,vcpu 2,内存4G或更多,操作系统盘50G,主机名设置规则为linux-hostX.exmaple.com,其中host1和host2为elasticsearch服务器,为保证效果特额外添加一块单独的数据磁盘大小为50G并格式化挂载到/data。
使用blkid /dev/sdb 查看UUID 使用UUID挂载更加直接,更准确。
1 2 3 4 5 | [root@linux-node1 ~]# hostnamectl set-hostname linux-node1.luffycity.com[root@linux-node2 ~]# hostnamectl set-hostname linux-node2.luffycity.com[root@linux-node1 ~]# mkdir /luffy[root@linux-node1 ~]# mount /dev/sdb /luffy[root@linux-node1 ~]# echo "/dev/sdb /luffy/ xfs defaults 0 0" >> /etc/fstab |
关闭防所有服务器的火墙和selinux,包括web服务器、redis和logstash服务器的防火墙和selinux全部关闭,此步骤是为了避免出现因为防火墙策略或selinux安全权限引起的各种未知问题,以下只显示了host1和host2的命令,但是其他服务器都要执行。
1 2 3 4 5 | [root@linux-node1 ~]# systemctl disable firewalld[root@linux-node1 ~]# #systemctl disable NetworkManager # 这个不懂就先别关了,不然网卡起不来。[root@linux-node1 ~]# sed -i '/SELINUX/s/enforcing/disabled/' /etc/selinux/config[root@linux-node1 ~]# echo "* soft nofile 65536" >> /etc/security/limits.conf[root@linux-node1 ~]# echo "* hard nofile 65536" >> /etc/security/limits.conf |
[root@linux-node1 ~]# vim /etc/hosts
1 2 | 192.168.56.11 linux-node1.luffycity.com192.168.56.12 linux-node2.luffycity.com |
1 2 3 4 5 6 | yum install -y epel-releaseyum install -y net-tools vim lrzsz tree screen lsof tcpdump wget ntpdatecp /usr/share/zoneinfo/Asia/Shanghai /etc/localtimeecho "*/5 * * * * ntpdate time1.aliyun.com &> /dev/null && hwclock -w" >> /var/spool/cron/rootsystemctl restart crondshutdown -r now |
因为elasticsearch服务运行需要java环境,因此两台elasticsearch服务器需要安装java环境,可以使用以下方式安装:
方式一:直接使用yum安装openjdk
1 | yum install -y java-1.8.0* |
方式二:本地安装在oracle官网下载rpm安装包:
1 2 | yum localinstall jdk-8u92-linux-x64.rpm# 或者 rpm -ivh jdk-8u92-linux-x64.rpm |
方式二需要配置各种环境变量。博主使用的是yum安装。
1 | 下载地址:https://www.elastic.co/downloads/elasticsearch |
1 2 | cd /usr/src/wget https://artifacts.elastic.co/downloads/elasticsearch/elasticsearch-5.6.3.rpm<br>yum localinstall -y elasticsearch-5.6.3.rpm |
配置文件/etc/elasticsearch/elasticsearch.yml
1 2 3 4 5 6 7 8 | cluster.name: ELK-Cluster #ELK的集群名称,名称相同即属于是同一个集群node.name: elk-node1 #本机在集群内的节点名称path.data: /elk/data #数据保存目录path.logs: /elk/logs #日志保存目bootstrap.memory_lock: true #服务启动的时候锁定足够的内存,防止数据写入swap 开启该参数需要 LimitMEMLOCK=infinity 下面启动文件加一条参数。network.host: 192.168.56.11 #监听IP 锁定IP,防止出现意想不到的问题。http.port: 9200discovery.zen.ping.unicast.hosts: ["192.168.56.11", "192.168.56.12"] # 组播方式,方式广播风暴,公有云环境启动会失败 |
vim /usr/lib/systemd/system/elasticsearch.service #修改内存限制
1 | LimitMEMLOCK=infinity #去掉注释 5.6.3 版本没找到该内容。好吧,没有就自己添加。<br>systemctl daemon-reload |
vim /etc/elasticsearch/jvm.options # 修改JVM内存参数
1 2 | 22 -Xms2g23 -Xmx2g #最小和最大内存限制 |
https://www.elastic.co/guide/en/elasticsearch/reference/current/heap-size.html
官方推荐最大内存30G内存以内
将以上配置文件scp到node2并修改自己的node名称,算啦,自己拷贝过去吧。
各服务器创建数据和日志目录并修改目录权限为elasticsearch
1 2 | mkdir /elk/{data,logs} -pchown elasticsearch.elasticsearch /elk/ -R |
1 2 | systemctl start elasticsearchsystemctl status elasticsearch |

插件是为了完成不同的功能,官方提供了一些插件但大部分是收费的,另外也有一些开发爱好者提供的插件,可以实现对elasticsearch集群的状态监控与管理配置等功能。
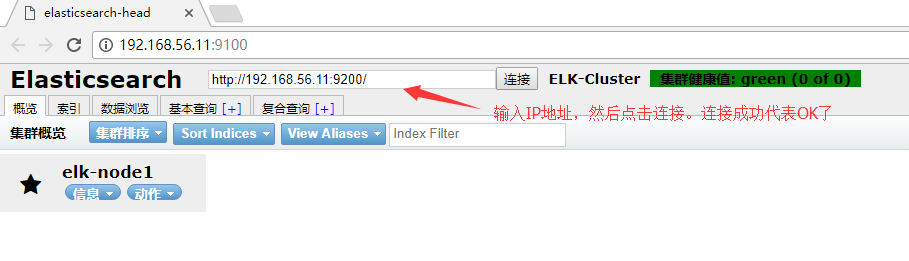
在elasticsearch 5.x版本以后不再支持直接安装head插件,而是需要通过启动一个服务方式,git地址:https://github.com/mobz/elasticsearch-head
# NPM的全称是Node Package Manager,是随同NodeJS一起安装的包管理和分发工具,它很方便让JavaScript开发者下载、安装、上传以及管理已经安装的包。
1 2 3 4 5 6 7 8 | yum install -y npmcd /usr/local/src/git clone git://github.com/mobz/elasticsearch-head.gitcd elasticsearch-head/npm install grunt -save ll node_modules/grunt #确认生成文件npm install #执行安装npm run start & #后台启动服务 |
开启跨域访问支持,然后重启elasticsearch服务
vim /etc/elasticsearch/elasticsearch.yml
1 2 | http.cors.enabled: true #最下方添加http.cors.allow-origin: "*" |
1 | systemctl restart elasticsearch |
1 2 3 | yum install docker -ysystemctl start docker && systemctl enable dockerdocker run -d -p 9100:9100 mobz/elasticsearch-head:5 |
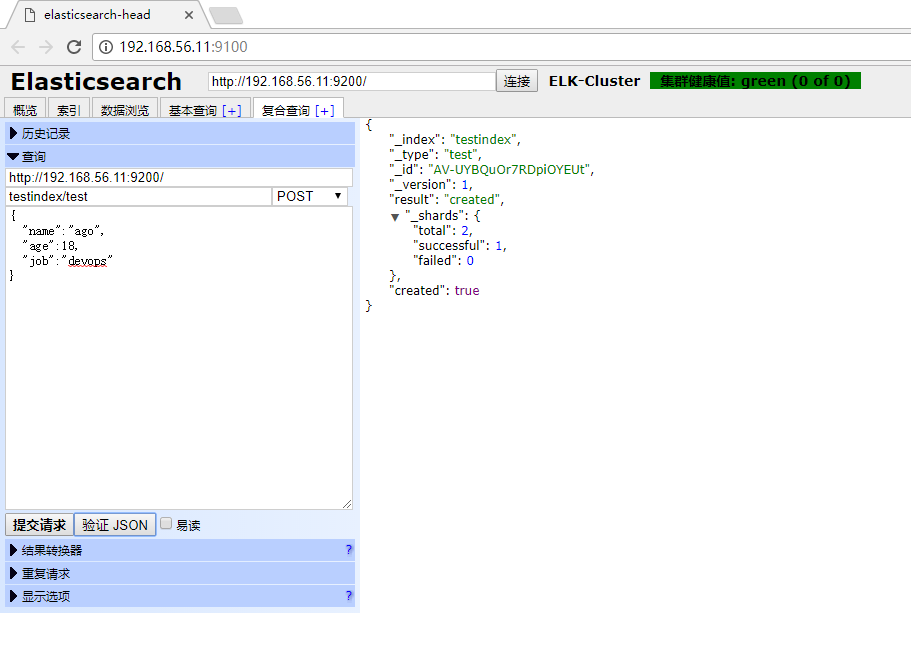
1 2 3 4 5 6 7 | testindex/test{ "name":"ago", "age":18, "job":"devops"} |


Master的职责:
统计各node节点状态信息、集群状态信息统计、索引的创建和删除、索引分配的管理、关闭node节点等
Slave的职责:
同步数据、等待机会成为Master
Git地址为https://github.com/lmenezes/elasticsearch-kopf,但是目前还不支持5.x版本的elasticsearch,但是可以安装在elasticsearc 1.x或2.x的版本安装。
1 | #curl –sXGET http://192.168.56.11:9200/_cluster/health?pretty=true |
els-cluster-monitor.py
1 2 3 4 5 6 7 8 9 10 11 12 13 14 15 16 17 18 | #!/usr/bin/env python#coding:utf-8#Author Zhang Jieimport smtplibfrom email.mime.text import MIMETextfrom email.utils import formataddrimport subprocessbody = ""false="false"obj = subprocess.Popen(("curl -sXGET http://192.168.56.11:9200/_cluster/health?pretty=true"),shell=True, stdout=subprocess.PIPE)data = obj.stdout.read()data1 = eval(data)status = data1.get("status")if status == "green": print "50"else:print "100" |
elasticsearch 安装部署以及插件head安装,和使用教程
原文:http://blog.51cto.com/523064/2047780