先粘贴未使用ueditor之前的代码:
<body>
<label for="input_content">作答区:</label>

<textarea id="input_content"></textarea>
</body>
运行效果:
很难看是不是?
使用ueditor后的代码:
<head>
<script type="text/javascript" src="{{ url_for(‘static‘,filename=‘ueditor/ueditor.config.js‘)}}"></script>
<script type="text/javascript" src="{{ url_for(‘static‘,filename=‘ueditor/ueditor.all.js‘)}}"></script>
</head>
<body>
<label for="input_content">作答区:</label>

<textarea id="input_content"></textarea>
<script type="text/javascript">
    var ue = UE.getEditor(‘input_content‘, {
        toolbars: [
            [‘fullscreen‘, ‘emotion‘,‘InsertImage‘, ‘preview‘, ‘link‘]
        ],
        initialFrameWidth: "100%",
        initialFrameHeight: "100",
    });
</script>
</body>
运行后效果:

导入的包截图:
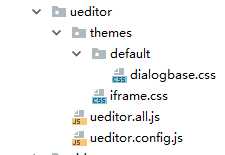
当然你也可以将ueditor所有的包全都导入static目录下也行。
本人在python下测试的,其它的语言,只是导入文件的方式有一些区别,其它没区别。
原文:https://www.cnblogs.com/jipinglong/p/9040356.html