一、软件包
Linux:CentOS-6.4
Apache:httpd-2.4.9
MySQL:mysql-5.6.19
PHP:php-5.4.30
二、编译安装 httpd
在安装 httpd 之前,首先要安装两个依赖包:apr 和 apr-util。apr 是 apache portable runtime 的缩写,是 apache 提供的一个可以跨平台使用的 API。安装方法很简单,就是编译安装的三步骤:
# apr
tar xf apr-1.5.1.tar.bz2
cd apr-1.5.1
./configure --prefix=/usr/local/apr # 指定安装目录方便卸载
make && make install

# apr-util
tar xf apr-util-1.5.3.tar.bz2
cd apr-util-1.5.3
./configure --prefix=/usr/local/apr-util --with-apr=/usr/local/apr # 指定apr安装目录
mke && make install
注:CentOS 默认安装了 apr 和 apr-util 两个软件包,httpd-2.4.x 依赖 apr 版本至少 1.4.x。
安装完两个依赖的包,接下来开始编译 httpd:
tar xf httpd-2.4.9.tar.bz2
cd httpd-2.4.9
./configure --prefix=/usr/local/httpd \        # 安装目录
 --sysconfdir=/etc/httpd \        # 配置文件目录
--enable-rewrite \                # 支持URL重写
--enable-ssl \                   # 启用ssl加密功能
--enable-cgi \                   # 启用cgi协议
--enable-mods-shared \          # 启用共享模块
--enable-mudules=most \         # 启用大多数模块
--with-apr=/usr/local/apr \        # apr安装目录
--with-apr-util=/usr/local/apr-util   # apr-util安装目录
make && make install
安装完成之后,在 /usr/local/httpd/bin 目录下有个 apachectl 脚本,使用 ./apachectl start 命令就能够启动服务。配置文件在 /etc/httpd 目录下,网页文件在 /usr/local/httpd/htdocs 目录。
二、安装 MySQL
MySQL在这里我选择了使用通用二进制格式进行安装,手动编译 MySQL 要用很长时间。二进制安装方法如下:
# 首先添加用户和组
groupadd mysql
useradd -r -g mysql mysql

# 解压缩到 /usr/local
tar xf mysql-5.6.19-linux-glibc2.5-i686.tar.gz -C /usr/local

#创建链接
cd /usr/local
ln -sv mysql-5.6.19-linux-glibc2.5-i686 mysql

# 更改用户和组
cd mysql
chown -R mysql:mydql .

# 初始化数据库
scripts/mysql_install_db --user=mysql --datadir=/var/lib/mysql    # 指定数据库用户和数据库目录

# 复制配置文件到 /etc
cp my.n

# 再更改用户
chown -R root .
chown -R mysql data

# 提供启动脚本
cp support-files/mysql.server /etc/init.d/mysqld
chmod +x /etc/init.d/mysqld
chkconfig --add mysqld

# 启动服务
service mysqld start
三、编译安装 PHP
tar xf php-5.4.30.tar.bz2
cd php-5.4.30
./configure --prefix=/usr/local/php --with-mysql=/usr/local/mysq --with-openssl --with-mysqli=/usr/local/mysql/bin/mysql_config --enable-mbstring --with-zlib --enable-xml --with-libxml-dir=/usr --enable-sockets --with-apxs2=/usr/local/apache/bin/apxs --with-mcrypt --with-config-file-path=/etc --with-config-file-scan-dir=/etc/php.d --with-bz2 --enable-maintainer-zts
make && make install
安装完成之后,提供配置文件:
cp php.ini-production /etc/php.ini
编辑 apache 的配置文件,使支持 php:
# 添加如下两项
AddType application/x-httpd-php .php
AddType application/x-httpd-php-sourece .phps
# 修改
DirectoryIndex  index.php index.html
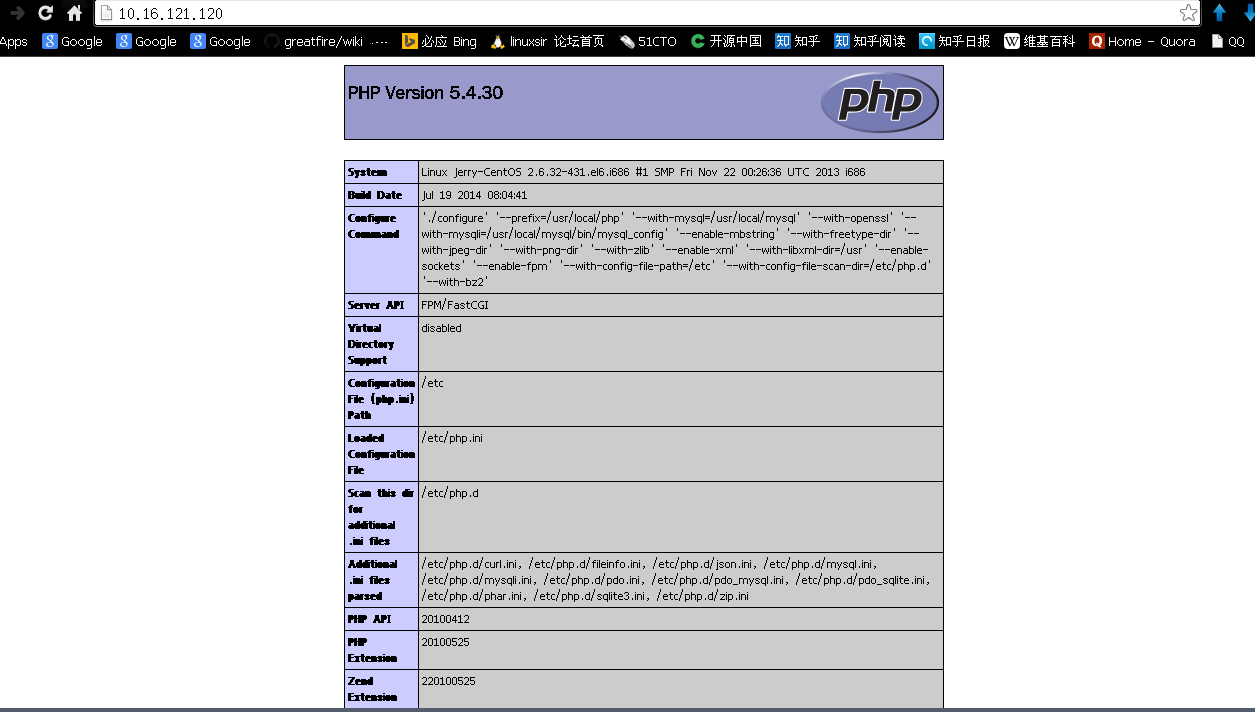
提供测试页面:
vim /usr/local/httpd/htdocs/index.php

<?php
phpinfo();
?>
访问测试:

原文:http://my.oschina.net/JerryBaby/blog/292731