In this article, I am going to explain ,"How to Upload Images to the server using Cordova File Transfer Plugin and Asp.Net core Web API".
Requirements
Steps
1. Build Asp.net core Web API.
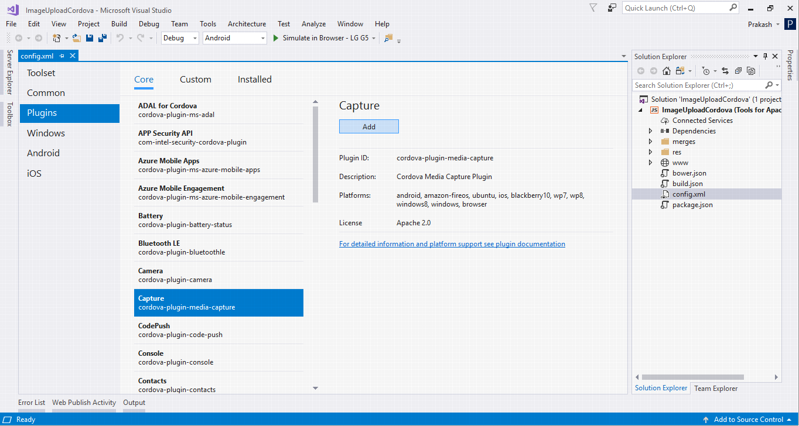
2. Camera Plugin to use mobile camera.
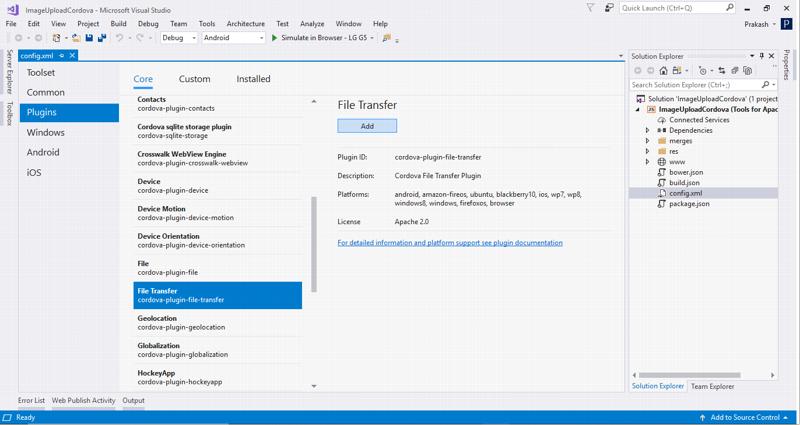
3. Upload Images using File transfer plugin.
SERVER SIDE:
Follow the link below to built Image Upload REST API Using ASP.NET Core.
Follow the link to Host ASP.NET Core Web API on IIS.
MOBILE APP:
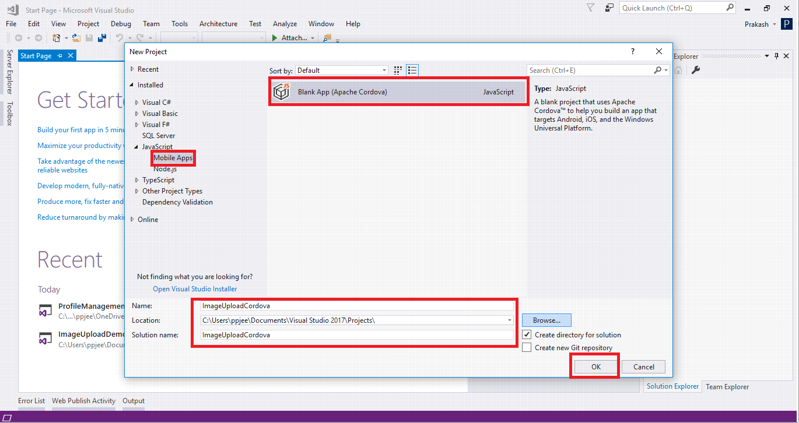
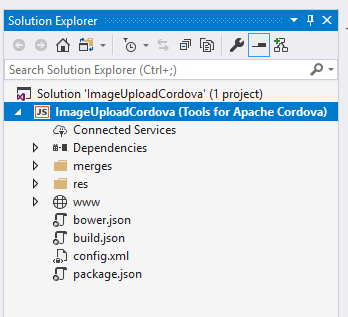
Create New project on Visual Studio.

Adding Plugin:

Now open your index.html and add following div.
<div class="row">
      <div class="profile-header-container">
         <div class="profile-header-img">
             <div id="image">
                 <img class=‘img-circle‘ width=‘120‘ height=‘120‘ src=‘images/USER.jpg‘ />
             </div>
             <div class="rank-label-container">
                 <input type="button" value="Update Profile Picture" id="GetImage">
             </div>
         </div>
      </div>
</div>
body, html {
    height: 100%;
    background-repeat: no-repeat;
    background-image: linear-gradient(rgb(104, 145, 162), rgb(12, 97, 33));
}
/**
 * Profile image component
 */
.profile-header-container {
    margin: 0 auto;
    text-align: center;
}

.profile-header-img {
    padding: 54px;
}

    .profile-header-img > img.img-circle {
        width: 120px;
        height: 120px;
        border: 2px solid #51D2B7;
    }

.profile-header {
    margin-top: 43px;
}

/**
 * Ranking component
 */
.rank-label-container {
    margin-top: -19px;
    /* z-index: 1000; */
    text-align: center;
}

.label.label-default.rank-label {
    background-color: rgb(81, 210, 183);
    padding: 5px 10px 5px 10px;
    border-radius: 27px;
}
<!DOCTYPE html>
<html>
<head>
    <meta http-equiv="Content-Security-Policy" content="default-src ‘self‘ data: gap: https://ssl.gstatic.com ‘unsafe-eval‘; style-src ‘self‘ ‘unsafe-inline‘; media-src *">
    <meta http-equiv="content-type" content="text/html; charset=UTF-8" />
    <meta name="format-detection" content="telephone=no">
    <meta name="msapplication-tap-highlight" content="no">
    <meta name="viewport" content="user-scalable=no, initial-scale=1, maximum-scale=1, minimum-scale=1, width=device-width">
    <link rel="stylesheet" type="text/css" href="css/index.css">
    <title>ImageUploadCordova</title>
</head>
<body>
    <div class="row">
        <div class="profile-header-container">
            <div class="profile-header-img">
                <div id="image">
                    <img class=‘img-circle‘ width=‘120‘ height=‘120‘ src=‘images/USER.jpg‘ />
                </div>
                <div class="rank-label-container">
                    <input type="button" value="Update Profile Picture" id="GetImage">
                </div>
            </div>
        </div>
    </div>
    <script type="text/javascript" src="cordova.js"></script>
    <script type="text/javascript" src="scripts/platformOverrides.js"></script>
    <script type="text/javascript" src="scripts/index.js"></script>
</body>
</html>(function () {
"use strict";
document.addEventListener( ‘deviceready‘, onDeviceReady.bind( this ), false );
function onDeviceReady() {
document.getElementById("GetImage").addEventListener("click", GetImage);
};
})();
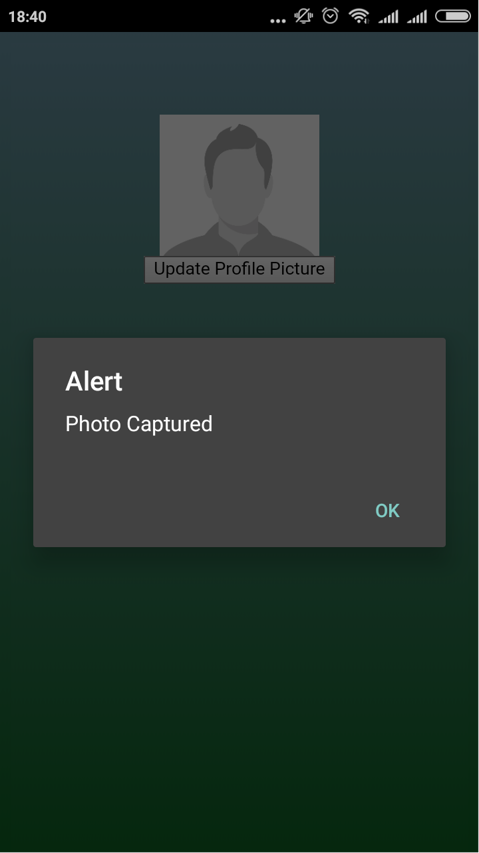
function GetImage() {
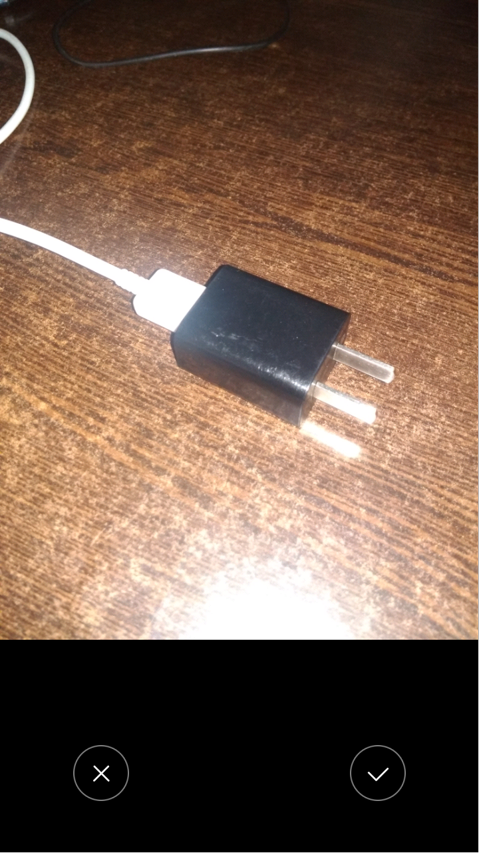
navigator.camera.getPicture(function (imageUri) {
var CapturePhoto = document.getElementById("image");
alert("Photo Captured");
CapturePhoto.innerHTML = "<img class=‘img-circle‘ width=‘120‘ height=‘120‘ src=‘" + imageUri + "‘ />‘";
uploadPhoto(imageUri);
}, null, null);
}
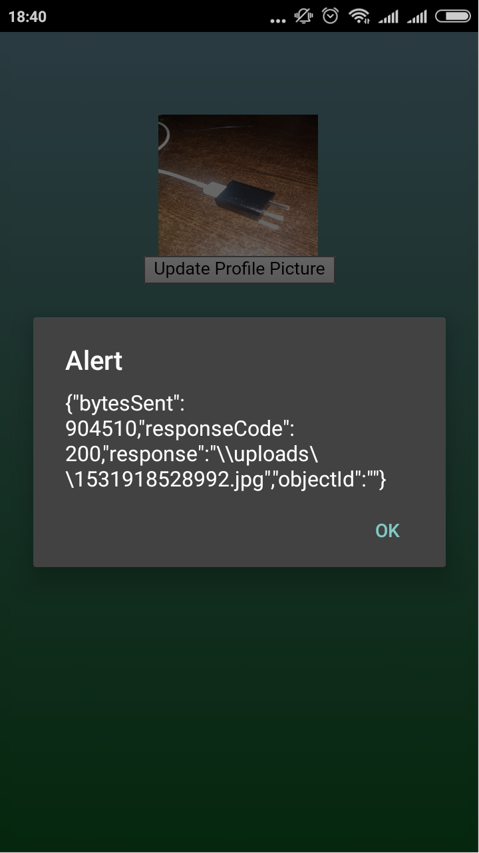
function uploadPhoto(imageURI) {
var options = new FileUploadOptions();
options.fileKey = "files";
options.fileName = imageURI.substr(imageURI.lastIndexOf(‘/‘) + 1);
options.mimeType = "image/jpeg";
console.log(options.fileName);
var ft = new FileTransfer();
ft.upload(imageURI, "http://192.168.1.66:8084/api/image", function (result) {
console.log(JSON.stringify(result));
alert(JSON.stringify(result));
}, function (error) {
console.log(JSON.stringify(error));
alert(JSON.stringify(result));
}, options);
}In Index.js, you can see two methods firstly, GetImage for capturing image from Camera and secondly, UploadImage for uploading image to our web api. http://192.168.1.66:8084 is my local IIS server address.
Output:

Server Side Output:

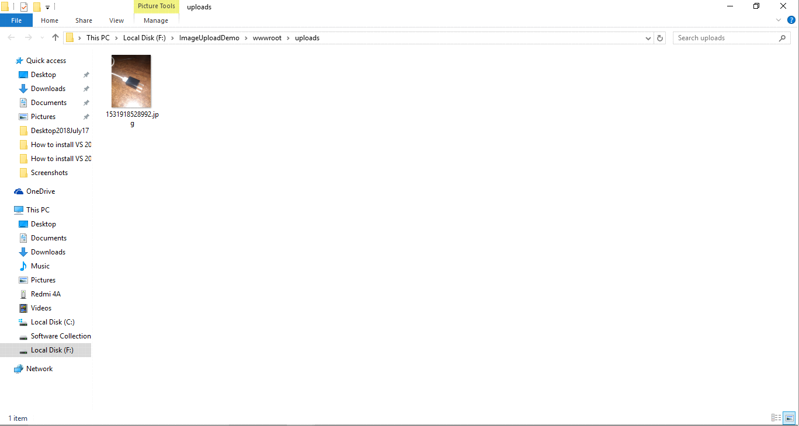
Finally, image is uploaded on Server Folder.
Summary:
In this article, we learned how to Upload Image using Cordova Camera plugin and File Transfer Plugin with ASP.Net core web API on Server Side.
Cordova Upload Images using File Transfer Plugin and .Net core WebAPI
原文:https://www.cnblogs.com/Javi/p/9334854.html