GitLab企业级代码管理仓库
四,GitLab服务器
前面我们已经知道Git人人都是中心,那他们怎么交互数据呢?
- 使用GitHub或者码云等公共代码仓库
- 使用GitLab私有仓库
4.1 GitLab是什么?
是一个用于仓库管理系统的开源项目,使用Git作为代码管理工具,并在此基础上搭建起来的web服务。基础功能免费,高级功能收费。
4.2 为什么要使用GitLab?
基础功能开源,可自行搭建
可以进行权限控制,使得代码对部分人可见
gitlab使用方便
|
主机名
|
IP
|
备注
|
特殊要求
|
|
G01
|
192.168.200.186
|
Git客户端
|
无
|
|
G02
|
192.168.200.187
|
GitLab服务器
|
内存2G
|
4.3 GitLab安装
官方安装文档:https://about.gitlab.com/installation/#centos-7
GitLab国内源下载地址:https://mirrors.tuna.tsinghua.edu.cn/gitlab-ce/yum/el7/
- #在Git02上安装GitLab
- #初始环境
- [root@Git02 ~]# cat /etc/redhat-release
- CentOS Linux release 7.5.1804 (Core)
- [root@Git02 ~]# uname -r
- 3.10.0-862.3.3.el7.x86_64
- [root@Git02 ~]# echo "Git02 127.0.0.1" >> /etc/hosts
- [root@Git02 ~]# tail -1 /etc/hosts
- Git02 127.0.0.1
- [root@Git02 ~]# tree
- .
- ├── anaconda-ks.cfg
- ├── gitlab-11-2-stable-zh.tar.gz #GitLab-11.2.3版汉化包
- └── gitlab-ce-11.2.3-ce.0.el7.x86_64.rpm #GitLab-11.2.3版安装包
- 0 directories, 3 files
- #下载GitLab最新版本安装包
- [root@Git02 ~]# wget https://mirrors.tuna.tsinghua.edu.cn/gitlab-ce/yum/el7/gitlab-ce-11.2.3-ce.0.el7.x86_64.rpm
- [root@Git02 ~]# yum localinstall gitlab-ce-11.2.3-ce.0.el7.x86_64.rpm -y
- 重要说明:
- yum localinstall 利用yum安装本地指定的rpm包,好处是自动解决依赖问题
- #初始化GitLab,只需要执行一次
- [root@Git02 ~]# gitlab-ctl reconfigure
- #查看gitlab启动状态
- [root@Git02 ~]# gitlab-ctl status
- run: alertmanager: (pid 17077) 202s; run: log: (pid 17085) 202s
- run: gitaly: (pid 17016) 204s; run: log: (pid 17027) 204s
- run: gitlab-monitor: (pid 17050) 203s; run: log: (pid 17052) 203s
- run: gitlab-workhorse: (pid 17000) 205s; run: log: (pid 17007) 204s
- run: logrotate: (pid 16640) 263s; run: log: (pid 17010) 204s
- run: nginx: (pid 16614) 269s; run: log: (pid 17011) 204s
- run: node-exporter: (pid 16714) 251s; run: log: (pid 17030) 204s
- run: postgres-exporter: (pid 17092) 202s; run: log: (pid 17173) 201s
- run: postgresql: (pid 16347) 308s; run: log: (pid 17035) 204s
- run: prometheus: (pid 17061) 203s; run: log: (pid 17171) 201s
- run: redis: (pid 16287) 314s; run: log: (pid 16990) 205s
- run: redis-exporter: (pid 16844) 238s; run: log: (pid 17056) 203s
- run: sidekiq: (pid 16586) 276s; run: log: (pid 17036) 204s
- run: unicorn: (pid 16548) 282s; run: log: (pid 16993) 205s
- #查看GitLab版本号
- [root@Git02 ~]# cat /opt/gitlab/embedded/service/gitlab-rails/VERSION
- 11.2.3
在宿主机输入http://IP地址就可以访问了

接下来我们设定管理员初始密码,最少8位
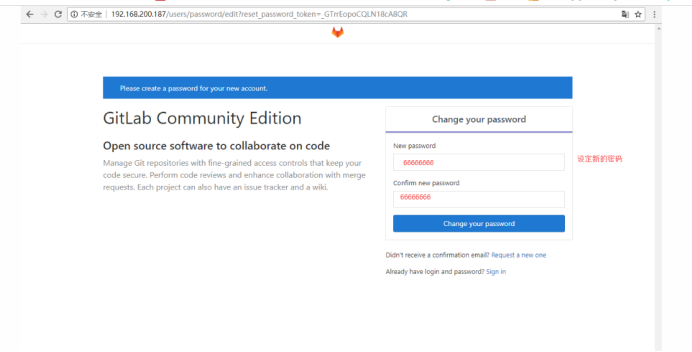
登陆管理员账号:root 密码:66666666
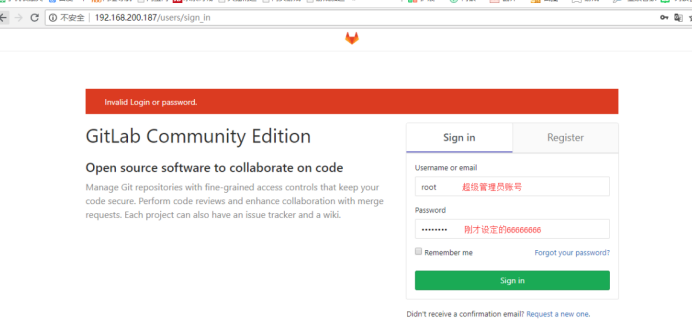
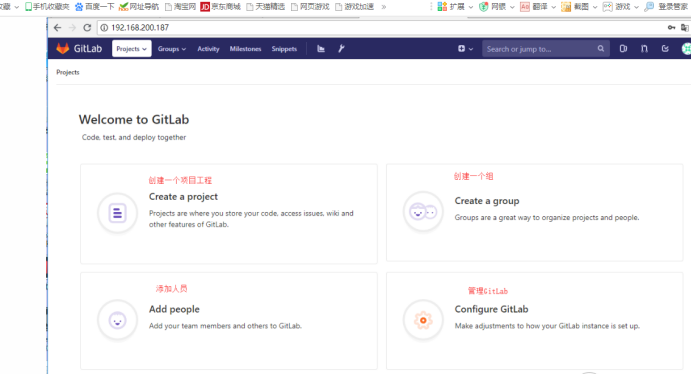
登陆后,我们就可以选择如下功能使用了
4.4 GitLab中文社区版补丁包安装
GitLab中文社区:https://gitlab.com/xhang/gitlab/tree/11-2-stable-zh
- [root@Git02 ~]# ls
- anaconda-ks.cfg gitlab-11-2-stable-zh.tar.gz gitlab-ce-11.2.3-ce.0.el7.x86_64.rpm
- #解压GitLab中文版补丁包
- [root@Git02 ~]# tar xf gitlab-11-2-stable-zh.tar.gz
- #查看系统已经安装的GitLab版本号
- [root@Git02 ~]# cat /opt/gitlab/embedded/service/gitlab-rails/VERSION
- 11.2.3
- #查看解压后的补丁包版本号
- [root@Git02 ~]# cat gitlab-11-2-stable-zh/VERSION
- 11.2.3
- 说明:
- 补丁包版本号和安装的GitLab版本号需要一致
- #备份英文版GitLab
- [root@Git02 ~]# cp -r /opt/gitlab/embedded/service/gitlab-rails{,.bak}
- #将中文补丁包的内容覆盖英文版
- [root@Git02 ~]# /bin/cp -rf gitlab-11-2-stable-zh/* /opt/gitlab/embedded/service/gitlab-rails/
- /bin/cp: 无法以目录"gitlab-11-2-stable-zh/log" 来覆盖非目录"/opt/gitlab/embedded/service/gitlab-rails/log"
- /bin/cp: 无法以目录"gitlab-11-2-stable-zh/tmp" 来覆盖非目录"/opt/gitlab/embedded/service/gitlab-rails/tmp"
- 说明:
- 此报错不用管,因为已经设置过root密码,登陆过,所以会报错
- #重新配置GitLab
- [root@Git02 ~]# gitlab-ctl reconfigure
- #重新启动GitLab
- [root@Git02 ~]# gitlab-ctl restart
重新刷新浏览器访问GitLab
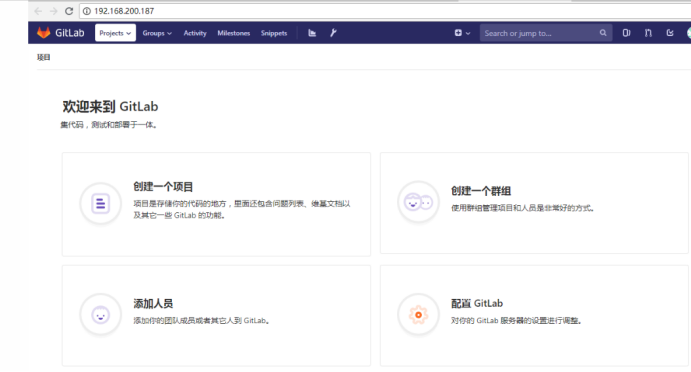
4.5 使用GitLab
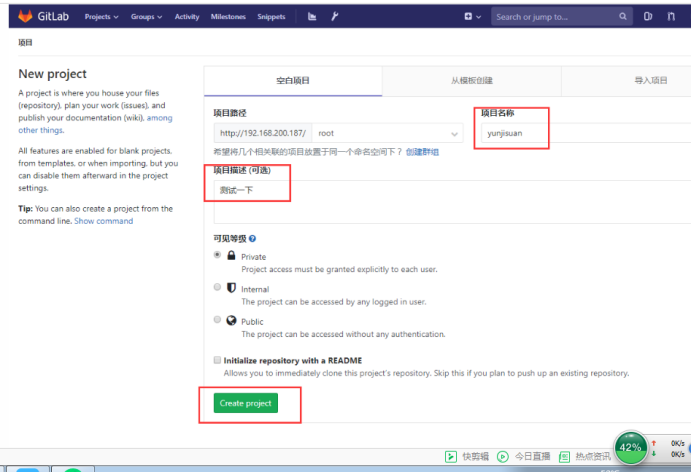
4.5.1 创建一个新项目
4.5.2 修改GitLab配置文件/etc/gitlab/gitlab.rb
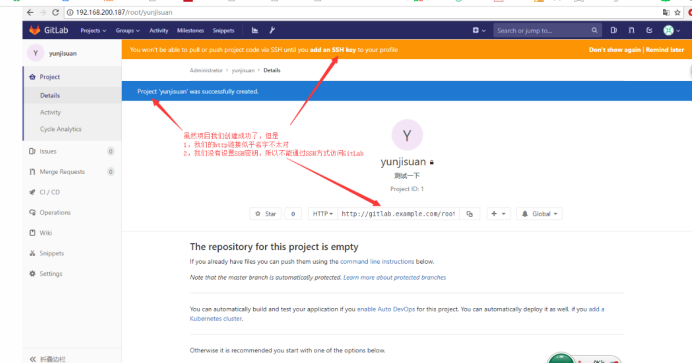
我们需要修改GitLab的默认访问域名(因为我们是在内网搭建的GitLab)
GitLab默认的监听端口为80,但是在企业中,这个端口经常被别的服务占用,所以我们还需要更换端口号
- [root@Git02 ~]# cat -n /etc/gitlab/gitlab.rb.bak | sed -n ‘13p;943p‘
- 13 external_url ‘http://gitlab.example.com‘
- 943 # nginx[‘listen_port‘] = nil
- [root@Git02 ~]# cat -n /etc/gitlab/gitlab.rb | sed -n ‘13p;943p‘
- 13 external_url ‘http://192.168.200.187:8888‘
- 943 nginx[‘listen_port‘] = 8888
- #重新配置GitLab
- [root@Git02 ~]# gitlab-ctl reconfigure
- #重启动GitLab
- [root@Git02 ~]# gitlab-ctl restart
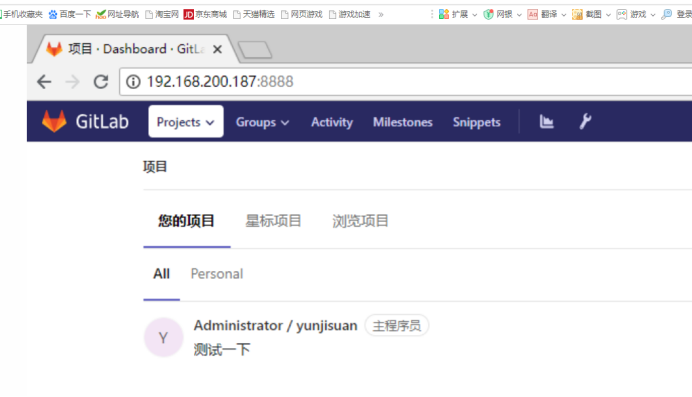
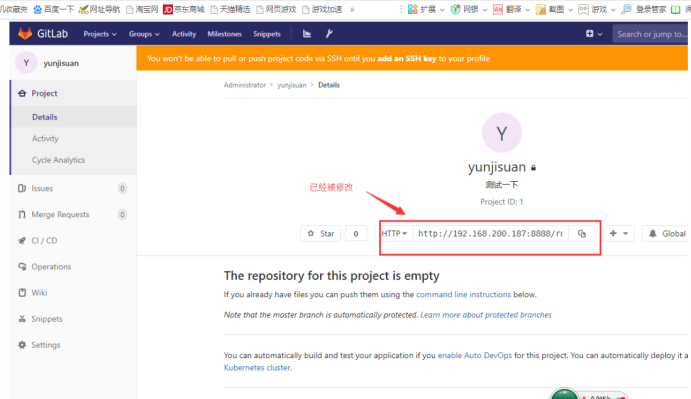
重新访问浏览器http://192.168.200.187:8888
4.5.3 尝试将本地仓库代码推送到私有GitLab
- #在Git01客户端上
- [root@Git01 mycode]# pwd
- /mycode
- [root@Git01 mycode]# ls
- 10 5 6 7 8 9 benet.txt test.txt xx.idea
- [root@Git01 mycode]# git branch
- linux
- * master #当前在master分支
- #添加远程GitLab仓库管理
- [root@Git01 mycode]# git remote add origin http://192.168.200.187:8888/root/yunjisuan.git
- [root@Git01 mycode]# git remote -v
- origin http://192.168.200.187:8888/root/yunjisuan.git (fetch)
- origin http://192.168.200.187:8888/root/yunjisuan.git (push)
- test https://github.com/yinsendemogui/yunjisuan.git (fetch)
- test https://github.com/yinsendemogui/yunjisuan.git (push)
- #推送本地仓库master分支到远程仓库GitLab上
- [root@Git01 mycode]# git push origin master
- Username for ‘http://192.168.200.187:8888‘: root
- Password for ‘http://root@192.168.200.187:8888‘:
- 对象计数中: 57, 完成.
- 压缩对象中: 100% (38/38), 完成.
- 写入对象中: 100% (57/57), 4.77 KiB | 0 bytes/s, 完成.
- Total 57 (delta 15), reused 0 (delta 0)
- To http://192.168.200.187:8888/root/yunjisuan.git
- * [new branch] master -> master
- #推送本地仓库Linux分支到远程仓库GitLab上
- [root@Git01 mycode]# git branch
- linux
- * master
- [root@Git01 mycode]# git checkout linux
- 切换到分支 ‘linux‘
- [root@Git01 mycode]# git branch
- * linux
- master
- [root@Git01 mycode]# git push origin linux
- Username for ‘http://192.168.200.187:8888‘: root
- Password for ‘http://root@192.168.200.187:8888‘:
- Total 0 (delta 0), reused 0 (delta 0)
- remote:
- remote: To create a merge request for linux, visit:
- remote: http://192.168.200.187:8888/root/yunjisuan/merge_requests/new?merge_request%5Bsource_branch%5D=linu
- remote:
- To http://192.168.200.187:8888/root/yunjisuan.git
- * [new branch] linux -> linux
- #推送本地仓库标签V1.0到远程仓库GitLab上
- [root@Git01 mycode]# git tag
- v1.0
- [root@Git01 mycode]# git push origin v1.0
- Username for ‘http://192.168.200.187:8888‘: root
- Password for ‘http://root@192.168.200.187:8888‘:
- 对象计数中: 4, 完成.
- 压缩对象中: 100% (3/3), 完成.
- 写入对象中: 100% (4/4), 444 bytes | 0 bytes/s, 完成.
- Total 4 (delta 1), reused 0 (delta 0)
- To http://192.168.200.187:8888/root/yunjisuan.git
- * [new tag] v1.0 -> v1.0
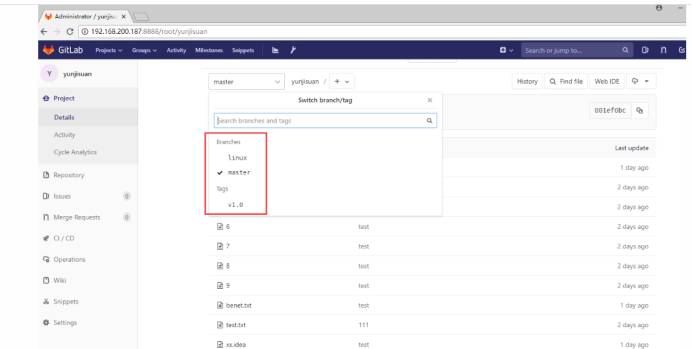
4.5.4 尝试在本地仓库克隆GitLab的项目Linux分支到本地仓库
- #创建Git工作目录
- [root@Git01 ~]# mkdir -p /GitLab
- [root@Git01 ~]# cd /GitLab
- [root@Git01 GitLab]# git init
- 初始化空的 Git 仓库于 /GitLab/.git/
- #克隆远程仓库GitLab的Linux分支
- [root@Git01 GitLab]# git clone -b linux http://192.168.200.187:8888/root/yunjisuan.git
- 正克隆到 ‘yunjisuan‘...
- Username for ‘http://192.168.200.187:8888‘: root
- Password for ‘http://root@192.168.200.187:8888‘:
- remote: Enumerating objects: 61, done.
- remote: Counting objects: 100% (61/61), done.
- remote: Compressing objects: 100% (41/41), done.
- remote: Total 61 (delta 16), reused 0 (delta 0)
- 展开对象中: 100% (61/61), 完成.
- 检查连接... 完成。
- [root@Git01 GitLab]# ls
- yunjisuan
- [root@Git01 GitLab]# cd yunjisuan/
- [root@Git01 yunjisuan]# ls
- 10 5 6 7 8 9 benet.txt test.txt xx.idea
- [root@Git01 yunjisuan]# git branch
- * linux
4.5.5 配置GitLab的SSH密钥连接方式
- #在Git01客户端生成密钥对
- [root@Git01 ~]# ssh-keygen -t rsa -C ‘215379068@qq.com‘
- Generating public/private rsa key pair.
- Enter file in which to save the key (/root/.ssh/id_rsa):
- Enter passphrase (empty for no passphrase):
- Enter same passphrase again:
- Your identification has been saved in /root/.ssh/id_rsa.
- Your public key has been saved in /root/.ssh/id_rsa.pub.
- The key fingerprint is:
- SHA256:ECF+/zlO9WMrd9t9wX6v1KKOt12RictT5CLT++YW9Vc 215379068@qq.com
- The key‘s randomart image is:
- +---[RSA 2048]----+
- | . o. |
- | . . . |
- | . o . |
- | . o . + E|
- | S o.+.*+|
- | . o+.==+|
- | = =B *|
- | o oo=+O*|
- | oo++B*O|
- +----[SHA256]-----+
- [root@Git01 ~]#
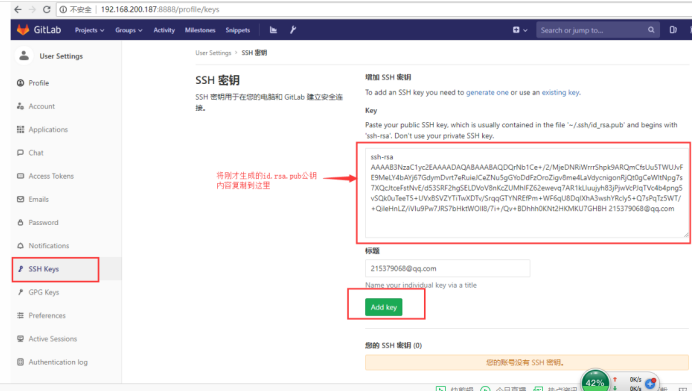
- [root@Git01 ~]# cat /root/.ssh/id_rsa.pub #公钥内容,复制到GitLab上
- ssh-rsa AAAAB3NzaC1yc2EAAAADAQABAAABAQDQrNb1Ce+/2/MjeDNRiWrrrShpk9ARQmCfsUu5TWUJvFE9MeLY4bAYj67GdymDvrt7eRuieJCeZNu5gGYoDdFzOroZigv8me4LaVdycnigonRjQt0gCeWltNpg7s7XQcJtceFstNvE/d53SRF2hgSELDVoV8nKcZUMhIFZ62ewevq7AR1kLIuujyh83jPjwVcPJqTVc4b4png5vSQk0uTeeT5+UVxBSVZYTiTwXDTv/SrqqGTYNREfPm+WF6qU8DqIXhA3wshYRcIy5+Q7sPqTz5WT/+QileHnLZ/iVIu9Pw7JRS7bHktWOIl8/7i+/Qv+BDhhh0KNt2HKMKU7GHBH 215379068@qq.com
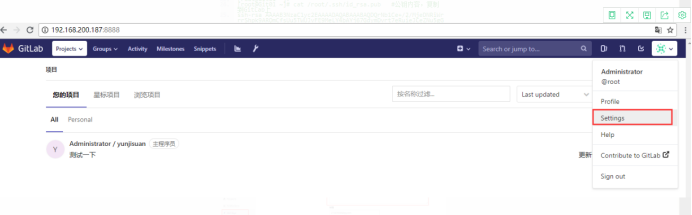
在浏览器端打开GitLab
4.5.6 利用ssh方式克隆GitLab上的一个项目
- [root@Git01 ~]# mkdir -p /test
- [root@Git01 ~]# cd /test
- [root@Git01 test]# git init
- 初始化空的 Git 仓库于 /test/.git/
- #将远程GitLab的Linux分支克隆到本地
- [root@Git01 test]# git clone -b linux git@192.168.200.187:root/yunjisuan.git
- 正克隆到 ‘yunjisuan‘...
- remote: Enumerating objects: 61, done.
- remote: Counting objects: 100% (61/61), done.
- remote: Compressing objects: 100% (41/41), done.
- remote: Total 61 (delta 16), reused 0 (delta 0)
- 接收对象中: 100% (61/61), 5.15 KiB | 0 bytes/s, 完成.
- 处理 delta 中: 100% (16/16), 完成.
- 检查连接... 完成。
- [root@Git01 test]# ls
- yunjisuan
- [root@Git01 test]# cd yunjisuan/
- [root@Git01 yunjisuan]# ls
- 10 5 6 7 8 9 benet.txt test.txt xx.idea
- [root@Git01 yunjisuan]# git branch
- * linux
4.6 配置GitLab邮件服务
- 配置邮箱服务的用途:
- 有合并请求时,邮件通知
- 账号注册时,邮件验证
- 修改密码时,通过邮件修改
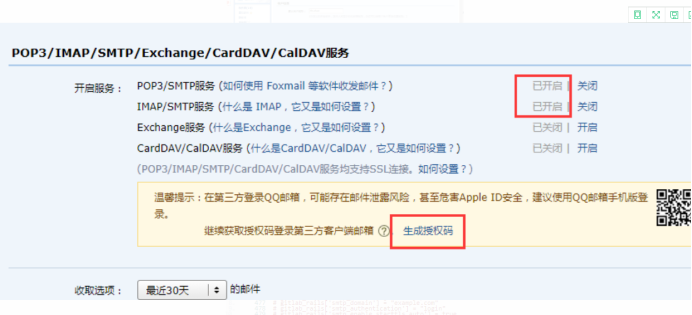
- 配置步骤:
- 开启QQ邮箱的smtp服务
- 修改gitlab配置
- 测试邮件服务是否正常
4.6.1 开启GitLab服务postfix服务并开启QQ邮箱的smtp服务
- [root@Git02 ~]# systemctl start postfix
- [root@Git02 ~]# systemctl enable postfix
- [root@Git02 ~]# systemctl status postfix

4.6.2 修改gitlab配置文件/etc/gitlab/gitlab.rb
- [root@Git02 ~]# cat -n /etc/gitlab/gitlab.rb.bak | sed -n ‘53p;472,480p;618p‘
- 53 # gitlab_rails[‘gitlab_email_from‘] = ‘example@example.com‘
- 472 # gitlab_rails[‘smtp_enable‘] = true
- 473 # gitlab_rails[‘smtp_address‘] = "smtp.server"
- 474 # gitlab_rails[‘smtp_port‘] = 465
- 475 # gitlab_rails[‘smtp_user_name‘] = "smtp user"
- 476 # gitlab_rails[‘smtp_password‘] = "smtp password"
- 477 # gitlab_rails[‘smtp_domain‘] = "example.com"
- 478 # gitlab_rails[‘smtp_authentication‘] = "login"
- 479 # gitlab_rails[‘smtp_enable_starttls_auto‘] = true
- 480 # gitlab_rails[‘smtp_tls‘] = false
- 618 # user[‘git_user_email‘] = "gitlab@#{node[‘fqdn‘]}"
- [root@Git02 ~]# cat -n /etc/gitlab/gitlab.rb | sed -n ‘53p;472,480p;618p‘
- 53 gitlab_rails[‘gitlab_email_from‘] = ‘215379068@qq.com‘ #GitLab默认邮箱
- 472 gitlab_rails[‘smtp_enable‘] = true #开启功能
- 473 gitlab_rails[‘smtp_address‘] = "smtp.qq.com" #QQ的smtp服务
- 474 gitlab_rails[‘smtp_port‘] = 465
- 475 gitlab_rails[‘smtp_user_name‘] = "215379068@qq.com" #smtp用户邮箱
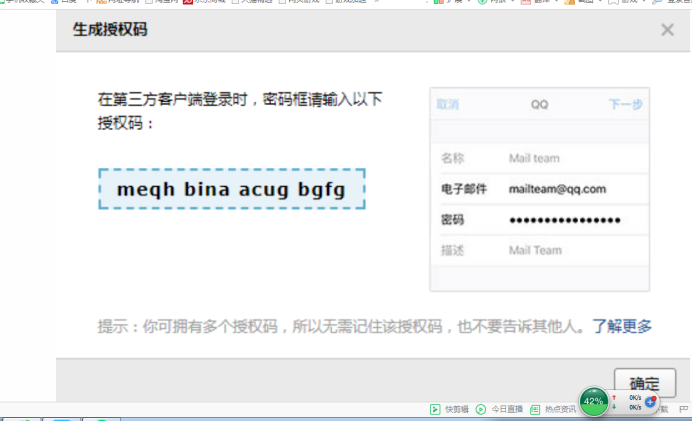
- 476 gitlab_rails[‘smtp_password‘] = "开通QQsmtp时返回的字符串"
- 477 gitlab_rails[‘smtp_domain‘] = "qq.com" #smtp域名
- 478 gitlab_rails[‘smtp_authentication‘] = "login"
- 479 gitlab_rails[‘smtp_enable_starttls_auto‘] = true
- 480 gitlab_rails[‘smtp_tls‘] = true
- 618 user[‘git_user_email‘] = "215379068@qq.com" #git用户邮箱
- #重新加载GitLab配置文件
- [root@Git02 ~]# gitlab-ctl reconfigure
- #重启动GitLab服务
- [root@Git02 ~]# gitlab-ctl restart
- #进入GitLab控制台进行邮件发送测试
- [root@Git02 ~]# gitlab-rails console #开启GitLab控制台
- -------------------------------------------------------------------------------------
- GitLab: 11.2.3 (06cbee3)
- GitLab Shell: 8.1.1
- postgresql: 9.6.8
- -------------------------------------------------------------------------------------
- Loading production environment (Rails 4.2.10)
- irb(main):001:0> Notify.test_email(‘513809552@qq.com‘,‘this is title‘,‘hello‘).deliver_now #输入左边内容
- 特别说明:
- Notify.test_email(‘收件人邮箱‘,‘邮件标题‘,‘邮件内容‘)
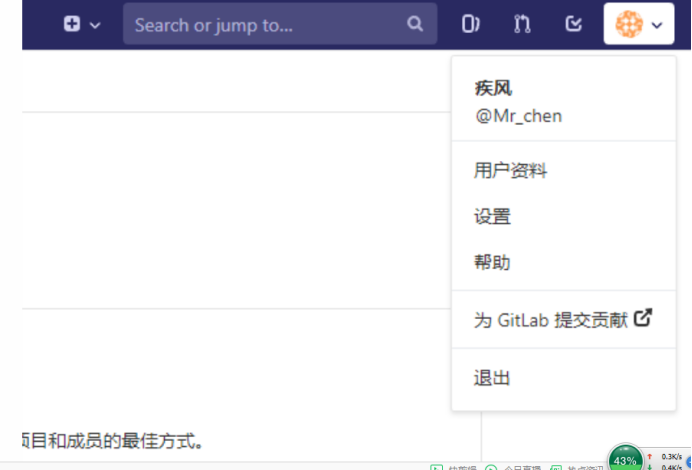
4.7 GitLab的账号注册及分组
4.7.1 账户注册测试

注册的时候,用的是乱写的邮箱都能注册并登陆;
显然这在企业里是绝对不允许的。
4.7.2 开启GitLab邮箱验证功能
重新登陆管理员用户root,密码:66666666 ,我们进行如下操作
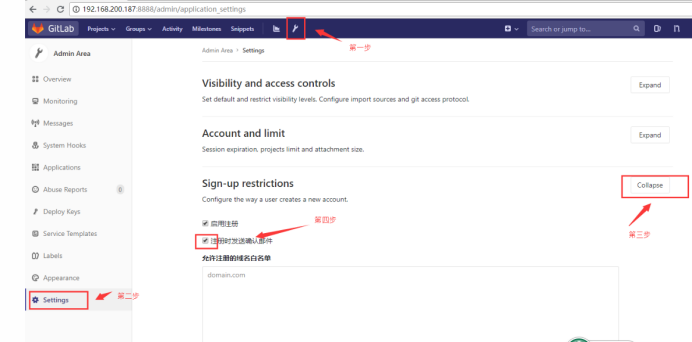
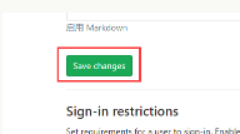
退出时别忘了保存修改的设置如下图
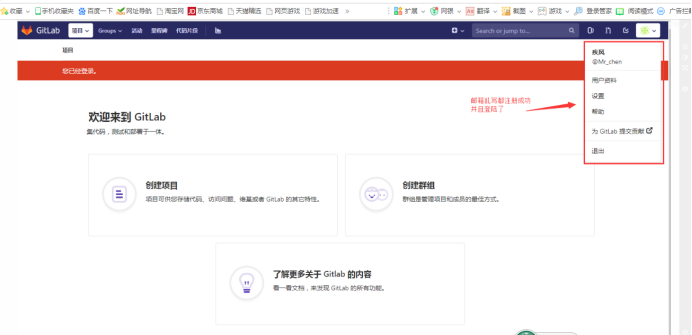
然后我们退出管理员的登陆,进行重新注册
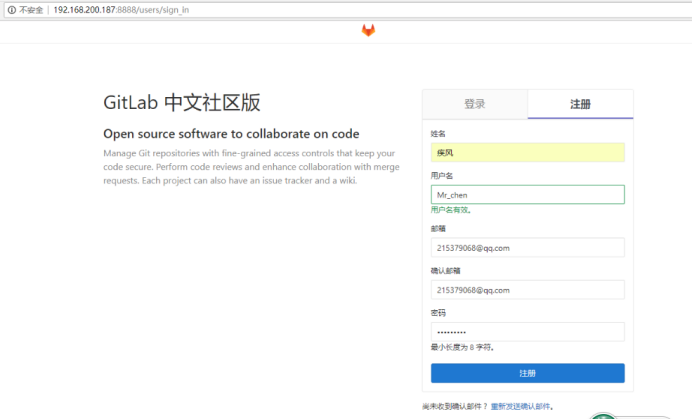
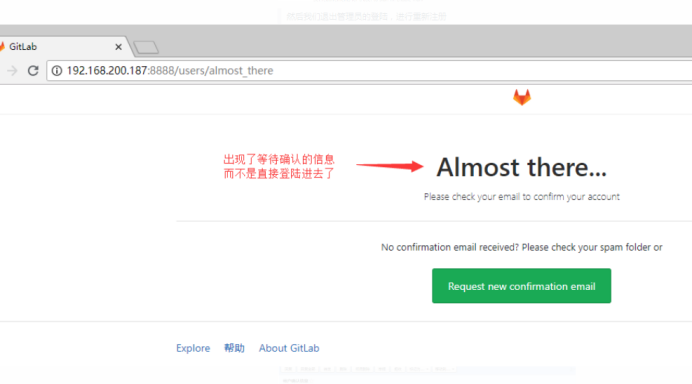
由上图,我们发现,此时注册用户,已经进不去GitLab了;
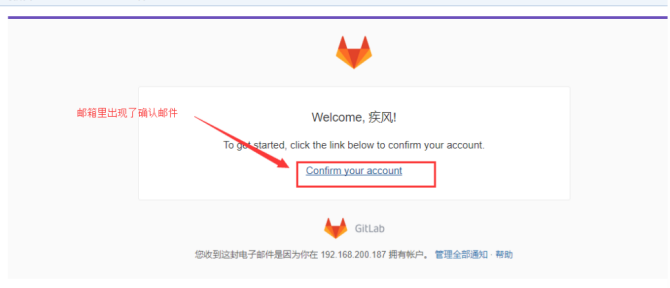
这是因为GitLab已经自动发了一封邮件给注册用户的邮箱
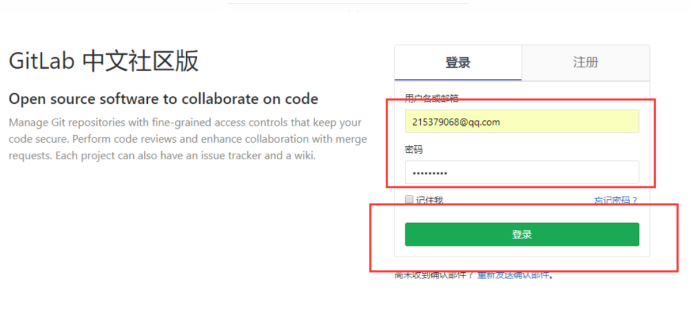
需要用户进行邮件确认后,方可登陆
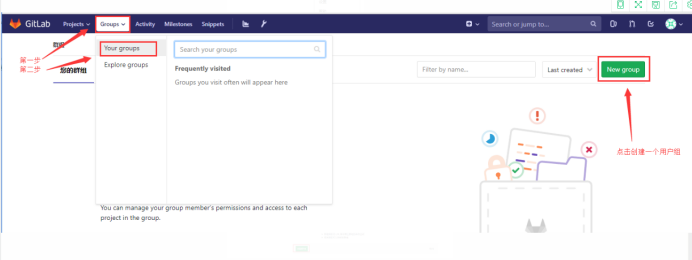
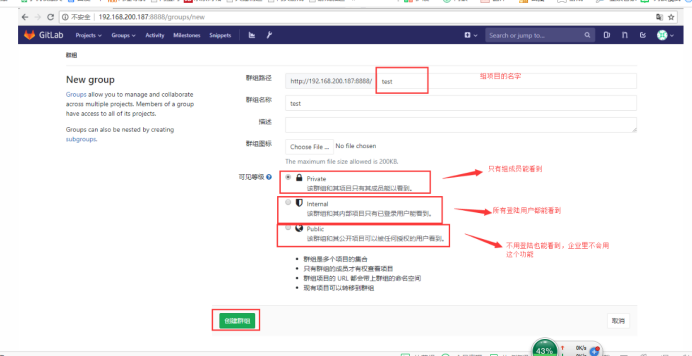
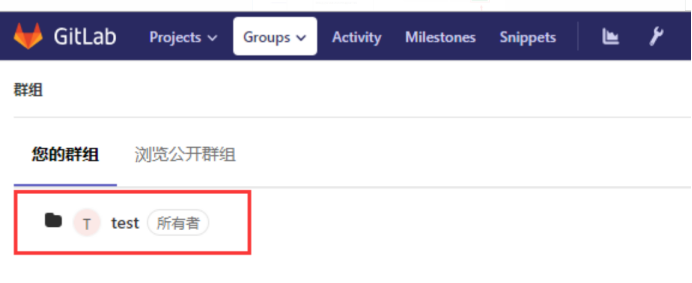
4.7.3 创建一个项目组

4.7.4 给组添加成员并授权

- Guest访客:
- Reporter报告者:
- 只能克隆代码(读),不能提交代码(修改)(产品测试)
- Developer开发人员:
- Master主程序员:
- 可以添加项目成员,添加标签,创建和保护分支(产品经理)
- Owner所有者:
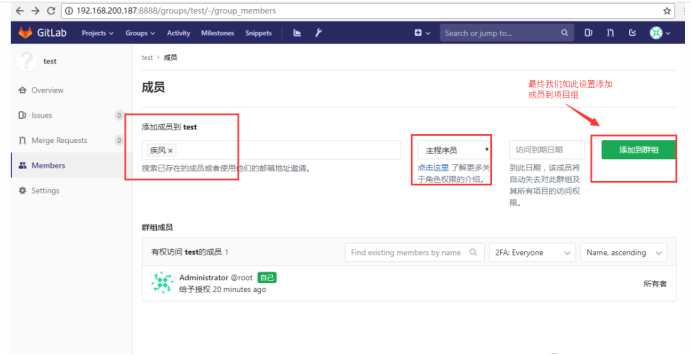
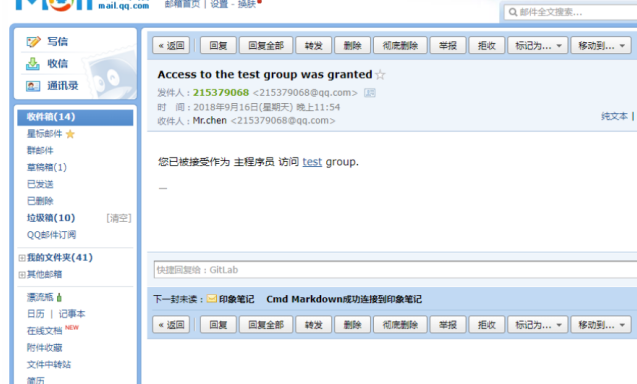
添加权限成功后,GitLab会自动邮件通知这个用户
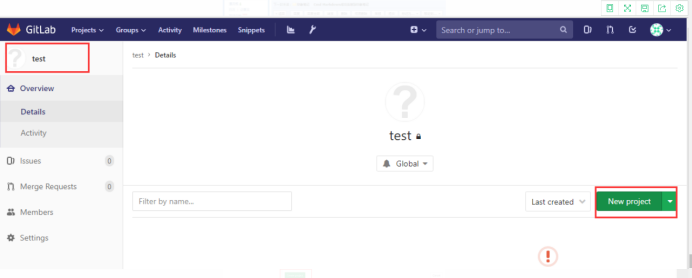
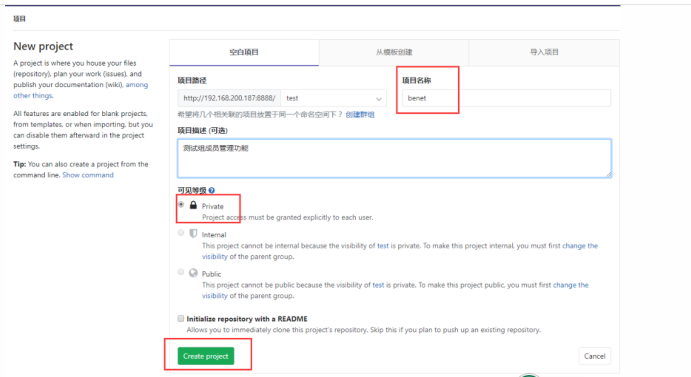
4.7.5 给项目组创建一个新项目
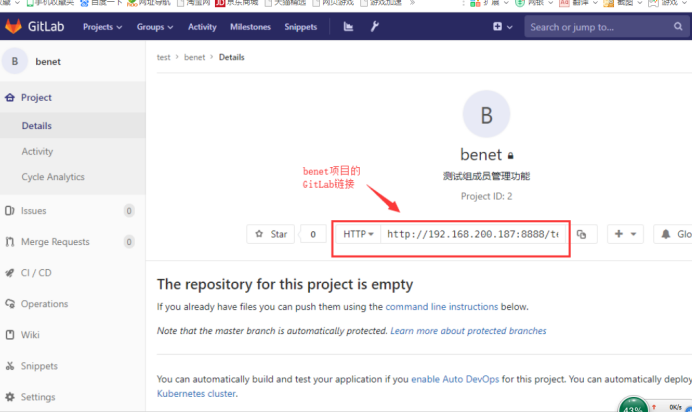
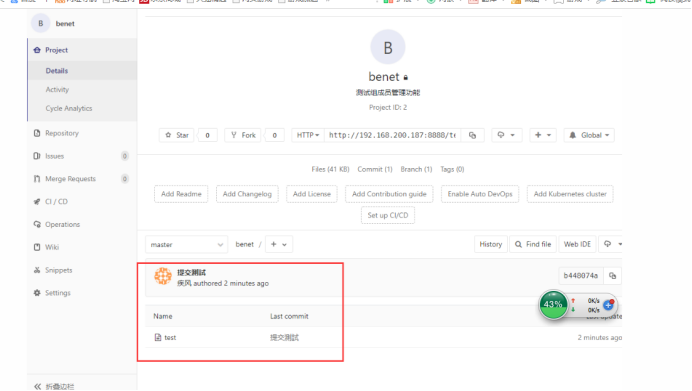
4.7.5 进行组成员的项目提交和克隆测试
- #进行组成员代码提交测试
- [root@Git01 ~]# mkdir -p /test
- [root@Git01 ~]# cd /test
- [root@Git01 test]# ls
- [root@Git01 test]# git init
- 初始化空的 Git 仓库于 /test/.git/
- [root@Git01 test]# echo "welcome to yunjisuan" >> test
- [root@Git01 test]# ls
- test
- [root@Git01 test]# git add *
- [root@Git01 test]# git commit -m "提交測試"
- [master(根提交) b448074] 提交測試
- 1 file changed, 1 insertion(+)
- create mode 100644 test
- #推送代码到远程GitLab
- [root@Git01 test]# git push http://192.168.200.187:8888/test/benet.git master
- Username for ‘http://192.168.200.187:8888‘: 215379068@qq.com
- Password for ‘http://215379068@qq.com@192.168.200.187:8888‘:
- 对象计数中: 3, 完成.
- 写入对象中: 100% (3/3), 235 bytes | 0 bytes/s, 完成.
- Total 3 (delta 0), reused 0 (delta 0)
- To http://192.168.200.187:8888/test/benet.git
- * [new branch] master -> master
- #进行组成员代码的克隆测试
- [root@Git01 ~]# mkdir -p /test2
- [root@Git01 ~]# cd /test2
- [root@Git01 test2]# git init
- 初始化空的 Git 仓库于 /test2/.git/
- [root@Git01 test2]# git clone http://192.168.200.187:8888/test/benet.git
- 正克隆到 ‘benet‘...
- Username for ‘http://192.168.200.187:8888‘: 215379068@qq.com
- Password for ‘http://215379068@qq.com@192.168.200.187:8888‘:
- remote: Enumerating objects: 3, done.
- remote: Counting objects: 100% (3/3), done.
- remote: Total 3 (delta 0), reused 0 (delta 0)
- 展开对象中: 100% (3/3), 完成.
- 检查连接... 完成。
- [root@Git01 test2]# ls
- benet
- [root@Git01 test2]# cat benet/test
- welcome to yunjisuan
- [root@Git01 test2]# cd benet/
- [root@Git01 benet]# git branch
- * master
五,GitLab的主从同步(待完善)
主从复制架构:
测试环境上的gitlab仓库,只同步master主分支到从库也就是生产环境上,然后生产环境jenkins只需要抓取从库gitlab就可以了。
其他方法:生产环境上的gitlab上有公网IP,可以通过ip找到公司的gitlab仓库拉取代码。
GitLab企业级代码管理仓库
原文:https://www.cnblogs.com/heroke/p/10303084.html