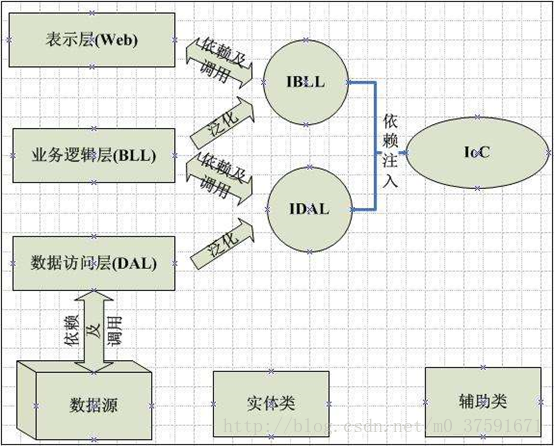
在介绍如何在程序中使用Unity之前,首先说一下什么是IOC:
IOC是Inversion of Control的缩写,被翻译为控制反转,是一种全新的设计模式,用来削减计算机程序的耦合问题,把程序上层对下层的依赖,转移到第三方的容器来装配。 控制反转一般分为两种类型,依赖注入(Dependency Injection,简称DI)和依赖查找(Dependency Lookup)。依赖注入应用比较广泛。
实现Ioc的框架有很多,比如astle Windsor、Unity、Spring.NET、StructureMap,我们这里学习使用微软提供的Unity。
下面介绍如何在程序中使用Unity:
第一步:
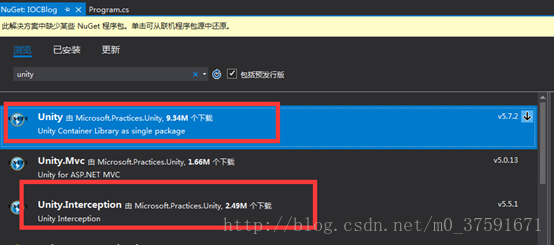
首先在Nuget添加Unity包,引用→右键→管理Nuget程序包,要实现AOP必须也添加下面的Unity.Interception包
这里添加Unity版本为5.5.6,Unity.Abstractions版本3.1.3,Unity.Interception版本5.3.1
第二步:
程序中添加一个配置文件的文件夹ConfigFiles,添加配置文件:
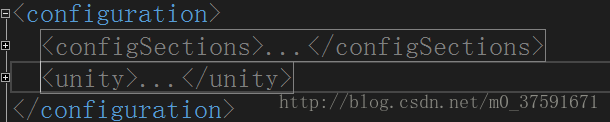
第三步:
配置文件:文件结构为
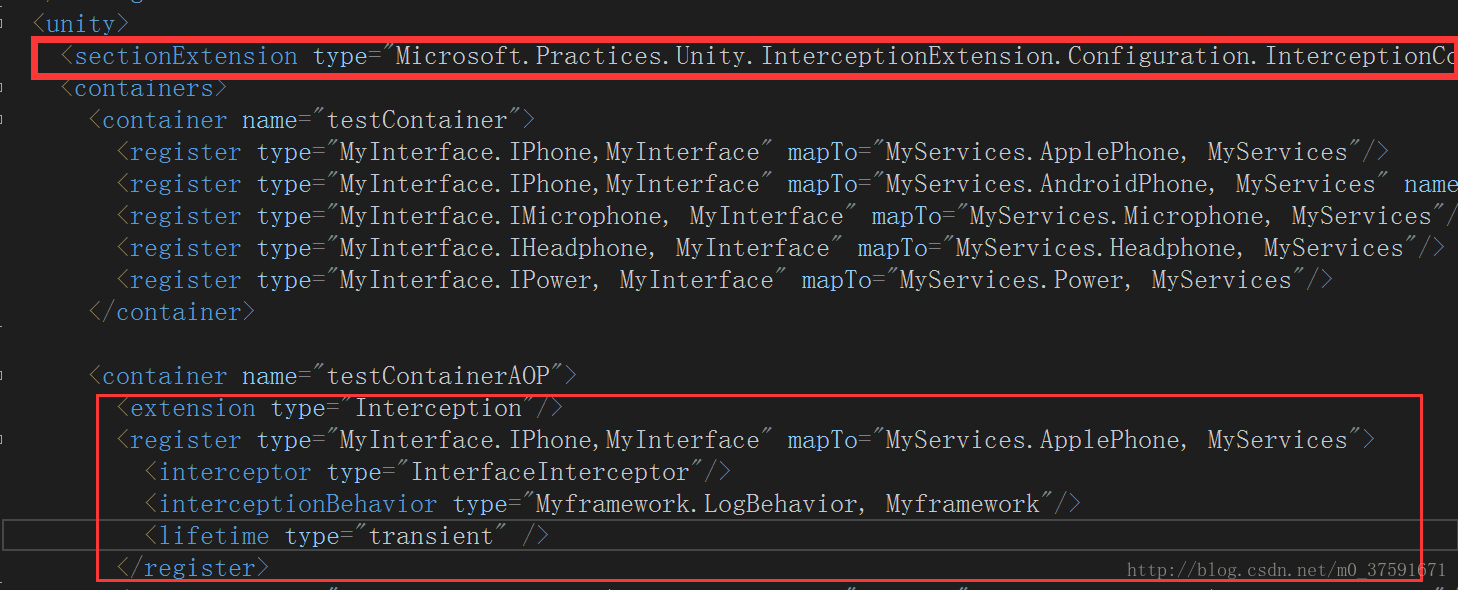
具体配置为:
<?xml version="1.0" encoding="utf-8" ?>
<configuration>
  <configSections>
    <section name="unity" type="Microsoft.Practices.Unity.Configuration.UnityConfigurationSection, Unity.Configuration"/>
  </configSections>
  <unity>
    <sectionExtension type="Microsoft.Practices.Unity.InterceptionExtension.Configuration.InterceptionConfigurationExtension, Unity.Interception.Configuration"/>
    <containers>
      <container name="testContainer">
        <register type="MyInterface.IPhone,MyInterface" mapTo="MyServices.ApplePhone, MyServices"/>
        <register type="MyInterface.IPhone,MyInterface" mapTo="MyServices.AndroidPhone, MyServices" name="Android"/>
        <register type="MyInterface.IMicrophone, MyInterface" mapTo="MyServices.Microphone, MyServices"/>
        <register type="MyInterface.IHeadphone, MyInterface" mapTo="MyServices.Headphone, MyServices"/>
        <register type="MyInterface.IPower, MyInterface" mapTo="MyServices.Power, MyServices"/>
      </container>

      <container name="testContainerAOP">
        <extension type="Interception"/>
        <register type="MyInterface.IPhone,MyInterface" mapTo="MyServices.ApplePhone, MyServices">
          <interceptor type="InterfaceInterceptor"/>
          <interceptionBehavior type="MyFramework.LogBehavior, MyFramework"/>
          <lifetime type="transient" />
          <!--<constructor>
            <param name="pubContext" type="IPubContext" />
            <param name="id" type="System.Int32" value="3" />
          </constructor>-->
        </register>
        <register type="MyInterface.IMicrophone, MyInterface" mapTo="MyServices.Microphone, MyServices"/>
        <register type="MyInterface.IHeadphone, MyInterface" mapTo="MyServices.Headphone, MyServices"/>
        <register type="MyInterface.IPower, MyInterface" mapTo="MyServices.Power, MyServices"/>
        <register type="MyInterface.IPhone,MyInterface" mapTo="MyServices.AndroidPhone, MyServices" name="android"/>
        <register type="MyInterface.IPhone,MyInterface" mapTo="MyServices.ApplePhone, MyServices" name="apple"/>
      </container>
    </containers>
  </unity>
</configuration>
这里注册了两个Unity容器“testContainer”,“testContainerAOP”,后者是带有AOP的。
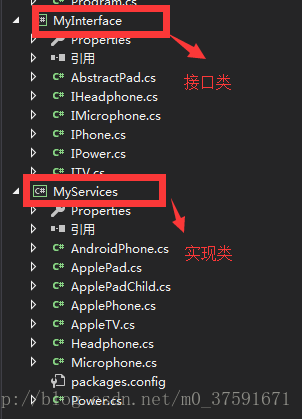
解释一下这个register:
<register type="MyInterface.IPhone,MyInterface" mapTo="MyServices.ApplePhone, MyServices"/>
MyInterface.IPhone:表示抽象接口的IPhone抽象类。
MyInterface为抽象类命名空间,即dll名称
MyServices.ApplePhone:表示实现的具体的ApplePhone类。
MyServices:为具体实现类命名空间,即dll名称
第四步:
Unity在程序中使用方式,这里是用配置文件:
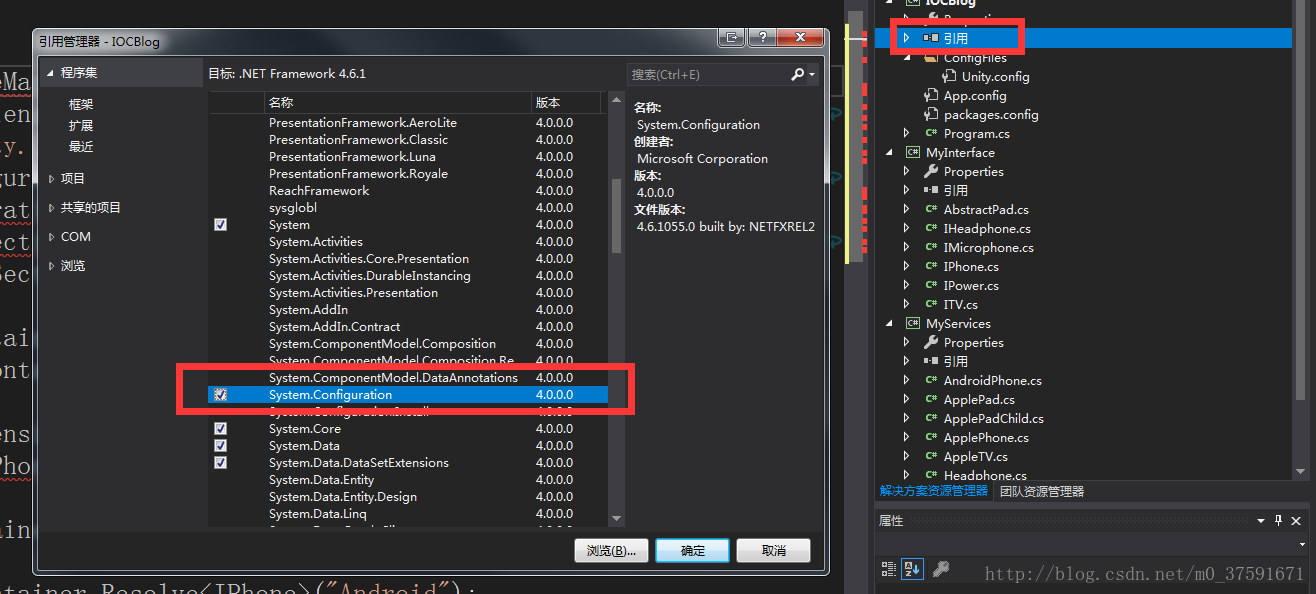
1.首先要添加System.Configuration的引用(引用右键→添加引用→框架):
2.找配置文件的路径
   ExeConfigurationFileMap fileMap = new ExeConfigurationFileMap();
            fileMap.ExeConfigFilename = Path.Combine(AppDomain.CurrentDomain.BaseDirectory + "CfgFiles\\Unity.Config");//找配置文件的路径
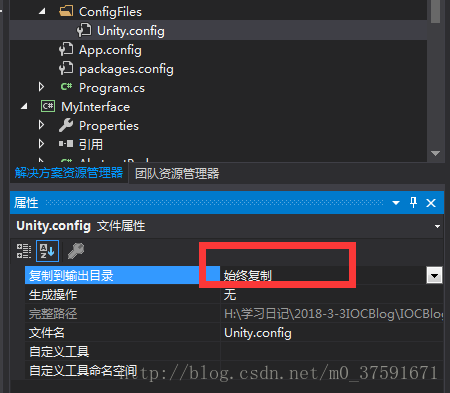
这里要注意吧Unity.config文件修改为始终复制:
3. 声明容器IUnityContainer
IUnityContainer container = new UnityContainer();
 section.Configure(container, "testContainer");
4.Resolve解析类型对象
IPhone phone = container.Resolve<IPhone>();
phone.Call();
IPhone android = container.Resolve<IPhone>("Android");
android.Call();
这里要说一下通过命名注册来区分生成的不同对象实例,即 上面的"Android",在配置文件中是这样注册的:
<register type="MyInterface.IPhone,MyInterface" mapTo="MyServices.AndroidPhone, MyServices" name="Android"/>
5.将MyServices编译生成的dll拷贝到项目文件的Bin/debug文件夹。
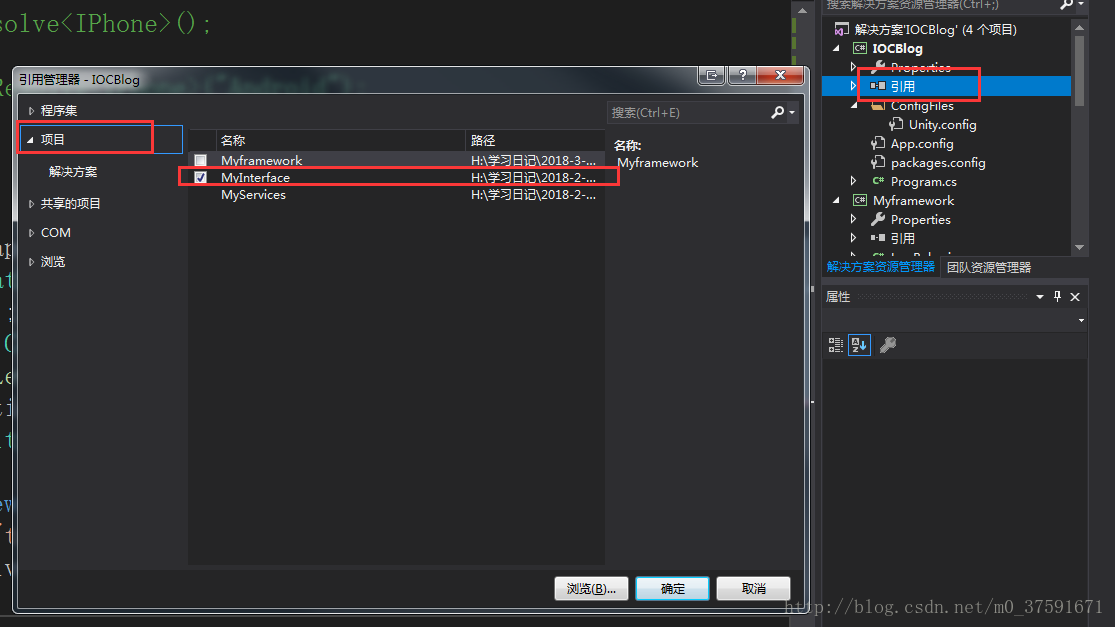
6.在项目中添加对接口的引用:
具体代码:
  static void Main(string[] args)
        {
            {
                //通过配置文件
                ExeConfigurationFileMap fileMap = new ExeConfigurationFileMap();
                fileMap.ExeConfigFilename = Path.Combine(AppDomain.CurrentDomain.BaseDirectory + "ConfigFiles\\Unity.Config");//找配置文件的路径
                Configuration configuration = ConfigurationManager.OpenMappedExeConfiguration(fileMap, ConfigurationUserLevel.None);
                UnityConfigurationSection section = (UnityConfigurationSection)configuration.GetSection(UnityConfigurationSection.SectionName);

                IUnityContainer container = new UnityContainer();
                section.Configure(container, "testContainer");

                container.AddNewExtension<Interception>().Configure<Interception>()
               .SetInterceptorFor<IPhone>(new InterfaceInterceptor());

                IPhone phone = container.Resolve<IPhone>();
                phone.Call();
                IPhone android = container.Resolve<IPhone>("Android");
                android.Call();
            }
        }
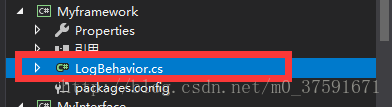
1.首先添加一个LogBehavior 的类,用来实现记录日志功能。
先要添加在Myframwork类库添加Unity,版本一样,以免冲突。然后继承IInterceptionBehavior接口。
public class LogBehavior: IInterceptionBehavior
{
public IEnumerable<Type> GetRequiredInterfaces()
{
return Type.EmptyTypes;
}
public IMethodReturn Invoke(IMethodInvocation input, GetNextInterceptionBehaviorDelegate getNext)
{
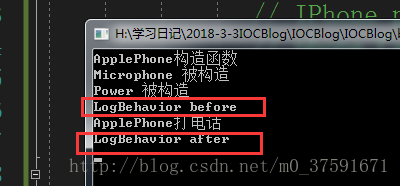
Console.WriteLine("LogBehavior before");
IMethodReturn method = getNext()(input, getNext);
Console.WriteLine("LogBehavior after");
return method;
}
public bool WillExecute
{
get { return true; }
}
}
2.在配置文件中配置:
<configuration>
  <configSections>
    <section name="unity" type="Microsoft.Practices.Unity.Configuration.UnityConfigurationSection, Unity.Configuration"/>
  </configSections>
  <unity>
    <sectionExtension type="Microsoft.Practices.Unity.InterceptionExtension.Configuration.InterceptionConfigurationExtension, Unity.Interception.Configuration"/>
    <containers>
      <container name="testContainer">
        <register type="MyInterface.IPhone,MyInterface" mapTo="MyServices.ApplePhone, MyServices"/>
        <register type="MyInterface.IPhone,MyInterface" mapTo="MyServices.AndroidPhone, MyServices" name="Android"/>
        <register type="MyInterface.IMicrophone, MyInterface" mapTo="MyServices.Microphone, MyServices"/>
        <register type="MyInterface.IHeadphone, MyInterface" mapTo="MyServices.Headphone, MyServices"/>
        <register type="MyInterface.IPower, MyInterface" mapTo="MyServices.Power, MyServices"/>
      </container>

      <container name="testContainerAOP">
        <extension type="Interception"/>
        <register type="MyInterface.IPhone,MyInterface" mapTo="MyServices.ApplePhone, MyServices">
          <interceptor type="InterfaceInterceptor"/>
          <interceptionBehavior type="Myframework.LogBehavior, Myframework"/>
          <lifetime type="transient" />
        </register>
        <register type="MyInterface.IMicrophone, MyInterface" mapTo="MyServices.Microphone, MyServices"/>
        <register type="MyInterface.IHeadphone, MyInterface" mapTo="MyServices.Headphone, MyServices"/>
        <register type="MyInterface.IPower, MyInterface" mapTo="MyServices.Power, MyServices"/>
        <register type="MyInterface.IPhone,MyInterface" mapTo="MyServices.AndroidPhone, MyServices" name="android"/>
        <register type="MyInterface.IPhone,MyInterface" mapTo="MyServices.ApplePhone, MyServices" name="apple"/>
      </container>
    </containers>
  </unity>
</configuration>
3.将Myframwork编译生成的dll拷贝到项目文件的Bin/debug文件夹。
4.在程序中使用:
 ExeConfigurationFileMap fileMap = new ExeConfigurationFileMap();
                fileMap.ExeConfigFilename = Path.Combine(AppDomain.CurrentDomain.BaseDirectory + "ConfigFiles\\Unity.Config");//找配置文件的路径
                Configuration configuration = ConfigurationManager.OpenMappedExeConfiguration(fileMap, ConfigurationUserLevel.None);
                UnityConfigurationSection section = (UnityConfigurationSection)configuration.GetSection(UnityConfigurationSection.SectionName);

                IUnityContainer container = new UnityContainer();
                section.Configure(container, "testContainerAOP");
                IPhone phone = container.Resolve<IPhone>();
                phone.Call();
5.运行效果:
原文:https://www.cnblogs.com/lonelyxmas/p/10382311.html