UITableView.03:
【1】拖入一个UITableView
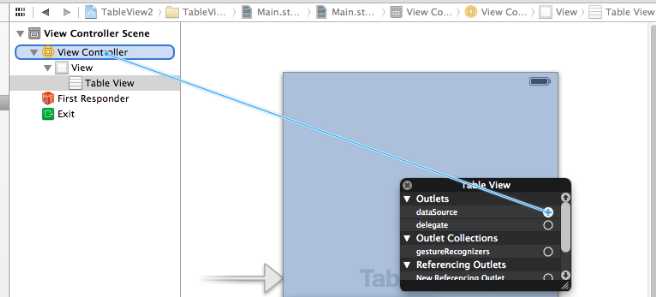
【2】将TableView的dataSource与控制器连接
【3】首先得遵循UITableView的数据源协议<UITableViewDataSource>
【4】加入图标文件
【5】代码
1.设置一共多少组,系统默认是1组,所以不写的话就默认1组
#pragma mark 返回多少组
-(NSInteger)numberOfSectionsInTableView:(UITableView *)tableView
{
    // 在这里默认是1,写与不写一样
    return 1;
}
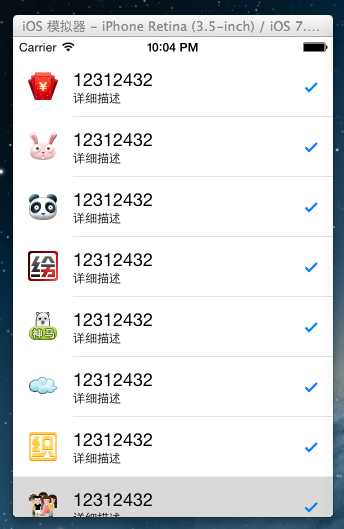
2.返回多少行,这里返回9行
#pragma mark 返回一组多少行
-(NSInteger)tableView:(UITableView *)tableView numberOfRowsInSection:(NSInteger)section
{
    return 9;
}
3.返回每一行的具体数据
下表为箭头样式
UITableViewCellAccessoryCheckmark |
 |
UITableViewCellAccessoryDetailButton |
|
UITableViewCellAccessoryDetailDisclosureButton |
|
UITableViewCellAccessoryDisclosureIndicator |
 |
UITableViewCellAccessoryNone |
表示没有 |
#pragma mark 返回具体数据
-(UITableViewCell *)tableView:(UITableView *)tableView cellForRowAtIndexPath:(NSIndexPath *)indexPath
{
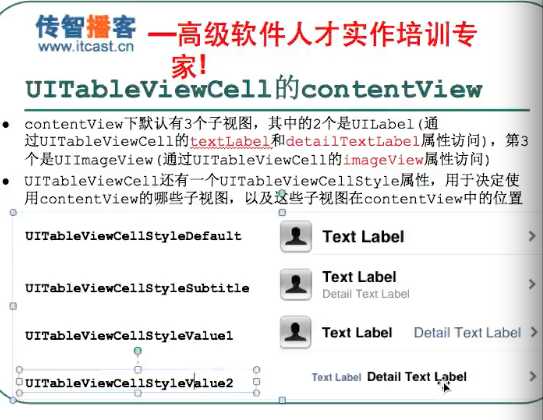
UITableViewCell *cell=[[UITableViewCell alloc]initWithStyle:UITableViewCellStyleSubtitle
reuseIdentifier:nil];
/************************设置左边图标*******************/
// 1.取出第i行所使用的图片名称
NSString *imageName=[NSString stringWithFormat:@"00%d.png",indexPath.row+1];
// 2.cell.imageView.image=上面取得的image的名字
cell.imageView.image=[UIImage imageNamed:imageName];
/***********************设置主标题*********************/
cell.textLabel.text=@"12312432";
// 设置子标题,需要在上面的UITableViewCellStyleDefault改为UITableViewCellStyleSubtitle
cell.detailTextLabel.text=@"详细描述"; //子标题内容为详细描述
// 设置cell箭头样式
cell.accessoryType=UITableViewCellAccessoryCheckmark;
return cell;
}
4.设置每一行的行高
1)加入代理
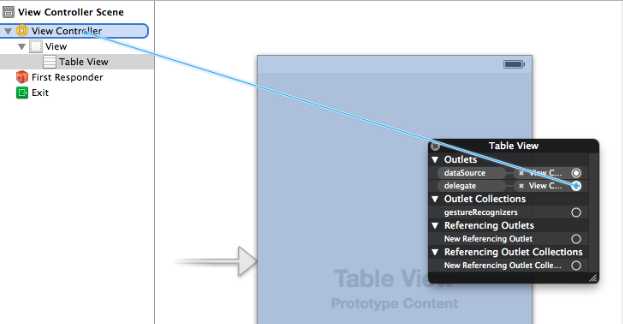
2) 添加代理协议<UITableViewDelegate>
3) 调整高度
#pragma mark- 调整每一行的高度,代理方法
-(CGFloat)tableView:(UITableView *)tableView heightForRowAtIndexPath:(NSIndexPath *)indexPath
{
    // 设置所有高度为70;
        return 60;

    // 也可以根据传入的不同内容进行不同的高度设置
    // 行数越多,高度越高
    //return 40+indexPath.row*5;
}
【UIKit】UITableView.03,布布扣,bubuko.com
原文:http://www.cnblogs.com/iflewless/p/3893242.html