像图片或者HTML文件这样的静态资源,在浏览器中打开正确的URL即可下载,只要该资源是放在应用程序的目录下,或者放在应用程序目录的子目录下,而不是放在WEB-INF下,tomcat服务器就会将该资源发送到浏览器。然而,有时静态资源是保存在应用程序目录之外,或者是保存在某一个数据库中,或者有时需要控制它的访问权限,防止其他网站交叉引用它。如果出现以上任意一种情况,都必要通过编程来发送资源。
简言之,通过编程进行的文件下载,使你可以有选择地将文件发送到浏览器。本篇博客将介绍如果通过编程把资源发送到浏览器,并通过两个案例进行示范。
为了将像文件这样的资源发送到浏览器,需要在控制器中完成以下工作:
文件下载的流程具体如下:
例如,以下代码将一个文件发送到浏览器:
        //下载文件:需要设置消息头
        response.setCharacterEncoding("UTF-8");
        response.addHeader("content-Type", "application/octet-stream");   //指定文件类型 MIME类型:二进制文件(任意文件)

        String encodeFileName = null;

        if(userAgent.contains("MSIE") || userAgent.contains("Trident") || (userAgent.contains("GECKO") && userAgent.contains("RV:11"))) {
            //处理IE浏览器下载中文文件名乱码问题
            encodeFileName = URLEncoder.encode( filename,"UTF-8");
        }else {
            encodeFileName = "=?UTF-8?B?" + new String(Base64.encodeBase64(filename.getBytes("UTF-8"))) + "?=";
            //encodeFileName = new String(filename.getBytes("UTF-8"),"ISO-8859-1");
        }

        System.out.println(filename + ":" + encodeFileName);
        //如果有换行,对于文本文件没有什么问题,但是对于其他格式:比如AutoCAD,Word,Excel等文件下载下来的文件中就会多出来一些换行符//0x0d和0x0a,这样可能导致某些格式的文件无法打开
        response.reset();
        response.addHeader("content-Disposition", "attachement;filename="+encodeFileName);  //告诉浏览器该文件以附件方式处理,而不是去解析

        //通过文件地址,将文件转换为输入流
        InputStream in = request.getServletContext().getResourceAsStream(filename);

        //通过输出流将刚才已经转为输入流的文件,输出给用户
        ServletOutputStream out= response.getOutputStream();

        byte[] bs = new byte[1000];
        int len = -1;
        while((len=in.read(bs)) != -1) {
            out.write(bs,0,len);
        }
        out.close();
        in.close();
为了编程将一个文件发送到浏览器,首先要读取该文件作为InputStream ,随后,获取HttpServletResponse的OutputStream;循环从in中读取1000个字节,写入out中,直至文件读取完毕。
注意:这里将文件转换为输入流使用的是:
request.getServletContext().getResourceAsStream(filename);
filenames指的是相对当前应用根路径下的文件。如果给定的路径是绝对路径,可以采用如下函数将文件转换为输入流:
FileInputStream in = new FileInputStream(filename) ;
将文件发送到HTTP客户端的更好方法是使用Java NIO的Files.copy()方法:
        //将文件的虚拟路径转为在文件系统中的真实路径
        String realpath = request.getServletContext().getRealPath(filename);
        System.out.print(realpath);
        Path file = Paths.get(realpath);
        Files.copy(file,response.getOutputStream());
代码更短,运行速度更快。
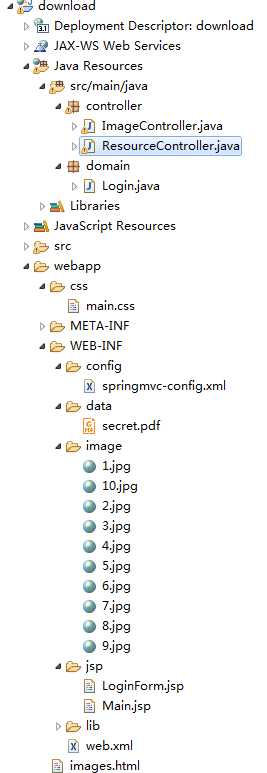
我们创建一个download应用程序,用于展示如何向浏览器发送文件。
Login类有两个属性,登录名和登录密码:
package domain;

import java.io.Serializable;

//登录实体类
public class Login  implements Serializable {
    private static final long serialVersionUID = 1L;

    //用户名
    private String userName;
    //用户密码
    private String password;

    public String getUserName() {
        return userName;
    }
    public void setUserName(String userName) {
        this.userName = userName;
    }
    public String getPassword() {
        return password;
    }
    public void setPassword(String password) {
        this.password = password;
    }
}
在这个应用程序中,由ResourceController类处理用户登录,并将一个secret.pdf文件发送给浏览器。secret.pdf文件放在/WEB-INF/data目录下,因此不能直接方法。只能得到授权的用户,才能看到它,如果用户没有登录,应用程序就会跳转到登录页面。
package controller;

import java.io.IOException;
import java.nio.file.Files;
import java.nio.file.Path;
import java.nio.file.Paths;
import javax.servlet.http.HttpServletRequest;
import javax.servlet.http.HttpServletResponse;
import javax.servlet.http.HttpSession;
import org.apache.commons.logging.Log;
import org.apache.commons.logging.LogFactory;
import org.springframework.stereotype.Controller;
import org.springframework.ui.Model;
import org.springframework.web.bind.annotation.ModelAttribute;
import org.springframework.web.bind.annotation.RequestMapping;
import domain.Login;

@Controller
public class ResourceController {

    private static final Log logger = LogFactory.getLog(ResourceController.class);

    //请求URL:/login
    @RequestMapping(value="/login")
    public String login(@ModelAttribute Login login, HttpSession session, Model model) {
        model.addAttribute("login", new Login());
        //校验用户名和密码
        if ("paul".equals(login.getUserName()) &&
                "secret".equals(login.getPassword())) {
            //设置sessopm属性"loggedIn"
            session.setAttribute("loggedIn", Boolean.TRUE);
            //校验通过 请求转发到Main.jsp页面
            return "Main";
        } else {
            //校验失败 请求转发到LoginForm.jsp页面
            return "LoginForm";
        }
    }

    //请求URL:/download-resource
    @RequestMapping(value="/download-resource")
    public String downloadResource(HttpSession session, HttpServletRequest request,
            HttpServletResponse response, Model model) {
        //如果用户没有登录
        if (session == null ||
                session.getAttribute("loggedIn") == null) {
            model.addAttribute("login", new Login());
            //请求转发到LoginForm.jsp页面 等待用户登录
            return "LoginForm";
        }
        //用户已经登录  获取待下载文件夹/WEB-INF/data在文件系统的真实路径
        String dataDirectory = request.
                getServletContext().getRealPath("/WEB-INF/data");
        //创建Path对象  文件为/WEB-INF/data/secret.pdf
        Path file = Paths.get(dataDirectory, "secret.pdf");
        //如果文件存在 下载文件
        if (Files.exists(file)) {
            //指定文件类型 pdf类型
            response.setContentType("application/pdf");
          //告诉浏览器该文件以附件方式处理,而不是去解析
            response.addHeader("Content-Disposition", "attachment; filename=secret.pdf");
            try {
                Files.copy(file, response.getOutputStream());
            } catch (IOException ex) {
            }
        }
        return null;
    }
}
控制器的第一个请求处理方法是login(),将用户请求转发到登录表单LoginForm.jsp:
<%@ taglib prefix="form" uri="http://www.springframework.org/tags/form" %>
<%@ taglib prefix="c" uri="http://java.sun.com/jsp/jstl/core" %>
<!DOCTYPE html>
<html>
<head>
<title>Login</title>
<style type="text/css">@import url("<c:url value="/css/main.css"/>");</style>
</head>
<body>
<div id="global">
<form:form modelAttribute="login" action="login" method="post">
    <fieldset>
        <legend>Login</legend>
        <p>
            <label for="userName">User Name: </label>
            <form:input id="userName" path="userName" cssErrorClass="error"/>
        </p>
        <p>
            <label for="password">Password: </label>
            <form:password id="password" path="password" cssErrorClass="error"/>
        </p>
        <p id="buttons">
            <input id="reset" type="reset" tabindex="4">
            <input id="submit" type="submit" tabindex="5"
                value="Login">
        </p>
    </fieldset>
</form:form>
</div>
</body>
</html>
当我们输入用户名"paul",密码"secret",将会成功登录,然后请求转发到Main.jsp页面,该页面包含一个链接,点击它可以将secret.pdf文件下载下来:
<%@ taglib uri="http://java.sun.com/jsp/jstl/core" prefix="c" %>
<!DOCTYPE html>
<html>
<head>
<title>Download Page</title>
<style type="text/css">@import url("<c:url value="/css/main.css"/>");</style>
</head>
<body>
<div id="global">
    <h4>Please click the link below.</h4>
    <p>
        <a href="download-resource">Download</a>
    </p>
</div>
</body>
</html>
控制器的第二个方法downloadResource(),它通过验证session属性loggedIn是否存在,来核实用户是否已经成功登录。如果找到该属性,就会将文件发送到浏览器。否则,用户就会跳转到登录页面。
main.css:

#global {
    text-align: left;
    border: 1px solid #dedede;
    background: #efefef;
    width: 560px;
    padding: 20px;
    margin: 100px auto;
}

form {
  font:100% verdana;
  min-width: 500px;
  max-width: 600px;
  width: 560px;
}

form fieldset {
  border-color: #bdbebf;
  border-width: 3px;
  margin: 0;
}

legend {
    font-size: 1.3em;
}

form label {
    width: 250px;
    display: block;
    float: left;
    text-align: right;
    padding: 2px;
}

#buttons {
    text-align: right;
}
#errors, li {
    color: red;
}
.error {
    color: red;
    font-size: 9pt;
}
下面给出springmvc-config.xml文件的所有内容:
<?xml version="1.0" encoding="UTF-8"?>
<beans xmlns="http://www.springframework.org/schema/beans"
    xmlns:xsi="http://www.w3.org/2001/XMLSchema-instance" xmlns:p="http://www.springframework.org/schema/p"
    xmlns:mvc="http://www.springframework.org/schema/mvc" xmlns:context="http://www.springframework.org/schema/context"
    xsi:schemaLocation="
        http://www.springframework.org/schema/beans
        http://www.springframework.org/schema/beans/spring-beans.xsd
        http://www.springframework.org/schema/mvc
        http://www.springframework.org/schema/mvc/spring-mvc.xsd
        http://www.springframework.org/schema/context
        http://www.springframework.org/schema/context/spring-context.xsd">

    <context:component-scan base-package="controller" />
    <mvc:annotation-driven/>
    <mvc:resources mapping="/css/**" location="/css/" />
    <mvc:resources mapping="/*.html" location="/" />

    <bean id="viewResolver"
        class="org.springframework.web.servlet.view.InternalResourceViewResolver">
        <property name="prefix" value="/WEB-INF/jsp/" />
        <property name="suffix" value=".jsp" />
    </bean>
</beans>
部署描述符(web.xml文件):
<?xml version="1.0" encoding="UTF-8"?>
<web-app version="3.1"
        xmlns="http://xmlns.jcp.org/xml/ns/javaee"
        xmlns:xsi="http://www.w3.org/2001/XMLSchema-instance"
        xsi:schemaLocation="http://xmlns.jcp.org/xml/ns/javaee
            http://xmlns.jcp.org/xml/ns/javaee/web-app_3_1.xsd">
    <servlet>
        <servlet-name>springmvc</servlet-name>
        <servlet-class>
            org.springframework.web.servlet.DispatcherServlet
        </servlet-class>
        <init-param>
            <param-name>contextConfigLocation</param-name>
            <param-value>/WEB-INF/config/springmvc-config.xml</param-value>
        </init-param>
        <load-on-startup>1</load-on-startup>
    </servlet>

    <servlet-mapping>
        <servlet-name>springmvc</servlet-name>
        <url-pattern>/</url-pattern>
    </servlet-mapping>
</web-app>
将应用程序部署到tomcat服务器,并在网页输入以下URL:
http://localhost:8008/download/login
将会看到一个表单:
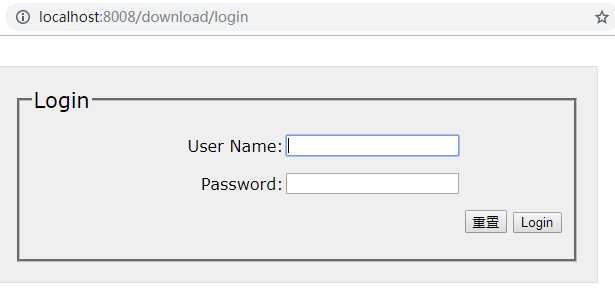
输入用户名"paul",密码"secret",将会跳转到文件下载页面:
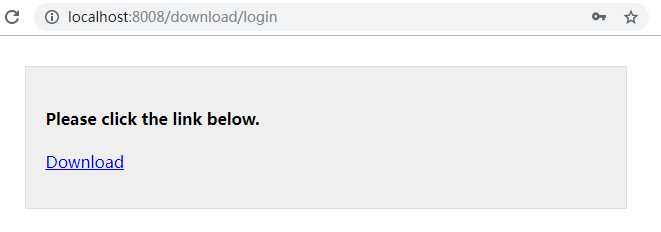
点击超链接,下载secret.pdf文件。
参考文章
原文:https://www.cnblogs.com/zyly/p/10888656.html
