做这个小程序的本意是,我曾经参加过我家乡的志愿者活动,然后加入的志愿者组织是家乡独自成立的一支
有着上千名成员的志愿者团队。因为名为蓝天高凉志愿服务队,所以起了名字叫蓝天筹,希望能做出一个为家乡服务的小程序。
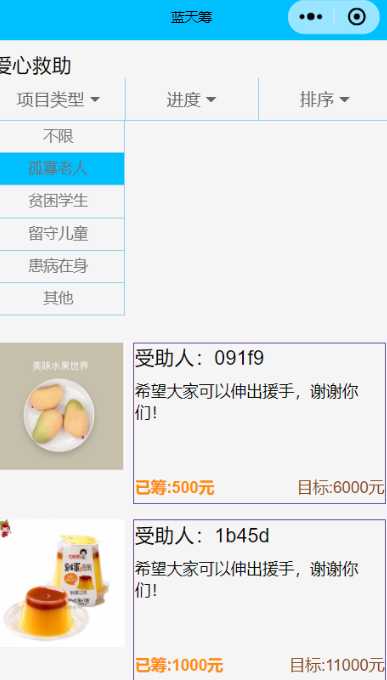
首页显示的功能:显示所有(由蓝天志愿队的会长或部长发起的众筹项目,这样确保都是经过组织上鉴定和实地考察帮助者的真实性)
首页有根据不同类型的排序功能,比如根据不同众筹项目的类型,孤寡老人,贫困学生,留守儿童等。
还有根据众筹项目的进展进度排序,有未完成,即将完成,已完成,已结束。(根据当前众筹金额与目标筹集金额做比例运算,而动态修改类型)
有根据目标筹集金额的高低排序
首页具有上拉到底加载更多的功能。
底部导航栏的第二个为添加项目(设计为只能通过管理员账号登陆实现,确保项目的真实性,必须由志愿者组织发起)
添加项目详情页则填写一些帮助者的信息,详情,上传相关图片。
首页里点击具体项目,能跳转项目详情页,能查看项目和帮助者的信息,还能查看照片。
在详情页具有我要帮帮他的按钮,(设计为模拟捐款和留言的功能)
筹集人的微信头像和昵称,还有众筹金额,留言都会显示在详情页。
技术选型:
加密:
public class PasswordEncryptor {
    //这是一个自定义的hexDigits,如果黑客不知道这串东西,是不能穷举破解出来的,知道salt也没用
    private final static String[] hexDigits = {"0", "1", "2", "3", "4", "5",
            "6", "!", "#", "@", "a", "b", "c", "d", "*", "f", "g", "F"};

    private String salt;    //salt
    private String algorithm;   //散列算法

    public PasswordEncryptor(String salt,String algorithm) {
        this.salt = salt;
        this.algorithm = algorithm;
    }

    //加密
    public String encode(String rawPassword){
        try {
            MessageDigest digest = MessageDigest.getInstance(algorithm);
            return byteArrayToHex(digest.digest(mergePasswordAndSalt(rawPassword).getBytes("UTF-8")));
        } catch (NoSuchAlgorithmException e) {
            e.printStackTrace();
        } catch (UnsupportedEncodingException e) {
            e.printStackTrace();
        }
        return null;
    }

    //合并salt + password
    private  String mergePasswordAndSalt(String rawPassword){
        if(rawPassword==null){
            rawPassword = "";
        }

        if(salt.equals("")||salt==null){
            return rawPassword;
        }else{
            return rawPassword+"{"+salt+"}";        //用特殊的方式拼接salt
        }
    }

    /**
     * 字节数组转16进制
     */

    private static String byteArrayToHex(byte[] b){
        StringBuffer stringBuffer = new StringBuffer();
        for(int i=0;i<b.length;i++){
            stringBuffer.append(byteToHex(b[i]));
        }
        return stringBuffer.toString();
    }

    private static String byteToHex(byte b){
        int n = b;
        if(n<0){
            n+=256;
        }
        int d1 = n / hexDigits.length;
        int d2 = n % hexDigits.length;

        return hexDigits[d1]+hexDigits[d2];
    }

    //初始的管理员密码
    public static void main(String[] args) {
        String salt = UUID.randomUUID().toString();
        PasswordEncryptor encoderMd5 = new PasswordEncryptor(salt, "sha-256");
        String encodedPassword = encoderMd5.encode("csyzhanpeng123456");
        System.out.println("加密后密码:" + encodedPassword + "\n密码长度:" + encodedPassword.length());
        System.out.println("salt:" + salt);
    }
}
前后端校验
@Service
public class UserPasswordServiceImpl implements UserPasswordService {
    @Autowired
    private SysAdminMapper sysAdminMapper;

    @Override
    public boolean isValid(String username, String password) {
        SysAdminExample example = new SysAdminExample();
        example.or().andUsernameEqualTo(username);
        List<SysAdmin> admins = sysAdminMapper.selectByExample(example);

        SysAdmin sysAdmin = new SysAdmin();

        //说明找到了这个username,后面就是检测密码
        if(admins!=null&&admins.size()!=0){
            sysAdmin = admins.get(0);

            //校验
            PasswordEncryptor encryptor = new PasswordEncryptor(sysAdmin.getSalt(), "sha-256");
            String encodePassword = encryptor.encode(password);

            if(encodePassword.equals(sysAdmin.getPassword())){
                return true;
            }else{
                return false;
            }
        }else{
            return false;
        }
    }
}salt+password参考链接:http://www.cnblogs.com/xiaochangwei/p/5942456.html
前端通过存在本地缓存,缓存管理员的登陆态。
通过在page的onShow生命周期,通过判断缓存,来达到拦截页面(检测是否具有权限)
  onShow:function(e){
    let that = this;
    wx.getStorage({
      key: 'login_key',
      success: function(res) {
        wx.request({
          url: baseUrl + 'item/itemTypes',
          method: "GET",
          success: function (res) {
            console.log(res);
            that.setData({
              itemTypes: res.data.extend.itemTypes
            })
          }
        })
      },
      fail:function(){
        wx.navigateTo({
          url: '../login/login',
        })
      }
    })

  },
formSubmit: function (e) {
wx.showLoading({
title: '登录中...',
})
console.log(e);
this.setData({ disabled: true });
wx.request({
url: baseUrl+"login",
method:"POST",
data: {
username: e.detail.value.no,
password: e.detail.value.pwd
},
header: {
'content-type': 'application/x-www-form-urlencoded'
},
success: function (res) {
console.log(res);
if (res.data.code == 200) {
// 设置本地缓存
wx.setStorageSync('login_key', res.data.extend.login_key);
wx.showToast({
title: "管理员登录成功",
icon: 'success',
duration: 2000
})
setTimeout(function () {
wx.switchTab({
url: '../add/add',
})
}, 2000)
} else {
wx.showToast({
title: "用户名或密码错误",
icon: 'none',
duration: 2000
})
}
}
})
},
功能:三级级联菜单 项目类型 + 项目进度情况 + 按目标筹集金额从低到高(从高到低)
总结:
下拉小按钮
/* 这里的icon用border渲染出来,而不是用字体图标 */

.icon{
  margin-left: 10rpx;
  margin-top: 16rpx;
  display: inline-block;

  border: 10rpx solid transparent;
  border-top: 10rpx solid #666;
}
效果:

参考链接:https://www.cnblogs.com/pssp/p/5884956.html
下拉多选菜单
思路:用大view包小view,通过点击状态和 标志记录位来 打开(使下拉菜单显示), 当选中其中一个或者再点
一次按钮时,将会切换打开状态或者关闭下拉菜单
核心:切换 ,记录打开状态位,通过点击事件进行状态位切换(这里的状态位为下拉导航索引)。前端根据状态位判断是否渲染出来
  data:{
    //筹集项目列表
    items:[],
    // 筹集项目类型
    itemTypes:[],

    // 进度类型
    processTypes:[],

    //排序类型
    sortTypes:[
      { id: 1, sortTypeName:"按目标金额从低到高"},
      { id: 2, sortTypeName: "按目标金额从高到低"}
    ],

    // 选中的项目类型
    selectItemType:-1,

    // 选中的进度类型
    selectProcessType:-1,

    // 选中的排序类型
    selectSortType:-1,

    // 显示下拉菜单导航索引
    showNavIndex:0,

    // 各类型菜单打开(滑动))状态
    itemTypeOpen:false,

    processOpen:false,

    sortOpen:false
这里只写其中的项目下拉菜单的显示
下拉菜单触发按钮
    <view class="nav-child" bindtap='listItemType' data-nav="1">
      <view class='content'>项目类型</view>
      <view class="icon"></view>
    </view>
下拉菜单条目
  <view class="itemTypeMenu {{itemTypeOpen? 'slidown':'slidup'}}"
        wx:if='{{showNavIndex==1}}' wx:for-index="index">
    <view class="itemType" bindtap='selectItemType' data-itemTypeId='-1'>
      不限
    </view>
    <view class="itemType {{selectItemType==(index+1)?'highlight':''}}" wx:for="{{itemTypes}}" wx:for-item="itemType" wx:key="itemTypeId"
      data-itemTypeId="{{itemType.itemTypeId}}"
      bindtap='selectItemType'
    >
      {{itemType.itemTypeName}}
    </view>
  </view>
点击事件的处理逻辑:
  listItemType:function(e){
    console.log(this.data.itemTypeOpen)
    // 如果已经打开了,再按一次就是关闭。
    if (this.data.itemTypeOpen){
      this.setData({
        itemTypeOpen: false,
        showNavIndex:0
      })
    }else{
      this.setData({
        itemTypeOpen: true,
          //切换 要显示的菜单导航
        showNavIndex:e.currentTarget.dataset.nav
      })
    }
  },
选中事件的处理逻辑:
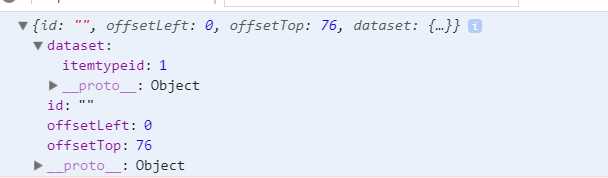
  selectItemType: function (e) {
    console.log(e.currentTarget)
    // 注意;这里的data-传过来的属性会自动换成小写
    let id = e.currentTarget.dataset.itemtypeid;

    if (id == -1) {
      this.setData({
        // 不限,也就是提交的这个筛选条件为空
        selectItemType: -1,
        itemTypeOpen: false,
        showNavIndex: 0
      })
    } else {
      this.setData({

        selectItemType: id,
        itemTypeOpen: false,
        showNavIndex: 0
      })
    }

    let that = this;

    // 找出符合条件的items
    that.request_findItem(that);
  },
根据条件,查询符合的项目
  // 封装一个根据条件查询得请求函数
  request_findItem:function(that){
    wx.request({
      url: baseUrl + 'item/findItems',
      data: {
        itemType: that.data.selectItemType,
        itemProcessType: that.data.selectProcessType,
        sortType: that.data.selectSortType
      },
      method: "GET",
      success: function (res) {
        that.setData({
          items: res.data.extend.items
        })
      }
    })
  }
总结:
选中高亮的实现原理:判断Id与列表渲染的索引index是否匹配。如果匹配了就渲染高亮class
    <view class="itemType
                 {{selectItemType==(index+1)?'highlight':''}}"
          wx:for="{{itemTypes}}" wx:for-item="itemType" wx:key="itemTypeId"
      data-itemTypeId="{{itemType.itemTypeId}}"
      bindtap='selectItemType'
    >
不设置筛选条件,菜单条目为 不限,通过设置为-1来让后端根据-1 做条件的判断
    @Override
    public List<RaiseItem> getItemsByType(FindItemDTO dto) {
        RaiseItemExample example = new RaiseItemExample();

        RaiseItemExample.Criteria criteria = example.or();

        Integer itemType = dto.getItemType();
        Integer itemProcessType = dto.getItemProcessType();
        if(itemType!=-1){
            criteria.andItemTypeEqualTo(itemType);
        }

        if(itemProcessType!=-1){
            criteria.andItemProcessTypeEqualTo(itemProcessType);
        }

        Integer sortType = dto.getSortType();

        if(sortType!=-1){
            if(sortType.equals(1)){
                example.setOrderByClause("raise_target ASC");
            }else if(sortType.equals(2)){
                example.setOrderByClause("raise_target DESC");
            }
        }
        return raiseItemMapper.selectByExample(example);
    }
效果演示:

参考链接:https://blog.csdn.net/u012927188/article/details/73369201/
思路 :
后端返回分页数据
小程序:
加载更多组件
?
?
?
?
? ```
   /* 上拉加载更多 */

   .weui-loading {
     margin: 0 5px;
     width: 20px;
     height: 20px;
     display: inline-block;
     vertical-align: middle;
     -webkit-animation: weuiLoading 1s steps(12, end) infinite;
     animation: weuiLoading 1s steps(12, end) infinite;
       /* base64的格式 */
     background: transparent url(data:image/svg+xml;base64,PHN2ZyB4bWxucz0iaHR0cDovL3d3dy53My5vcmcvMjAwMC9zdmciIHdpZHRoPSIxMjAiIGhlaWdodD0iMTIwIiB2aWV3Qm94PSIwIDAgMTAwIDEwMCI+PHBhdGggZmlsbD0ibm9uZSIgZD0iTTAgMGgxMDB2MTAwSDB6Ii8+PHJlY3Qgd2lkdGg9IjciIGhlaWdodD0iMjAiIHg9IjQ2LjUiIHk9IjQwIiBmaWxsPSIjRTlFOUU5IiByeD0iNSIgcnk9IjUiIHRyYW5zZm9ybT0idHJhbnNsYXRlKDAgLTMwKSIvPjxyZWN0IHdpZHRoPSI3IiBoZWlnaHQ9IjIwIiB4PSI0Ni41IiB5PSI0MCIgZmlsbD0iIzk4OTY5NyIgcng9IjUiIHJ5PSI1IiB0cmFuc2Zvcm09InJvdGF0ZSgzMCAxMDUuOTggNjUpIi8+PHJlY3Qgd2lkdGg9IjciIGhlaWdodD0iMjAiIHg9IjQ2LjUiIHk9IjQwIiBmaWxsPSIjOUI5OTlBIiByeD0iNSIgcnk9IjUiIHRyYW5zZm9ybT0icm90YXRlKDYwIDc1Ljk4IDY1KSIvPjxyZWN0IHdpZHRoPSI3IiBoZWlnaHQ9IjIwIiB4PSI0Ni41IiB5PSI0MCIgZmlsbD0iI0EzQTFBMiIgcng9IjUiIHJ5PSI1IiB0cmFuc2Zvcm09InJvdGF0ZSg5MCA2NSA2NSkiLz48cmVjdCB3aWR0aD0iNyIgaGVpZ2h0PSIyMCIgeD0iNDYuNSIgeT0iNDAiIGZpbGw9IiNBQkE5QUEiIHJ4PSI1IiByeT0iNSIgdHJhbnNmb3JtPSJyb3RhdGUoMTIwIDU4LjY2IDY1KSIvPjxyZWN0IHdpZHRoPSI3IiBoZWlnaHQ9IjIwIiB4PSI0Ni41IiB5PSI0MCIgZmlsbD0iI0IyQjJCMiIgcng9IjUiIHJ5PSI1IiB0cmFuc2Zvcm09InJvdGF0ZSgxNTAgNTQuMDIgNjUpIi8+PHJlY3Qgd2lkdGg9IjciIGhlaWdodD0iMjAiIHg9IjQ2LjUiIHk9IjQwIiBmaWxsPSIjQkFCOEI5IiByeD0iNSIgcnk9IjUiIHRyYW5zZm9ybT0icm90YXRlKDE4MCA1MCA2NSkiLz48cmVjdCB3aWR0aD0iNyIgaGVpZ2h0PSIyMCIgeD0iNDYuNSIgeT0iNDAiIGZpbGw9IiNDMkMwQzEiIHJ4PSI1IiByeT0iNSIgdHJhbnNmb3JtPSJyb3RhdGUoLTE1MCA0NS45OCA2NSkiLz48cmVjdCB3aWR0aD0iNyIgaGVpZ2h0PSIyMCIgeD0iNDYuNSIgeT0iNDAiIGZpbGw9IiNDQkNCQ0IiIHJ4PSI1IiByeT0iNSIgdHJhbnNmb3JtPSJyb3RhdGUoLTEyMCA0MS4zNCA2NSkiLz48cmVjdCB3aWR0aD0iNyIgaGVpZ2h0PSIyMCIgeD0iNDYuNSIgeT0iNDAiIGZpbGw9IiNEMkQyRDIiIHJ4PSI1IiByeT0iNSIgdHJhbnNmb3JtPSJyb3RhdGUoLTkwIDM1IDY1KSIvPjxyZWN0IHdpZHRoPSI3IiBoZWlnaHQ9IjIwIiB4PSI0Ni41IiB5PSI0MCIgZmlsbD0iI0RBREFEQSIgcng9IjUiIHJ5PSI1IiB0cmFuc2Zvcm09InJvdGF0ZSgtNjAgMjQuMDIgNjUpIi8+PHJlY3Qgd2lkdGg9IjciIGhlaWdodD0iMjAiIHg9IjQ2LjUiIHk9IjQwIiBmaWxsPSIjRTJFMkUyIiByeD0iNSIgcnk9IjUiIHRyYW5zZm9ybT0icm90YXRlKC0zMCAtNS45OCA2NSkiLz48L3N2Zz4=) no-repeat;
     background-size: 100%;
   }
   .weui-loadmore {
     width: 65%;
     margin: 1.5em auto;
     line-height: 1.6em;
     font-size: 14px;
     text-align: center;
   }

   .weui-loadmore__tips {
     display: inline-block;
     vertical-align: middle;
   }
     onReachBottom:function(){
       let that = this;
       // 模拟延时,显示加载更多
         // wx.request({
         //   url: baseUrl+'',
         // })
         // that.setData({

         // })
       let isLastPage = that.data.pageInfo.isLastPage;

       // 不是最后一页,才要请求分页
       if (!isLastPage){
         setTimeout(() => {
           // 判断一下这个触底是常规触底,还是带着条件的触底事件
           let f1 = that.data.selectItemType;
           let f2 = that.data.selectProcessType;
           let f3 = that.data.selectSortType;
           if (f1 != -1 || f2!=-1 || f3!=-1){
             // 带条件查询 (其实带条件和不带条件其实在后端可以合并为一个接口的))
             wx.request({
               url: baseUrl + 'item/findItems',
               data: {
                 itemType: that.data.selectItemType,
                 itemProcessType: that.data.selectProcessType,
                 sortType: that.data.selectSortType,
                 pn: that.data.pageInfo.pageNum + 1
               },
               method: "GET",
               success: function (res) {
                 let oldItems = that.data.items;
                 let newItems = res.data.extend.pageInfo.list;
                 let pageInfo = res.data.extend.pageInfo;
                 // concat拼接后返回一个新的数组
                 newItems = oldItems.concat(newItems);
                 that.setData({
                   pageInfo: pageInfo,
                   items: newItems,
                   isHideLoadMore: pageInfo.isLastPage ? true : false
                 })
               }
             })
           }else{
              // 不带条件查询
             wx.request({
               url: baseUrl + 'item/all',
               data: {
                 pn: that.data.pageInfo.pageNum + 1
               },
               method: "GET",
               success: function (res) {
                 let oldItems = that.data.items;
                 let newItems = res.data.extend.pageInfo.list;
                 // concat拼接后返回一个新的数组
                 newItems = oldItems.concat(newItems);
                 let pageInfo = res.data.extend.pageInfo;
                 that.setData({
                   pageInfo: pageInfo,
                   items: newItems,
                   isHideLoadMore: pageInfo.isLastPage ? true : false
                 })
               }
             })
           }
         }, 1000);
       }
     }
后端返回分页
//    获取所有的项目基本信息
    @RequestMapping(value = "/all",method = RequestMethod.GET)
    @ResponseBody
    public Msg getAllItems(@RequestParam(value = "pn",defaultValue = "1") Integer page_num){
        PageHelper.startPage(page_num,5);

        List<RaiseItem> items = raiseItemService.getAllItems();

        PageInfo<RaiseItem> pageInfo = new PageInfo<>(items);
        return Msg.success().add("pageInfo",pageInfo);
    }
// 根据类型来查询符合的项目
@RequestMapping(value = "/findItems",method = RequestMethod.GET)
@ResponseBody
public Msg findItems(@RequestParam(value = "pn",defaultValue = "1") Integer page_num,FindItemDTO dto){
// 开始分页
PageHelper.startPage(page_num,5);
List<RaiseItem> items = raiseItemService.getItemsByType(dto);
PageInfo<RaiseItem> pageInfo = new PageInfo<>(items);
return Msg.success().add("pageInfo",pageInfo);
}效果:

加载完成后:

普通表单UI
文件(图片)上传UI
长按图片删除的操作
参考链接:https://www.jb51.net/article/140388.htm
参考JS语法:
splice() 方法向/从数组中添加/删除项目,然后返回被删除的项目。
注释:该方法会改变原始数组。
arrayObject.splice(index,howmany,item1,.....,itemX)| 参数 | 描述 |
|---|---|
| index | 必需。整数,规定添加/删除项目的位置,使用负数可从数组结尾处规定位置。 |
| howmany | 必需。要删除的项目数量。如果设置为 0,则不会删除项目。 |
| item1, ..., itemX | 可选。向数组添加的新项目。 |
| 类型 | 描述 |
|---|---|
| Array | 包含被删除项目的新数组,如果有的话。 |
data: {
        Data: [{id:0,value:'a',name:'A' },{id:1,value:'b',name:'B' }],
        Index: 0,
      currentId
    },
对象数组的下拉菜单的使用
<picker class="picker" bindchange="bindChange" value="{{Index}}"  range="{{Data}}" range-key="name">
    <view >
      当前选择:{{Data[Index].name}}
    </view>
</picker>
itemTypePickerChange:function(e){
this.setData({
Index:e.detail.value
})
},编写基础的wxml,wxss,js,获取item表和detail表的基础信息,布局用flex嵌套flex合理布局
效果如下:


这个按钮悬浮固定在底部的实现:
```css
/* 按钮固定高为46px */
.detail_box{
margin-bottom: 92rpx;
}
/* 固定在底部,这样可以避免内容区的内容过多,让按钮一直看不到 */
.chou_button{

 z-index: 999;
    position: fixed;
    bottom: 0;
    width: 100%;
  }
```效果:

  <!-- 筹集人的名单列表 -->
  <view class="raise_person_box">
    <view class="raise_person_title">
    捐助人名单
  </view>
    <view wx:for="{{persons}}" wx:for-key="person.item_person_id" wx:for-item="person" class="raise_person_item">
      <view class="raise_person_item_left">
        <view class="index_pic">
          <image src="{{person.userAvatarUrl}}"></image>
        </view>
      </view>
      <view class="raise_person_item_right">
        <view class="raise_person_item_right_top">
          {{person.userNickName}}
        </view>
        <view class="raise_person_item_right_mid">
          支持了: <text class="mid_money">{{person.raiseMoney}} 元</text>
        </view>
        <view class="raise_person_item_right_bottom">
          {{person.comment}}
        </view>
        <view class="raise_person_item_right_time">
          {{person.raiseTime}}
        </view>
      </view>
    </view>
  </view>
总结:html页面用了flex嵌套布局吧
js部分:onShow()用于获取捐助人名单+留言信息
    wx.request({
      url: baseUrl + 'item/person',
      data:{
        itemId: that.data.itemId,
      },
      method: "GET",
      success: function (res) {

        //调用 处理留言时间的函数,修改返回的数据
        let list = res.data.extend.pageInfo.list;
        for (let i=0;i<list.length;i++){
          let last_time = timeHandle(list[i].raiseTime)
          list[i].raiseTime = last_time;
        }

        that.setData({
          persons: list,
        })
      }
    })
此处要提的是一个特殊的常用需求:就是根据返回的时间戳计算出几天前,几个月前,又或者是具体的月份,年份
js部分:用了一个专门的函数放在单独的js文件,放在utils目录下,被其他的js import引入使用
function commentTimeHandle(dateStr) {
  // dateStr = 2018-09-06 18:47:00" 测试时间
   //获取dataStr的秒数  打印结果--1536230820000
  var publishTime = dateStr / 1000,
    date = new Date(publishTime * 1000), //获取dateStr的标准格式 console.log(date) 打印结果  Thu Sep 06 2018 18:47:00 GMT+0800 (中国标准时间)
    // 获取date 中的 年 月 日 时 分 秒
    Y = date.getFullYear(),
    M = date.getMonth() + 1,
    D = date.getDate(),
    H = date.getHours(),
    m = date.getMinutes(),
    s = date.getSeconds();
  // 对 月 日 时 分 秒 小于10时, 加0显示 例如: 09-09 09:01
  if (M < 10) {
    M = '0' + M;
  }
  if (D < 10) {
    D = '0' + D;
  }
  if (H < 10) {
    H = '0' + H;
  }
  if (m < 10) {
    m = '0' + m;
  }
  if (s < 10) {
    s = '0' + s;
  }
  // console.log("年", Y); // 年 2018
  // console.log("月", M); // 月 09
  // console.log("日", D); // 日 06
  // console.log("时", H); // 时 18
  // console.log("分", m); // 分 47
  // console.log("秒", s); // 秒 00

  //获取此时此刻日期的秒数
  var nowTime = new Date().getTime() / 1000,
    diffValue = nowTime - publishTime,  // 获取此时 秒数 与 要处理的日期秒数 之间的差值

    // 一天86400秒 获取相差的天数 取整
    diff_days = parseInt(diffValue / 86400),

    // 一时3600秒
    diff_hours = parseInt(diffValue / 3600),
    diff_minutes = parseInt(diffValue / 60),
    diff_secodes = parseInt(diffValue);

  if (diff_days > 0 && diff_days < 3) {  //相差天数 0 < diff_days < 3 时, 直接返出
    return diff_days + "天前";
  } else if (diff_days <= 0 && diff_hours > 0) {
    return diff_hours + "小时前";
  } else if (diff_hours <= 0 && diff_minutes > 0) {
    return diff_minutes + "分钟前";
  } else if (diff_secodes < 60) {
    if (diff_secodes <= 0) {
      return "刚刚";
    } else {
      return diff_secodes + "秒前";
    }
  } else if (diff_days >= 3 && diff_days < 30) {
    return M + '-' + D + ' ' + H + ':' + m;
  } else if (diff_days >= 30) {
    return Y + '-' + M + '-' + D + ' ' + H + ':' + m;
  }
}
module.exports = {
  timeHandle: commentTimeHandle
}
如何使用:在JS里引入这个JS文件的函数
import { timeHandle } from '../../utils/timehandle';分页后端:
//    获取筹集人列表
    @RequestMapping(value = "/person",method = RequestMethod.GET)
    @ResponseBody
    public Msg getPersons(@RequestParam(value = "pn",defaultValue = "1")Integer page_num, Integer itemId){
        PageHelper.startPage(page_num,5);
        List<RaiseItemPerson> persons = raiseItemService.getRaisePersons(itemId);
        PageInfo<RaiseItemPerson> pageInfo = new PageInfo<>(persons);

        return Msg.success().add("pageInfo",pageInfo);
}? 总结:
? 获取到用户头像,昵称 (可在一个按钮绑定两个事件,一个用来获取用户信息,一个用来发出请求)
<button open-type='getUserInfo' type='primary' bindgetuserinfo="bindGetUserInfo" bindtap='donate'>我要帮帮他</button> //获取用户信息
bindGetUserInfo: function (e) {
console.log(e.detail.userInfo)
this.setData({
userNickName: e.detail.userInfo.nickName,
userAvatarUrl: e.detail.userInfo.avatarUrl
})
}效果:

总结:就是通过按钮点击切换模态框的显示,然后在模态框里模拟微信支付功能以及添加留言
  <!-- modal支付模态框 -->
    <modal id="modal" hidden="{{hiddenmodal}}" title="支付页面" confirm-text="确定" cancel-text="取消" bindcancel="cancel" bindconfirm="confirm">
      <text style="font-weight:bolder;font-size:35rpx">捐助金额:</text> <input type='text' placeholder="请填写资助金额" class='weui-input' bindinput="bindKeyInput" auto-focus/>
      <text style="font-weight:bolder;font-size:35rpx">留言:</text> <input type='text' placeholder="留言" class='weui-input brief_description' bindinput="bindKeyComment"></input>
  </modal>
confirm:function(){
let openId = getApp().globalData.openId;
console.log("openId: " + openId);
let that = this;
wx.request({
url: baseUrl+'item/donate',
data:{
donate_money: that.data.donate_money,
itemId: that.data.itemId,
comment: that.data.comment,
openId: openId,
userNickName:that.data.userNickName,
userAvatarUrl: that.data.userAvatarUrl
},
method:"POST",
header:{
"content-type": "application/x-www-form-urlencoded"
},
success:function(res){
that.setData({
comment: "",
donate_money: "",
hiddenmodal: true,
hiddenmodal:true
})
// 发起请求
wx.request({
url: baseUrl + 'item/detail',
data: {
itemId: that.data.itemId
},
success: function (res) {
if (res.data.code == 200) {
that.setData({
currentTarget: res.data.extend.detail.currentTarget,
raisePersonNum: res.data.extend.detail.raisePersonNum,
})
}
}
})
}
})
} cancel:function(){
this.setData({
donate_money:"",
comment:"",
hiddenmodal: true,
})
},
//此处省略其他input的处理事件总结:
    // 发送首页图片。对应首页图片的处理
    wx.uploadFile({
      url: baseUrl + 'item/imageIndex',
      filePath: files[0],
      name: 'img',
      header:{
        'content-type':'application/json'
      },
      success: function (res) {

        console.log("res: "+res.data);
        // 微信小程序 uploadFile的坑是接收的是JSON字符串,不会帮你自动转JS对象。所以需要自己解析data
        let data = JSON.parse(res.data);


        //获取返回值
        that.setData({
          server_file_index: data.extend.file_index_path
        })
      }
    })
点击提交按钮,图片如何处理
分成两个接口,一个是首页图片,另一个是详情多个图片urls.把文件名存放在数据库中
  add_submit:function(){
    let that = this;

    let item_index = that.data.Index;


    // 先上传图片,后端处理成功后(通过返回值包含了首页图片路径,
    //以及多个图片展示的路径)回调进行insert
    let files = that.data.files;

    // 发送首页图片。对应首页图片的处理
    wx.uploadFile({
      url: baseUrl + 'item/imageIndex',
      filePath: files[0],
      name: 'img',
      header:{
        'content-type':'application/json'
      },
   success: function (res) {

          console.log("res: " + res.data);
          // 微信小程序 uploadFile的坑是接收的是JSON字符串,不会帮你自动转JS对象。所以需要自己解析data
          let data = JSON.parse(res.data);


          //获取返回值
          that.setData({
            server_file_index: data.extend.file_index_path
          })


          //等server_file_index成功获取后再执行下面的add操作
          let i;
          //循环发送多个详情的图片
          for (i = 1; i < files.length; i++) {
            // 采用闭包,保证索引值正确
            (function (i) {
              //调用promise处理异步
              that.GetImage(i, that).then((index) => {
                //最后一张处理完成
                if (that.data.server_detail_files.length == (that.data.files.length - 1)) {
                  console.log("开始执行提交add");
                  console.log("index: " + index);
                  console.log("server_detail_file:" + that.data.server_detail_file);
                  // 提交插入请求
                  wx.request({
                    url: baseUrl + '/item/add',
                    method: 'POST',
                    header: {
                      "content-type": "application/x-www-form-urlencoded"
                    },
                    data: {
                      targetPerson: name,
                      itemDescription: description,
                      raiseTarget: money,
                      itemType: that.data.itemTypes[that.data.Index].itemTypeId,
                      createTime: date,
                      description: detail_description,

                      picIndexUrl: that.data.server_file_index,
                      picDetailUrls: that.data.server_detail_files.join(',')
                    },
                    success: function (res) {
                      if (res.data.code == 200) {
                        // 清空
                        that.setData({
                          targetPerson: "",
                          itemDescription: "",
                          raiseTarget: "",
                          Index: 0,
                          date: "",
                          detail_description: "",
                          server_file_index: "",
                          server_detail_files: "",
                          files: ""
                        })
                        wx.switchTab({
                          url: '/pages/index/index',
                        })
                      }

                    }
                  })
                }
              });
            })(i)
          }
        }

}基础补习之闭包:
因为for循环,的索引index不会从1,2,3这样,而是执行完了,显示最后一个索引值。需要闭包控制一下。

演示:

文本测试:
18岁花季少女突发心脏病。急需救助!
小红成绩优异,家里经济贫困,在石鼓镇。父母残疾,只能在家里下田。小红下课后就回家做饭做菜给他们吃,自己暑假出去打工赚学费。学校老师说她的成绩非常好,是年级前三的学生,模拟成绩很可能考上211学校。
该案例已经过蓝天志愿组织实地考察,经多名志愿者核实,情况属实。希望大家能给予帮助,奉献大爱。
1. 微信小程序 uploadFile的坑是接收的是JSON字符串,不会帮你自动转JS对象。所以需要自己解析data
for循环里有异步请求,想要for里面的异步请求都执行完再执行其他的怎么做?
异步请求:
//   promise
  GetImage:function(i,that){
    console.log("当前循环:"+i);
    return new Promise(function (resolve, reject) {
      wx.uploadFile({
        url: baseUrl + '/item/images',
        filePath: that.data.files[i],
        name: 'img',
        success: (res) => {
          // console.log("这是第"+i+"次循环")
          console.log(that.data);

          //先拿到旧的
          var server_detail_files = that.data.server_detail_files;
          console.log("server_detail_files" + server_detail_files);

          //服务端返回的
          let data = JSON.parse(res.data);
          let files_detail_path = data.extend.files_detail_path;
          console.log("files_detail_path:" + files_detail_path)

          //如果是拼的第一个,加入数组
          console.log("server_detail_files:" + server_detail_files)
          //push是在原数组上操作,并返回新的长度。
          server_detail_files.push(files_detail_path);
          //获取返回值
          that.setData({
            server_detail_files: server_detail_files
          })
          resolve(server_detail_files);
        }
      })
    })
  }
for循环里异步,并且通过判断i==要执行下一步的值去执行add请求
      //循环发送多个详情的图片
      for (i = 1; i < files.length; i++) {
        // 采用闭包,保证索引值正确
        (function (i) {
            //调用promise处理异步
          that.GetImage(i,that).then(()=>{
            //最后一张处理完成
            console.log("i: "+i);
              //在then里判断是否是最后一张图片,从而达到完成所有的for循环后再执行这个提交插入的请求
            if (that.data.server_detail_files.length == (that.data.files.length-1))              {
              // 提交插入请求
              wx.request({
                url: baseUrl + '/item/add',
                method: 'POST',
                header:{
                  "content-type":"application/x-www-form-urlencoded"
                },
                data: {
                  targetPerson: name,
                  itemDescription: description,
                  raiseTarget: money,
                  itemType: that.data.itemTypes[that.data.Index].itemTypeId,
                  createTime: date,
                  description: detail_description,

                  picIndexUrl: that.data.server_file_index,
                  picDetailUrls: that.data.server_detail_files.join(',')
                },
                success: function (res) {
                  if (res.code == 200) {
                    // 清空
                    that.setData({
                      targetPerson: "",
                      itemDescription: "",
                      raiseTarget: "",
                      Index: 0,
                      date: "",
                      detail_description: "",
                      server_file_index: "",
                      server_detail_files: "",
                      files: ""
                    })
                    wx.navigateTo({
                      url: 'pages/index/index',
                    })
                    return;
                  }

                }
              })
            }
          });
        })(i)
      }
如果微信小程序使用post请求,后端没数据的话,说明小程序没有设置header为
        header: {
          'content-type': 'application/json'
},PowerDesigner的使用
安装: https://blog.csdn.net/sinat_34104446/article/details/79885141
sys_admin:
| id | username | password | salt |
|---|---|---|---|
| 1 | zhanp | @gd5@a6#ca1f5b@30@3a@2bcc#5F0b0f40@f@5a6@1!a4a5b6b0F1#b1!0a1cfa2 | d4171b48-fca9-45b1-9bb7-716ea057aa25 |
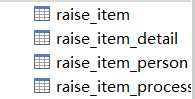
raise_item:
| item_id | target_person | raise_target | current_target | raise_person_num | pic_index_url | item_description | item_type_id | item_process_type_id |
|---|---|---|---|---|---|---|---|---|
| 1 | 小江 | 5000 | 1000 | 60 | http://localhost/image/po1.jpg | xxxx加油,战胜病魔 | 1 | 1 |
| 2 | 小洋 | 6000 | 2000 | 70 | http://localhost/image/po2.jpg | xxx加油,努力读书 | 2 | 2 |
item_process_type
| item_process_type_id | item_process_type_name |
|---|---|
| 1 | 未完成 |
| 2 | 即将完成 |
| 3 | 已完成 |
| 4 | 已结束 |
(已结束是时间已过,该项目取消筹款了)
raise_item_type
| item_type_id | item_type_name |
|---|---|
| 1 | 孤寡老人 |
| 2 | 贫困学生 |
| 3 | 留守儿童 |
| 4 | 患病在身 |
| 5 | 其他 |
raise_item_detail
| item_detail_id | item_id | description | pic_detail_urls | create_time |
|---|---|---|---|---|
raise_item_process (一个项目可以有多次进展)
| item_process_id | item_id | pic_process_urls | description | |
|---|---|---|---|---|
| 1 | 1 | |||
| 2 | 1 |
raise_item_person
| item_person_id | item_id | user_avatar_url | user_nick_name | raise_money | comment | raise_time | open_id |
|---|---|---|---|---|---|---|---|
后续还有排行榜
单元测试模拟数据的过程中遇到的bug
<!--在spring单元测试中,由于引入validator而导致的Tomcat7及以下的EL表达式版本不一致-->
<dependency>
    <groupId>org.apache.tomcat</groupId>
    <artifactId>tomcat-el-api</artifactId>
    <version>8.5.24</version>
    <scope>provided</scope>
</dependency>
<dependency>
    <groupId>org.apache.tomcat</groupId>
    <artifactId>tomcat-jasper-el</artifactId>
    <version>8.5.24</version>
    <scope>provided</scope>
</dependency>
报错:

解决方法:因为@ResponseBody,但是底层的jackson忘记引入了
<!--jackson支持-->
<dependency>
    <groupId>com.fasterxml.jackson.core</groupId>
    <artifactId>jackson-databind</artifactId>
    <version>2.9.8</version>
</dependency>
    <context-param>
        <param-name>log4jConfigLocation</param-name>
        <param-value>classpath*:log/log4j.properties</param-value>
    </context-param>
    <listener>
        <description>log4j</description>
        <listener-class>org.springframework.web.util.Log4jConfigListener</listener-class>
</listener>一定要仔细看报错的部分,会显示哪一行报错,不要自己瞎找。不然改一天你都不知道哪里错。
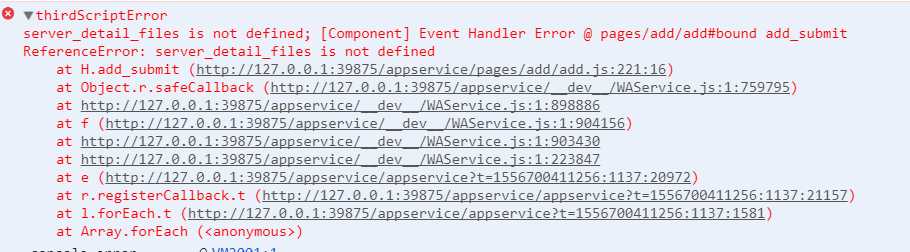
指示add.js 221行错了
测试:

为什么服务器端的mysql一直连不上去?
因为root只允许localhost访问,所以要修改。
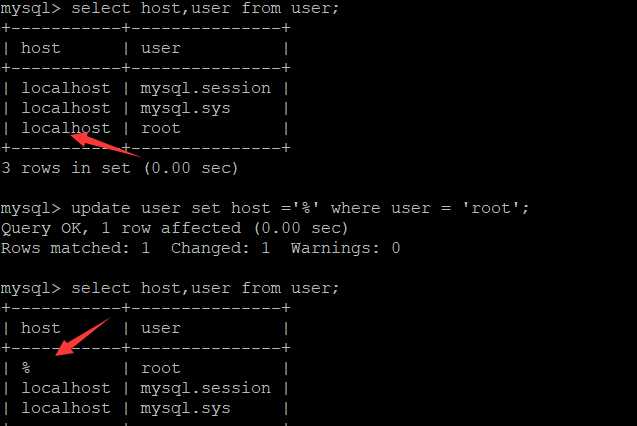
别忘了flush一下

成功:
今天在服务器安装mysql之后,登录发现密码错误,但是我没有设置密码呀,最后百度之后得知,mysql在5.7版本之后会自动创建一个初始密码。
报错如下:
[root@mytestlnx02 ~]# mysql -u root -p
Enter password:
ERROR 1045 (28000): Access denied for user 'root'@'localhost' (using password: YES)
mysql服务是否启动,如果启动,关闭mysql服务//查看mysql服务状态
[root@mytestlnx02 ~]# ps -ef | grep -i mysql
root 22972 1 0 14:18 pts/0 00:00:00 /bin/sh /usr/bin/mysqld_safe --datadir=/var/lib/mysql --socket=/var/lib/mysql/mysql.sock --pid-file=/var/run/mysqld/mysqld.pid --basedir=/usr --user=mysql
mysql 23166 22972 0 14:18 pts/0 00:00:00 /usr/sbin/mysqld --basedir=/usr --datadir=/var/lib/mysql --plugin-dir=/usr/lib/mysql/plugin --user=mysql --log-error=/var/log/mysqld.log --pid-file=/var/run/mysqld/mysqld.pid --socket=/var/lib/mysql/mysql.sock
root 23237 21825 0 14:22 pts/0 00:00:00 grep -i mysql
//关闭服务
[root@mytestlnx02 ~]# service mysql stop
[root@mytestlnx02 ~]#
mysql的配置文件my.cnfmy.cnf`配置文件的位置,一般在`/etc/my.cnf`,有些版本在`/etc/mysql/my.cnf
在配置文件中,增加2行代码
[mysqld]

skip-grant-tables
作用是登录mysql的时候跳过密码验证
然后启动mysql服务,并进入mysql
[root@mytestlnx02 ~]# service mysqld start
[root@mytestlnx02 ~]#
[root@mytestlnx02 ~]# mysql -u root
Type 'help;' or '\h' for help. Type '\c' to clear the current input statement.

mysql>
连接mysql这个数据库,修改用户密码
mysql> use mysql;
Reading table information for completion of table and column names
You can turn off this feature to get a quicker startup with -A

Database changed
mysql> update mysql.user set authentication_string=password('root_password') where user='root';
Query OK, 1 row affected, 1 warning (0.00 sec)
Rows matched: 1  Changed: 1  Warnings: 1

mysql> flush privileges;
Query OK, 0 rows affected (0.00 sec)

mysql> exit
mysql服务先将之前加在配置文件里面的2句代码注释或删除掉,然后重启mysql服务,就可以使用刚刚设置的密码登录了。
[root@mytestlnx02 ~]# service mysql start
[root@mytestlnx02 ~]#
[root@mytestlnx02 ~]# mysql -u root -p
Enter password:
Welcome to the MySQL monitor.  Commands end with ; or \g.
在CentOS上的操作方式有所不同。
执行修改密码的命令一直报错
mysql> update user set authentication_string=password('xxxxxxxx') where User='root';
ERROR 1064 (42000): You have an error in your SQL syntax; check the manual that corresponds to your MySQL server version for the right syntax to use near '('root_password') where User='root'' at line 1
不可能是语法问题,检查了很多遍,最后发现CentOS下应该这样操作:
[root@VM_0_8_centos ~]# grep 'temporary password' /var/log/mysqld.log
2018-09-26T04:25:54.927944Z 5 [Note] [MY-010454] [Server] A temporary password is generated for root@localhost: DN34N/=?aIfZ
可以看到初始密码为DN34N/=?aIfZ
[root@VM_0_8_centos ~]# mysql -u root -p
Enter password:
Welcome to the MySQL monitor.  Commands end with ; or \g.
Your MySQL connection id is 8
Server version: 8.0.12 MySQL Community Server - GPL

Copyright (c) 2000, 2018, Oracle and/or its affiliates. All rights reserved.
mysql> ALTER USER 'root' IDENTIFIED BY 'xxxxxxxxx';
ERROR 1820 (HY000): You must reset your password using ALTER USER statement before executing this statement.
mysql> ALTER USER 'root'@'localhost' IDENTIFIED BY 'xxxxxxxx';
Query OK, 0 rows affected (0.11 sec)

mysql> flush privileges;
Query OK, 0 rows affected (0.01 sec)

mysql> exit
Bye
[root@VM_0_8_centos ~]# service mysqld stop
Redirecting to /bin/systemctl stop  mysqld.service
[root@VM_0_8_centos ~]# service mysqld start
Redirecting to /bin/systemctl start  mysqld.service
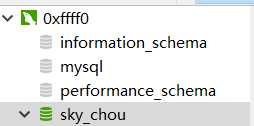
jdbc.driver=com.mysql.jdbc.Driver
jdbc.url=jdbc:mysql://xxxx/sky_chou?useUnicode=true&characterEncoding=UTF-8
jdbc.username=root
jdbc.password=xxxxx
记住:一定不要添加useSSL=true这种配置信息,不然会SQL报错
改成localhost,不然不会识别服务器的ip。!
通过nginx升级到HTTPS
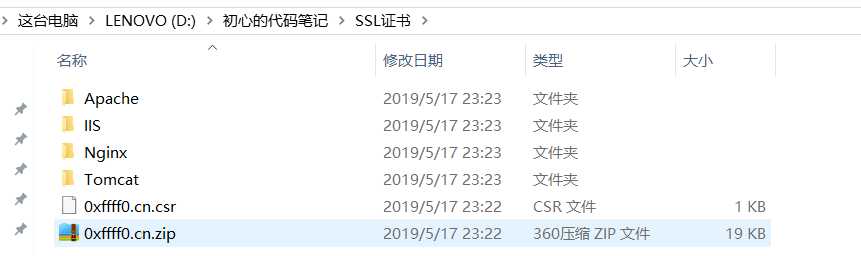
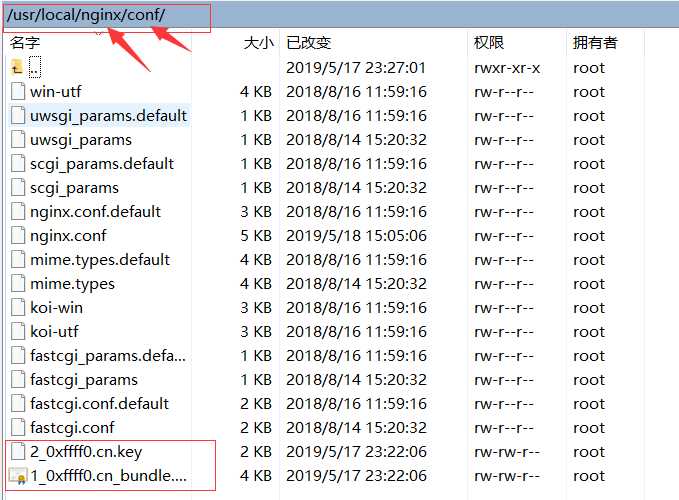
修改nginx.conf文件
#HTTPS server

server {
    listen       443;
    server_name  你的域名;

    ssl                  on;
    ssl_certificate      xxxx_bundle.crt;
    ssl_certificate_key  xxx.key;

    ssl_session_timeout  5m;

    ssl_protocols  TLSv1 TLSv1.1 TLSv1.2;
    ssl_ciphers  ECDHE-RSA-AES128-GCM-SHA256:HIGH:!aNULL:!MD5:!RC4:!DHE;
    ssl_prefer_server_ciphers   on;

    location / {
          client_max_body_size    16m;
          client_body_buffer_size 128k;
          proxy_pass                          http://127.0.0.1:9999/;
          proxy_set_header        Host $host;
          proxy_set_header        X-Real-IP $remote_addr;
          proxy_set_header        X-Forwarded-For $proxy_add_x_forwarded_for;
      proxy_set_header           X-Forwarded-Proto https;
          proxy_next_upstream   off;

          proxy_connect_timeout   30;
          proxy_read_timeout      300;
          proxy_send_timeout      300;
    }
}
要着重修改的SSL相关地方:
    ssl                  on;
    ssl_certificate     xxxxx.crt;
    ssl_certificate_key  xxxx.key;
这些是网上的固定配置
          proxy_set_header        Host $host;
          proxy_set_header        X-Real-IP $remote_addr;
          proxy_set_header        X-Forwarded-For $proxy_add_x_forwarded_for;
      proxy_set_header           X-Forwarded-Proto https;
          proxy_next_upstream   off;

          proxy_connect_timeout   30;
          proxy_read_timeout      300;
          proxy_send_timeout      300;
nginx代理443端口的配置部分
server {
    listen       443;
    server_name  你的域名;

        location / {
          client_max_body_size    16m;
          client_body_buffer_size 128k;
          proxy_pass                          http://127.0.0.1:9999/;
记住所有的server模块的配置都应该包含在http块里面,不然会报错的!
成功标志:

4.保存退出。
5.再输入:source /etc/profilecond tomcat在生效
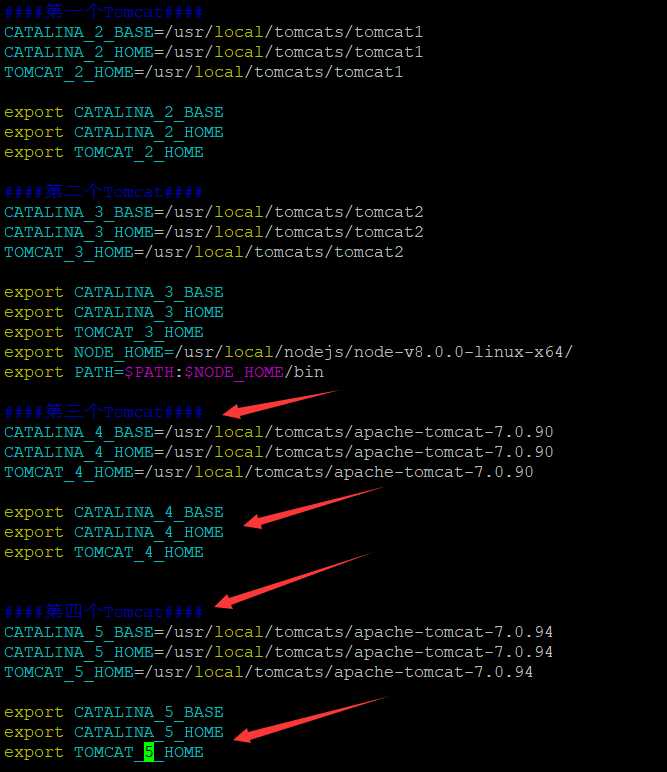
6.第一个tomcat,保持解压后的原状不用修改,
来到第二个tomcat的bin目录下打开catalina.sh ,找到下面红字,
# OS specific support. $var must be set to either true or false.
在下面增加如下代码
export CATALINA_BASE=$CATALINA_2_BASE
export CATALINA_HOME=$CATALINA_2_HOME

7.来到第二个tomcat的conf目录下
打开server.xml更改端口:
修改server.xml配置和第一个不同的启动、关闭监听端口。
修改后示例如下:
? <Connector port="9080" maxHttpHeaderSize="8192" 端口:8080->9080
maxThreads="150" minSpareThreads="25" maxSpareThreads="75"
? enableLookups="false" redirectPort="8443" acceptCount="100"
? connectionTimeout="20000" disableUploadTimeout="true" />
? <Connector port="9009" 端口:8009->9009
? enableLookups="false" redirectPort="8443" protocol="AJP/1.3" />
8.分别进入两个tomcat的bin目录,启动tomcat--./startup.sh
9.然后访问http://localhost:8080 和 http://localhost:9080 都可以看到熟悉的tomcat欢迎界面

原文:https://www.cnblogs.com/zhanp/p/10956543.html