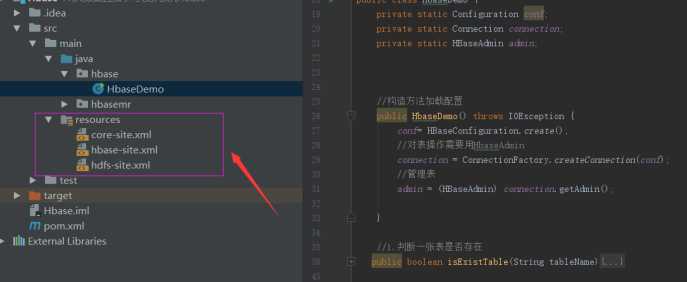
这里我没在代码中写各种集群信息,而是将集群的配置文件放在了项目的resource中的,就可以直接读取到了
package hbase;

import org.apache.hadoop.conf.Configuration;
import org.apache.hadoop.hbase.*;
import org.apache.hadoop.hbase.client.*;
import org.apache.hadoop.hbase.util.Bytes;

import java.io.IOException;
import java.util.ArrayList;
import java.util.List;

/**
 * @author Dawn
 * @date 2019年5月30日22:36:41
 * @version 1.0
 * hbase的基本api操作
 */
public class HbaseDemo {
    private static Configuration conf;
    private static Connection connection;
    private static HBaseAdmin admin;


    //构造方法加载配置
    public HbaseDemo() throws IOException {
        conf= HBaseConfiguration.create();
        //对表操作需要用HbaseAdmin
        connection = ConnectionFactory.createConnection(conf);
        //管理表
        admin = (HBaseAdmin) connection.getAdmin();

    }

    //1.判断一张表是否存在
   public boolean isExistTable(String tableName){
       boolean rs = false;
       try {
           rs = admin.tableExists(TableName.valueOf(tableName));
       } catch (IOException e) {
           e.printStackTrace();
       }
       return rs;
   }

    //2.在hbase集群创建表  create ‘user‘,‘info‘,‘info1‘
    public void createTable(String tableName,String... columnFamily) throws IOException {
       if (this.isExistTable(tableName)){
           System.out.println("表已近存在,请输入其他表名");
       }else {
           //2.注意:创建表的话 需要创建一个描述器
           HTableDescriptor htd = new HTableDescriptor(TableName.valueOf(tableName));

           //3.创建列族
           for (String cf:columnFamily){
               //同样的:创建列族的话 需要创建一个列族描述器
               htd.addFamily(new HColumnDescriptor(cf));
           }

           //4.创建表
           admin.createTable(htd);
           System.out.println("表创建成功");
       }


    }

    //3.删除表
    public void deleteTable(String tableName) throws IOException {
        //1.如果表存在 删除 否则打印不存在
        //需要先指定表不可用 再删除
       if (this.isExistTable(tableName)){
           //2.指定不可用
           admin.disableTable(TableName.valueOf(tableName));
            admin.deleteTable(tableName);
           System.out.println("成功删除表"+tableName);
       }else {
           System.out.println("表都没得你删what???");
       }
    }

    //4.添加数据put ‘user‘,‘rowkey‘,‘‘
    public void addRow(String tableName,String rowkey,String cf,String col,String value) throws IOException {
        //对表中数据操作就要拿到Table对象,和上面那个对表操作,就要拿到HbaseAdmin对象
        Table table=connection.getTable(TableName.valueOf(tableName));

        //1.用put方式加入数据
        Put p = new Put(Bytes.toBytes(rowkey));
        //2.加入数据
        p.addColumn(Bytes.toBytes(cf),Bytes.toBytes(col),Bytes.toBytes(value));

        //3.放入表中
        table.put(p);
        System.out.println("成功插入!!");
    }

    //5.删除表中一行数据 deleteall ‘表名‘,‘rowkey‘
    public void deleteRow(String tableName,String rowkey) throws IOException {
        Table t = connection.getTable(TableName.valueOf(tableName));

        //1.根据rowkey删除数据
        Delete d = new Delete(Bytes.toBytes(rowkey));

        //2.删除
        t.delete(d);
        System.out.println("删除成功!!");
    }

    //6.删除多行数据
    public void deleteAllRow(String tableName,String... rowkeys) throws IOException {
        Table t = connection.getTable(TableName.valueOf(tableName));

        //1.把delete封装到集合
        List<Delete> list = new ArrayList<Delete>();
        //2.遍历
        for (String row:rowkeys){
            Delete d=new Delete(Bytes.toBytes(row));
            list.add(d);
        }

        t.delete(list);
        System.out.println("成功删除多行数据!!!");
    }


    //7.扫面表数据 scan全表扫描
    public void scanAll(String tableName) throws IOException {
        Table t = connection.getTable(TableName.valueOf(tableName));

        //1.实例scan
        Scan s = new Scan();
        //2,拿到Scanner对象
        ResultScanner rs = t.getScanner(s);

        //3.遍历
        for (Result r:rs){
            //拿到每个列族 info1 info2
            Cell[] cells = r.rawCells();
            //遍历具体数据
            for (Cell c:cells){
                System.out.println("行键为:" + Bytes.toString(CellUtil.cloneRow(c)));
                System.out.println("列族为:" + Bytes.toString(CellUtil.cloneFamily(c)));
                System.out.println("值为:" + Bytes.toString(CellUtil.cloneValue(c)));
            }
        }

    }

    //8.扫描指定的数据 scan ‘user‘,{STARTROW =>‘101‘,STOPROW => ‘101‘}
    public void scanRow(String tableName,String rowkey) throws IOException {
        Table t = connection.getTable(TableName.valueOf(tableName));

        //1.扫描指定数据需要实例Get
        Get g = new Get(Bytes.toBytes(rowkey));
        //2.可加过滤条件 这里只查找info1列族的数据
        g.addFamily(Bytes.toBytes("info1"));

        Result rs = t.get(g);
        Cell[] cells = rs.rawCells();
        //3.遍历
        //遍历具体数据
        for (Cell c:cells){
            System.out.println("行键为:" + Bytes.toString(CellUtil.cloneRow(c)));
            System.out.println("列族为:" + Bytes.toString(CellUtil.cloneFamily(c)));
            System.out.println("值为:" + Bytes.toString(CellUtil.cloneValue(c)));
        }
    }

    public static void main(String[] args) throws IOException {
        HbaseDemo hbase = new HbaseDemo();
//        System.out.println(hbase.isExistTable("dawn"));
//        hbase.createTable("emp1","info1","info2");
//        hbase.deleteTable("temp");
//        hbase.addRow("emp1","003","info2","age","20");
//        hbase.deleteRow("emp1","001");
//        hbase.deleteAllRow("emp1","001","002");
//        hbase.scanAll("emp1");
        hbase.scanRow("emp1","003");

    }
}
官方Hbase-Mapreduce,
查看需要的包(由于hbase是基于hdfs之上的。所以我们要跑MR任务的话就要导入hbase的包到yarn中)
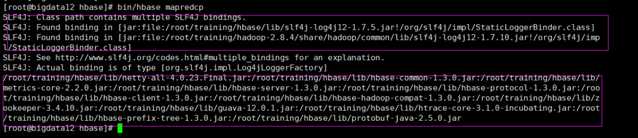
1)导入环境变量(没有在~/.bash_profile中添加,这里是一个临时的环境变量)
export HBASE_HOME=/root/training/hbase
export HADOOP_HOME=/root/training/hadoop-2.8.4
export HADOOP_CLASSPATH=`${HBASE_HOME}/bin/hbase mapredcp`


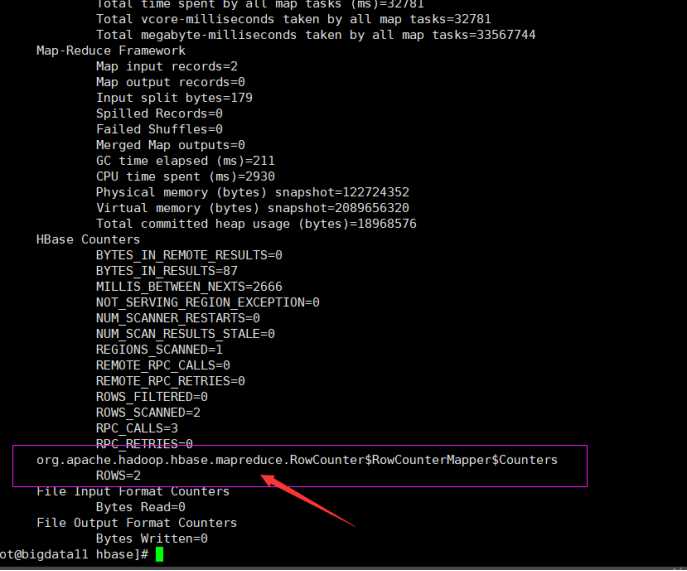
1)启动hbase-mr任务(这里使用官方提供的一个包)
/root/training/hadoop-2.8.4/bin/yarn jar lib/hbase-server-1.3.0.jar rowcounter dawn

结果:
思路?
hbase底层存储是hdfs,把数据先导入到hdfs hbase对应创建一张表 利用mr导入数据到表中
1:在hdfs中创建文件夹 导入本地数据
hdfs dfs -mkdir /hbasetest
hdfs dfs -put love.tsv /hbasetest
2:创建表 create ‘love‘,‘info‘
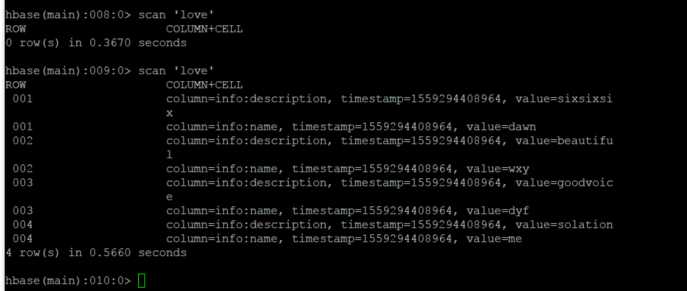
3:导入操作:
/root/training/hadoop-2.8.4/bin/yarn jar lib/hbase-server-1.3.0.jar importtsv -Dimporttsv.columns=HBASE_ROW_KEY,info:name,info:description love hdfs://bigdata11:9000/hbasetest

运行结果:
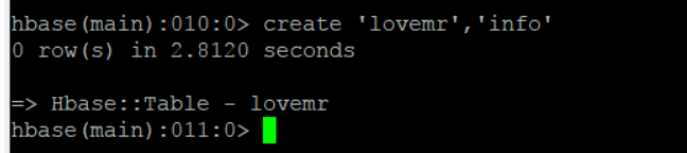
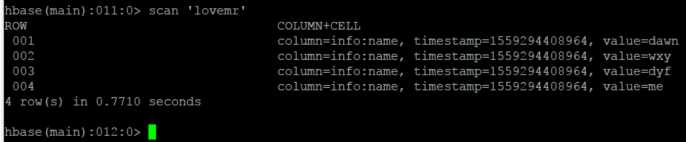
提前在hbase中创建好lovemr表
1) 构建Mapper类,读取love表中数据
package hbasemr;

import org.apache.hadoop.hbase.Cell;
import org.apache.hadoop.hbase.CellUtil;
import org.apache.hadoop.hbase.client.Put;
import org.apache.hadoop.hbase.client.Result;
import org.apache.hadoop.hbase.io.ImmutableBytesWritable;
import org.apache.hadoop.hbase.mapreduce.TableMapper;
import org.apache.hadoop.hbase.util.Bytes;

import java.io.IOException;

/**
 * @author Dawn
 * @date 2019年5月31日17:31:47
 * @version 1.0
 * hbase提供了mr的API
 * 需求?见readme文件
 */
public class ReadLoveMapper extends TableMapper<ImmutableBytesWritable,Put>{
    @Override
    protected void map(ImmutableBytesWritable key, Result value, Context context)
            throws IOException, InterruptedException {
        //1.读取数据 拿到一个rowkey的数据
        Put put = new Put(key.get());

        //2.遍历column
        for (Cell c:value.rawCells()){
            //3.加入列族数据 当前列族是info要 不是info列族的不要 是info数据才导入lovemr表中
            if ("info".equals(Bytes.toString(CellUtil.cloneFamily(c)))){
                //4.拿到指定列的数据
                if ("name".equals(Bytes.toString(CellUtil.cloneQualifier(c)))){
                    put.add(c);
                }
            }
        }

        context.write(key,put);
    }
}
2) 构建Reducer类,将love表中数据写入到lovemr表中
package hbasemr;

import org.apache.hadoop.hbase.client.Put;
import org.apache.hadoop.hbase.io.ImmutableBytesWritable;
import org.apache.hadoop.hbase.mapreduce.TableReducer;
import org.apache.hadoop.io.NullWritable;


import java.io.IOException;

public class WriteLoveReducer extends TableReducer<ImmutableBytesWritable,Put,NullWritable> {
    @Override
    protected void reduce(ImmutableBytesWritable key, Iterable<Put> values, Context context)
            throws IOException, InterruptedException {
        for (Put p:values){
            //遍历数据
            context.write(NullWritable.get(),p);
        }
    }
}
3) 构建driver驱动类
package hbasemr;

import org.apache.hadoop.conf.Configuration;
import org.apache.hadoop.hbase.HBaseConfiguration;
import org.apache.hadoop.hbase.client.Put;
import org.apache.hadoop.hbase.client.Scan;
import org.apache.hadoop.hbase.io.ImmutableBytesWritable;
import org.apache.hadoop.hbase.mapreduce.TableMapReduceUtil;
import org.apache.hadoop.mapreduce.Job;
import org.apache.hadoop.util.Tool;
import org.apache.hadoop.util.ToolRunner;

/**
 * @author Dawn
 * @date 2019年5月31日17:44:13
 * @version 1.0
 * 驱动类
 */
public class LoveDriver implements Tool {

    private Configuration conf;

    //业务逻辑
    public int run(String[] strings) throws Exception {
        //1.创建任务
        Job job=Job.getInstance(conf);
        //2.指定运行的主类
        job.setJarByClass(LoveDriver.class);
        //3.配置job 采用scan方式扫描该表
        Scan scan = new Scan();

        //4.设置mapper类
        TableMapReduceUtil.initTableMapperJob("love",
                scan,
                ReadLoveMapper.class,
                ImmutableBytesWritable.class,
                Put.class,
                job);

        //5.设置reducer类
        TableMapReduceUtil.initTableReducerJob("lovemr",
                WriteLoveReducer.class,
                job);

        //设置reduceTask个数
        job.setNumReduceTasks(1);

        boolean rs = job.waitForCompletion(true);
        return rs?0:1;
    }

    //设置配置
    public void setConf(Configuration configuration) {
        this.conf= HBaseConfiguration.create(configuration);
    }

    //拿到配置
    public Configuration getConf() {
        return this.conf;
    }

    public static void main(String[] args) {
        try {
            int status = ToolRunner.run(new LoveDriver(), args);
            System.exit(status);
        } catch (Exception e) {
            e.printStackTrace();
        }

    }
}
4) 打包 放入集群中运行这个任务
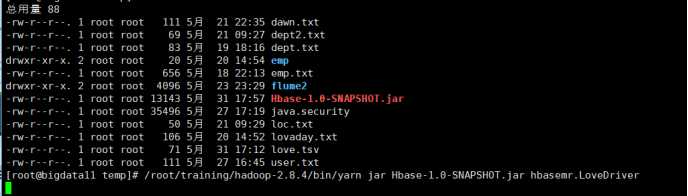
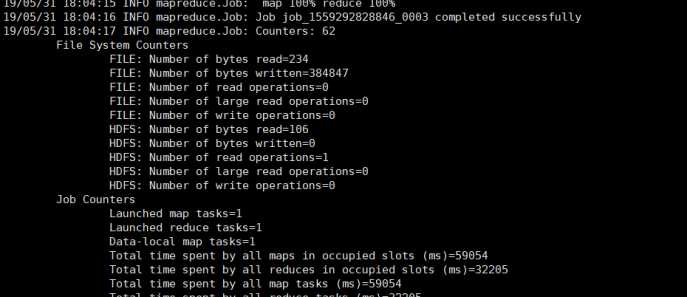
运行结果:
大数据学习之Hbase基本JavaAPI操作及HbaseMR 29
原文:https://www.cnblogs.com/hidamowang/p/10960611.html