导入 matplotlib 模块:
import matplotlib
查看自己版本所支持的backends:
print(matplotlib.rcsetup.all_backends)
返回信息:
[‘GTK3Agg‘, ‘GTK3Cairo‘, ‘MacOSX‘, ‘nbAgg‘, ‘Qt4Agg‘, ‘Qt4Cairo‘, ‘Qt5Agg‘, ‘Qt5Cairo‘, ‘TkAgg‘, ‘TkCairo‘, ‘WebAgg‘, ‘WX‘, ‘WXAgg‘, ‘WXCairo‘, ‘agg‘, ‘cairo‘, ‘pdf‘, ‘pgf‘, ‘ps‘, ‘svg‘, ‘template‘]
查看当前工作的matplotlibrc文件是哪个:
print(matplotlib.matplotlib_fname())
返回信息:
D:\ProgramData\Anaconda2\lib\site-packages\matplotlib\mpl-data\matplotlibrc
打开 matplotlibrc 查看相应内容:

将 backend 修改为 TkAgg:

执行如下代码:
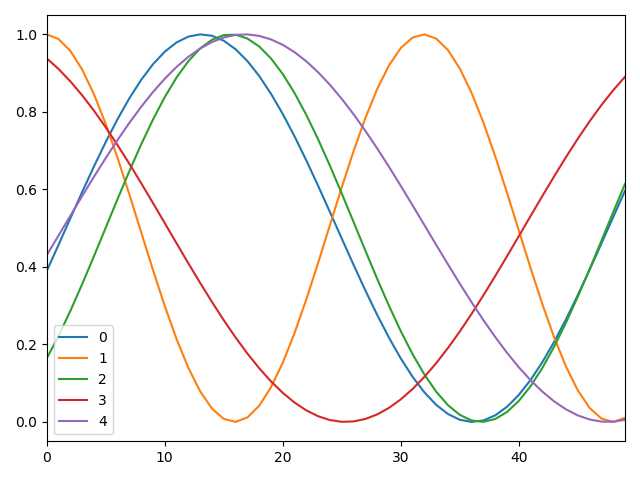
import numpy as np
import pandas as pd
import matplotlib.pyplot as plt

from keras.models import Model
from keras.layers import Dense, Activation, Input, Reshape
from keras.layers import Conv1D, Flatten, Dropout
from keras.optimizers import SGD, Adam

def sample_data(n_samples=10000, x_vals=np.arange(0, 5, .1), max_offset=100, mul_range=[1, 2]):
    vectors = []
    for i in range(n_samples):
        offset = np.random.random() * max_offset
        mul = mul_range[0] + np.random.random() * (mul_range[1] - mul_range[0])
        vectors.append(
            np.sin(offset + x_vals * mul) / 2 + .5
        )
    return np.array(vectors)

ax = pd.DataFrame(np.transpose(sample_data(5))).plot()
plt.show()
生成图片:
执行代码:
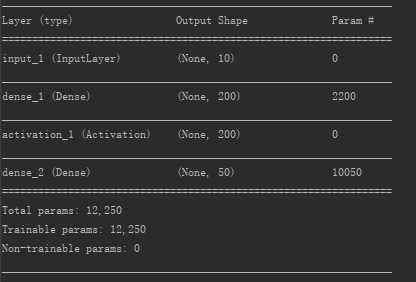
def get_generative(G_in, dense_dim=200, out_dim=50, lr=1e-3):
    x = Dense(dense_dim)(G_in)
    x = Activation(‘tanh‘)(x)
    G_out = Dense(out_dim, activation=‘tanh‘)(x)
    G = Model(G_in, G_out)
    opt = SGD(lr=lr)
    G.compile(loss=‘binary_crossentropy‘, optimizer=opt)
    return G, G_out

G_in = Input(shape=[10])
G, G_out = get_generative(G_in)
G.summary()
生成图像:
参考:
https://blog.csdn.net/tanmx219/article/details/88074600
https://blog.csdn.net/xqf1528399071/article/details/53385593
原文:https://www.cnblogs.com/ratels/p/11158734.html