为了实现骰子的实例,先建一个骰子的模型
<!DOCTYPE html>
<html lang="en">
<head>
<meta charset="UTF-8">
<meta name="viewport" content="width=device-width, initial-scale=1.0">
<meta http-equiv="X-UA-Compatible" content="ie=edge">
<title>Document</title>
<style>
[class$="face"] {
margin: 16px;
padding: 4px;
background-color: #e7e7e7;
width: 104px;
height: 104px;
object-fit: contain;
box-shadow: inset 0 5px white, inset 0 -5px #bbb, inset 5px 0 #d7d7d7, inset -5px 0 #d7d7d7;
border-radius: 10%;
}
.item {
display: block;
width: 24px;
height: 24px;
border-radius: 50%;
margin: 4px;
background-color: #333;
box-shadow: inset 0 3px #111, inset 0 -3px #555;
}
</style>
</head>
<body>
</body>
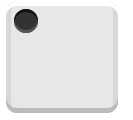
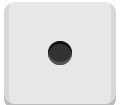
</html>骰子的一面,最多可以放置9个点。
<div class="box-face">
        <span class="item"></span>
</div>
上面代码中,div元素(代表骰子的一个面)是Flex容器,span元素(代表一个点)是Flex项目。如果有多个项目,就要添加多个span元素,以此类推。
.box-face {
            display: flex;
            justify-content: center;
            align-items: center;
        }
原文:https://www.cnblogs.com/tangge/p/11222987.html