Ubuntu使用过程中整理的一些常用或关键操作整理,以备不时之需,
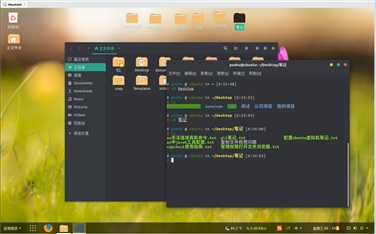
另外自己可以对界面做一些美化,这部分自行百度去配置,我的界面如图

##################Ubuntu18.04版###########################
1.########################换源##############################

1) 备份默认的apt源

1 $ cd /etc/apt
2 $ sudo cp sources.list sources.list.backup
2) 编辑

$ sudo gedit sources.list
复制粘贴以下列表:

deb http://mirrors.aliyun.com/ubuntu/ xenial main restricted universe multiverse
deb http://mirrors.aliyun.com/ubuntu/ xenial-security main restricted universe multiverse
deb http://mirrors.aliyun.com/ubuntu/ xenial-updates main restricted universe multiverse
deb http://mirrors.aliyun.com/ubuntu/ xenial-backports main restricted universe multiverse
##测试版源
deb http://mirrors.aliyun.com/ubuntu/ xenial-proposed main restricted universe multiverse
# 源码
deb-src http://mirrors.aliyun.com/ubuntu/ xenial main restricted universe multiverse
deb-src http://mirrors.aliyun.com/ubuntu/ xenial-security main restricted universe multiverse
deb-src http://mirrors.aliyun.com/ubuntu/ xenial-updates main restricted universe multiverse
deb-src http://mirrors.aliyun.com/ubuntu/ xenial-backports main restricted universe multiverse
##测试版源
deb-src http://mirrors.aliyun.com/ubuntu/ xenial-proposed main restricted universe multiverse
# Canonical 合作伙伴和附加
deb http://archive.canonical.com/ubuntu/ xenial partner
deb http://extras.ubuntu.com/ubuntu/ xenial main

 3) 注意,每次修改完apt源,一定要执行一下更新

##更新
sudo apt-get update 更新源
sudo apt-get upgrade 更新软件

2.########################配置c++环境###################

    sudo apt-get install build-essential    //安装了该软件包,编译c/c++所需要的软件包也都会被安装。

3.############################python3.6#######################

    ubuntu18版本默认安装Python3.6,没安装2.7等 其他

sudo apt-get install python3.6
调整Python3的优先级,使得3.6优先级较高
sudo update-alternatives --install /usr/bin/python3 python3 /usr/bin/python3.5 1
sudo update-alternatives --install /usr/bin/python3 python3 /usr/bin/python3.6 2

更改默认值,python默认为Python2,现在修改为Python3
sudo update-alternatives --install /usr/bin/python python /usr/bin/python2 100
sudo update-alternatives --install /usr/bin/python python /usr/bin/python3 150

    输入命令sudo apt-get install python3-pip安装pip
    输入命令sudo pip3 install --upgrade pip更新pip

    接下来,安装Django:
    sudo apt install python3-django
    sudo pip install Django==1.11.13
    sudo pip install Django==2.1.5

    通过键入以下内容来测试安装是否成功:
    django-admin --version

    安装pyecharts
    pip install pyecharts


    卸载Python包命令    pip uninstall xlrd

    远程运行django命令:
    python manage.py runserver 0.0.0.0:8000

    刘旸项目 pyecharts配置:
    ⁄usr⁄local⁄lib⁄python3.6/dist-packages/constants.py    添加   DEFAULT_HOST="../static/js"


4 。##########################lamp#############################

    可从网上找相关资料
MySQL
1.安装MySQL

首先查看一下自己PC是否安装了其他版本的mysql,有则删之。。。

查看版本号:

mysql -V

apt-get autoremove --purge mysql-server-版本号
apt-get autoremove mysql-server
apt-get remove mysql-common
dpkg -l |grep ^rc|awk ‘{print $2}‘ |sudo xargs dpkg -P
至此,卸载完成


#命令1
sudo apt-get update

#命令2
sudo apt-get install mysql-server mysql-client

2.1 安装配置
sudo mysql_secure_installation

2.2 检查mysql服务状态:
systemctl status mysql.service

设置密码等级
sudo su
mysql
set global validate_password_policy=0;
设置密码长度
set global validate_password_length=4;

以root进入mysql后也可用命令给root设置密码:
#这个为允许本地登录
GRANT ALL PRIVILEGES ON *.* TO root@localhost IDENTIFIED BY "123456";

#这个为允许远程登录
GRANT ALL PRIVILEGES ON *.* TO ‘root‘@‘%‘ IDENTIFIED BY ‘8341‘ WITH GRANT OPTION;


设置Ubuntu18.04安装MySQL后普通用户登录
sudo su
mysql
select user, plugin from mysql.user;

发现MySQL的root用户的plugin被修改了,只有换成mysql_native_password才可以使用密码登录MySQL。
使用下面的命令更改plugin,同时设置MySQL的root访问密码
update mysql.user set authentication_string=PASSWORD(‘8341‘), plugin=‘mysql_native_password‘ where user=‘root‘;

#刷新权限
flush privileges;

退出后,切换到普通用户shell并重启MySQL,即可使用root用户和上一步设置的root密码登录MySQL。
重启mysql:
方式一:sudo/etc/init.d/mysql restart
方式二:sudo service mysql restart

====================忘了mysql密码,从网上找到的解决方案记录在这里====================

结束当前正在运行的mysql进程

# /etc/init.d/mysql stop

用mysql安全模式运行并跳过权限验证

# mysqld_safe --user=mysql --skip-grant-tables --skip-networking &

用空密码方式使用root用户登录 MySQL

#  mysql -u root mysql

更新密码

# update user set Password = PASSWORD(‘root‘) where User =‘root‘;

刷新权限

# FLUSH PRIVILEGES;

退出

# quit


4.1#########################phpmyadmin###########################

    apt-get 安装
sudo  apt-get install  phpmyadmin

已有的虚拟主机目录建立软连接
sudo  ln -s /usr/share/phpmyadmin/      /var/www/

但是 ubuntu中的mysql 默认是不允许的 所以要修改mysql的配置
sudo vim /etc/mysql/my.cnf #修改     bind-address 白名单 取消掉


5.############################Vim################################

    重新安装vim:
sudo apt-get remove vim-common
sudo apt-get install vim

或

执行下面的命令就自动安装好了:
wget -qO- https://raw.github.com/ma6174/vim/master/setup.sh | sh -x


6.#########################Django部署到apache2###########################
教程见自强学堂
https://code.ziqiangxuetang.com/django/django-deploy.html

    apt-get update    #获取更新列表
apt-get install apache2    #安装 Apache2
Restart Apache 2 Server /重启apache服务

#修改 /etc/apache2/envvars 文件添加下面两句 配置中文环境
 export LANG=‘zh_CN.UTF-8‘
export LC_ALL=‘zh_CN.UTF-8‘

apt-get install libapache2-mod-wsgi-py3  #让 Apache2识别 Python3 程序的请求,安装 mod-wsgi模块

确认安装的 Apache2 版本号
apachectl -v
ls /user/bin | grep python
默认的版本改为Python 3

apachectl -v    查看apache2版本号,本次实验是安装的是Apache 2.4.18

安装 Python 的 pip 组件管理程序和虚拟机环境程序 virtualenv
pip3 install virtualenv  ,可不装

Django项目中顺手新建两个文件夹:
mkdir static
mkdir media

在 /etc/apache2/sites-available/下新建一个文件 这里我把它命名为mysite.conf,文件名可任意取。
sudo vim /etc/apache2/sites-available/mysite.conf
在mysite.conf文件下输入:    (端口为8000,同时后面要为其添加监听端口8000,见后面)

<VirtualHost *:8000>
    ServerName www.XXX.com(这里替换成你自己域名)
    ServerAlias anothername.com
    ServerAdmin 1249223183@qq.com(这里替换成你自己的邮箱)
     DocumentRoot /var/www/djangotest/ (这里的参数替换成你自己的项目的目录)
    Alias /media/ /var/www/djangotest/media/
    Alias /static/ /var/www/djangotest/static/

    <Directory /var/www/djangotest/media>
        Require all granted
    </Directory>

    <Directory /var/www/djangotest/static>
        Require all granted
    </Directory>

    WSGIScriptAlias / /var/www/djangotest/djangotest/wsgi.py
    <Directory /var/www/djangotest/djangotest>
    <Files wsgi.py>
        Require all granted
    </Files>
    </Directory>
</VirtualHost>

这里我的项目地址位置 /var/www/djangotest/目录下


修改你项目中的wsgi.py文件,改为以下内容

import os
from os.path import join,dirname,abspath
import sys    #3
PROJECT_DIR = dirname(dirname(abspath(__file__)))    #4
from django.core.wsgi import get_wsgi_application
sys.path.insert(0,PROJECT_DIR)    #5
os.environ.setdefault("DJANGO_SETTINGS_MODULE", "djangotest.settings")
#这里将settings文件换成你自己的settings即可
application = get_wsgi_application()

3,4,5 为新加的内容,作用是让脚本找到django项目的位置,也可以在mysite.conf中做,
用WSGIPythonPath,想了解的自行搜索, 第 7 行如果一台服务器有多个django project时一定要修改
成上面那样,否则访问的时候会发生网站互相串的情况,即访问A网站到了B网站,一会儿正常,
一会儿又不正常(当然也可以使用 mod_wsgi daemon 模式)

5. 设置目录和文件权限
一般目录权限设置为 755,文件权限设置为 644
sudo chmod -R 644 j1945LibraryMS  #项目为djangotest
sudo find j1945LibraryMS  -type d | xargs chmod 755

apache 服务器运行用户可以在 /etc/apache2/envvars 文件里面改,这里使用的是默认值,
当然也可以更改成自己的当前用户,这样的话权限问题就简单很多,但在服务器上推荐有 www-data 用户,
更安全。以下是默认设置
export APACHE_RUN_USER=www-data
export APACHE_RUN_GROUP=www-data

上传文件夹权限
media 文件夹一般用来存放用户上传文件,static 一般用来放自己网站的js,css,图片等,在settings.py中的相关设置
STATIC_URL 为静态文件的网址 STATIC_ROOT 为静态文件的根目录,
MEDIA_URL 为用户上传文件夹的根目录,MEDIA_URL为对应的访问网址
在settings.py中设置:

# Static files (CSS, JavaScript, Images)
# https://docs.djangoproject.com/en/dev/howto/static-files/
STATIC_URL = ‘/static/‘
STATIC_ROOT = os.path.join(BASE_DIR,‘static‘)
# upload folder
MEDIA_URL = ‘/media/‘
MEDIA_ROOT = os.path.join(BASE_DIR,‘media‘)

STATICFILES_DIRS=[
    (‘css‘,os.path.join(STATIC_ROOT,