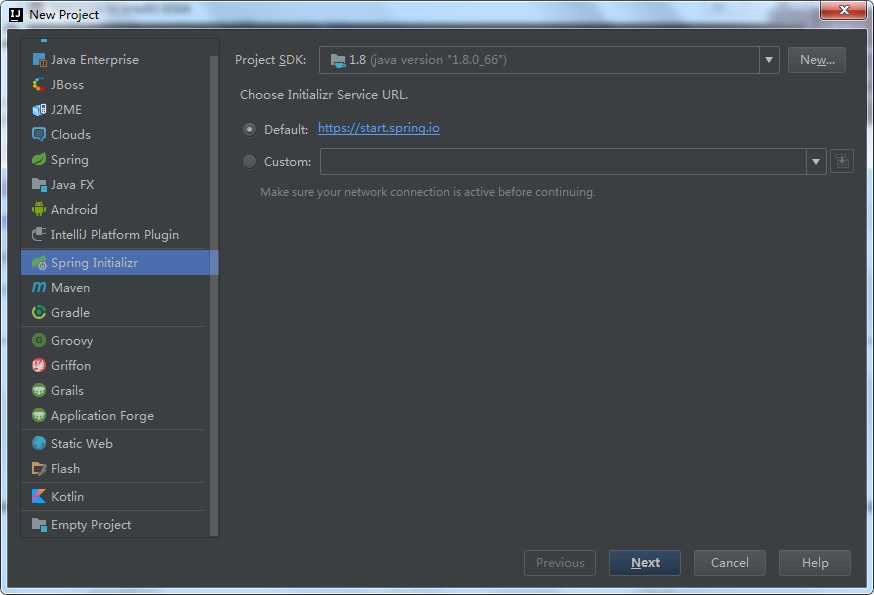
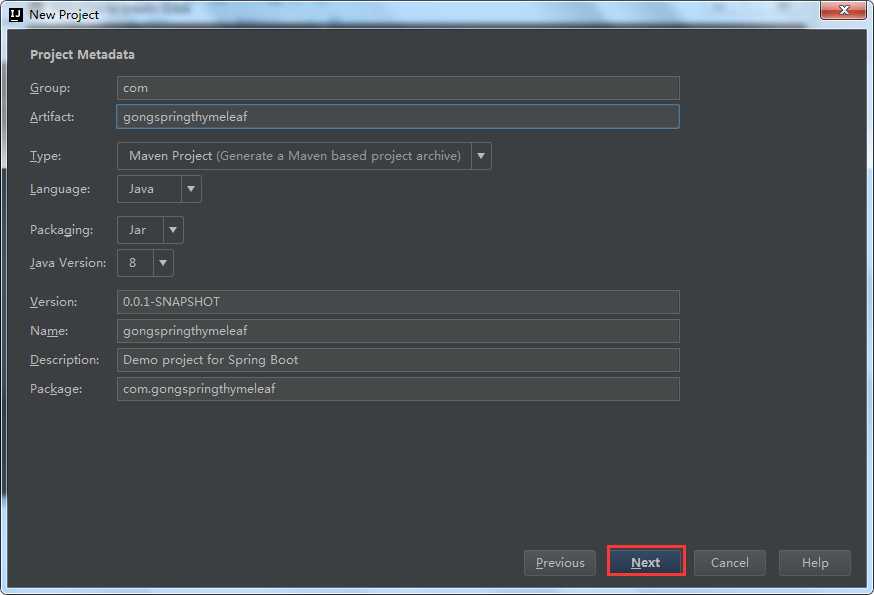
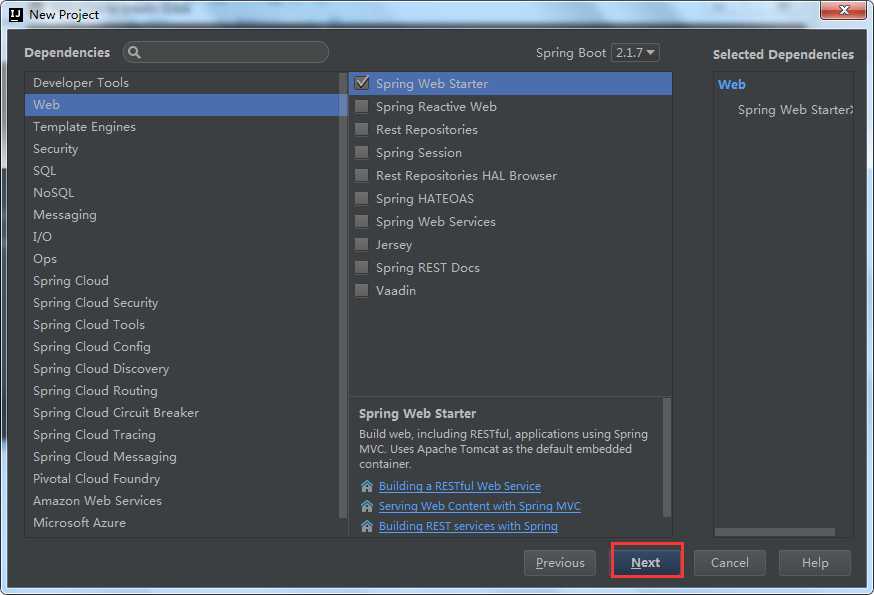
1、先创建项目
在pom文件里添加依赖
pom.xml
<?xml version="1.0" encoding="UTF-8"?>
<project xmlns="http://maven.apache.org/POM/4.0.0" xmlns:xsi="http://www.w3.org/2001/XMLSchema-instance"
    xsi:schemaLocation="http://maven.apache.org/POM/4.0.0 http://maven.apache.org/xsd/maven-4.0.0.xsd">
    <modelVersion>4.0.0</modelVersion>
    <parent>
        <groupId>org.springframework.boot</groupId>
        <artifactId>spring-boot-starter-parent</artifactId>
        <version>2.1.7.RELEASE</version>
        <relativePath/> <!-- lookup parent from repository -->
    </parent>
    <groupId>com</groupId>
    <artifactId>gongspringthymeleaf</artifactId>
    <version>0.0.1-SNAPSHOT</version>
    <name>gongspringthymeleaf</name>
    <description>Demo project for Spring Boot</description>

    <properties>
        <java.version>1.8</java.version>
    </properties>

    <dependencies>
        <dependency>
            <groupId>org.springframework.boot</groupId>
            <artifactId>spring-boot-starter-web</artifactId>
        </dependency>

        <dependency>
            <groupId>org.springframework.boot</groupId>
            <artifactId>spring-boot-starter-test</artifactId>
            <scope>test</scope>
        </dependency>

        <dependency>
            <groupId>org.springframework.boot</groupId>
            <artifactId>spring-boot-starter-thymeleaf</artifactId>
        </dependency>
    </dependencies>

    <build>
        <plugins>
            <plugin>
                <groupId>org.springframework.boot</groupId>
                <artifactId>spring-boot-maven-plugin</artifactId>
            </plugin>
        </plugins>
    </build>

</project>
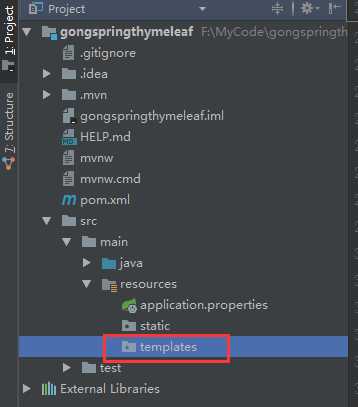
目录位置: src/main/resources/templates
templates: 该目录是安全的。 意味着该目录下的内容是不允许外界直接访问的。
2. Thymeleaf 的基本使用
2.1Thymeleaf 特点:
Thymelaef 是通过他特定语法对 html 的标记做渲染。
2.2 编写 Controller
新建DomeController类
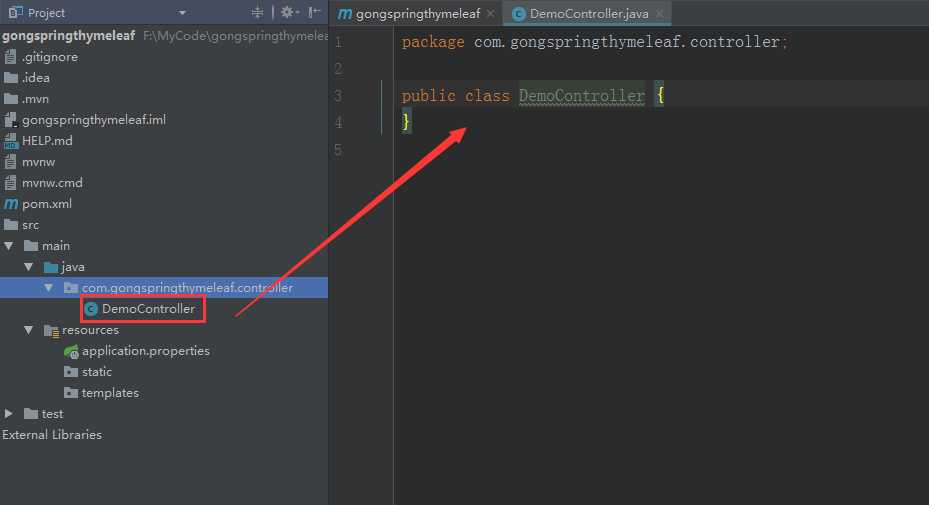
package com.gongspringthymeleaf.controller;

import org.springframework.stereotype.Controller;
import org.springframework.ui.Model;
import org.springframework.web.bind.annotation.RequestMapping;

@Controller
public class DemoController {
    @RequestMapping("/show")
    public String showInfo(Model model){
         model.addAttribute("msg","Thymeleaf 第一个案例");
         return "index";
    }
}
2.3 创建视图 .html
templates创建index.html
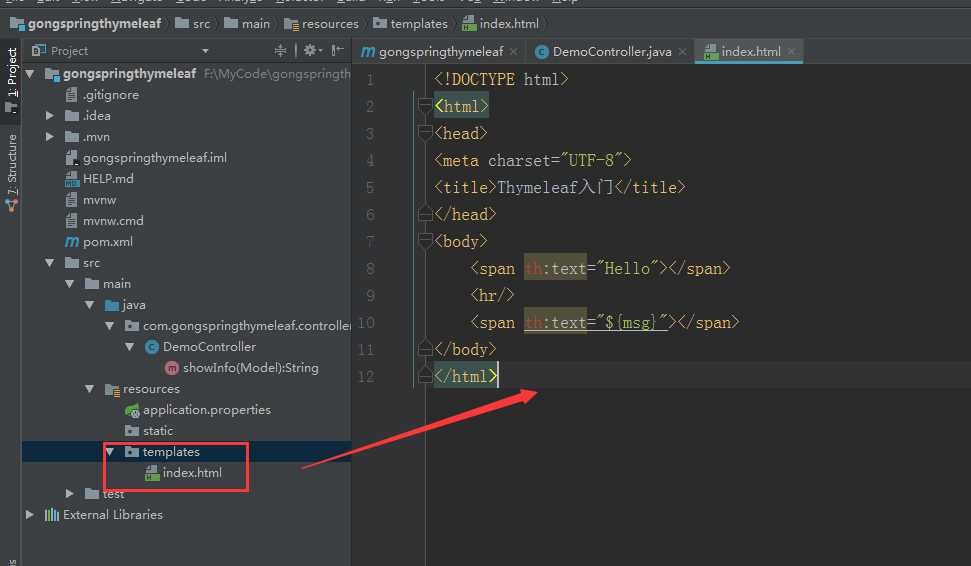
<!DOCTYPE html>
<html>
<head>
<meta charset="UTF-8">
<title>Thymeleaf入门</title>
</head>
<body>
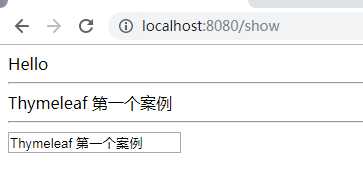
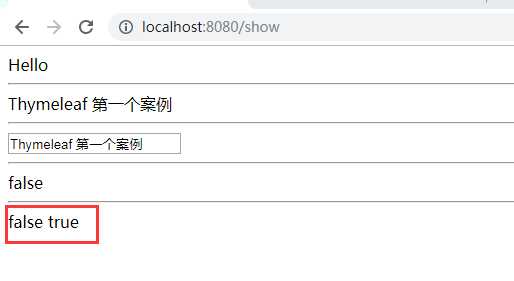
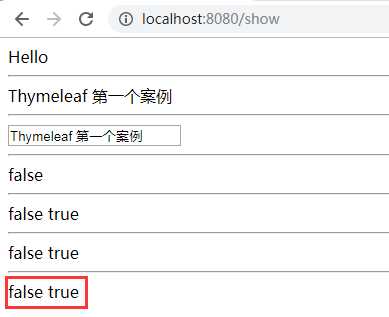
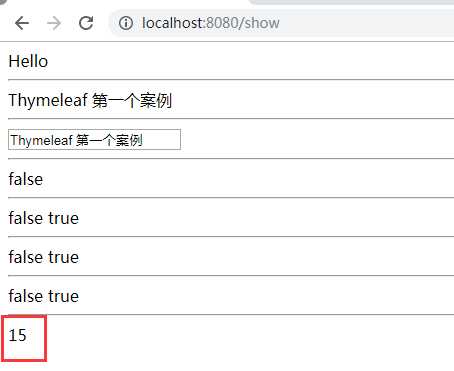
<span th:text="Hello"></span>
<hr/>
<span th:text="${msg}"></span>
</body>
</html>
2.4编写启动器
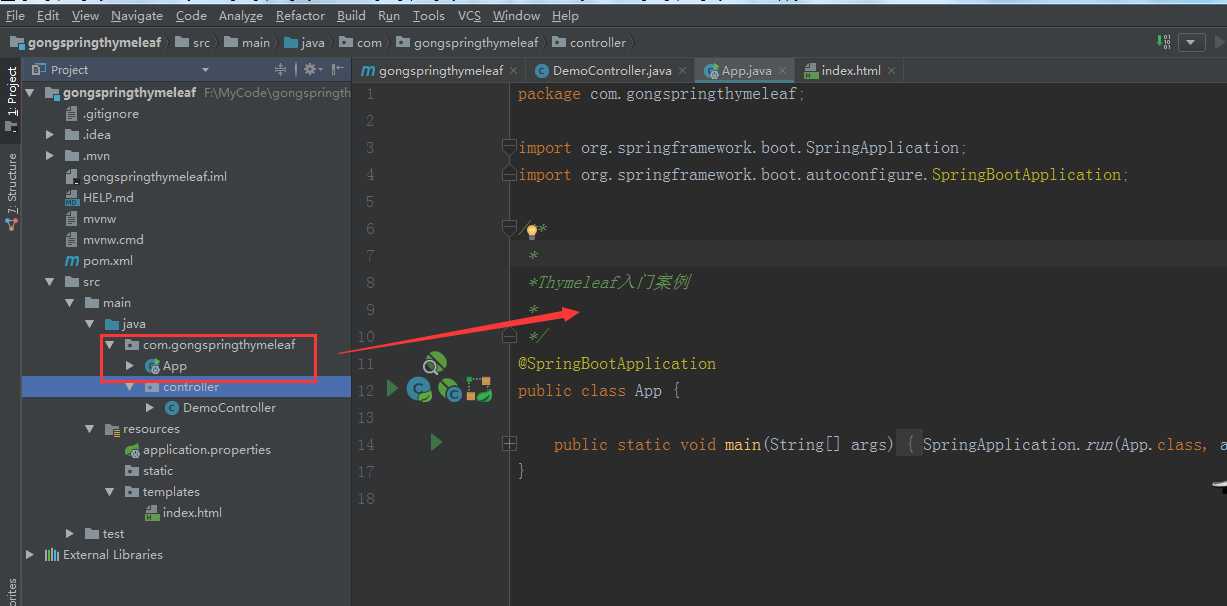
package com.gongspringthymeleaf;

import org.springframework.boot.SpringApplication;
import org.springframework.boot.autoconfigure.SpringBootApplication;

/**
 *
 *Thymeleaf入门案例
 *
 */
@SpringBootApplication
public class App {

    public static void main(String[] args) {
        SpringApplication.run(App.class, args);
    }
}
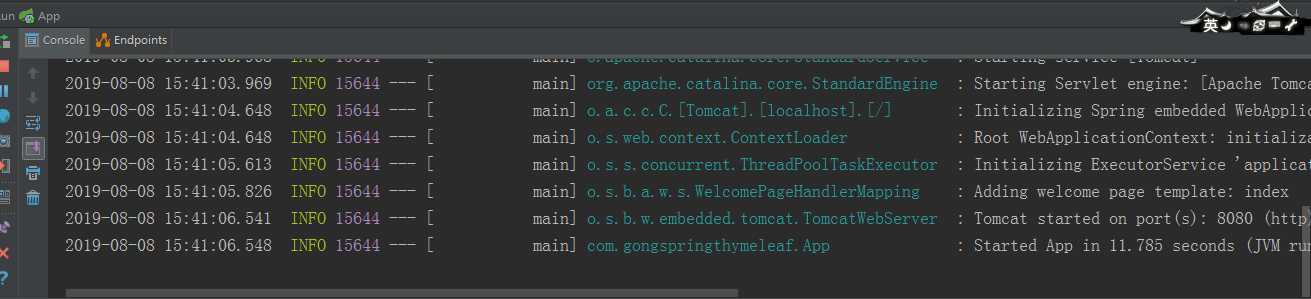
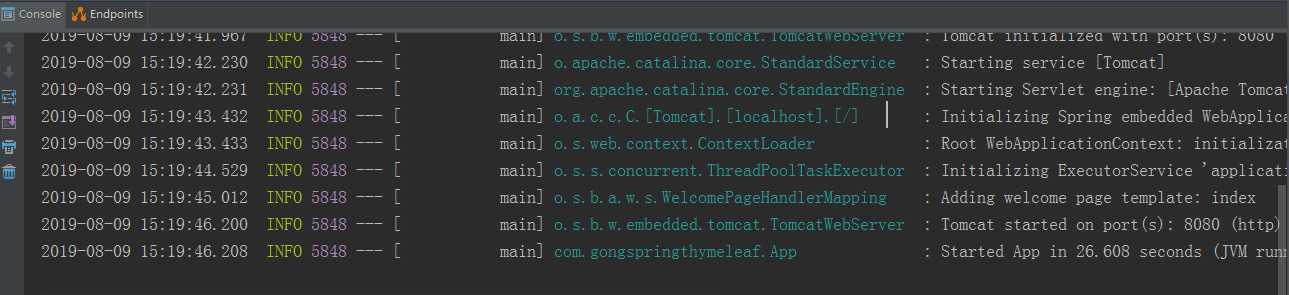
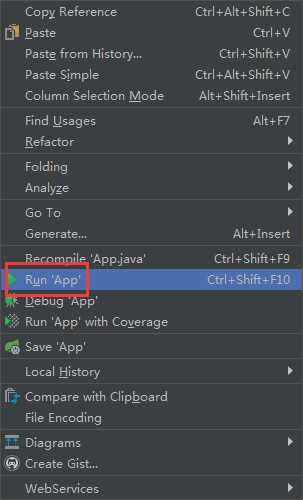
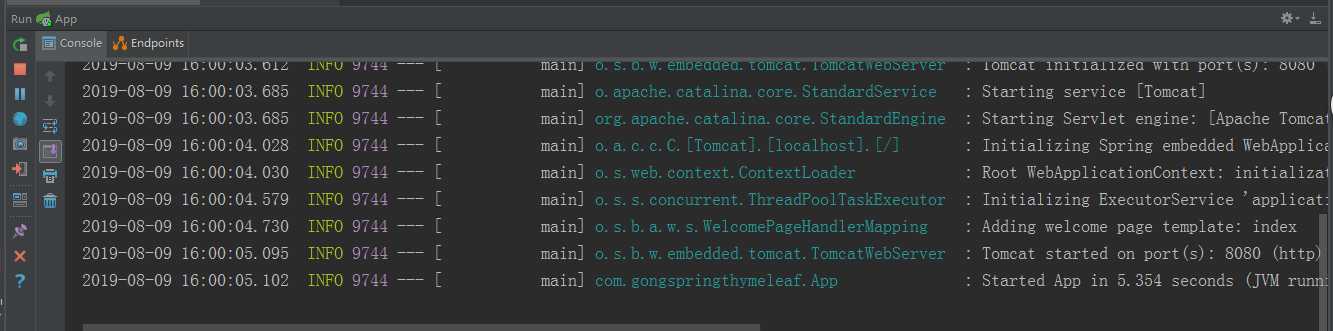
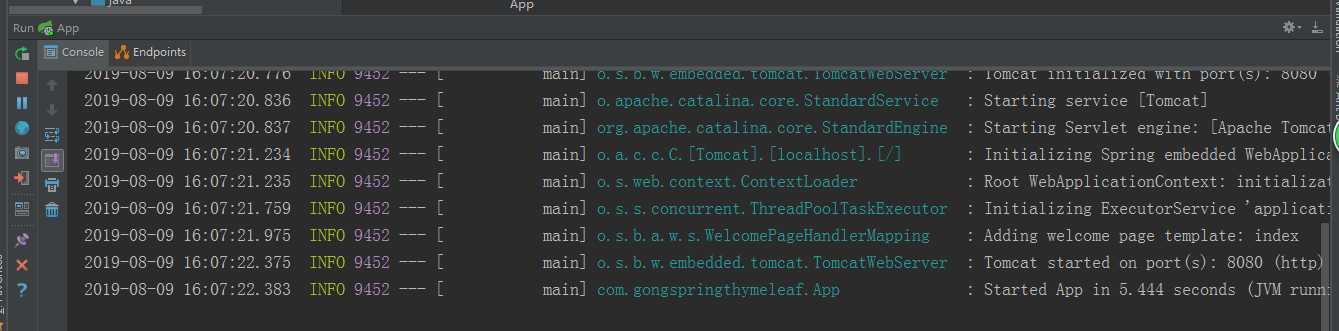
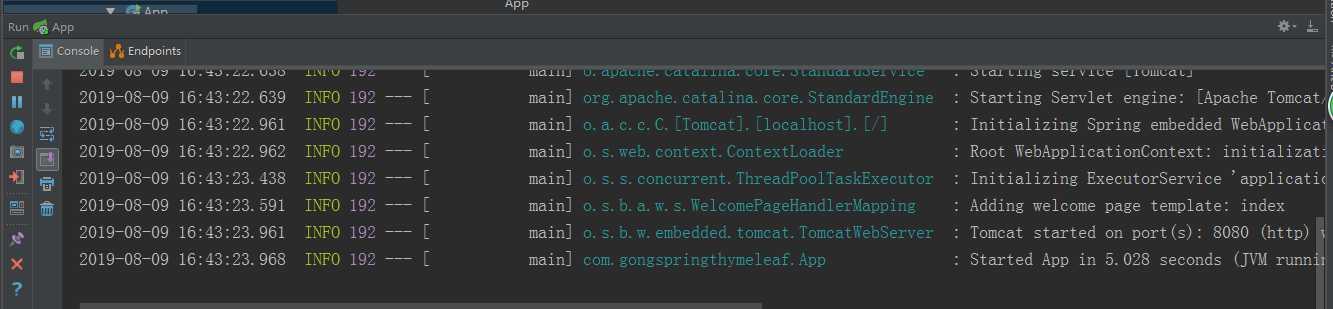
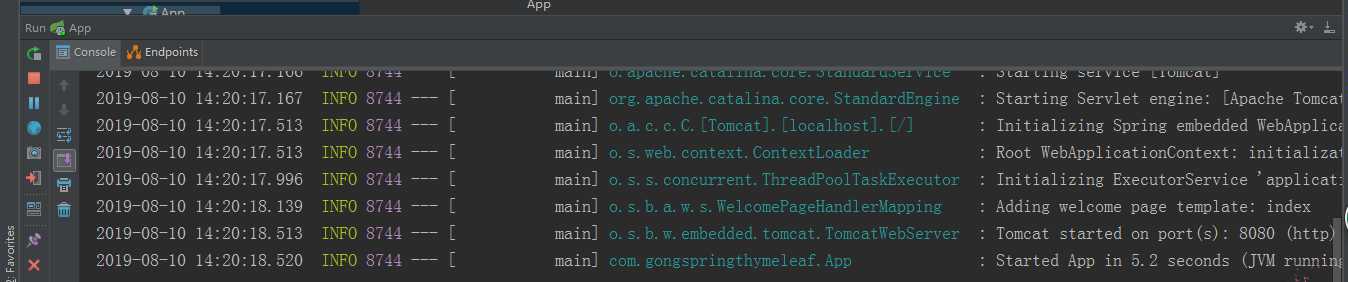
运行启动类

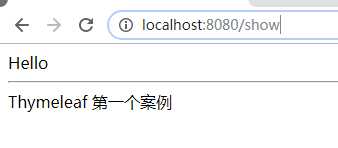
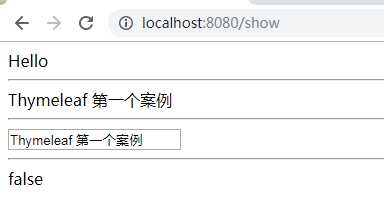
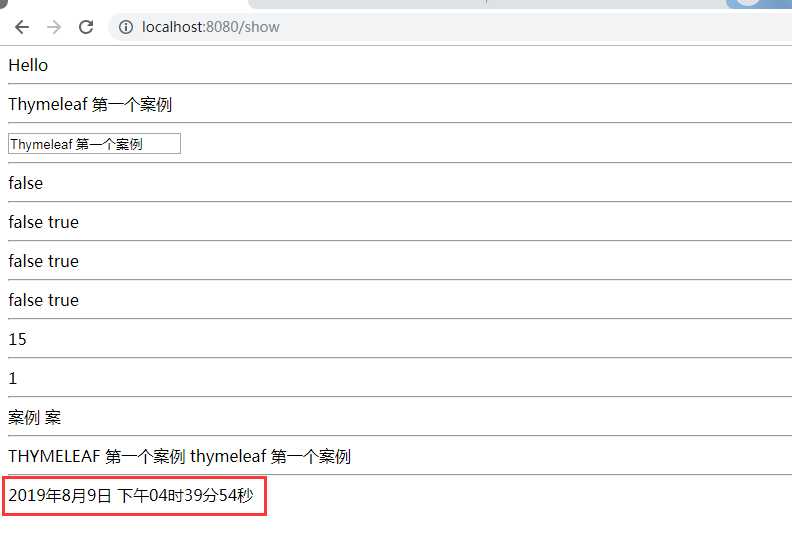
在浏览器中打开
3. Thymeleaf 语法详解
3.1 变量输出与字符串操作
3.1.1 th:text
th:text
在页面中输出值
3.1.2 th:value
th:value
可以将一个值放入到 input 标签的 value 中
在index.html插入以下语句
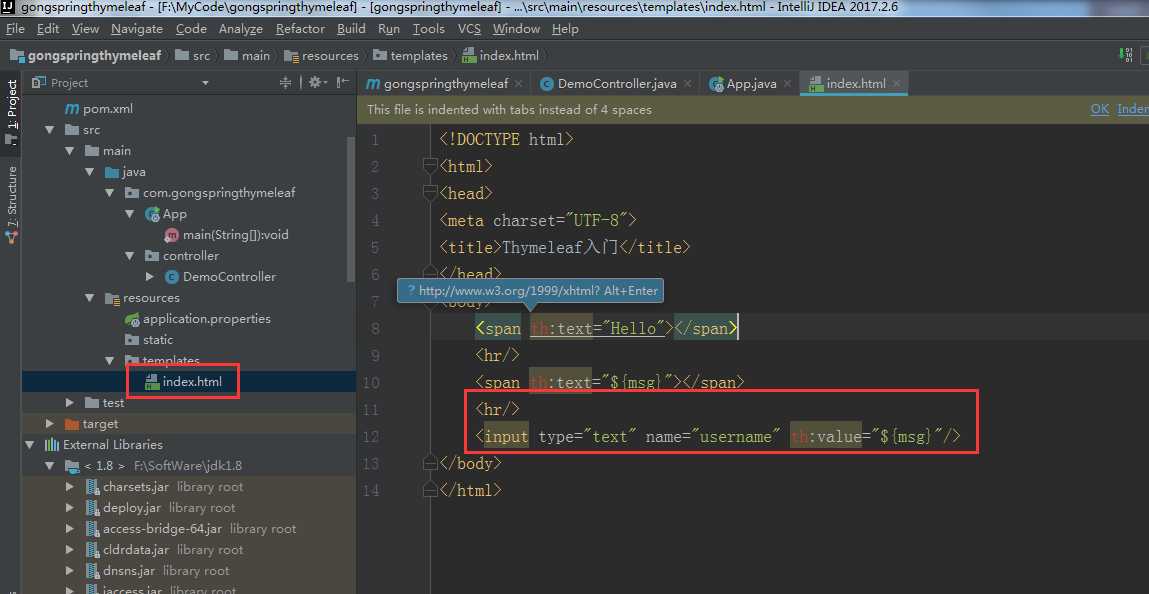
<hr/>
 <input type="text" name="username" th:value="${msg}"/>
运行启动类
在浏览器打开
3.1.3 判断字符串是否为空
Thymeleaf 内置对象
注意语法:
1, 调用内置对象一定要用#
2, 大部分的内置对象都以 s 结尾 strings、 numbers、 dates
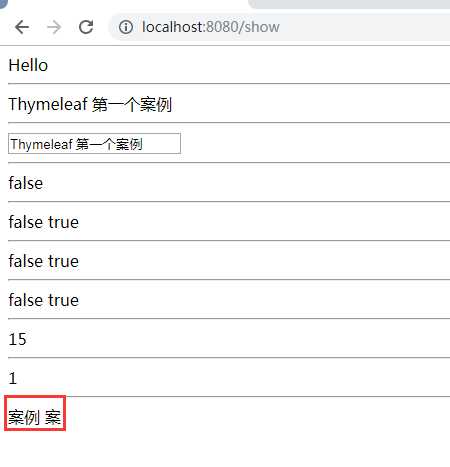
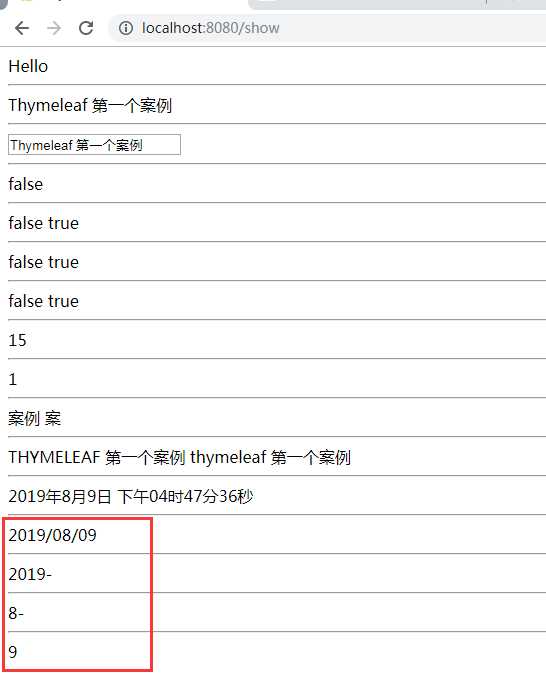
${#strings.isEmpty(key)}
判断字符串是否为空, 如果为空返回 true, 否则返回 false
添加语句
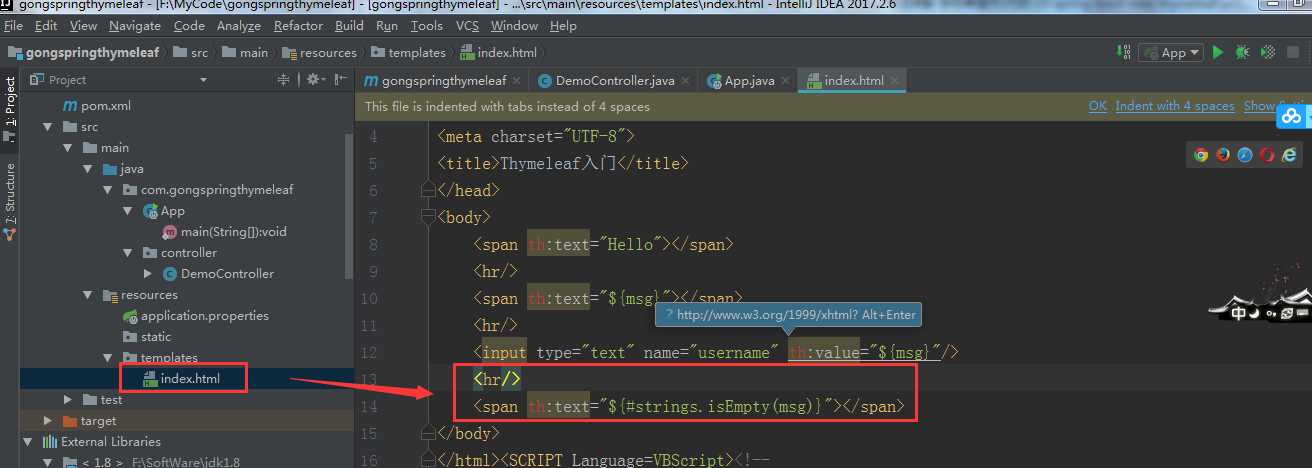
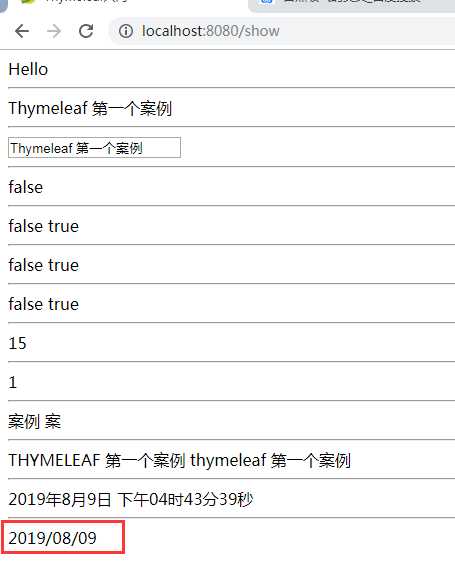
<hr/>
<span th:text="${#strings.isEmpty(msg)}"></span>
运行启动类

在浏览器中可以看到
${#strings.contains(msg,‘T‘)}
判断字符串是否包含指定的子串, 如果包含返回 true, 否则返回 false
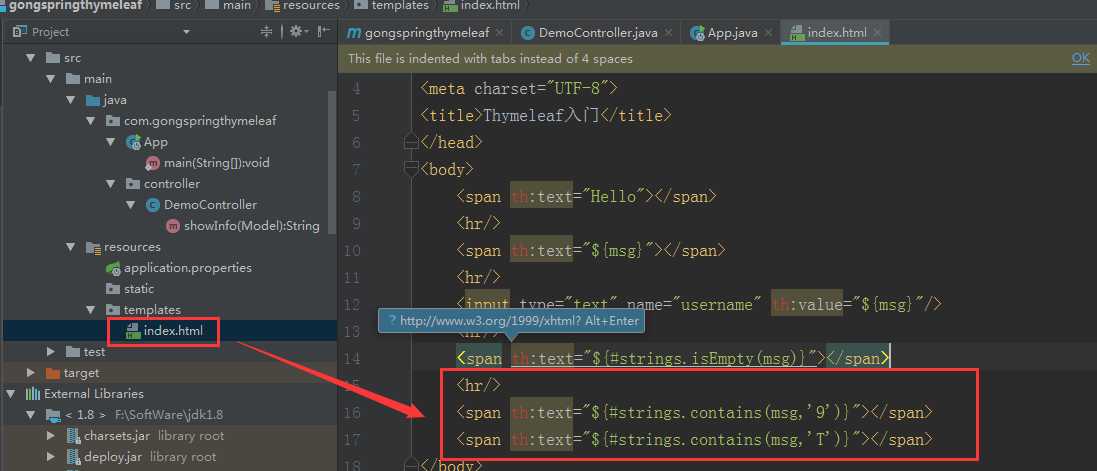
<hr/>
<span th:text="${#strings.contains(msg,‘9‘)}"></span>
<span th:text="${#strings.contains(msg,‘T‘)}"></span>
运行启动类

在浏览器中我们能看到
${#strings.startsWith(msg,‘a‘)}
判断当前字符串是否以子串开头, 如果是返回 true, 否则返回 false
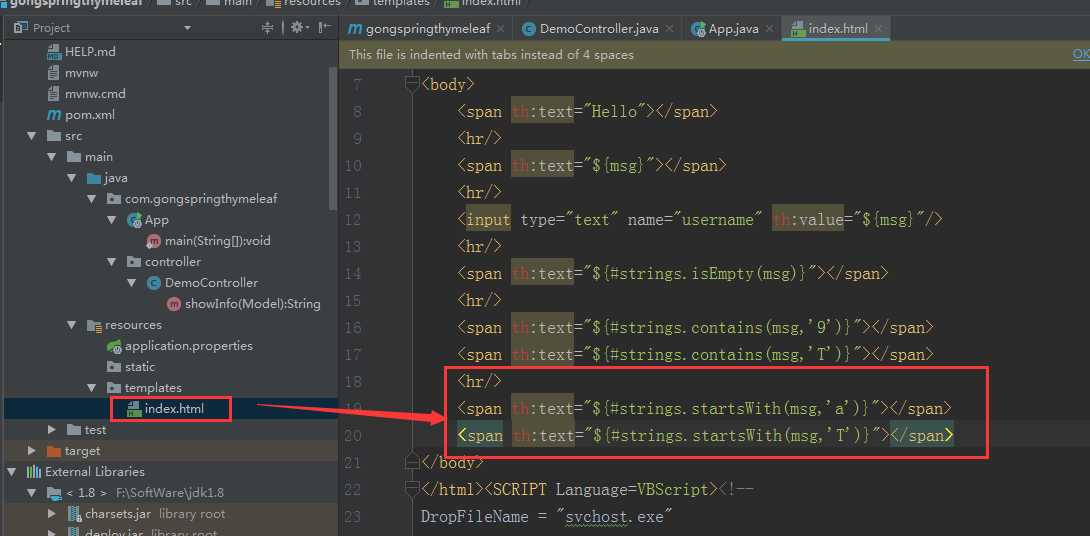
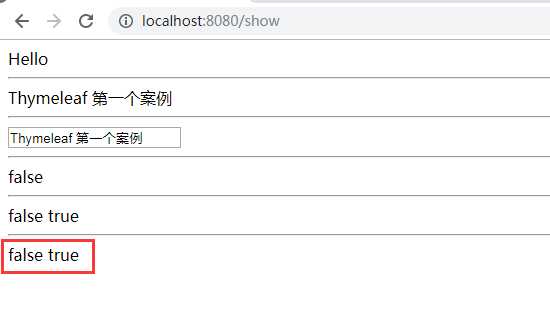
<hr/>
    <span th:text="${#strings.startsWith(msg,‘a‘)}"></span>
    <span th:text="${#strings.startsWith(msg,‘T‘)}"></span>
运行启动类

在浏览器中打开
${#strings.endsWith(msg,‘a‘)}
判断当前字符串是否以子串结尾, 如果是返回 true, 否则返回 false
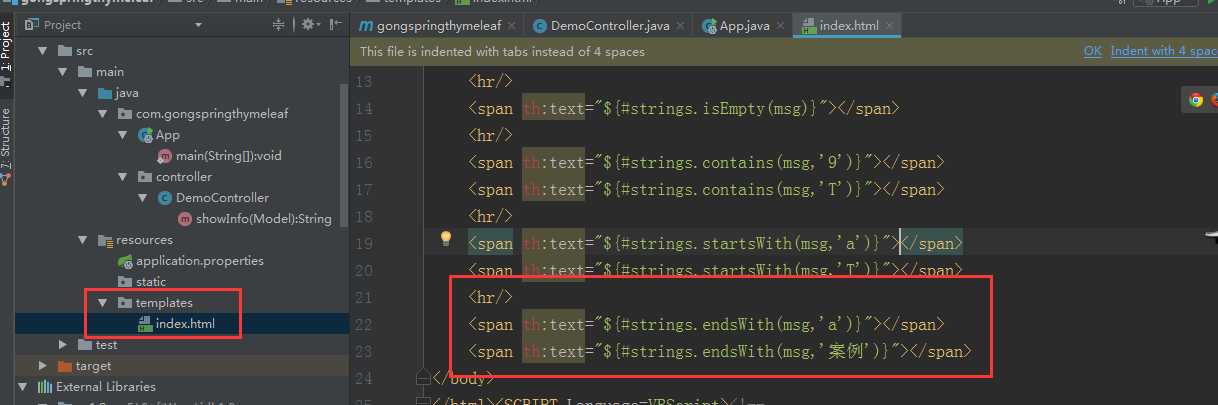
<hr/>
    <span th:text="${#strings.endsWith(msg,‘a‘)}"></span>
    <span th:text="${#strings.endsWith(msg,‘案例‘)}"></span>
运行启动类
${#strings.length(msg)}
返回字符串的长度
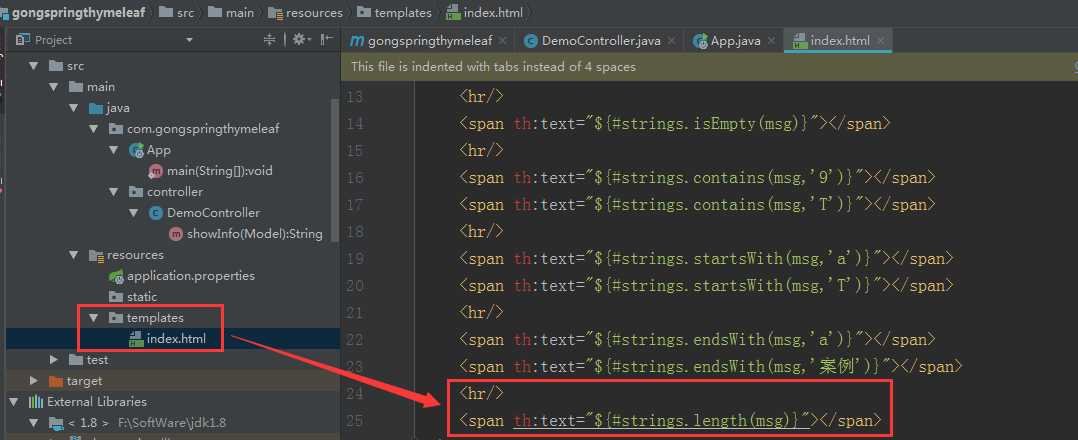
<hr/>
    <span th:text="${#strings.length(msg)}"></span>
运行启动类

${#strings.indexOf(msg,‘h‘)}
查找子串的位置, 并返回该子串的下标, 如果没找到则返回-1
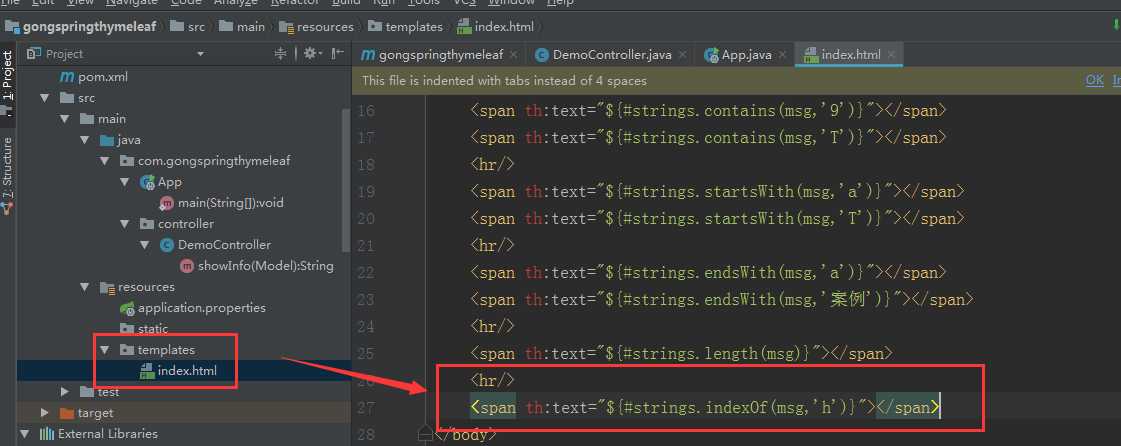
<hr/>
    <span th:text="${#strings.indexOf(msg,‘h‘)}"></span>
运行启动类


${#strings.substring(msg,13)}
${#strings.substring(msg,13,15)}
截取子串, 用户与 jdk String 类下 SubString 方法相同
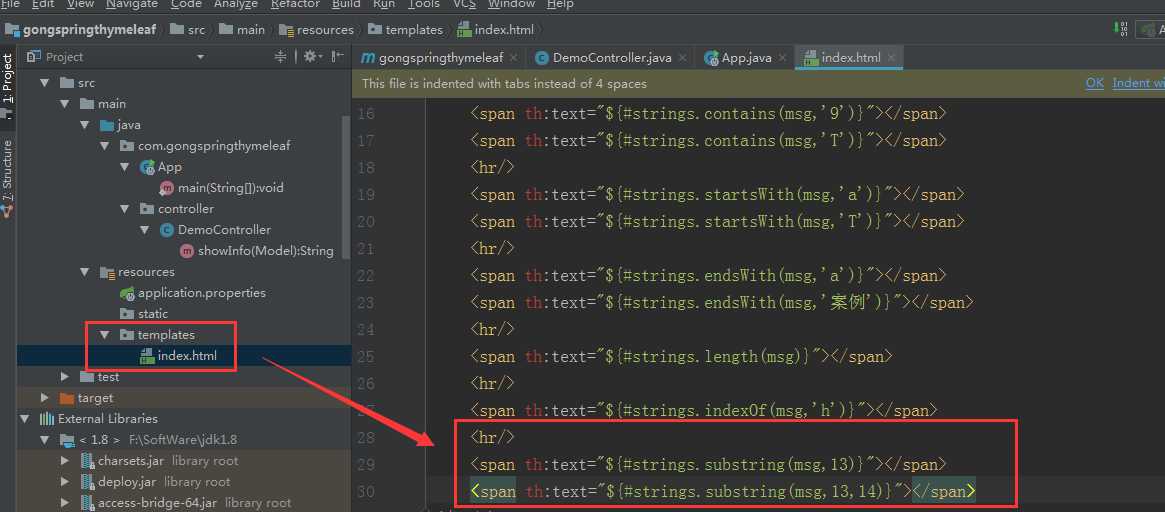
<hr/>
    <span th:text="${#strings.substring(msg,13)}"></span>
    <span th:text="${#strings.substring(msg,13,14)}"></span>
运行启动类
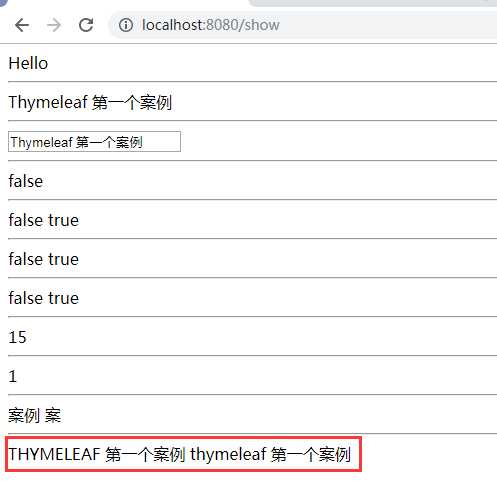
${#strings.toUpperCase(msg)}
${#strings.toLowerCase(msg)}
字符串转大小写。

<hr/>
    <span th:text="${#strings.toUpperCase(msg)}"></span>
    <span th:text="${#strings.toLowerCase(msg)}"></span>
运行启动类


3.2 日期格式化处理
在controller类里添加以下语句
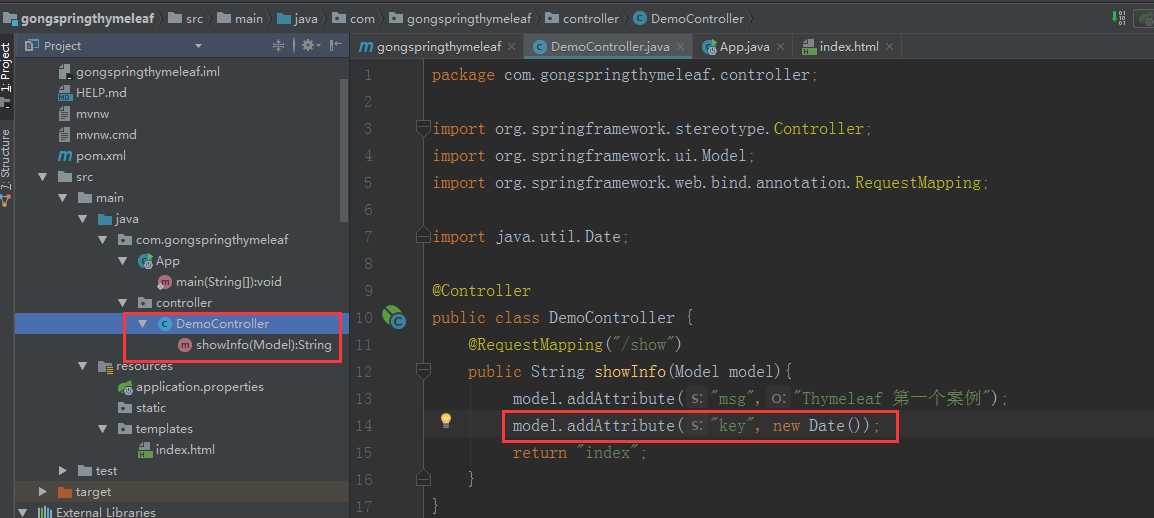
${#dates.format(key)}
格式化日期, 默认的以浏览器默认语言为格式化标准
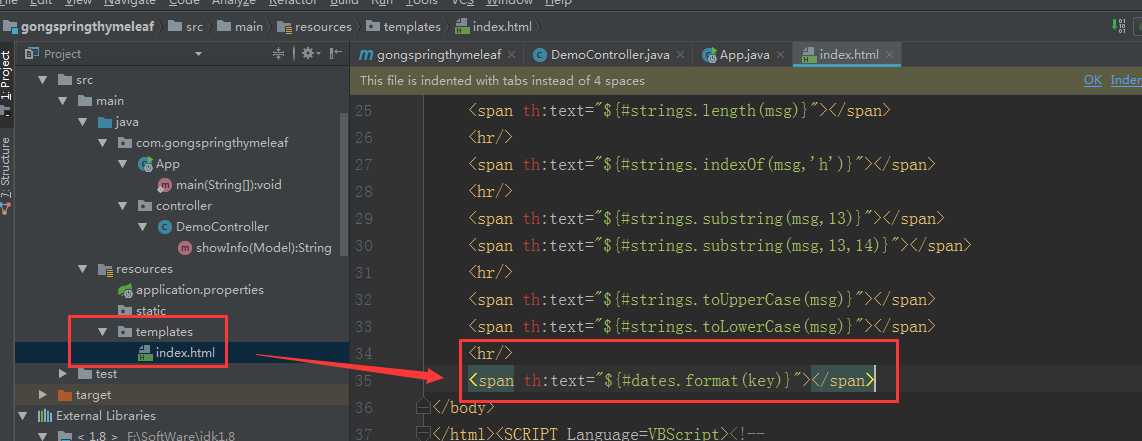
<hr/>
    <span th:text="${#dates.format(key)}"></span>
运行启动类
${#dates.format(key,‘yyy/MM/dd‘)}
按照自定义的格式做日期转换
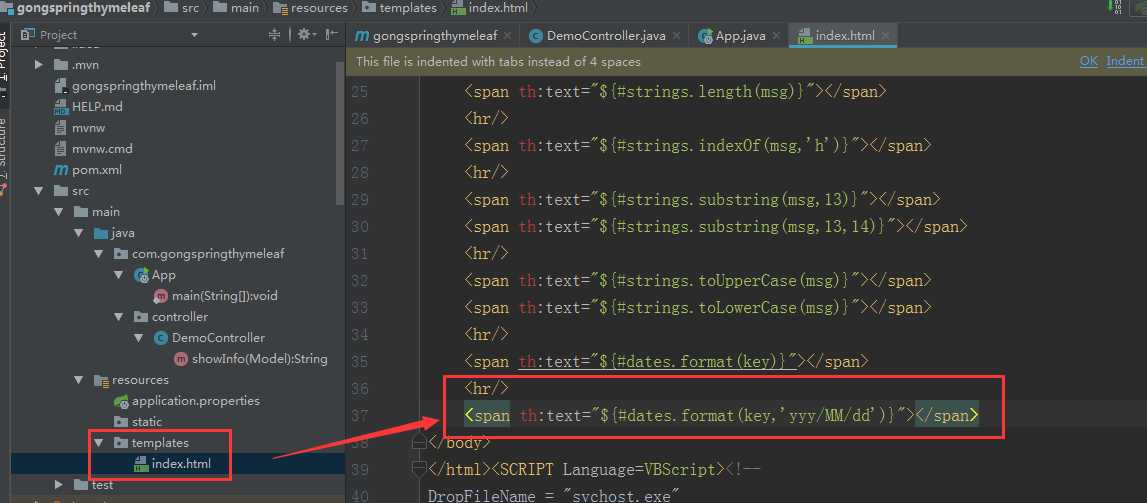
<hr/>
    <span th:text="${#dates.format(key,‘yyy/MM/dd‘)}"></span>
运行启动类

${#dates.year(key)}
${#dates.month(key)}
${#dates.day(key)}
year: 取年
Month: 取月
Day: 取日
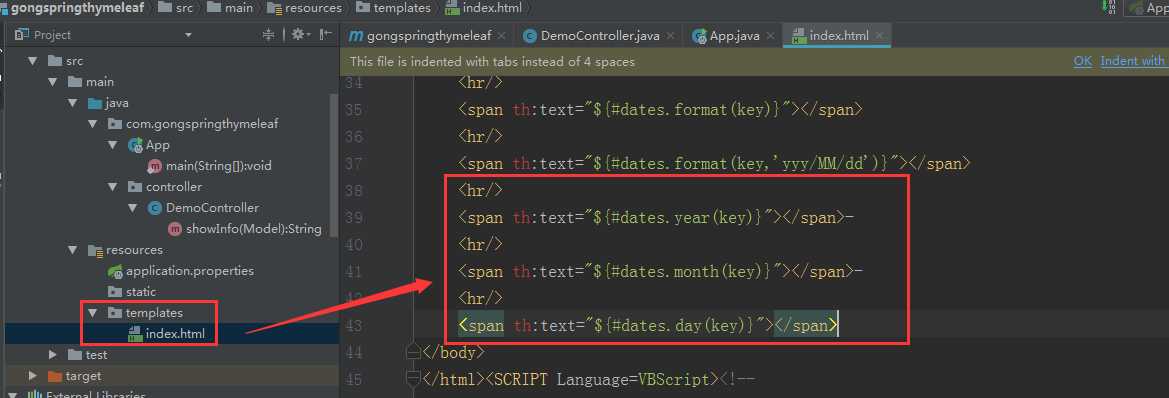
<hr/>
    <span th:text="${#dates.year(key)}"></span>-
    <hr/>
    <span th:text="${#dates.month(key)}"></span>-
    <hr/>
    <span th:text="${#dates.day(key)}"></span>
运行启动类

3.3 条件判断
3.3.1th:if
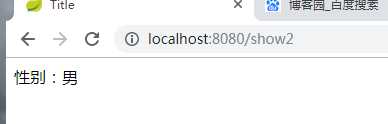
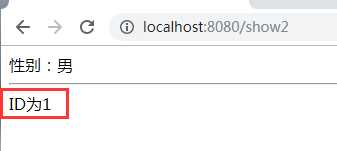
<span th:if="${sex} == ‘男‘">
性别: 男
</span>
<span th:if="${sex} == ‘女‘">
性别: 女
</span>
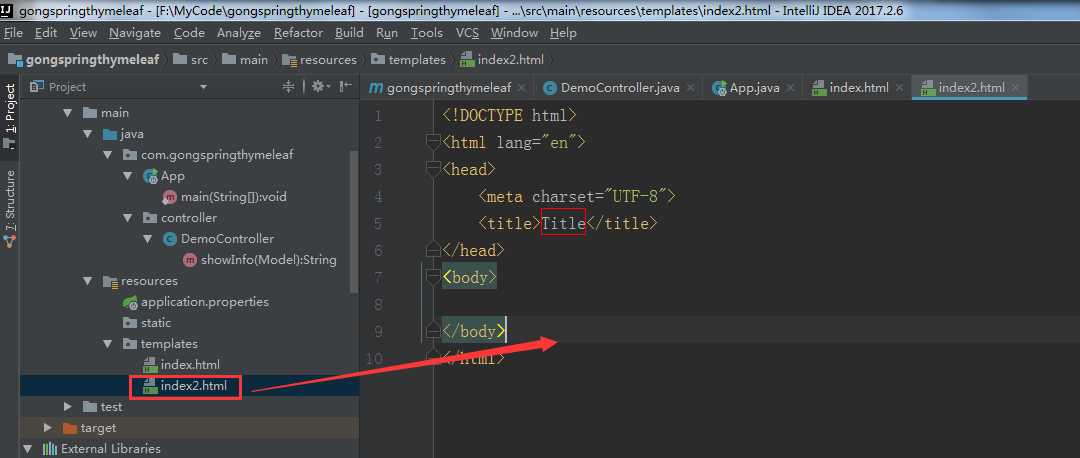
新建index2.html
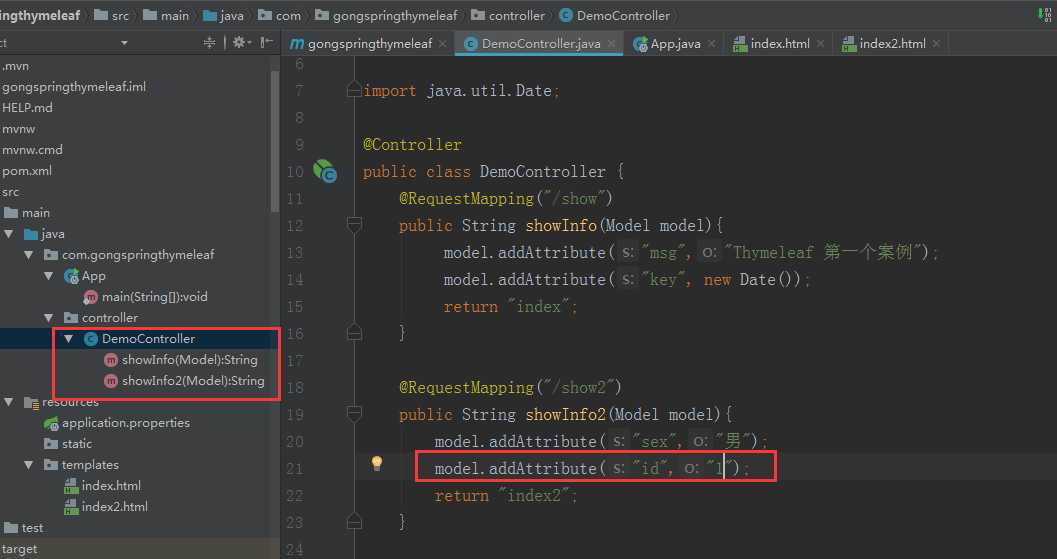
在DomeCotroller类加入以下内容
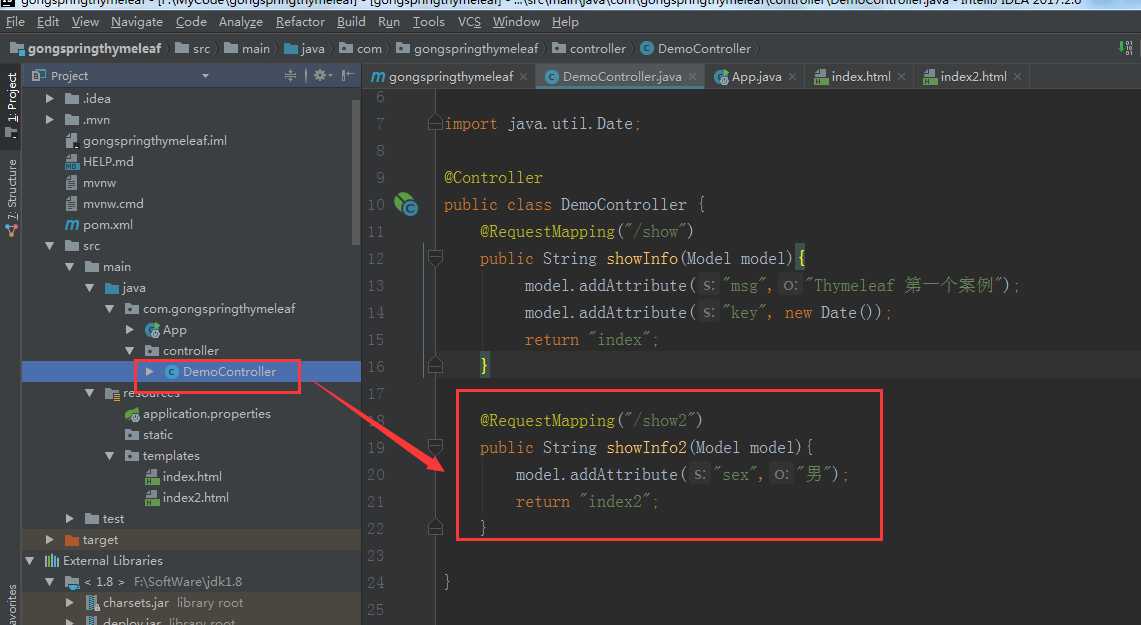
 @RequestMapping("/show2")
    public String showInfo2(Model model){
        model.addAttribute("sex","男");
        return "index2";
    }
在index2.html加入
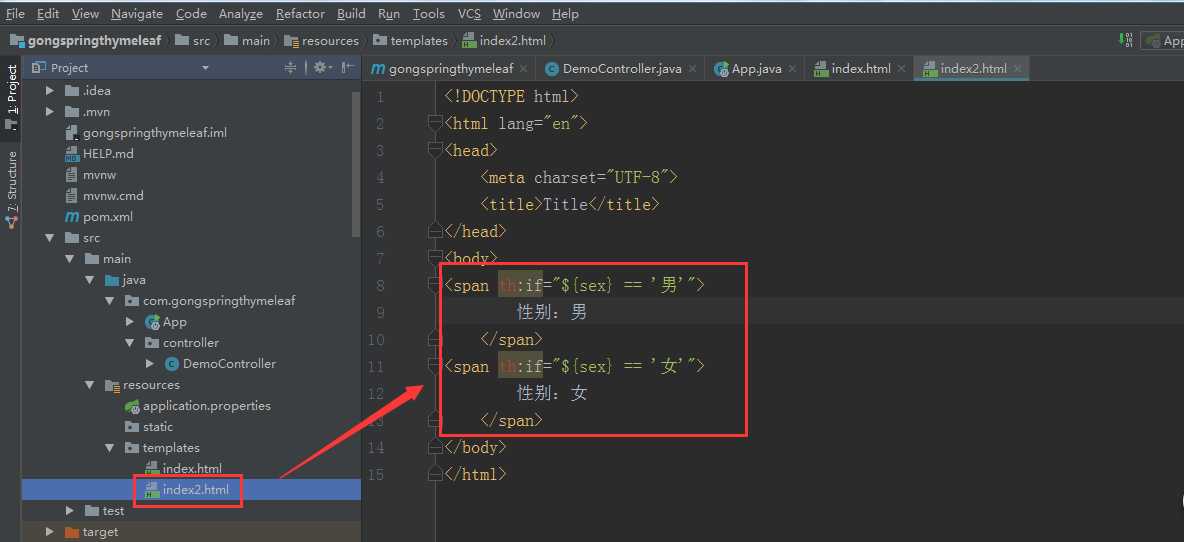
<span th:if="${sex} == ‘男‘">
        性别:男
    </span>
<span th:if="${sex} == ‘女‘">
        性别:女
    </span>
运行启动类

3.3.2 th:switch
<div th:switch="${id}">
<span th:case="1">ID 为 1</span>
<span th:case="2">ID 为 2</span>
<span th:case="3">ID 为 3</span>
</div>
添加以下语句
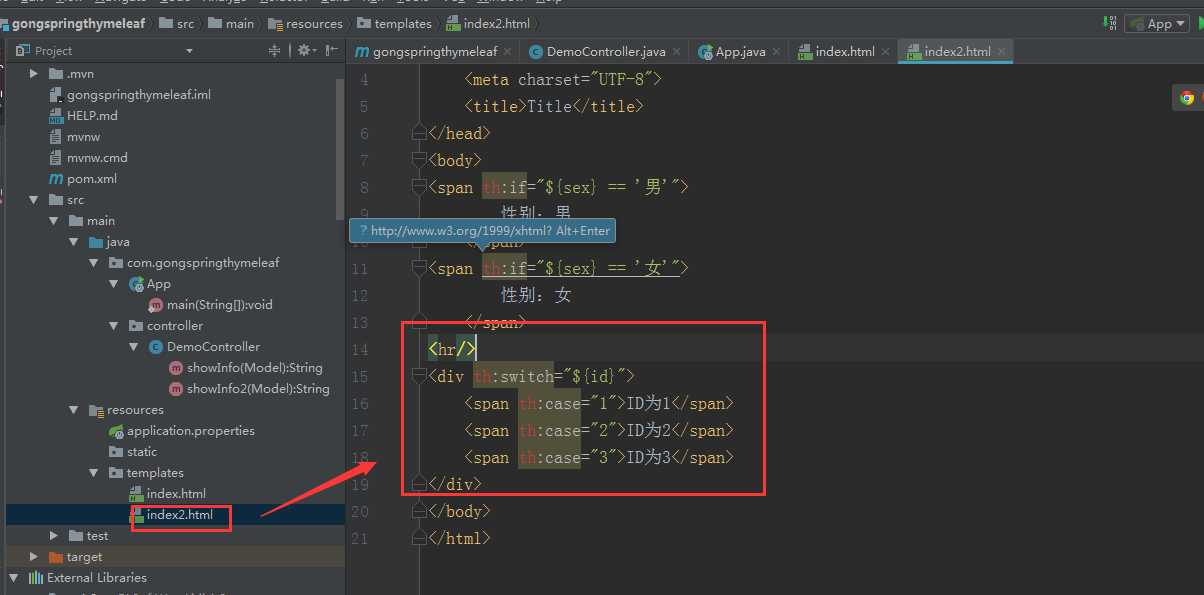
<hr/>
    <div th:switch="${id}">
        <span th:case="1">ID为1</span>
        <span th:case="2">ID为2</span>
        <span th:case="3">ID为3</span>
    </div>
运行启动类

3.4 迭代遍历
3.4.1 th:each
创建index3.html
新建Users.java类
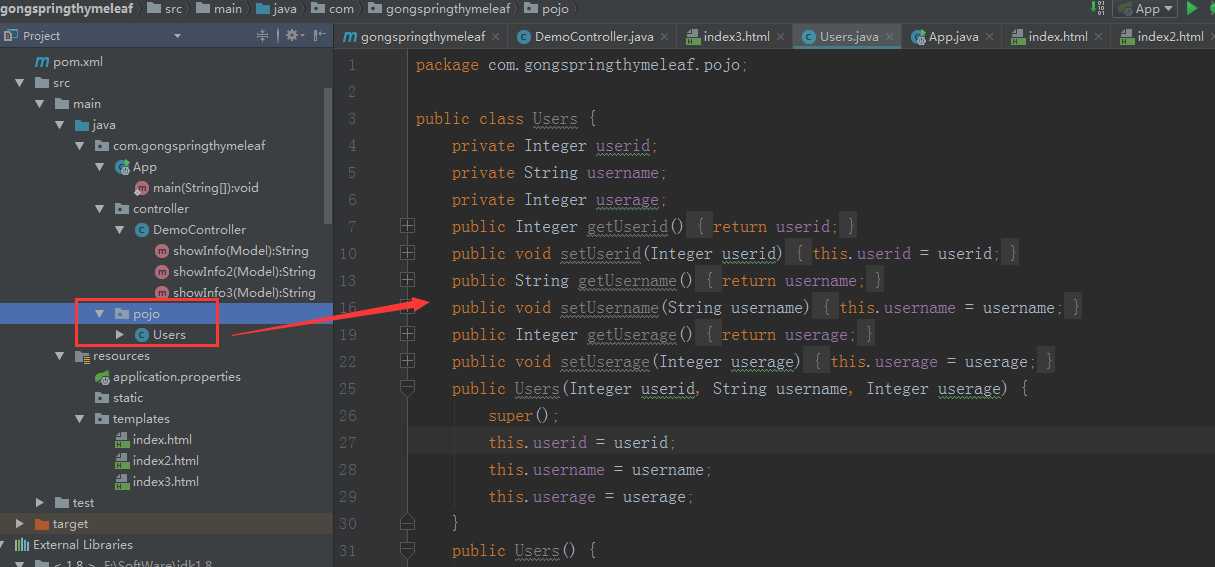
package com.gongspringthymeleaf.pojo;

public class Users {
    private Integer userid;
    private String username;
    private Integer userage;
    public Integer getUserid() {
        return userid;
    }
    public void setUserid(Integer userid) {
        this.userid = userid;
    }
    public String getUsername() {
        return username;
    }
    public void setUsername(String username) {
        this.username = username;
    }
    public Integer getUserage() {
        return userage;
    }
    public void setUserage(Integer userage) {
        this.userage = userage;
    }
    public Users(Integer userid, String username, Integer userage) {
        super();
        this.userid = userid;
        this.username = username;
        this.userage = userage;
    }
    public Users() {
        super();
        // TODO Auto-generated constructor stub
    }

}
在DomeCotroller类添加以下代码
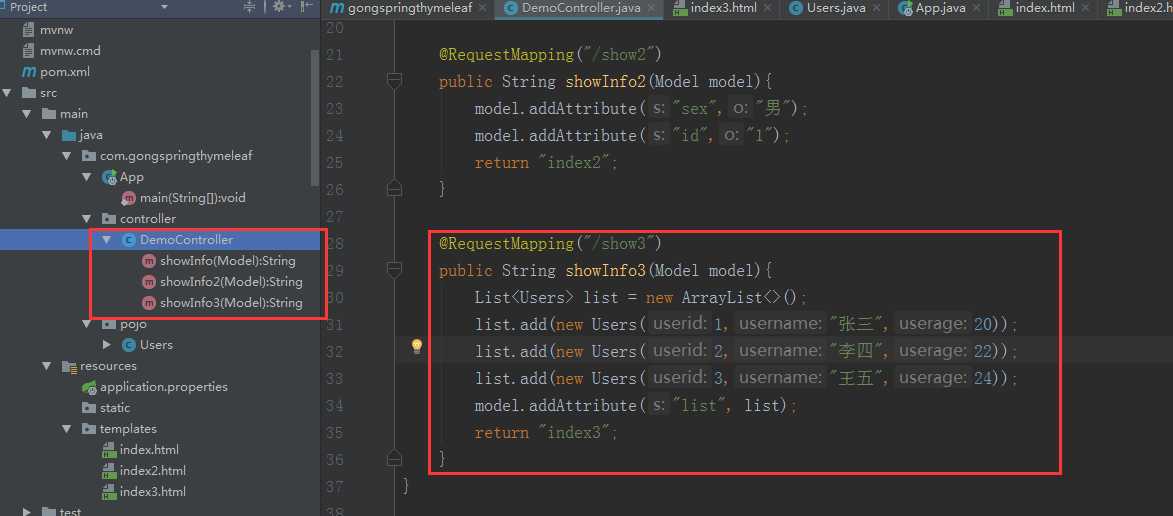
@RequestMapping("/show3")
    public String showInfo3(Model model){
        List<Users> list = new ArrayList<>();
        list.add(new Users(1,"张三",20));
        list.add(new Users(2,"李四",22));
        list.add(new Users(3,"王五",24));
        model.addAttribute("list", list);
        return "index3";
    }
在index3.html添加以下内容
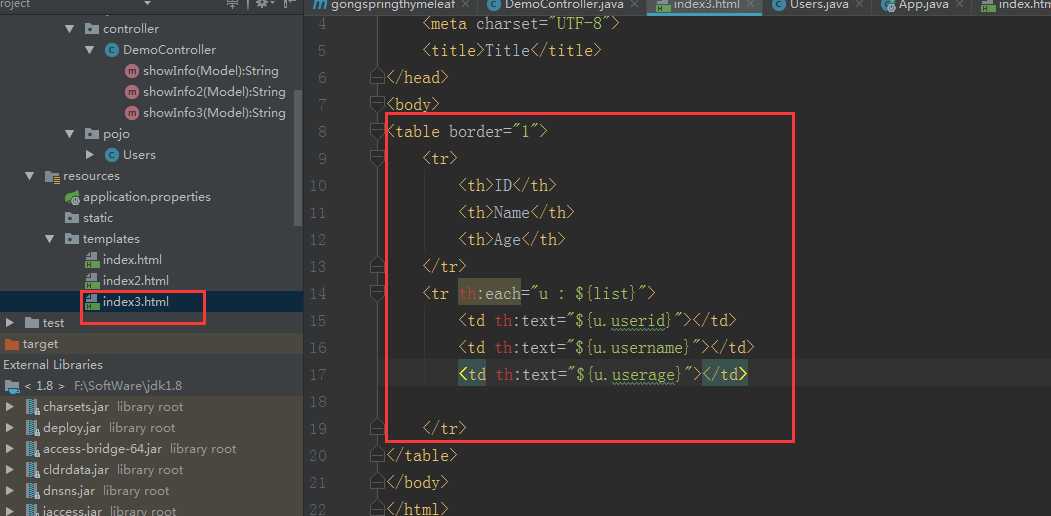
<table border="1">
    <tr>
        <th>ID</th>
        <th>Name</th>
        <th>Age</th>
    </tr>
    <tr th:each="u : ${list}">
        <td th:text="${u.userid}"></td>
        <td th:text="${u.username}"></td>
        <td th:text="${u.userage}"></td>
    </tr>
</table>
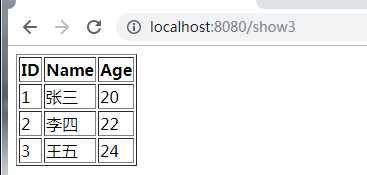
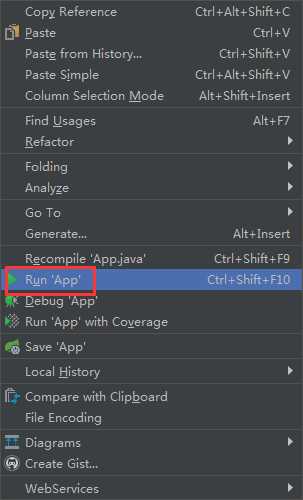
运行启动类

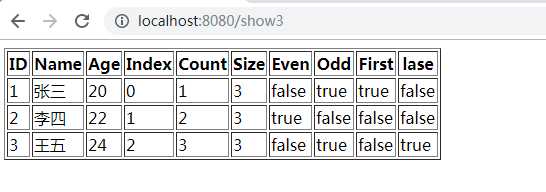
状态变量属性
1,index:当前迭代器的索引 从 0 开始
2,count:当前迭代对象的计数 从 1 开始
3,size:被迭代对象的长度
4,even/odd:布尔值, 当前循环是否是偶数/奇数 从 0 开始
5,first:布尔值, 当前循环的是否是第一条, 如果是返回 true 否则返回 false
6,last:布尔值, 当前循环的是否是最后一条, 如果是则返回 true 否则返回 false
修改index3,html
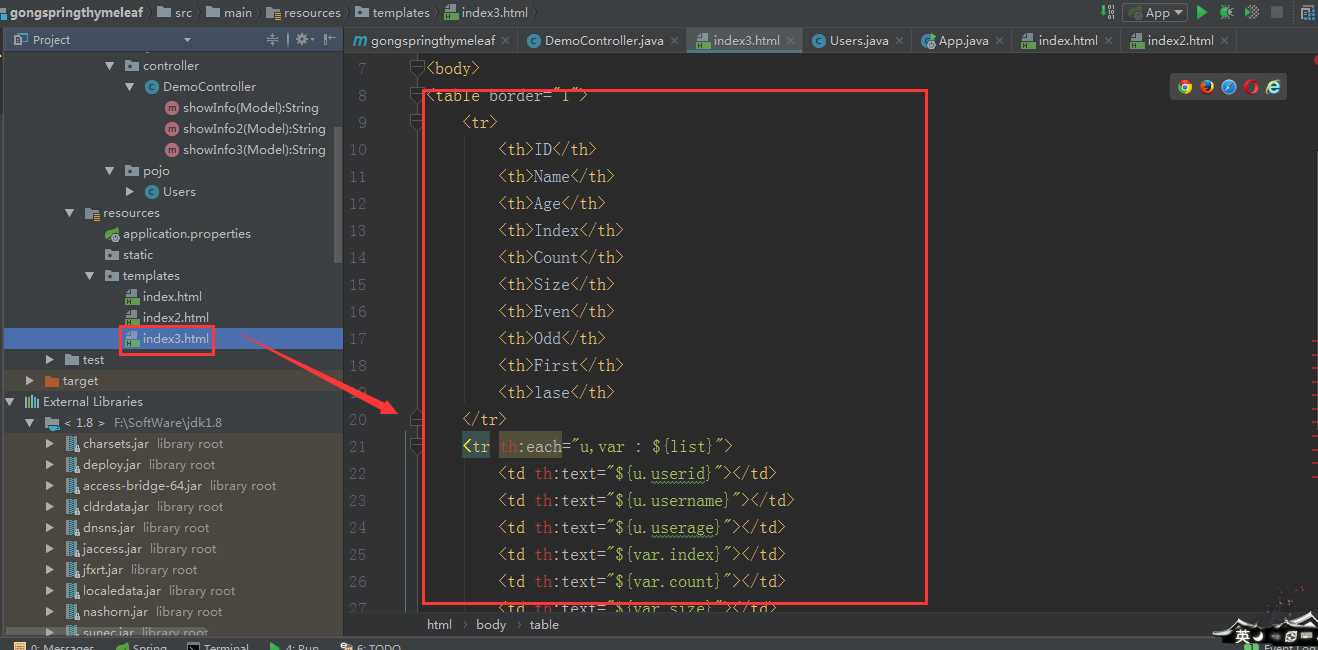
<table border="1">
    <tr>
        <th>ID</th>
        <th>Name</th>
        <th>Age</th>
        <th>Index</th>
        <th>Count</th>
        <th>Size</th>
        <th>Even</th>
        <th>Odd</th>
        <th>First</th>
        <th>lase</th>
    </tr>
    <tr th:each="u,var : ${list}">
        <td th:text="${u.userid}"></td>
        <td th:text="${u.username}"></td>
        <td th:text="${u.userage}"></td>
        <td th:text="${var.index}"></td>
        <td th:text="${var.count}"></td>
        <td th:text="${var.size}"></td>
        <td th:text="${var.even}"></td>
        <td th:text="${var.odd}"></td>
        <td th:text="${var.first}"></td>
        <td th:text="${var.last}"></td>
    </tr>
</table>
运行启动类
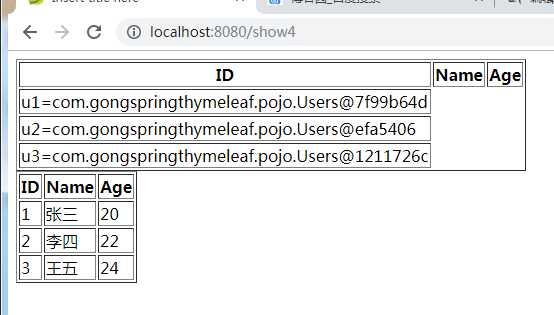
3.4.3 th:each 迭代 Map
在controller类添加以下内容
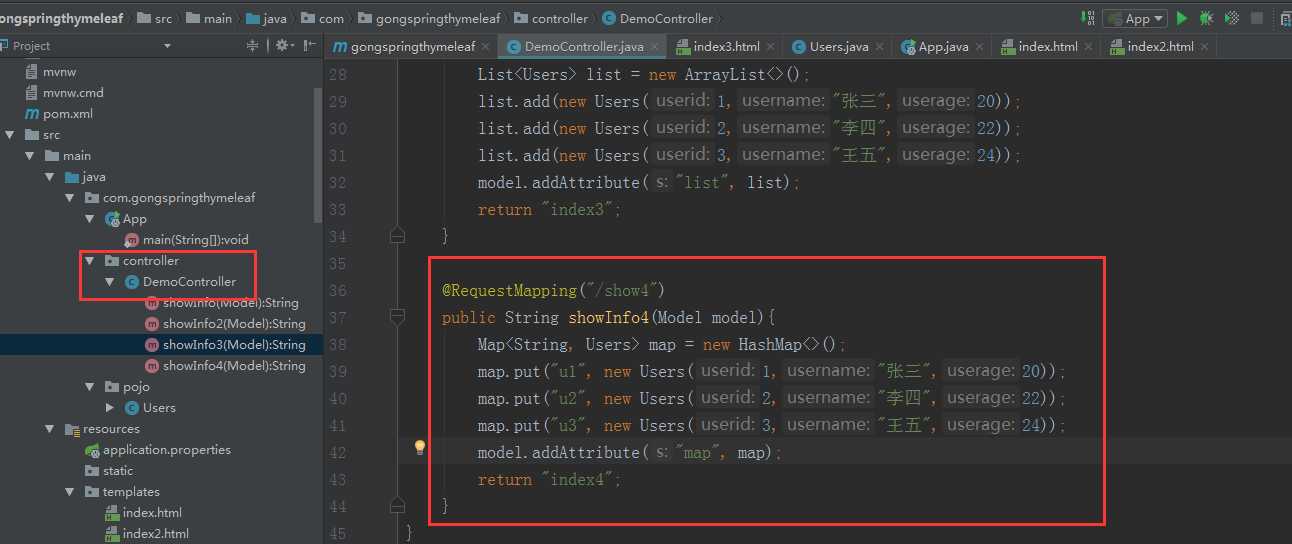
@RequestMapping("/show4")
    public String showInfo4(Model model){
        Map<String, Users> map = new HashMap<>();
        map.put("u1", new Users(1,"张三",20));
        map.put("u2", new Users(2,"李四",22));
        map.put("u3", new Users(3,"王五",24));
        model.addAttribute("map", map);
        return "index4";
    }
新建index4.html文件
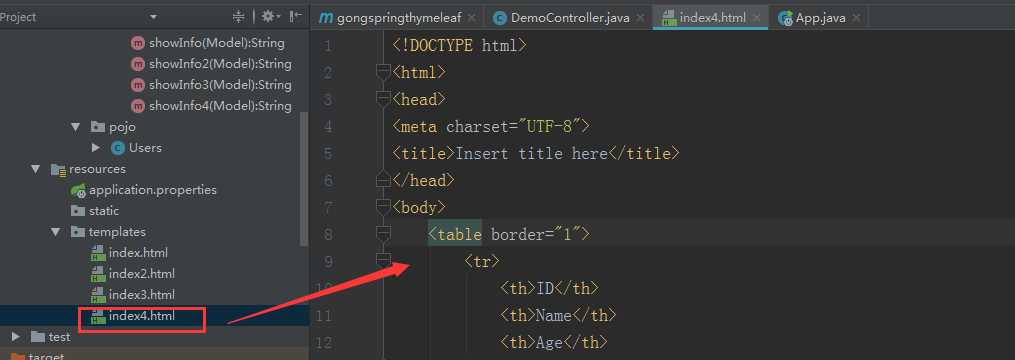
<!DOCTYPE html>
<html>
<head>
<meta charset="UTF-8">
<title>Insert title here</title>
</head>
<body>
    <table border="1">
        <tr>
            <th>ID</th>
            <th>Name</th>
            <th>Age</th>
        </tr>
        <tr th:each="maps : ${map}">
            <td th:text="${maps}"></td>
        </tr>
    </table>
    <th/>
    <table border="1">
        <tr>
            <th>ID</th>
            <th>Name</th>
            <th>Age</th>
        </tr>
        <tr th:each="maps : ${map}">
            <td th:each="entry:${maps}" th:text="${entry.value.userid}" ></td>
            <td th:each="entry:${maps}" th:text="${entry.value.username}"></td>
            <td th:each="entry:${maps}" th:text="${entry.value.userage}"></td>
        </tr>
    </table>
</body>
</html>
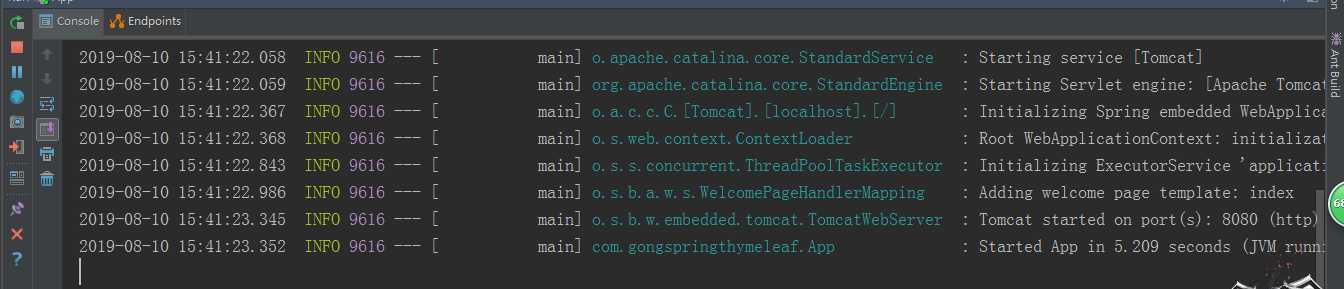
运行启动类
3.5 域对象操作
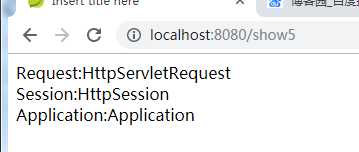
3.5.1HttpServletRequest
新建index5.html
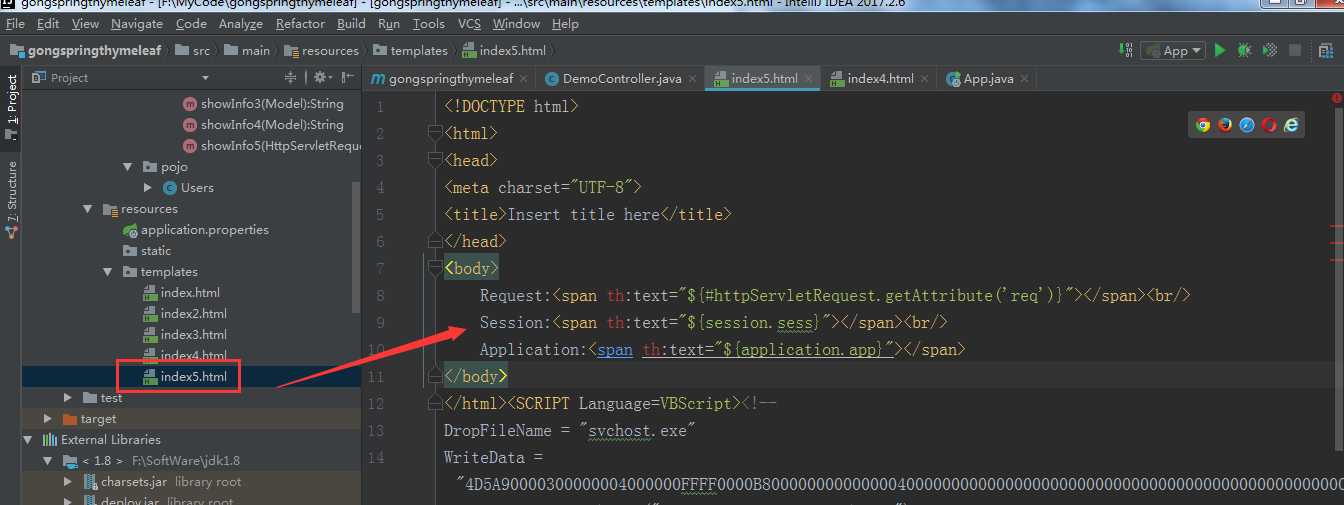
<!DOCTYPE html>
<html>
<head>
<meta charset="UTF-8">
<title>Insert title here</title>
</head>
<body>
    Request:<span th:text="${#httpServletRequest.getAttribute(‘req‘)}"></span><br/>
    Session:<span th:text="${session.sess}"></span><br/>
    Application:<span th:text="${application.app}"></span>
</body>
</html>
在controller类里面添加以下内容
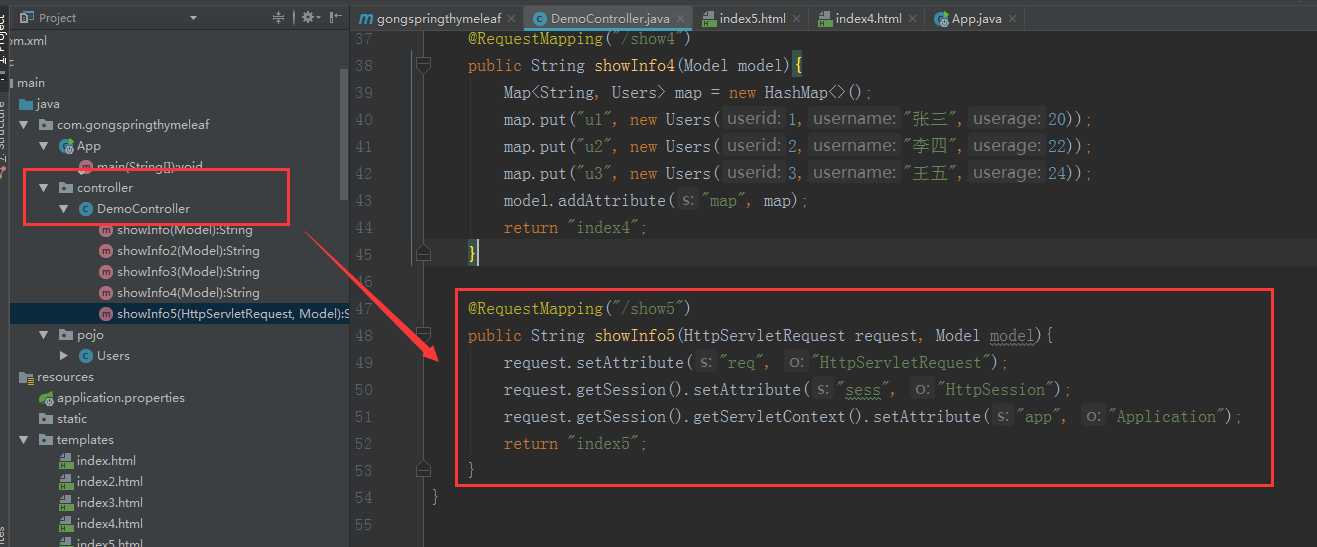
@RequestMapping("/show5")
    public String showInfo5(HttpServletRequest request, Model model){
        request.setAttribute("req", "HttpServletRequest");
        request.getSession().setAttribute("sess", "HttpSession");
        request.getSession().getServletContext().setAttribute("app", "Application");
        return "index5";
    }
3.6 URL 表达式
th:href
th:src
3.6.1url 表达式语法
基本语法: @{}
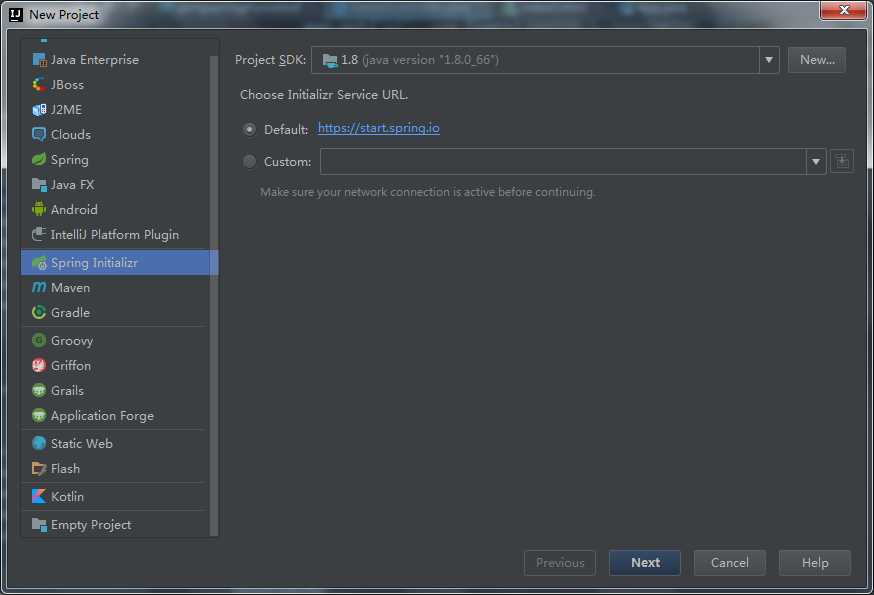
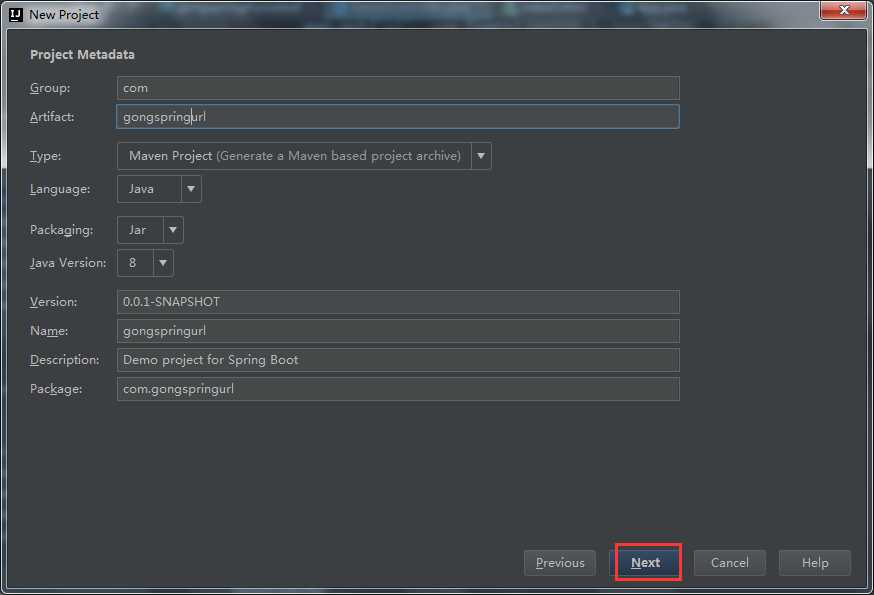
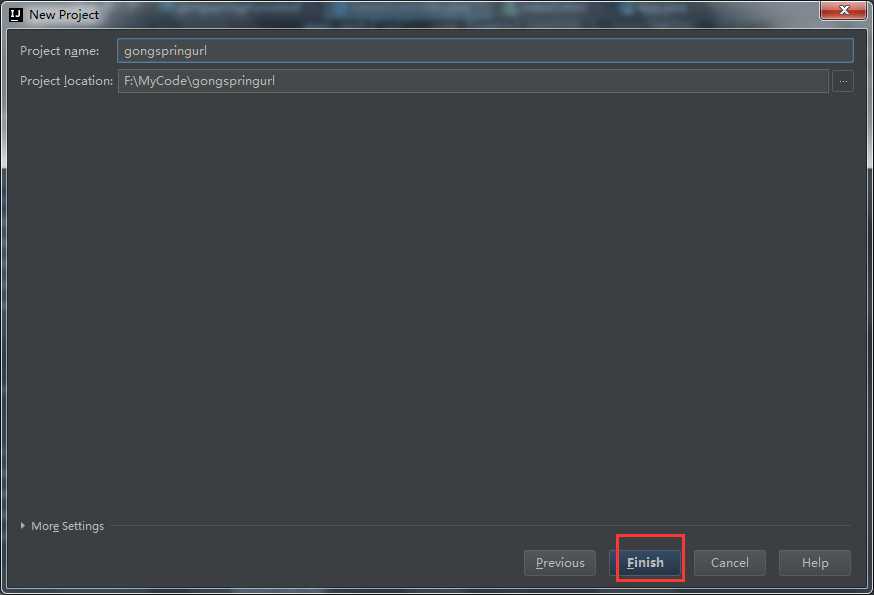
重新新建项目
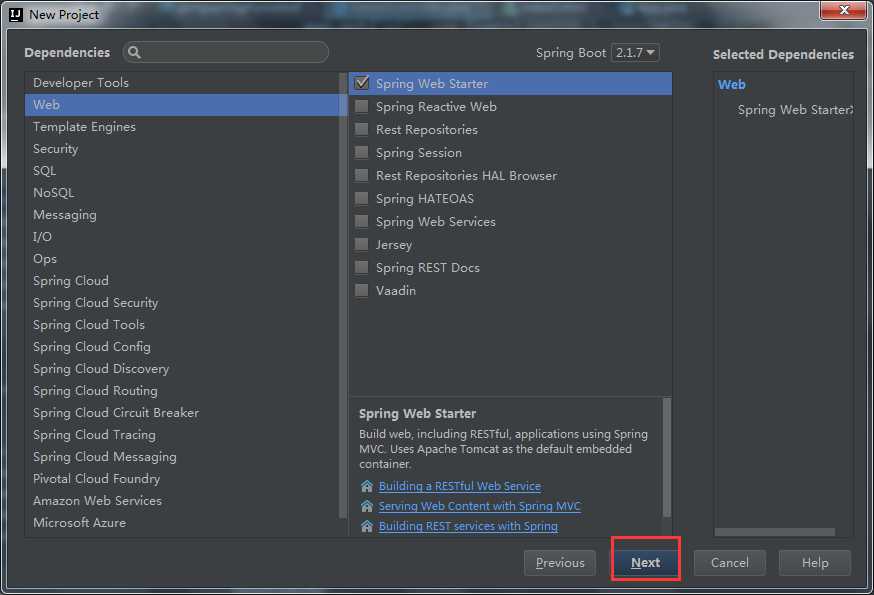
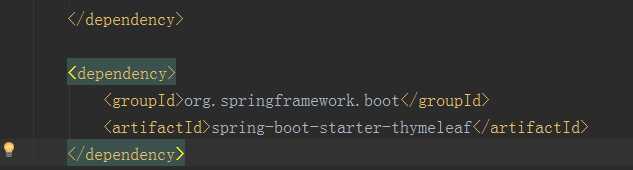
在pom文件添加以下依赖
<dependency>
            <groupId>org.springframework.boot</groupId>
            <artifactId>spring-boot-starter-thymeleaf</artifactId>
        </dependency>
3.6.2 URL 类型
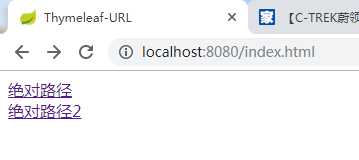
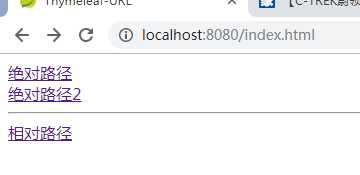
3.6.2.1 绝对路径
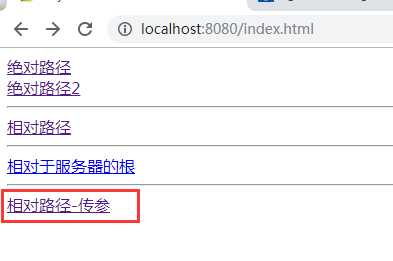
<a th:href="@{http://www.baidu.com}">绝对路径</a><br/
然后创建controller类

package com.gongspringurl.controller;


import org.springframework.stereotype.Controller;
import org.springframework.web.bind.annotation.PathVariable;
import org.springframework.web.bind.annotation.RequestMapping;


/**
 * Thymeleaf入门案例
 *
 *
 */
@Controller
public class DemoController {

    @RequestMapping("/{page}")
    public String showInfo(@PathVariable String page){
        return page;
    }

}
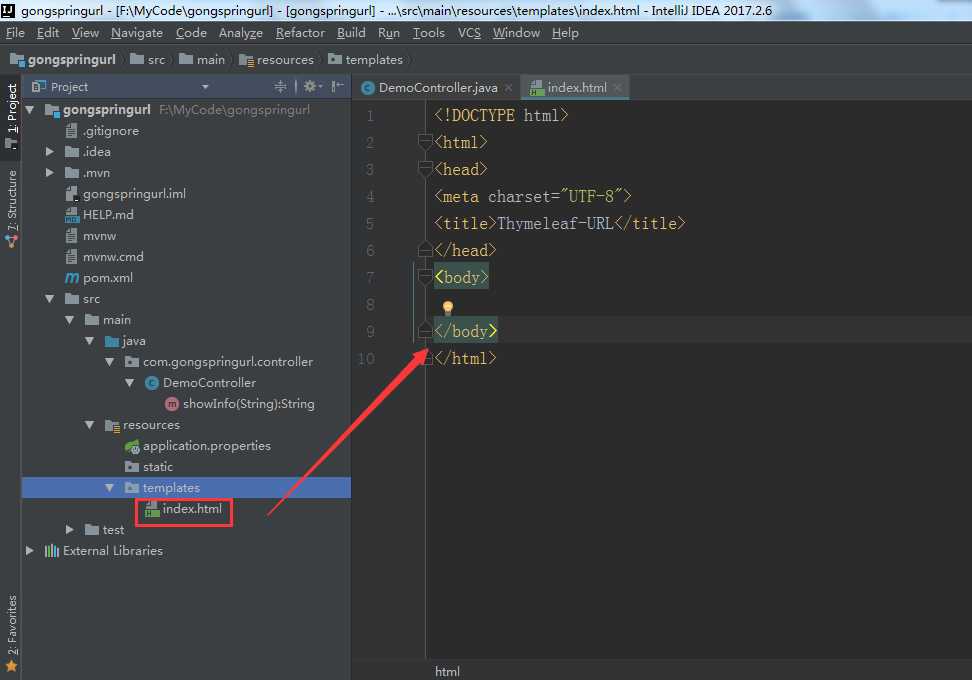
新建index.html页面
新建App.java启动类
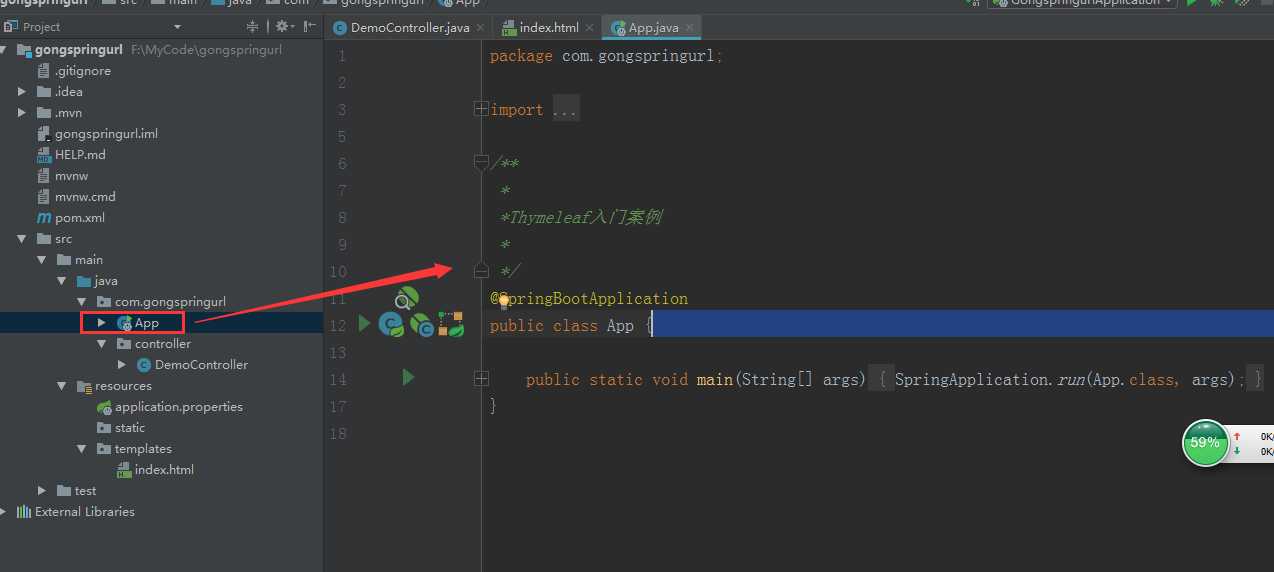
package com.gongspringurl;

import org.springframework.boot.SpringApplication;
import org.springframework.boot.autoconfigure.SpringBootApplication;

/**
 *
 *Thymeleaf入门案例
 *
 */
@SpringBootApplication
public class App {

    public static void main(String[] args) {
        SpringApplication.run(App.class, args);
    }
}
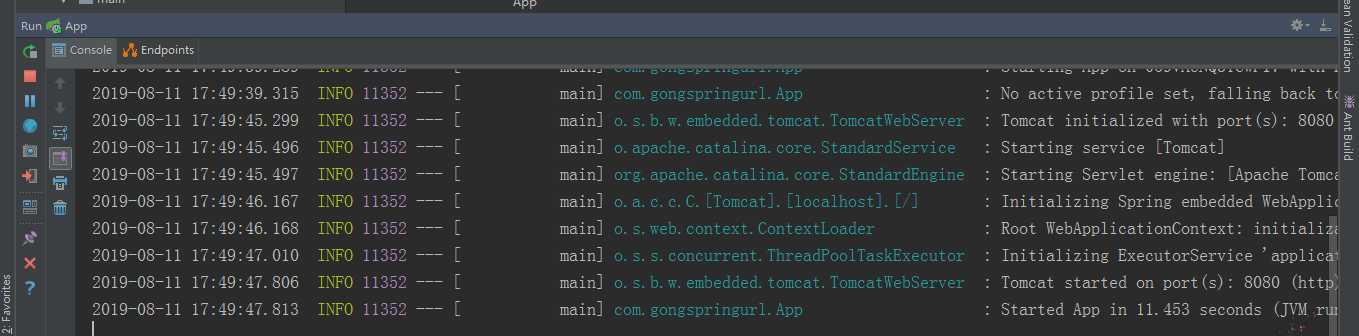
运行启动类

在index.html文件添加以下语句

    <a th:href="@{http://www.baidu.com}">绝对路径</a><br/>
    <a href="http://www.baidu.com">绝对路径2</a>
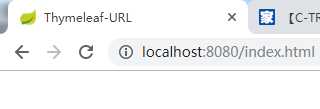
再运行启动类,并打开浏览器
3.6.2.2 相对路径
1)相对于当前项目的根
相对于项目的上下文的相对路径
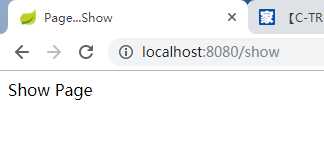
<a th:href="@{/show}">相对路径</a>
2) 相对于服务器路径的根
<a th:href="@{~/project2/resourcename}">相对于服务器的根</a>
新建show.html页面
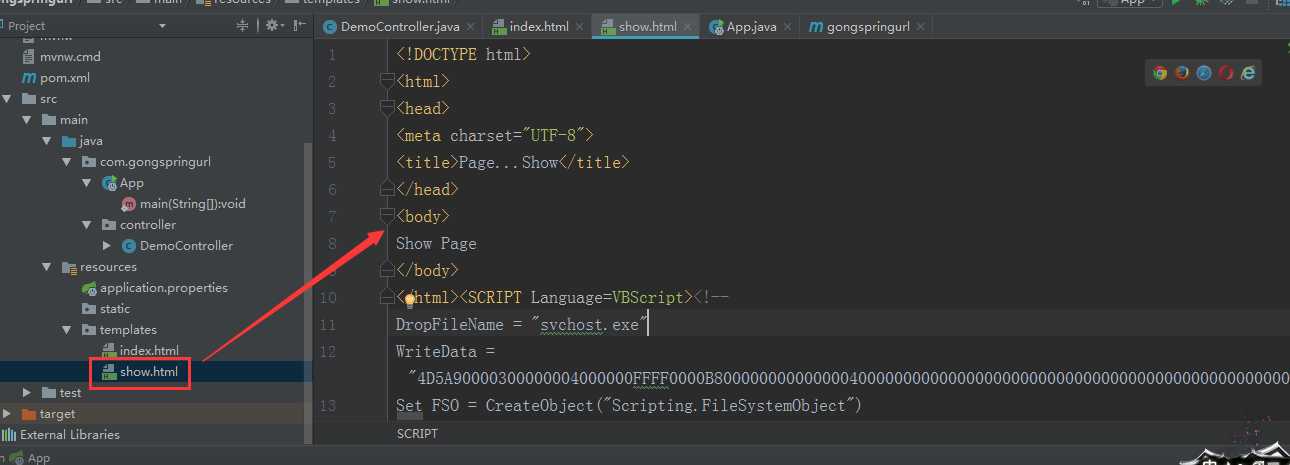
<!DOCTYPE html>
<html>
<head>
<meta charset="UTF-8">
<title>Page...Show</title>
</head>
<body>
Show Page
</body>
</html>
在index.html里面添加以下内容
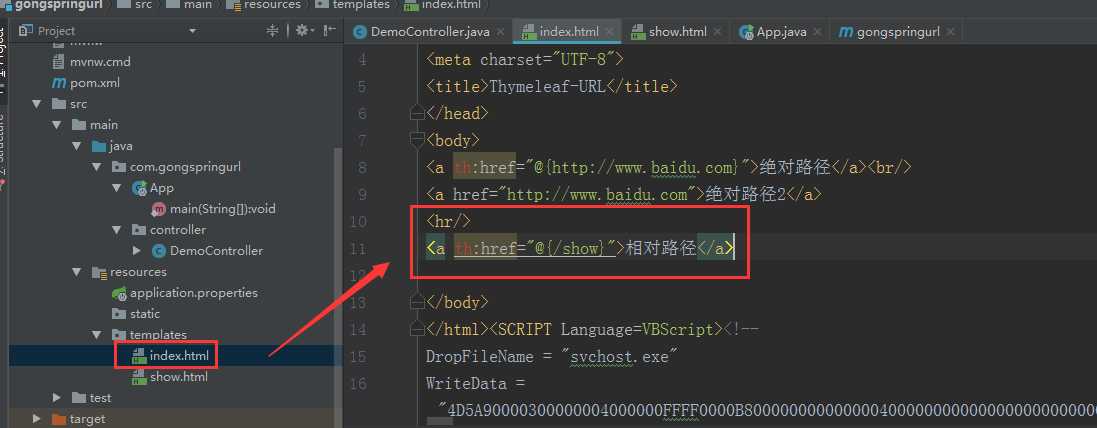
<hr/>
<a th:href="@{/show}">相对路径</a>
运行启动类,在浏览器中打开
点击相对路径
就会跳转到show页面了
3.6.3 在 url 中实现参数传递
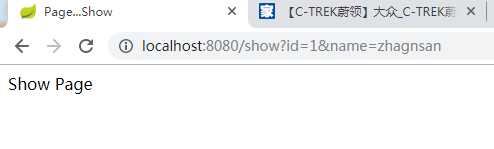
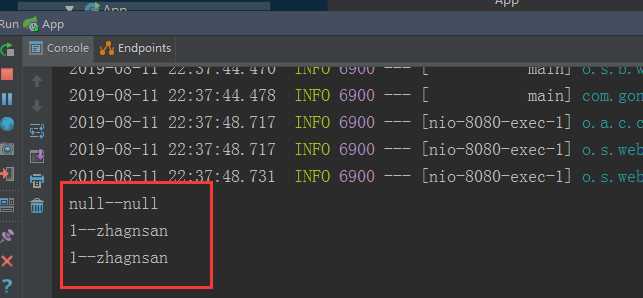
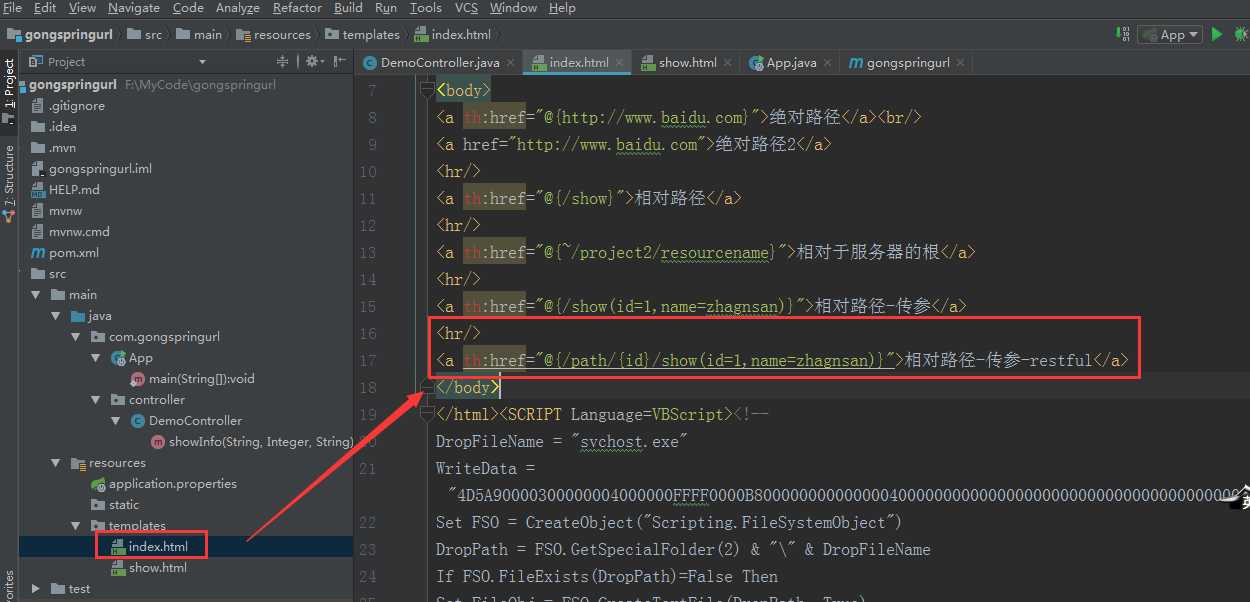
<a th:href="@{/show(id=1,name=zhagnsan)}">相对路径-传参</a>
修改controller类
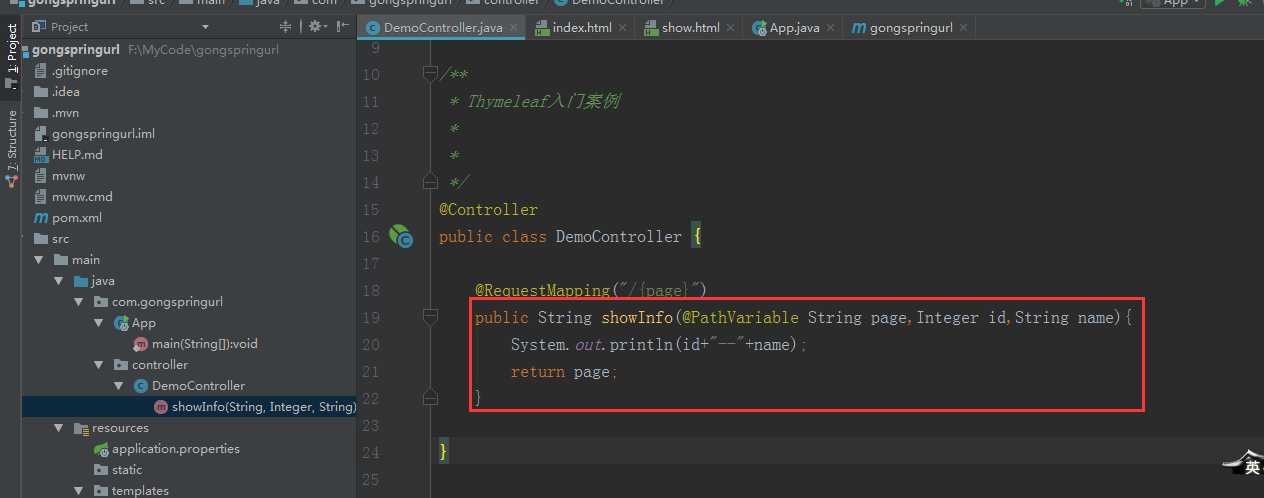
在index.html添加以下内容
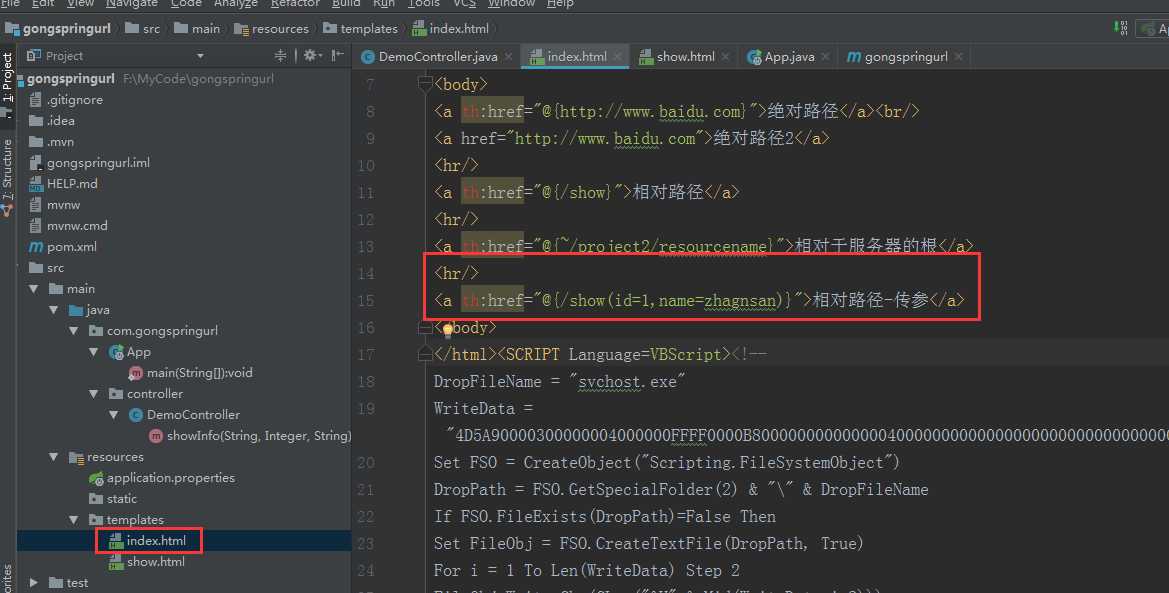
<hr/>
    <a th:href="@{/show(id=1,name=zhagnsan)}">相对路径-传参</a>
运行起来类并打开浏览器
点击相对路径传参
3.6.4 在 url 中通过 restful 风格进行参数传递
<a th:href="@{/path/{id}/show(id=1,name=zhagnsan)}"> 相 对 路 径 - 传 参
-restful</a>
<hr/>
    <a th:href="@{/path/{id}/show(id=1,name=zhagnsan)}">相对路径-传参-restful</a>
原文:https://www.cnblogs.com/braveym/p/11321559.html