public class UserDaoImpl implements UserDao {

    //需要spring注入模板
    private HibernateTemplate hibernateTemplate;
    public void setHibernateTemplate(HibernateTemplate hibernateTemplate) {
        this.hibernateTemplate = hibernateTemplate;
    }

    @Override
    public void save(User user) {
        this.hibernateTemplate.save(user);
    }

}
②HibernateDaoSupport类
HibernateDaoSupport类是用来简化上面的操作,上面的HibernateTemplate这个类的实例需要我们手动去spring中注入。而HibernateDaoSupport类中已经包含了创建HibernateTemplate的代码,我们只需要继承这个类然后只需要去注入SessionFactory即可
<!-- 3 dao -->
    <bean id="userDao" class="com.itheima.dao.impl.UserDaoImpl">
        <property name="sessionFactory" ref="sessionFactory"></property>
    </bean>
③如果删除hibernate.cfg.xml配置文件怎么去配置hibernate所需要的东西
在spring中有相应的配置来配置hibernate所需要的东西。如下代码,我们使用特殊的LocalSessionFactoryBean来创建特殊的bean,使用这个类我们创建出SessionFactory
然后在SessionFactory里面配置我们hibernate中所需要的配置!
<!-- 1.3配置 LocalSessionFactoryBean,获得SessionFactory
        * configLocation确定配置文件位置
            <property name="configLocation" value="classpath:hibernate.cfg.xml"></property>
        1)dataSource 数据源
        2)hibernateProperties hibernate其他配置项
        3) 导入映射文件
            mappingLocations ,确定映射文件位置,需要“classpath:” ,支持通配符 【】
                <property name="mappingLocations" value="classpath:com/itheima/domain/User.hbm.xml"></property>
                <property name="mappingLocations" value="classpath:com/itheima/domain/*.hbm.xml"></property>
            mappingResources ,加载执行映射文件,从src下开始 。不支持通配符*
                <property name="mappingResources" value="com/itheima/domain/User.hbm.xml"></property>
            mappingDirectoryLocations ,加载指定目录下的,所有配置文件
                <property name="mappingDirectoryLocations" value="classpath:com/itheima/domain/"></property>
            mappingJarLocations , 从jar包中获得映射文件
    -->
    <bean id="sessionFactory" class="org.springframework.orm.hibernate3.LocalSessionFactoryBean">
        <property name="dataSource" ref="dataSource"></property>
        <property name="hibernateProperties">
            <props>
                <prop key="hibernate.dialect">org.hibernate.dialect.MySQL5Dialect</prop>
                <prop key="hibernate.show_sql">true</prop>
                <prop key="hibernate.format_sql">true</prop>
                <prop key="hibernate.hbm2ddl.auto">update</prop>
                <prop key="hibernate.current_session_context_class">thread</prop>
            </props>
        </property>
        <property name="mappingLocations" value="classpath:com/itheima/domain/*.hbm.xml"></property>
    </bean>
二、spring中关于struts的整合
整合struts只有两种方式:
①在spring中使用IOC来给Action动作类中注入UserService的实例
<!-- 6 配置action -->
    <bean id="userAction" class="com.itheima.web.action.UserAction" scope="prototype">
        <property name="userService" ref="userService"></property>
    </bean>
然后对应着struts.xml配置中指定动作类
<struts>
    <!-- 开发模式 -->
    <constant name="struts.devMode" value="true" />

    <package name="default" namespace="/" extends="struts-default">
        <!-- 底层自动从spring容器中通过名称获得内容, getBean("userAction") -->
        <action name="userAction_*" class="userAction" method="{1}">
            <result name="success">/messag.jsp</result>
        </action>
    </package>
②我们不在spring中注入UserService的实例。(那问题来了,谁给我们创建UserService的实例,不实例化则不能使用其对象方法)
如图可看见struts.xml还是按照正常的方式编写
<package name="default" namespace="/" extends="struts-default">
        <!-- 底层自动从spring容器中通过名称获得内容, getBean("userAction") -->
        <action name="userAction_*" class="com.itheima.web.action.UserAction" method="{1}">
            <result name="success">/messag.jsp</result>
那么谁给注入UserService的实例呢?
分析:
1. struts 配置文件
default.properties ,常量配置文件
struts-default.xml ,默认核心配置文件
struts-plugins.xml ,插件配置文件
struts.xml,自定义核心配置文件
常量的使用,后面配置项,将覆盖前面的。
2.default.properties ,此配置文件中确定 按照【名称】自动注入
/org/apache/struts2/default.properties

3.当整合struts-plugins.xml ,struts整合spring
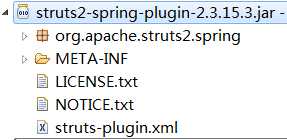
<constant name="struts.objectFactory" value="spring" />
struts的action将由spring创建
但前提是:Action类中,必须提供service名称与 spring配置文件一致。(如果名称一样,将自动注入)
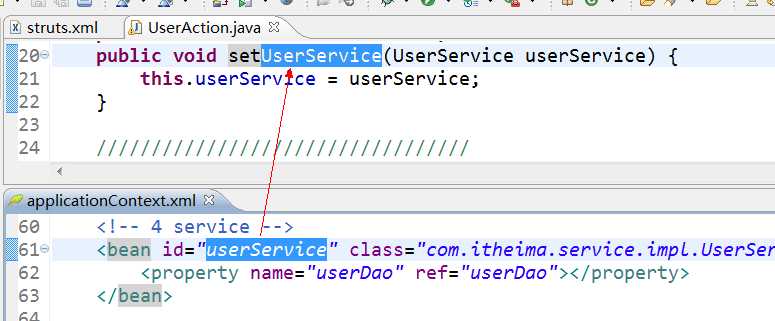
总结,之后action有spring创建,并按照名称自动注入
当项目创建时我们想要它在请求前加载完成spring的配置文件
又想要在项目之后创建,则我们可以想到配置web.xml
spring提供了一个监听器ContextLoaderListener上下问加载监听器,当服务器启动时会加载web.xml则这个监听也将会被加载,但是这个监听默认指向的是WEB-INF下所以我们还需要配置指定路径classpath:applicationContext.xml,这样当服务启动后就会加载spring的配置文件
web.xml配置
<!-- 1 确定spring xml位置 -->
  <context-param>
      <param-name>contextConfigLocation</param-name>
      <param-value>classpath:applicationContext.xml</param-value>
  </context-param>
  <!-- 2 spring监听器 -->
  <listener>
      <listener-class>org.springframework.web.context.ContextLoaderListener</listener-class>
  </listener>
  <!-- 3 struts 前端控制器 -->
  <filter>
      <filter-name>struts2</filter-name>
      <filter-class>org.apache.struts2.dispatcher.ng.filter.StrutsPrepareAndExecuteFilter</filter-class>
  </filter>
  <filter-mapping>
      <filter-name>struts2</filter-name>
      <url-pattern>/*</url-pattern>
  </filter-mapping>
原文:https://www.cnblogs.com/zwxbky/p/11397495.html