备注
开机自启
systemctl enable kubelet docker
零 前期准备
1.关闭firewall && 安装且关闭 iptables
systemctl disable firewalld
yum install iptables-services
systemctl disable iptables
3 主节点和nodes 互信 配置hosts
修改主机名 sysctl hostname-set master
cat /etc/hosts
127.0.0.1 localhost localhost.localdomain localhost4 localhost4.localdomain4
::1 localhost localhost.localdomain localhost6 localhost6.localdomain6
192.168.31.201 master
192.168.31.202 node1
192.168.31.203 node2
生成密钥互信
ssh-keygen
ssh-copy-id -i ~/.ssh/id-rsa.pub root@node1
一 yum安装
0.master nodes都安装下面几个
yum install docker-ce kubelet kubeadm kubectl
1.镜像源配置
阿里云
wget https://mirrors.aliyun.com/docker-ce/linux/centos/docker-ce.repo
vim kubernetes.repo
[kubernetes]
name=Kubernetes Repo
baseurl=https://mirrors.aliyun.com/kubernetes/yum/repos/kubernetes-el7-x86_64/
gpgcheck=https://mirrors.aliyun.com/kubernetes/yum/doc/yum-key.gpg
enable=1
2.gpg导入
wget https://mirrors.aliyun.com/kubernetes/yum/doc/rpm-package-key.gpg
rpm --import xxxx
二 通过kubeadm工具安装
0.修改配置文件 忽略Swap错误
vim /etc/sysconfig/kubelet #默认是空 (KUBELET_EXTRA_ARGS=)
KUBELET_EXTRA_ARGS="--fail-swap-on=false"
执行下面 发现镜像下载失败
kubeadm init --pod-network-cidr=10.244.0.0/16 --service-cidr=10.96.0.0/12 --ignore-preflight-errors=Swap
1.docker初始化配置 &&配置代理下载 k8s.gcr.io 镜像(或者手动下载)
修改存储目录 新建 /etc/docker/daemon.json
{
"graph":"/data/docker/"
}
systemctl daemon-reload
systemctl start docker
2 执行报错 镜像无法下载 === 手动下载 再修改名称
通过阿里云docker可以绑定github使用国外机器打包
Dockfile 内容如下 一共处理了7个镜像(参考https://blog.csdn.net/sjyu_ustc/article/details/79990858)
FROM k8s.gcr.io/kube-apiserver:v1.15.3
MAINTAINER shaoyun
三 解决了上面的问题之后开始安装
master执行成功
kubeadm init --pod-network-cidr=10.244.0.0/16 --service-cidr=10.96.0.0/12 --ignore-preflight-errors=Swap
然后会提示
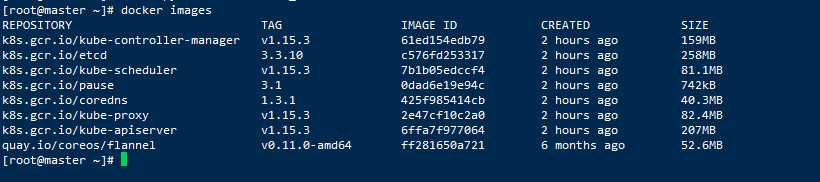
To start using your cluster, you need to run the following as a regular user:

  mkdir -p $HOME/.kube
  sudo cp -i /etc/kubernetes/admin.conf $HOME/.kube/config
  sudo chown $(id -u):$(id -g) $HOME/.kube/config

You should now deploy a pod network to the cluster.
Run "kubectl apply -f [podnetwork].yaml" with one of the options listed at:
  https://kubernetes.io/docs/concepts/cluster-administration/addons/


  Then you can join any number of worker nodes by running the following on each as root:
kubeadm join 192.168.31.201:6443 --token iv8o1u.pb9jqkqalec4p3v1     --discovery-token-ca-cert-hash sha256:f0f5a32712ef847c13278d49016b5f24f0b7d768cd115608307a83d3878ca82d

kubeadm join 192.168.31.201:6443 --token iv8o1u.pb9jqkqalec4p3v1     --discovery-token-ca-cert-hash sha256:f0f5a32712ef847c13278d49016b5f24f0b7d768cd115608307a83d3878ca82d --ignore-preflight-errors=Swap

问题
The connection to the server localhost:8080 was refused - did you specify the right host or port?

 出现这个问题的原因是kubectl命令需要使用kubernetes-admin来运行,解决方法如下,将主节点中的【/etc/kubernetes/admin.conf】文件拷贝到从节点相同目录下,然后配置环境变量:

echo "export KUBECONFIG=/etc/kubernetes/admin.conf" >> ~/.bash_profile
source source ~/.bash_profile

状态为 NotReady  需要主节点安装网络插件 flannel
kubectl apply -f https://raw.githubusercontent.com/coreos/flannel/master/Documentation/kube-flannel.yml
quay.io/coreos/alannel:v0.11.0-amd64
Node节点安装:
复制出这句话 到node节点执行即可(node一样安装 docker kubelet kubeadm和配置)
/etc/docker/daemon.json
{
"graph":"/data/docker/"
}
systemctl daemon-reload
systemctl start docker
vim /etc/sysconfig/kubelet #默认是空 (KUBELET_EXTRA_ARGS=)
KUBELET_EXTRA_ARGS="--fail-swap-on=false"
然后执行安装命令
kubeadm join 192.168.31.201:6443 --token iv8o1u.pb9jqkqalec4p3v1 --discovery-token-ca-cert-hash sha256:f0f5a32712ef847c13278d49016b5f24f0b7d768cd115608307a83d3878ca82d --ignore-preflight-errors=Swap
原文:https://www.cnblogs.com/a10086/p/11406811.html