1. 什么是spring,它能够做什么?
Spring是一个开源框架,它由Rod Johnson创建。它是为了解决企业应用开发的复杂性而创建的。
Spring使用基本的JavaBean来完成以前只可能由EJB完成的事情。
然而,Spring的用途不仅限于服务器端的开发。从简单性、可测试性和松耦合的角度而言,任何Java应用都可以从Spring中受益。
目的:解决企业应用开发的复杂性
功能:使用基本的JavaBean代替EJB,并提供了更多的企业应用功能
范围:任何Java应用
简单来说,Spring是一个轻量级的控制反转(IoC)和面向切面(AOP)的容器框架。
2. 什么是控制反转(或依赖注入)
控制反转(IoC=Inversion of Control)IoC,用白话来讲,就是由容器控制程序之间的(依赖)关系,而非传统实现中,由程序代码直接操控。这也就是所谓“控制反转”的概念所在:(依赖)控制权由应用代码中转到了外部容器,控制权的转移,是所谓反转。
IoC还有一个另外的名字:“依赖注入 (DI=Dependency Injection)” ,即由容器动态的将某种依赖关系注入到组件之中
使用spring框架 先导入依赖
pom.xml:
 1 <project xmlns="http://maven.apache.org/POM/4.0.0" xmlns:xsi="http://www.w3.org/2001/XMLSchema-instance"
 2   xsi:schemaLocation="http://maven.apache.org/POM/4.0.0 http://maven.apache.org/maven-v4_0_0.xsd">
 3   <modelVersion>4.0.0</modelVersion>
 4   <groupId>com.lww</groupId>
 5   <artifactId>T224_spring</artifactId>
 6   <packaging>war</packaging>
 7   <version>0.0.1-SNAPSHOT</version>
 8   <name>T224_spring Maven Webapp</name>
 9   <url>http://maven.apache.org</url>
10   <properties>
11         <spring.version>5.0.1.RELEASE</spring.version>
12         <javax.servlet.version>4.0.0</javax.servlet.version>
13         <junit.version>4.12</junit.version>
14     </properties>
15   <dependencies>
16     <!-- 2、导入spring依赖 -->
17     <dependency>
18             <groupId>org.springframework</groupId>
19             <artifactId>spring-context</artifactId>
20             <version>${spring.version}</version>
21     </dependency>
22
23     <dependency>
24             <groupId>org.springframework</groupId>
25             <artifactId>spring-aspects</artifactId>
26             <version>${spring.version}</version>
27     </dependency>
28
29     <!-- 5.1、junit -->
30         <dependency>
31             <groupId>junit</groupId>
32             <artifactId>junit</artifactId>
33             <version>${junit.version}</version>
34             <scope>test</scope>
35     </dependency>
36
37     <!-- 5.2、servlet -->
38         <dependency>
39             <groupId>javax.servlet</groupId>
40             <artifactId>javax.servlet-api</artifactId>
41             <version>${javax.servlet.version}</version>
42             <scope>provided</scope>
43         </dependency>
44
45   </dependencies>
46   <build>
47     <finalName>T224_spring</finalName>
48     <plugins>
49             <plugin>
50                 <groupId>org.apache.maven.plugins</groupId>
51                 <artifactId>maven-compiler-plugin</artifactId>
52                 <version>3.7.0</version>
53                 <configuration>
54                     <source>1.8</source>
55                     <target>1.8</target>
56                     <encoding>UTF-8</encoding>
57                 </configuration>
58             </plugin>
59         </plugins>
60   </build>
61 </project>
写一个接口 定义一个方法
UserBiz:
 1 package com.liuwenwu.ioc.biz;
 2 /**
 3  * 需求:
 4  *       上传文件需求
 5  *         完成的思路:完成功能就好   文件上传就行
 6  *         客户使用的时候:嫌弃上传的事件过长,要求优化
 7  *         由于某程序员的失误,改动的代码影响了其他模块的正常使用
 8  *
 9  *         客户:两头利害取其轻,情愿回退上一个版本
10  *
11  * @author ASUS
12  *
13  */
14 public interface UserBiz {
15
16     public void read();
17 }
两个实现类来实现接口:
UserBizImpl1:
 1 package com.liuwenwu.ioc.biz.impl;
 2
 3 import com.liuwenwu.ioc.biz.UserBiz;
 4
 5 public class UserBizImpl1 implements UserBiz{
 6
 7     @Override
 8     public void read() {
 9         System.out.println("死记硬背");
10
11     }
12 }
UserBizImpl2:
 1 package com.liuwenwu.ioc.biz.impl;
 2
 3 import com.liuwenwu.ioc.biz.UserBiz;
 4
 5 public class UserBizImpl2 implements UserBiz{
 6
 7     @Override
 8     public void read() {
 9         System.out.println("边学习边记笔记,最后举一反三");
10     }
11 }
spring管理Bean的方式(注入方式)
set注入
基本数据类型
引用数据类型
UserAction定义属性,提供set方法
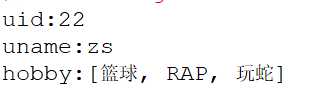
 1 package com.liuwenwu.ioc.web;
 2
 3 import java.util.ArrayList;
 4 import java.util.List;
 5
 6 import com.liuwenwu.ioc.biz.UserBiz;
 7 import com.liuwenwu.ioc.biz.impl.UserBizImpl1;
 8
 9 /**
10  * 弊端:
11  *      当需求变化非常快的时候,不便于维护,因为维护的权利是属于程序员的
12  *
13  *      spring的ioc就是解决这一问题的
14  *         将维护代码的权利由程序员转交给spring容器来完成
15  *
16  * 1、spring管理Bean的方式(注入方式)
17  *       set注入
18  *             基本数据类型
19  *             引用数据类型
20  *           构造注入
21  *           自动装配
22  *
23  * @author ASUS
24  *
25  */
26 public class UserAction {
27 //    实际开发中可能不止一个action实现这个接口
28 //    private UserBiz userBiz =new UserBizImpl1();
29     private UserBiz userBiz;
30     private int uid;
31     private String uname;
32     private List<String> hobby=new ArrayList<String>();
33
34
35     //提供set方法
36 //    public void setUid(int uid) {
37 //        this.uid = uid;
38 //    }
39 //
40 //    public void setUname(String uname) {
41 //        this.uname = uname;
42 //    }
43
44     public void setHobby(List<String> hobby) {
45         this.hobby = hobby;
46     }
47
48
49     public void setUserBiz(UserBiz userBiz) {
50         this.userBiz = userBiz;
51     }
52
53
54     //    提供构造方法
55     public UserAction(int uid, String uname) {
56         super();
57         this.uid = uid;
58         this.uname = uname;
59     }
60
61
62     public UserAction() {
63     super();
64
65     }
66
67     /**
68      * set注入
69      */
70     public void test1() {
71         System.out.println("uid:"+this.uid);
72         System.out.println("uname:"+this.uname);
73         System.out.println("hobby:"+this.hobby);
74     }
75
76
77
78     /**
79      * 构造注入
80      */
81     public void test2() {
82
83     }
84
85     /**
86      * 测试注入引用类型
87      */
88
89     public void test3() {
90         userBiz.read();
91     }
92
93 }
spring-context.xml中配置
 1 <?xml version="1.0" encoding="UTF-8"?>
 2 <beans xmlns="http://www.springframework.org/schema/beans"
 3     xmlns:xsi="http://www.w3.org/2001/XMLSchema-instance"
 4     xmlns:aop="http://www.springframework.org/schema/aop"
 5     xmlns:context="http://www.springframework.org/schema/context"
 6     xsi:schemaLocation="http://www.springframework.org/schema/beans http://www.springframework.org/schema/beans/spring-beans.xsd
 7         http://www.springframework.org/schema/aop http://www.springframework.org/schema/aop/spring-aop-4.3.xsd
 8         http://www.springframework.org/schema/context http://www.springframework.org/schema/context/spring-context-4.3.xsd">
 9
10     <!-- id是唯一的 -->
11     <bean id="userBiz" class="com.liuwenwu.ioc.biz.impl.UserBizImpl2"></bean>
12     <!-- 管理多个  实现同一个接口-->
13     <!-- <bean id="userBiz2" class="com.liuwenwu.ioc.biz.impl.UserBizImpl1"></bean> -->
14     <bean id="userAction" class="com.liuwenwu.ioc.web.UserAction">
15         <!-- set注入 -->
16         <!-- <property name="uid" value="22"></property> -->
17         <!-- <property name="uname" value="zs"></property> -->
18         <property name="userBiz" ref="userBiz"></property>
19         <!-- 构造方法注入 -->
20         <constructor-arg name="uid" value="22"></constructor-arg>
21         <constructor-arg name="uname" value="zs"></constructor-arg>
22         <property name="hobby">
23             <list>
24                 <value>篮球</value>
25                 <value>RAP</value>
26                 <value>玩蛇</value>
27             </list>
28         </property>
29     </bean>
30 </beans>
模拟浏览器发请求请求后台 Demo1:
 1 package com.liuwenwu.ioc.test;
 2
 3 import org.springframework.context.ApplicationContext;
 4 import org.springframework.context.support.ClassPathXmlApplicationContext;
 5
 6 import com.liuwenwu.ioc.web.UserAction;
 7
 8 /**
 9  * 模拟浏览器发请求请求后台
10  * @author ASUS
11  *
12  */
13 public class Demo1 {
14     public static void main(String[] args) {
15 //        UserAction userAction =new UserAction();
16 //        userAction.test1();
17
18 //        从spring获取
19         ApplicationContext context=new ClassPathXmlApplicationContext("/spring-context.xml");
20         UserAction bean = (UserAction) context.getBean("userAction");
21 //        bean.test1();
22         bean.test3();
23
24     }
25 }
构造方法注入 提供构造方法
 1 //    提供构造方法
 2     public UserAction(int uid, String uname) {
 3         super();
 4         this.uid = uid;
 5         this.uname = uname;
 6     }
 7
 8
 9     public UserAction() {
10     super();
11
12     }
spring-context.xml中配置
 <!-- 构造方法注入 -->
<constructor-arg name="uid" value="22"></constructor-arg>
<constructor-arg name="uname" value="zs"></constructor-arg>
set注入引用数据类型
private UserBiz userBiz;
<!-- 引用一个bean文件  把实体类注入接口-->
    <bean id="userBiz" class="com.liuwenwu.ioc.biz.impl.UserBizImpl2"></bean>
<!-- 引用类型注入 -->
    <property name="userBiz" ref="userBiz"></property>
spring自动装配:
default-autowire="byType" 根据类型装配 如果多个类实现一个接口 就会报错
default-autowire="byName" 根据名字装配 用的多
将spring的上下文交给Tomcat上下文进行管理
SpringLoadListener:
 1 package com.liuwenwu.ioc.test;
 2
 3 import javax.servlet.ServletContext;
 4 import javax.servlet.ServletContextEvent;
 5 import javax.servlet.ServletContextListener;
 6 import javax.servlet.annotation.WebListener;
 7
 8 import org.springframework.context.ApplicationContext;
 9 import org.springframework.context.support.ClassPathXmlApplicationContext;
10
11 /**
12  * 2、如何将spring的上下文交给Tomcat上下文进行管理
13  *      首先spring上下文为什么交给tomca?
14  *      分析:目前工程中所用javabean都交给了spring进行管理,那么浏览器发送请求
15  *          请求的是Tomcat,由Tomcat来处理请求,Tomcat处理请求一般来说都要访问数据库
16  *          数据库是由dao层访问的,dao层的实体类又是交给了spring是上下文管理,那就意味着
17  *          Tomcat要处理请求,必须拿到spring的上下文,才能够拿到dao层的javabean
18  * @author ASUS
19  *
20  */
21 //监听器
22 @WebListener
23 public class SpringLoadListener implements ServletContextListener {
24 //    配置文件地址
25     private String springXmlLocation="";
26
27     //重写
28     @Override
29 //    Tomcat启动就会加载
30     public void contextInitialized(ServletContextEvent sce) {
31         System.out.println("监听了Tomcat的启动...");
32 //        获取Tomcat上下文
33         ServletContext servletContext = sce.getServletContext();
34         springXmlLocation=servletContext.getInitParameter("springXmlLocation");
35         if(springXmlLocation==null ||"".equals(springXmlLocation)) {
36             springXmlLocation="spring-context.xml";
37         }
38         System.out.println("springXmlLocation"+springXmlLocation);
39 //        spring上下文
40         ApplicationContext springContext=new ClassPathXmlApplicationContext(springXmlLocation);
41 //        将spring上下文交给Tomcat上下文
42         servletContext.setAttribute("SPRING_CONTEXT_KEY", springContext);
43     }
44
45 }
UserServlet:
 1 package com.liuwenwu.ioc.test;
 2
 3 import java.io.IOException;
 4
 5 import javax.servlet.ServletContext;
 6 import javax.servlet.ServletException;
 7 import javax.servlet.annotation.WebServlet;
 8 import javax.servlet.http.HttpServlet;
 9 import javax.servlet.http.HttpServletRequest;
10 import javax.servlet.http.HttpServletResponse;
11
12 import org.springframework.context.ApplicationContext;
13
14 import com.liuwenwu.ioc.web.UserAction;
15
16 @WebServlet("/user")
17 public class UserServlet extends HttpServlet {
18
19     private static final long serialVersionUID = 3011793850996016507L;
20
21     @Override
22     protected void doGet(HttpServletRequest req, HttpServletResponse resp) throws ServletException, IOException {
23         // TODO Auto-generated method stub
24         doPost(req, resp);
25     }
26
27     @Override
28     protected void doPost(HttpServletRequest req, HttpServletResponse resp) throws ServletException, IOException {
29 //        拿到上下文
30         ServletContext servletContext = req.getServletContext();
31         ApplicationContext springContext=(ApplicationContext) servletContext.getAttribute("SPRING_CONTEXT_KEY");
32         UserAction bean=(UserAction) springContext.getBean("userAction");
33         bean.test3();
34     }
35 }
调用成功说明spring上下文交给了Tomcat上下文进行管理
意味着每一个servlet都能获取到spring上下文管理的所有的bean文件
 1 <web-app xmlns="http://xmlns.jcp.org/xml/ns/javaee"
 2          xmlns:xsi="http://www.w3.org/2001/XMLSchema-instance"
 3          xsi:schemaLocation="http://xmlns.jcp.org/xml/ns/javaee http://xmlns.jcp.org/xml/ns/javaee/web-app_3_1.xsd"
 4          version="3.1">
 5       <display-name>Archetype Created Web Application</display-name>
 6      <context-param>
 7             <param-name>springXmlLocation</param-name>
 8             <param-value>/spring-other.xml</param-value>
 9         </context-param>
10
11 </web-app>
可以变更配置文件
原文:https://www.cnblogs.com/hyfl/p/11416134.html