对于springboot热部署貌似是这样的
Ctrl+Shift+Alt+/ 快捷键选择Registry会弹出如下图
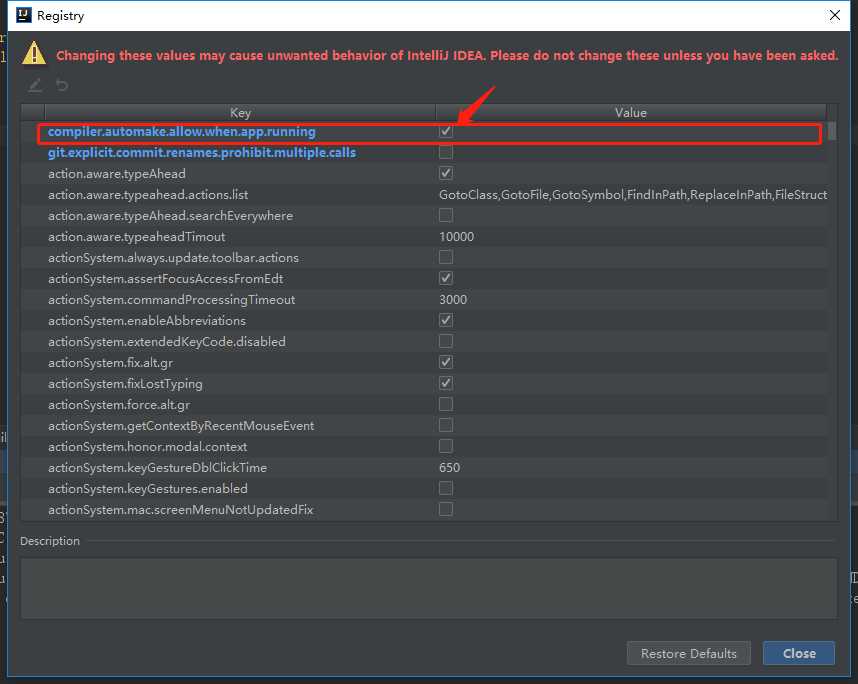
在红色选择的一行打勾,就完成了这步骤。
接着开始配置pom.xml文件
.....
<dependencies>
<dependency>
    <groupId>org.springframework.boot</groupId>
    <artifactId>spring-boot-devtools</artifactId>
    <optional>true</optional>
</dependency>
</dependencies>
<build>
<plugins>
   <!-- springboot maven plugin -->
   <plugin>
      <groupId>org.springframework.boot</groupId>
      <artifactId>spring-boot-maven-plugin</artifactId>
      <configuration>
         <!--fork :  如果没有该项配置,肯定devtools不会起作用,即应用不会restart -->
         <fork>true</fork>
      </configuration>
   </plugin>
</plugins>
</build>
pom文件也配置好了,就开始配置application.yml (或者 application.properties)
   #THYMELEAF
 spring:
    thymeleaf:
      cache: false #这里一定要设置false
      prefix: classpath:/thymeleaf/
      suffix: .html
      mode: HTML5
      encoding: UTF-8
    devtools:
    restart:
      #热部署生效true
      enabled: true
        #设置重启的目录
        additional-paths: resources/**,static/**,templates/**
      #该目录下的内容修改不重启
        exclude: data/**
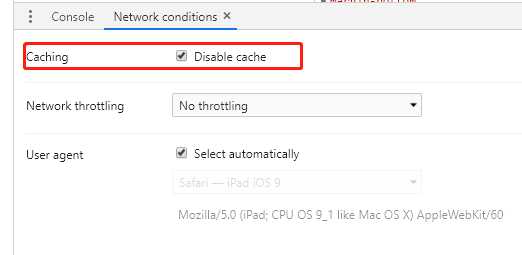
配置完之后,基本上就可以运行了,还有最后要记得浏览器要设置 禁止缓存
以上就是springboot热部署的流程,希望对大家有所帮助!
原文:https://www.cnblogs.com/zrl66/p/11423599.html