环境:CentOS7,Docker CE
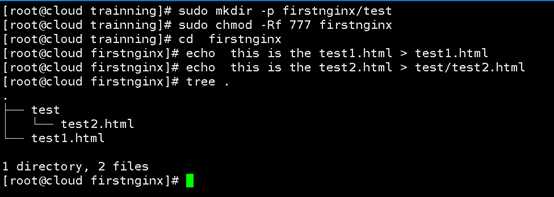
1,Use below commands to prepare folders and testing files.
使用如下指令准备文件夹和测试文件
sudo mkdir -p firstnginx/test
sudo chmod -Rf 777 firstnginx
cd  firstnginx
echo  this is the test1.html > test1.html
echo  this is the test2.html > test/test2.html
2,Edit Dockerfile
编辑Dockerfile
sudo mkdir -p docker
sudo chmod -Rf 777 docker
sudo vi docker/Dockerfile
Copy the the content below to the dockerfile:
#拷贝如下内容至Dockerfile
FROM centos:6
MAINTAINER Liping<tlping@163.com>

#add nginx repo and install nginx package
RUN bash -c "rpm -ivh http://nginx.org/packages/centos/6/noarch/RPMS/nginx-release-centos-6-0.el6.ngx.noarch.rpm && \
yum install -y nginx.x86_64"

#copy your customized nginx.conf to the container
ADD ./docker/nginx.conf /etc/nginx/nginx.conf
#create nginx log folder
RUN mkdir -p /etc/nginx/logs

#copy full project to nginx web site folder
ADD ./ /var/www/html/public/

# publish the container port
EXPOSE 80

#copy your shell script to the container
COPY ./docker/my-init.sh /usr/bin/my-init.sh
#set execution access right
RUN chmod +x /usr/bin/my-init.sh

#refresh the the container folder files
RUN bash -c ‘touch /var/www/html/*‘

#execute the initializaton script
ENTRYPOINT ["my-init.sh"]
3,Edit nginx.conf file ,we need change the default website location of nginxserver
sudo vi docker/nginx.conf
Copy below content to the nginx.conf and Save.
#拷贝如下内容至nginx.conf 并且保存

user  nginx;
worker_processes  1;

error_log  /var/log/nginx/error.log warn;
pid        /var/run/nginx.pid;


events {
    worker_connections  1024;
}


http {
    include       /etc/nginx/mime.types;
    default_type  application/octet-stream;

    log_format  main  ‘$remote_addr - $remote_user [$time_local] "$request" ‘
                      ‘$status $body_bytes_sent "$http_referer" ‘
                      ‘"$http_user_agent" "$http_x_forwarded_for"‘;

    access_log  /var/log/nginx/access.log  main;

    sendfile        on;
    #tcp_nopush     on;

    keepalive_timeout  65;

    #gzip  on;


     server {
        listen       80;
        server_name  localhost;

        #charset koi8-r;

        #access_log  logs/host.access.log  main;
        set $root    "/var/www/html/public";
		root $root;
        location / {
		    root    $root;
            index  index.html index.htm index.php l.php;


            try_files  $uri  /index.php$uri;

        }

        error_log    /var/www/html/err.txt    error;
        #error_page  404              /404.html;


        error_page   500 502 503 504  /50x.html;
        location = /50x.html {
            root  "/var/www/html";
        }

        location ~ \.php(.*)$  {
	        root    $root;
            fastcgi_pass   127.0.0.1:9000;
            fastcgi_index  index.php;

            fastcgi_split_path_info  ^((?U).+\.php)(/?.+)$;
            fastcgi_param  SCRIPT_FILENAME  $document_root$fastcgi_script_name;
            fastcgi_param  PATH_INFO  $fastcgi_path_info;
            fastcgi_param  PATH_TRANSLATED  $document_root$fastcgi_path_info;
            include        fastcgi_params;

        }

    }
#this statement must be put as the last line
include /etc/nginx/conf.d/*.conf;

}
4,edit my-init.sh file
编辑my-init.sh
sudo vi docker/my-init.sh
copy the content below to the file and save(拷贝如下内容至文件并保存)
#!/bin/sh

echo ‘start nginx message now‘
service nginx start
echo ‘finish‘
read
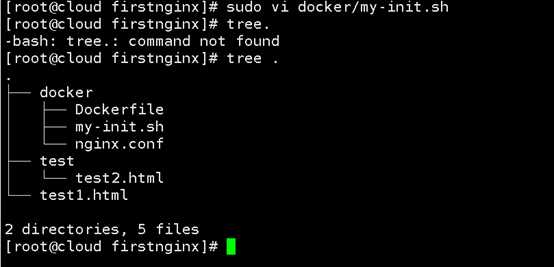
after you finish all above ,your current folder structure should be like this,
在你完成所有以上操作后,当前文件夹结构如下,
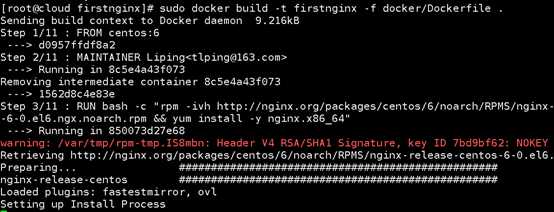
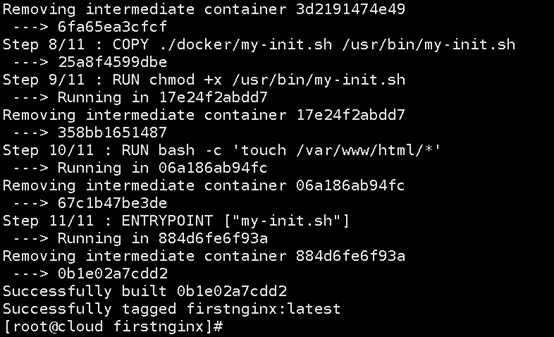
5,build the dockerfile(编译Dockerfile)
sudo docker build -t firstnginx -f docker/Dockerfile .
6,run the image to start a container(运行Docker镜像以启动容器)
sudo docker run -td --name first_nginx -p 8080:80 firstnginx
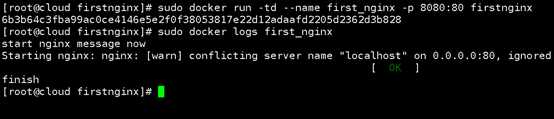
7,
sudo docker ps -a | grep first_nginx

8,
Verfiy the test1.html and test/test2.html
Open browser
http://localhost:8080/test1.html
http://localhost:8080/test/test2.html
here use your docker host ip address to replace sys.beserp.com
打开浏览器验证test1.html, test/test2.html文件是否可以被正常访问


The nginx container is working!!
Nginx 运行起来了!
文章版权归属千分网络科技(重庆)有限公司
原文:https://www.cnblogs.com/lipingshare/p/make-a-docker-based-nginx.html
