//授权服务器配置
@Configuration
@EnableAuthorizationServer
public class OAuth2AuthorizationServer extends
        AuthorizationServerConfigurerAdapter {

    @Override
    public void configure(ClientDetailsServiceConfigurer clients)
            throws Exception {
        clients.inMemory()
            .withClient("clientapp")
            .secret("112233")
            .redirectUris("http://localhost:9001/callback")
            // 授权码模式
            .authorizedGrantTypes("authorization_code")
            .scopes("read_userinfo", "read_contacts");
    }

}//资源服务配置
@Configuration
@EnableResourceServer
public class OAuth2ResourceServer extends ResourceServerConfigurerAdapter {
@Override
public void configure(HttpSecurity http) throws Exception {
http.authorizeRequests()
.anyRequest()
.authenticated()
.and()
.requestMatchers()
.antMatchers("/api/**");
}
}
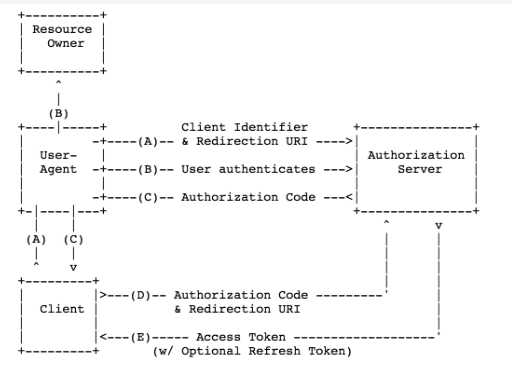
http://localhost:8080/oauth/authorize?client_id=clientapp&redirect_uri=http://localhost:9001/callback&response_type=code&scope=read_userinfo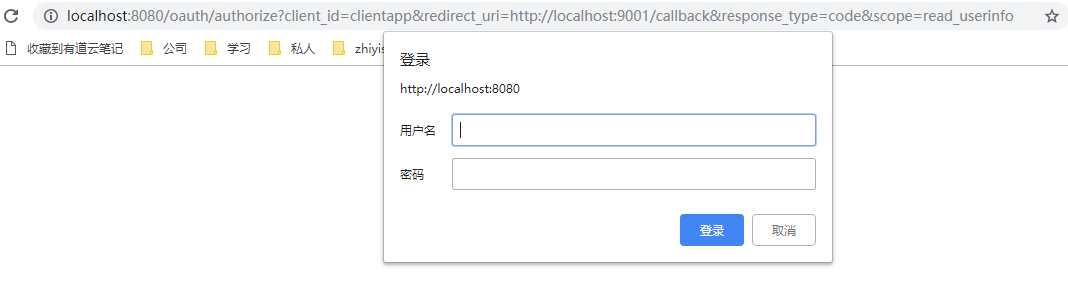
# Spring Security Setting
security.user.name=bobo
security.user.password=xyz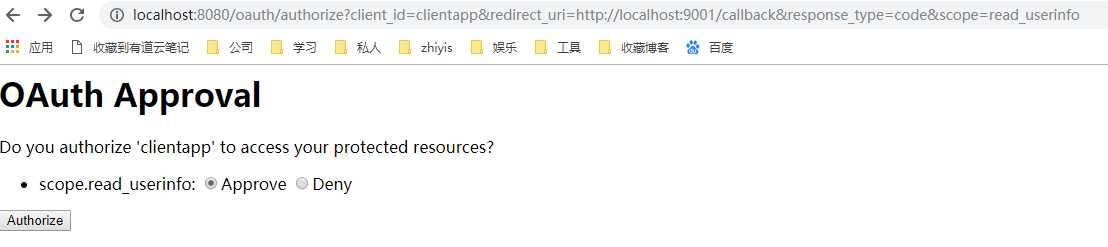

http://localhost:8080/oauth/token?code=ghN0hF&grant_type=authorization_code&redirect_uri=http://localhost:9001/callback&scope=read_userinfo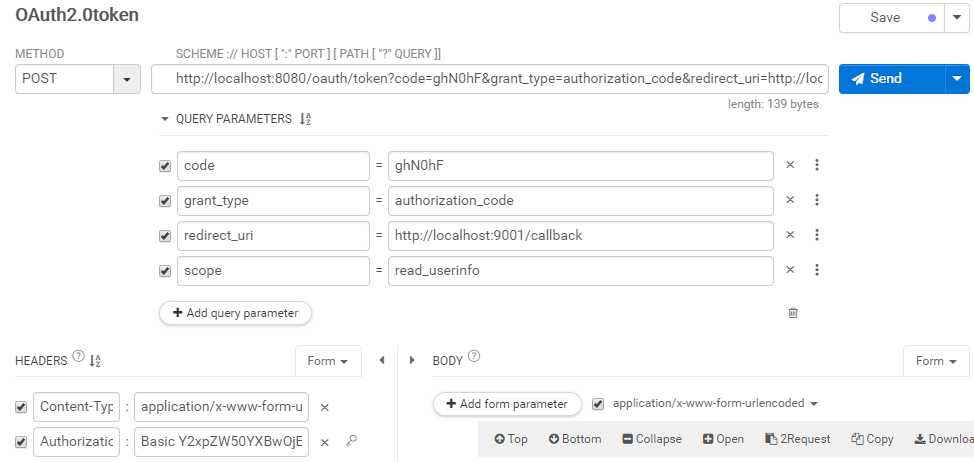
注意:需要在headers里添加认证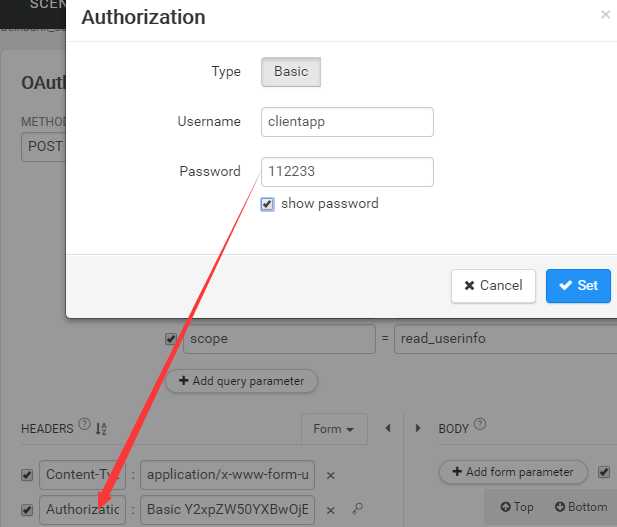
认证参数就是授权服务器配置的client和secret
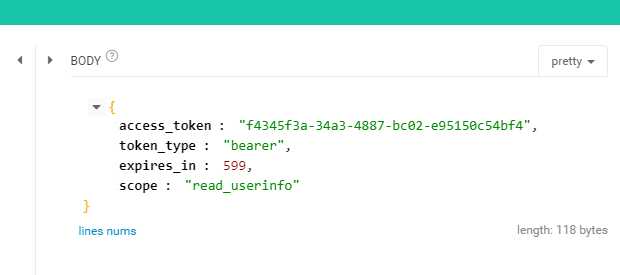
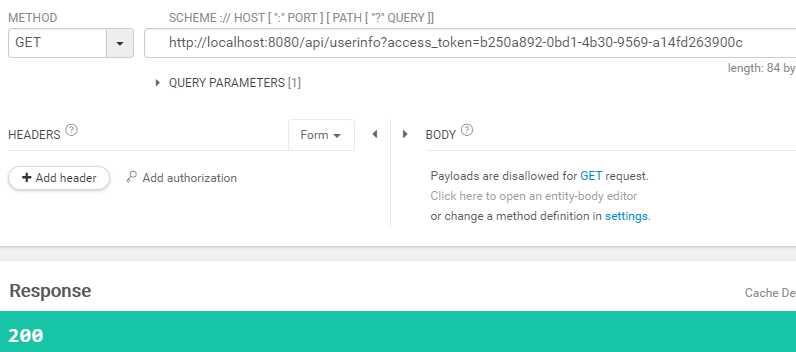
http://localhost:8080/api/userinfo?access_token=f4345f3a-34a3-4887-bc02-e95150c54bf4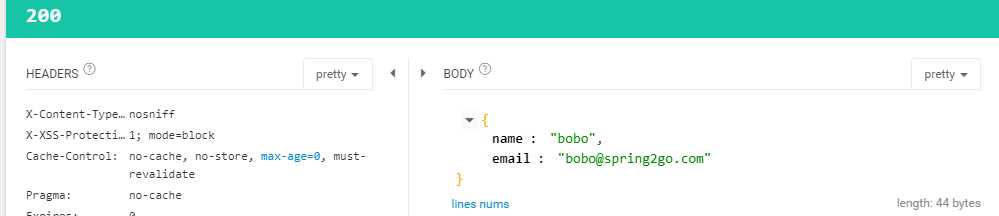
如果token错误,则
@Configuration
@EnableAuthorizationServer
public class OAuth2AuthoriationServer extends AuthorizationServerConfigurerAdapter{
@Override
public void configure(ClientDetailsServiceConfigurer clients) throws Exception {
clients.inMemory()
.withClient("clientapp")
.secret("112233")
.accessTokenValiditySeconds(60)
.redirectUris("http://localhost:9001/callback")
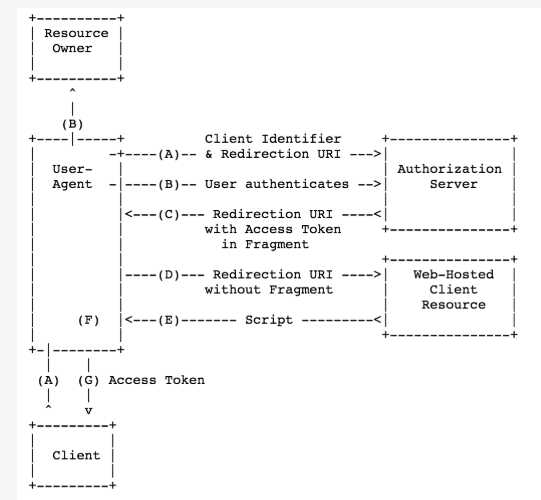
.authorizedGrantTypes("implicit")
.scopes("admin", "visitor");
}
}http://localhost:8080/oauth/authorize?client_id=clientapp&redirect_uri=http://localhost:9001/callback&response_type=token&scope=admin&state=abc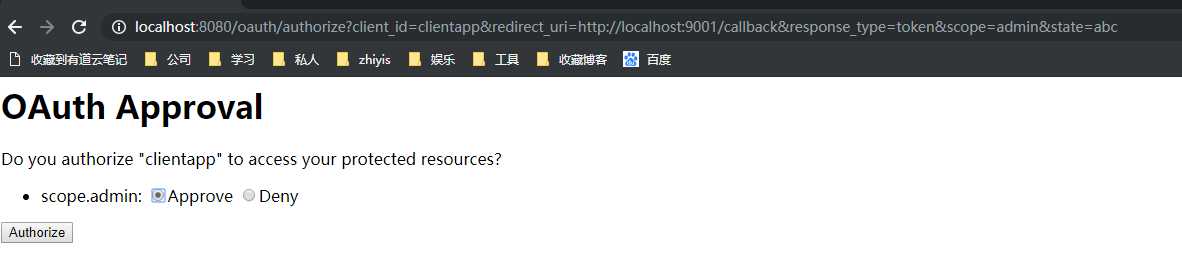

注意:因为Access token是附着在 redirect_uri 上面被返回的,所以这个 Access token就可能会暴露给资源所有者或者设置内的其它方(对资源所有者来说,可以看到redirect_uri,对其它方来说,可以通过监测浏览器的地址变化来得到 Access token)。
// 授权服务器配置
@Configuration
@EnableAuthorizationServer
public class OAuth2AuthoriationServer extends AuthorizationServerConfigurerAdapter{
@Autowired
private AuthenticationManager authenticationManager;
@Override
public void configure(AuthorizationServerEndpointsConfigurer endpoints) throws Exception {
endpoints.authenticationManager(authenticationManager);
}
@Override
public void configure(ClientDetailsServiceConfigurer clients) throws Exception {
clients.inMemory()
.withClient("clientapp")
.secret("112233")
.accessTokenValiditySeconds(60)
.redirectUris("http://localhost:9001/callback")
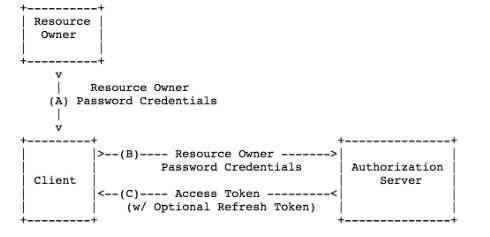
.authorizedGrantTypes("password")
.scopes("admin", "visitor");
}
}http://localhost:8080/oauth/token?password=123456&grant_type=password&username=lll&scope=admin注意:和授权码模式一样,需要在headers里添加认证
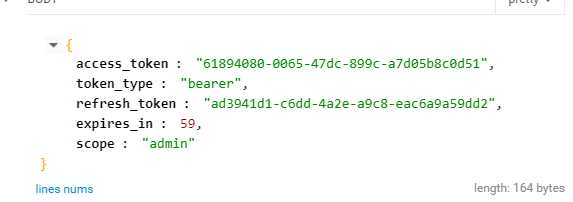
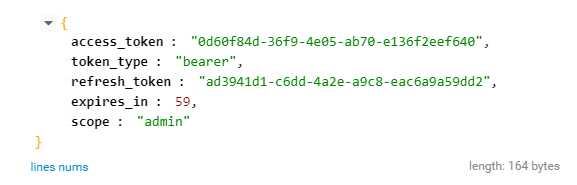
结果:
获取token后,步骤同1.1和1.2模式
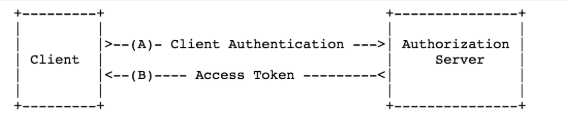
http://localhost:8080/oauth/token?grant_type=client_credentials&scope=admin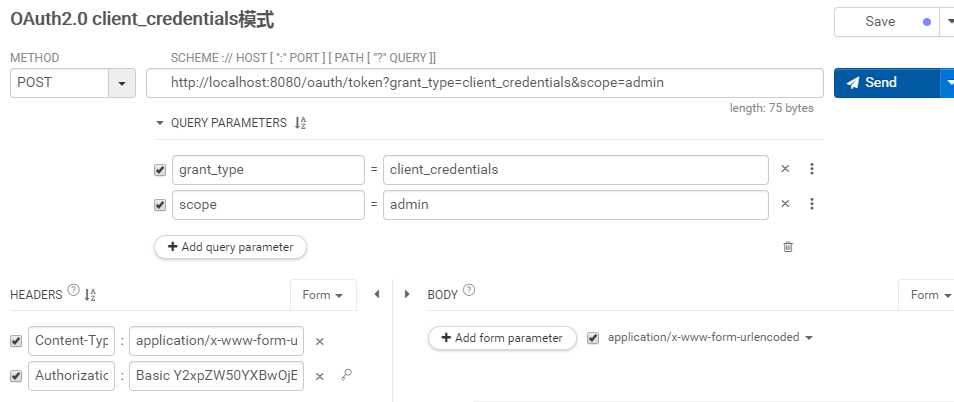
http://localhost:8080/oauth/token?grant_type=refresh_token&refresh_token=ad3941d1-c6dd-4a2e-a9c8-eac6a9a59dd2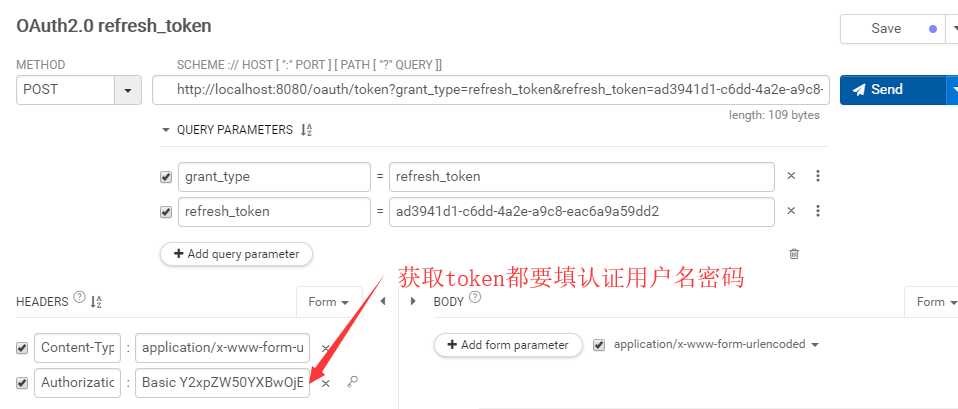
参考 https://www.cnblogs.com/maoxiaolv/p/5838680.html
代码学习地址 https://github.com/spring2go/oauth2lab
原文:https://www.cnblogs.com/x-jingxin/p/11507819.html