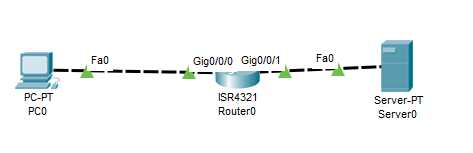
使用Packet Tracer,正确配置网络参数,通过抓取HTTP数据包,分析TCP连接建立过程。
网络拓扑图如下图所示:
3.2 配置参数
192.168.1.64 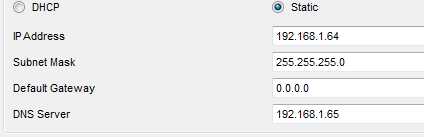
192.168.2.64。 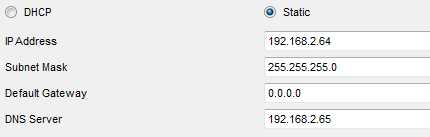
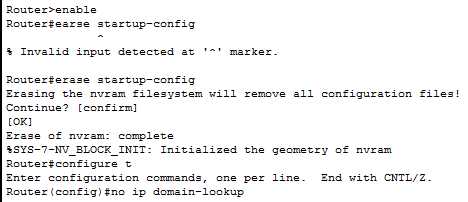
(1)清除路由器的现有配置
• Router>enable # 进入特权执行模式
• Router#erase startup-congig #清除路由器的现有配置
• Router#configure terminal # 进入全局配置模式
• Router(config)#no domain-lookup #禁用DNS查找
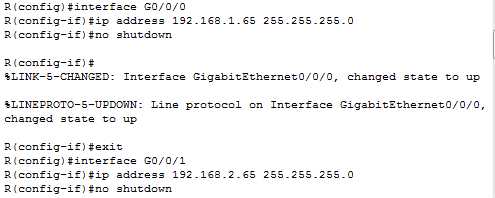
(2)配置并激活端口
• Router(config)#hostname R # 将路由器名称配置为R

• R(config)#interface G0/0/0 #进入路由器端口G0/0/0
• R(config-if)# ip address 192.168.1.65 255.255.255.0 #路由器端口G0/0/0配置ip地址
• R(config-if)#no shutdown # 打开路由器端口G0/0/0
• R(config)#interface G0/0/1 #进入路由器端口G0/0/1
• R(config-if)# ip address 192.168.2.65 255.255.255.0 #路由器端口G0/0/1配置ip地址
• R(config-if)#no shutdown # 打开路由器端口G0/0/1
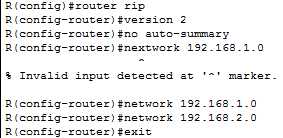
(3)配路由算法
• R(config)#router rip #启动动态路由
• R(config-router)# versin 2 #使用rpi 2版本
• R(config-router)#no auto-summary #关闭自动路由汇总
• R(config-router)# network 192.168.1.0
• R(config-router)# network 192.168.2.0 #指定网络
(4)验证参数配置是否正确
• R#show ip interface brief #检验ip地址正确并且接口处于激活状态
• R#show ip route #查看路由表
• R#ping 192.168.2.65 #任意两台机器能ping成功


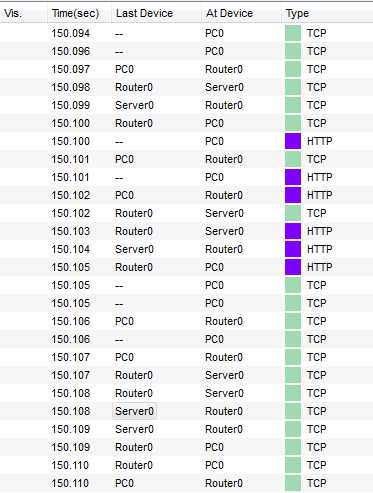
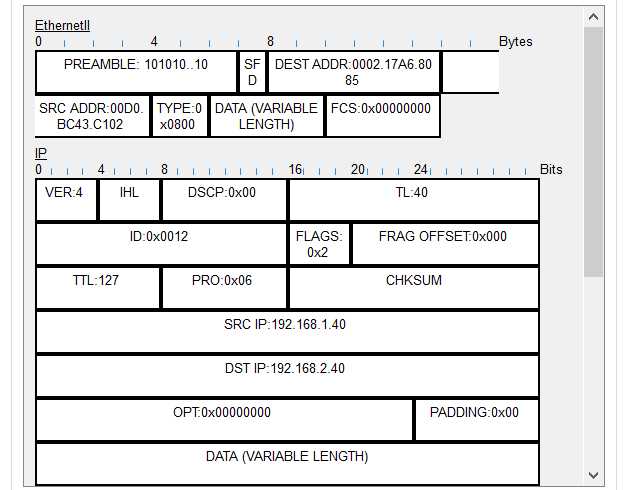
(1)抓包
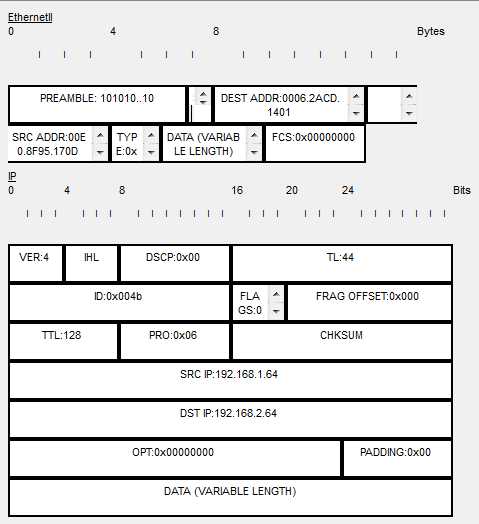
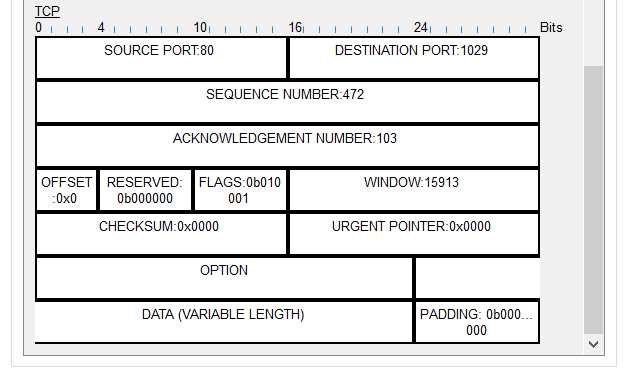
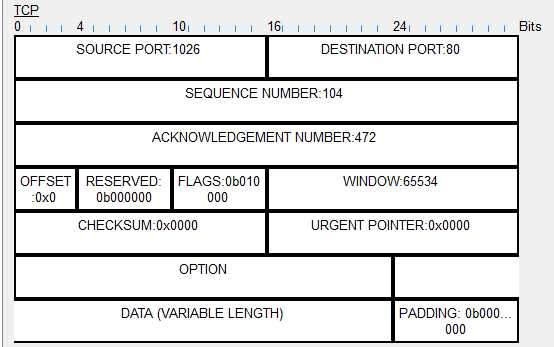
(2)报文
(3)画出TCP连接建立示意图
如下图所示:
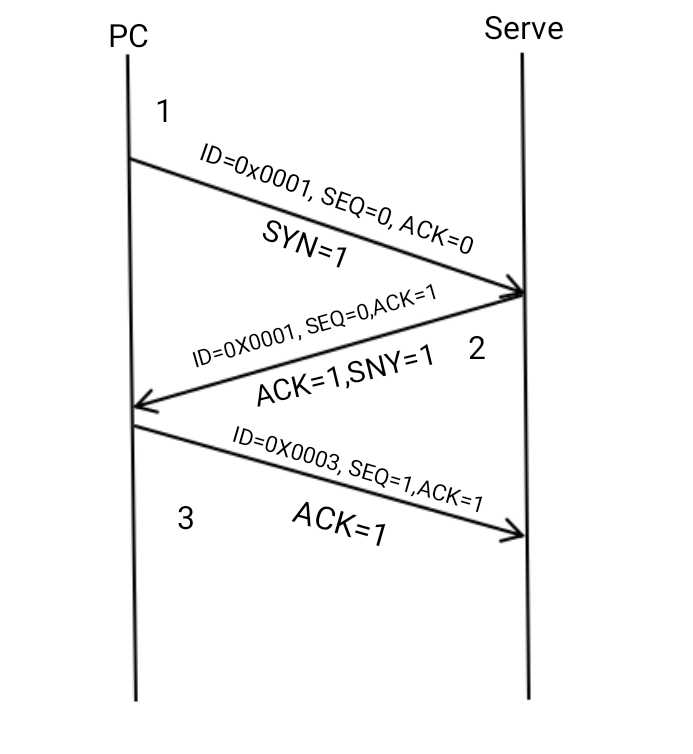
(4)分析序号和确认号的变化
(5)解答:为什么连接建立需要第三次握手
答:防止已经失效的连接请求报文段突然又传到服务端,因而产生错误;
第三次实验报告:使用Packet Tracer分析TCP连接建立过程
原文:https://www.cnblogs.com/zhengly/p/11707814.html