前言:官方文档已经看了一遍,但印象不是很深,于是在mooc上找了个实战学习项目做一做。
本篇目录:
1.ReactNavigation之createStackNavigator导航器案例练习
相关资料:
练习链接:http://www.devio.org/2018/12/24/createStackNavigator/
React Navigationan官网:https://reactnavigation.org/docs/zh-Hans/getting-started.html
1. 初始化react native项目
react-native init react_navigation_demo
2. 在项目目录下安装reactnavigation这个包
yarn add react-navigation
3. 安装依赖
yarn add react-native-reanimated react-native-gesture-handler react-native-screens@^1.0.0-alpha.23
4. 为了完成 react-native-screens 在 Android 上的安装, 请在android/app/build.gradle 中 dependencies 选项中添加下面这两行:
implementation ‘androidx.appcompat:appcompat:1.1.0-rc01‘

Implementation ‘androidx.swiperefreshlayout:swiperefreshlayout:1.1.0-alpha02‘
5. 新建并配置路由文件navigator/navigators.js
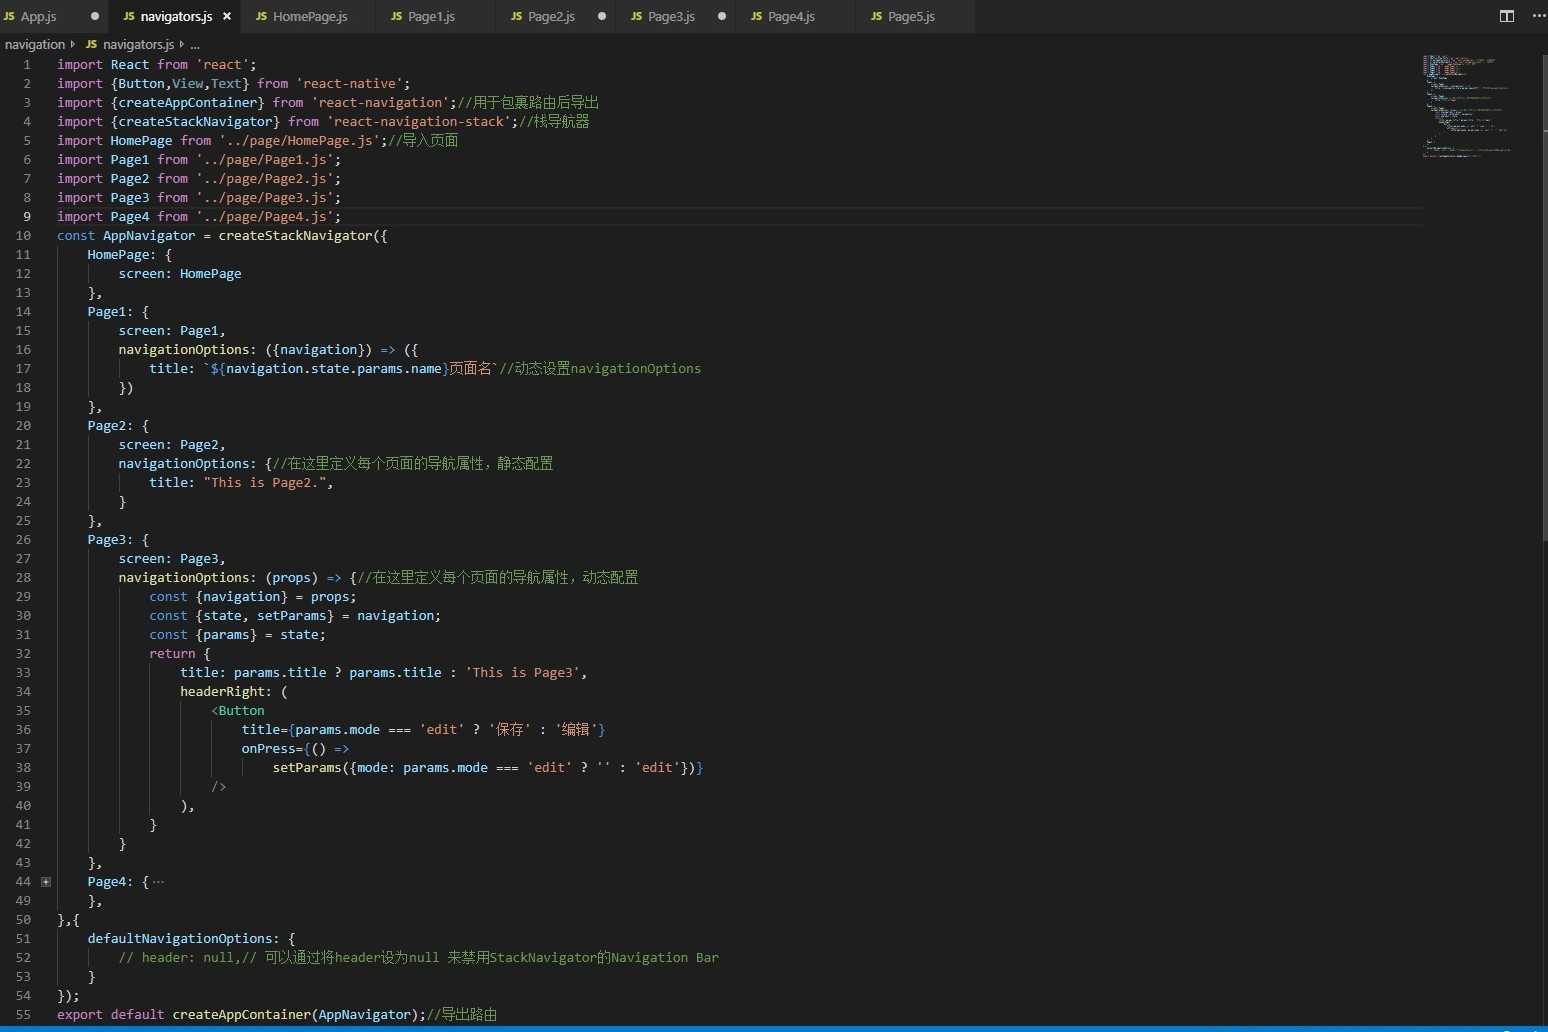
6. 新建页面文件夹Page,构建HomePage.js,Page1.js,Page2.js,Page3.js,Page4.js,Page5.js等页面
HomePage.js
import React,{Component} from ‘react‘;
import {Button ,View,Text,StyleSheet} from ‘react-native‘;

export default class HomePage extends Component{
    render(){
        const {navigation}=this.props; //获取navigation
        return(
            <View style={styles.container}>
                <Text style={styles.welcome}>Welcome To HomePage</Text>
                <Button title={‘Go to Page1‘} onPress={()=>{
                    navigation.navigate(‘Page1‘,{name:‘动态的‘});//跳转页面,并且允许传递参数
                }} />
                <Button title={‘Go to Page2‘} onPress={()=>{
                    navigation.navigate(‘Page2‘);
                }} />
                <Button title={‘Go to Page3‘} onPress={()=>{
                    navigation.navigate(‘Page3‘,{name:‘动态的‘});
                }} />
            </View>
        )
    }
}
const styles=StyleSheet.create({
    container:{
        flex:1,
    },
    welcome:{
        fontSize:20,
        textAlign:‘center‘,
        margin:10,
    }
});
Page1.js
import React from ‘react‘;
import {Button,View,Text,StyleSheet} from ‘react-native‘;


export default class Page1 extends React.Component{
    render(){
        const {navigation}=this.props;
        return(
            <View style={styles.container}>
                <Text style={styles.welcome}>Welcome To Page1</Text>
                <Button
                    title={‘Go Back‘}
                    onPress={()=>{
                        navigation.goBack();
                    }}
                />
                <Button
                    title={‘Go TO Page4‘}
                    onPress={()=>{
                        navigation.navigate(‘Page4‘);
                    }}
                />
            </View>
        )
    }
}

const styles=StyleSheet.create({
    container:{
        flex:1,
    },
    welcome:{
        fontSize:20,
        textAlign:‘center‘,
        margin:10,
    }
});
Page2.js
import React from ‘react‘;
import {View,Text,StyleSheet} from ‘react-native‘;


export default class Page2 extends React.Component{
    render(){
        const {navigation}=this.props;
        return(
            <View style={styles.container}>
                <Text style={styles.welcome}>Welcome To Page2</Text>
            </View>
        )
    }
}
const styles=StyleSheet.create({
    container:{
        flex:1,
    },
    welcome:{
        fontSize:20,
        textAlign:‘center‘,
        margin:10,
    }
});
7. 修改根目录下的APP.js,将路由导入
import React from ‘react‘;
import AppContainer from ‘./navigation/navigators.js‘//导入路由文件

export default class App extends React.Component {
  render() {
    return <AppContainer />;
  }
}
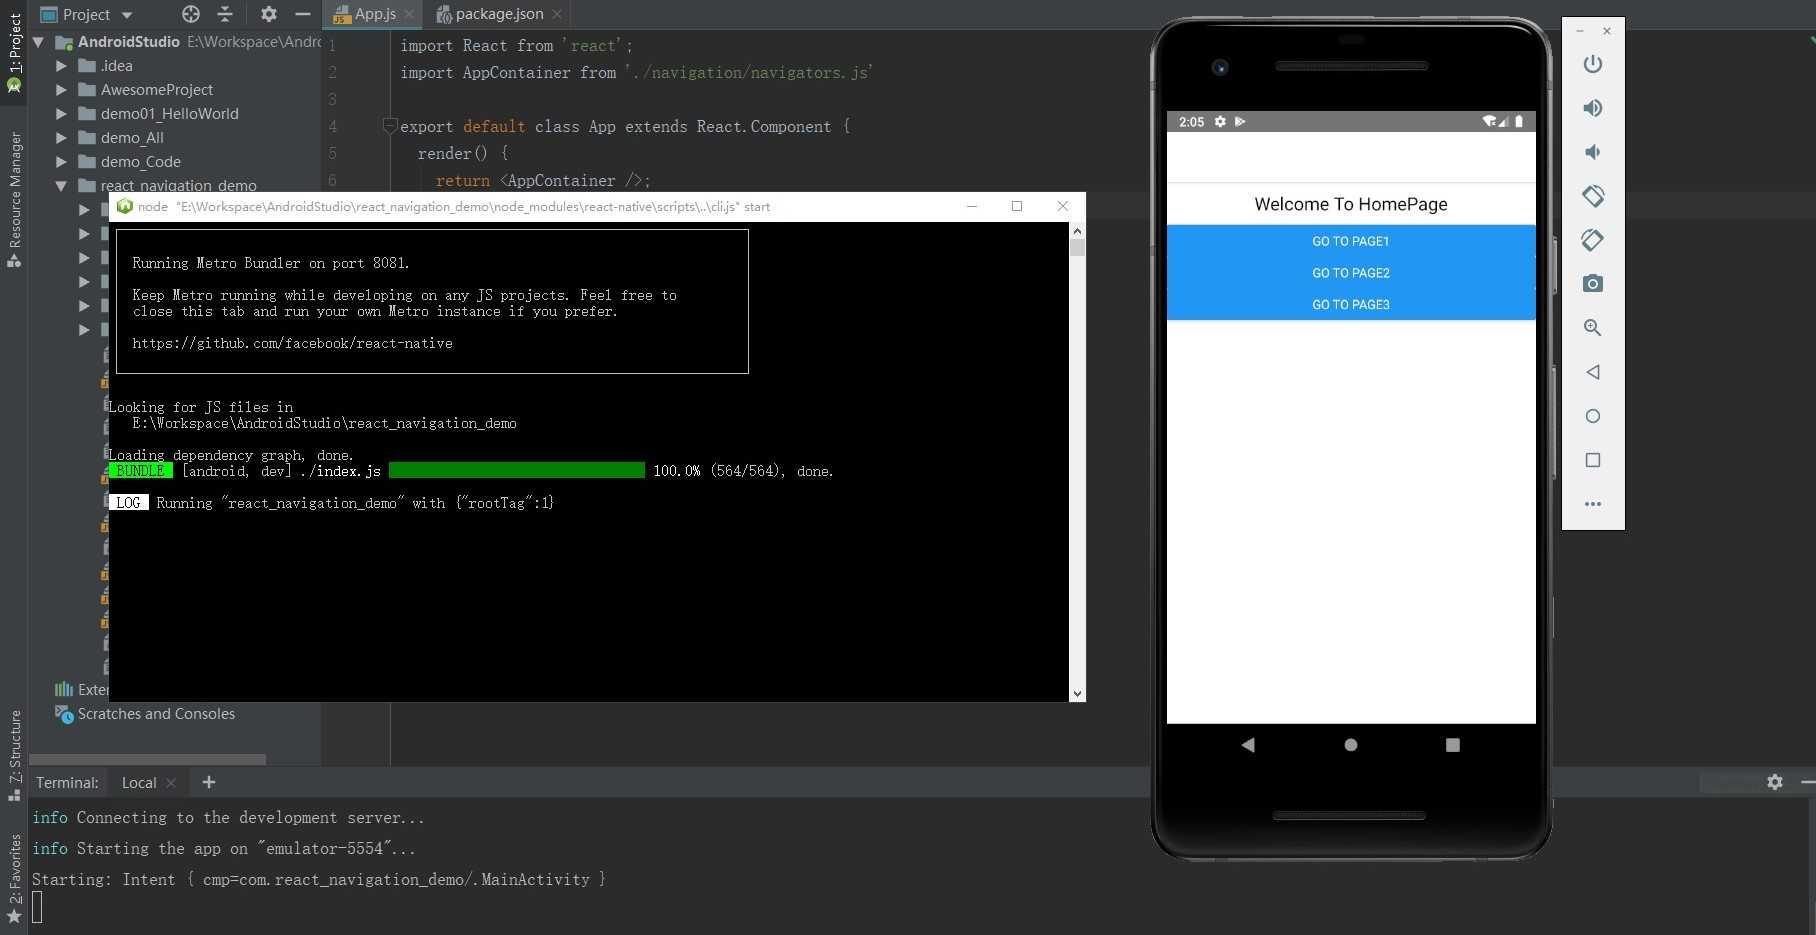
8. 启动连接虚拟手机,用react-native run-android编译运行代码
原文:https://www.cnblogs.com/zlforever-young/p/11723863.html