文本显示是界面开发必不可少的内容,在Qt Quick模块中提供了 Text 项目来进行文本的显示,其中可以使用 font 属性组对文本字体进行设置。这一篇我们来看看它们的具体使用。
就像前面教程中提到过的,在文本中可以使用 font 属性组来设置字体,常用的属性如下:
我们可以直接使用点表示法来使用一个属性,也可以使用组表示法来一次指定多个属性,建议使用组表示法,这样代码的可读性更好。下面来看一个示例:
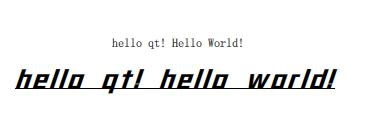
Text {
    id: text1
    anchors.centerIn: parent
    text: "hello qt! Hello World!"
}

Text {
    id: text2
    anchors.top: text1.bottom
    anchors.topMargin: 10
    anchors.horizontalCenter: text1.horizontalCenter
    text: "hello qt! Hello World!"

    font.weight: Font.ExtraBold
    font.pointSize: 20
    font.letterSpacing: 3
    font.wordSpacing: 6
    font {
        capitalization: Font.AllLowercase
        italic: true
        underline: true
    }
    font.family: webFont.name
    FontLoader {
        id: webFont
        source: "http://qter-images.qter.org/other/myfont.ttf"
        onStatusChanged: if (webFont.status == FontLoader.Ready)
                                 console.log(‘Loaded‘)
    }
}
这里最后使用了 FontLoader 类型来加载一个字体,可以通过设置 source 属性来指定一个字体名称或者网络 url 地址,比如这里使用了网上的一个 ttf 字体,当使用网络字体时,可以通过 status 属性来获取加载的状态。下图是运行效果。
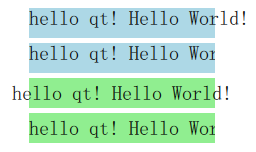
Text 项目是可以设置宽度的,当里面的文本内容超出 Text 的宽度时,可以使用 clip 属性设置文本是否被裁剪。下面来看一个例子:
Column{
    anchors.centerIn: parent
    spacing: 5

    Rectangle {
        width: 186; height: 30
        color: "lightblue"

        Text {
            text: "hello qt! Hello World!"
            font.pointSize: 15
        }
    }
    Rectangle {
        width: 186; height: 30
        color: "lightblue"

        Text {
            text: "hello qt! Hello World!"
            font.pointSize: 15
            width: 186
            clip: true
        }
    }

    Rectangle {
        width: 186; height: 30
        color: "lightgreen"

        Text {
            anchors.centerIn: parent
            text: "hello qt! Hello World!"
            font.pointSize: 15
        }
    }

    Rectangle {
        width: 186; height: 30
        color: "lightgreen"

        Text {
            anchors.centerIn: parent
            text: "hello qt! Hello World!"
            font.pointSize: 15
            width: 186
            clip: true
        }
    }
}
运行效果如下图所示。
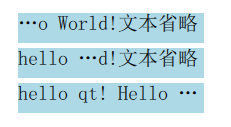
如果使用 clip 属性,当文本超出边界后会被突然截断,这样可能在边界只显示了单词或字母的局部,非常不友好。在 Text 中还提供了 elide 属性,可以通过省略文本的部分内容来匹配文本的宽度,其取值包括Text.ElideNone (默认)、Text.ElideLeft、Text.ElideMiddle 和 Text.ElideRight ,需要注意的是,该属性也是在设置了 Text 宽度时才有作用。下面看一段示例代码:
Column{
    anchors.centerIn: parent
    spacing: 5

    Rectangle {
        width: 186; height: 30
        color: "lightblue"

        Text {
            width: 186
            text: qsTr("hello qt! Hello World!文本省略")
            font.pointSize: 15
            elide: Text.ElideLeft
        }
    }

    Rectangle {
        width: 186; height: 30
        color: "lightblue"

        Text {
            width: 186
            text: qsTr("hello qt! Hello World!文本省略")
            font.pointSize: 15
            elide: Text.ElideMiddle
        }
    }

    Rectangle {
        width: 186; height: 30
        color: "lightblue"

        Text {
            width: 186
            text: qsTr("hello qt! Hello World!文本省略")
            font.pointSize: 15
            elide: Text.ElideRight
        }
    }
}
运行效果如下图所示。
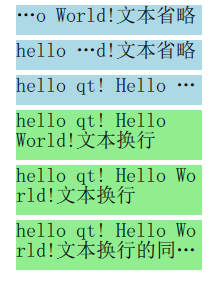
对于过长的文本,除了进行省略以外,也可以使用 wrapMode 来设置换行,可用的换行模式包括:Text.NoWrap (默认) 、Text.WordWrap、Text.WrapAnywhere 和Text.Wrap。当设定了 Text 的高度 height,或者最大行数 maximumLineCount 后,换行和省略可以同时使用。下面来看一个例子,在前面代码的基础上继续添加如下代码:
Rectangle {
    width: 186; height: 50
    color: "lightgreen"

    Text {
        width: 186
        text: qsTr("hello qt! Hello World!文本换行")
        font.pointSize: 15
        wrapMode: Text.WordWrap
    }
}

Rectangle {
    width: 186; height: 50
    color: "lightgreen"

    Text {
        width: 186
        text: qsTr("hello qt! Hello World!文本换行")
        font.pointSize: 15
        wrapMode: Text.WrapAnywhere
    }
}

Rectangle {
    width: 186; height: 50
    color: "lightgreen"

    Text {
        width: 186; height: 50
        text: qsTr("hello qt! Hello World!文本换行的同时也可以省略")
        font.pointSize: 15
        wrapMode: Text.WrapAnywhere
        elide: Text.ElideRight
    }
}
运行效果如下图所示。
使用 Text 的 style 属性可以设置文本的样式,包括:Text.Normal(默认)、Text.Outline、Text.Raised 和 Text.Sunken ,下面是示例:
Row {
    spacing: 10

    Text { font.pointSize: 24; text: "Normal" }

    Text { font.pointSize: 24; text: "Raised"; color: "white"
        style: Text.Raised; styleColor: "blue" }

    Text { font.pointSize: 24; text: "Outline";
        style: Text.Outline; styleColor: "red" }

    Text { font.pointSize: 24; text: "Sunken"; color: "white"
        style: Text.Sunken; styleColor: "black" }
}
运行效果如下图所示。

当设置了 Text 的宽度和高度以后,可以通过 horizontalAlignment 和 verticalAlignment 来设置文本内容的对齐方式,水平方向包括:Text.AlignLeft、 Text.AlignRight、 Text.AlignHCenter 和 Text.AlignJustify;垂直方向包括:Text.AlignTop、 Text.AlignBottom 和 Text.AlignVCenter 。下面是示例代码:
Rectangle {
    width: 300; height: 50
    color: "gold"

    Text {
        width: 300; height: 50
        text: qsTr("hello qt! Hello World!")
        font.pointSize: 15
        horizontalAlignment: Text.AlignHCenter
        verticalAlignment: Text.AlignBottom
    }
}
运行效果如下图所示。

Text 项目除了显示纯文本以外,也可以显示富文本。通过 textFormat 属性可以设置文本格式,包括:
Text.AutoText (默认):自动判断以什么样式来进行显示;
Text.PlainText:以纯文本进行显示;
Text.StyledText:是一种支持基本文本样式标签的优化格式,例如HTML 3.2中的标签:
<b></b>
<strong></strong>
<i></i>
<br>
<p>
<u>
<font color="color_name" size="1-7"></font>
<h1> to <h6>
<a href="">
<img src="" align="top,middle,bottom" width="" height="">
<ol type="">, <ul type=""> , <li>
<pre></pre>
> < &Supported HTML Subset 文档种进行查看。为了获取更好的性能,建议使用 Text.PlainText 或 Text.StyledText 。下面是示例代码:
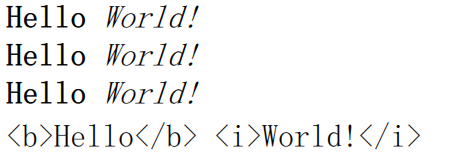
Text {
    font.pointSize: 24
    text: "<b>Hello</b> <i>World!</i>"
}
Text {
    font.pointSize: 24
    textFormat: Text.StyledText
    text: "<b>Hello</b> <i>World!</i>"
}
Text {
    font.pointSize: 24
    textFormat: Text.RichText
    text: "<b>Hello</b> <i>World!</i>"
}
Text {
    font.pointSize: 24
    textFormat: Text.PlainText
    text: "<b>Hello</b> <i>World!</i>"
}
效果如下图所示:
原文:https://www.cnblogs.com/laiyingpeng/p/11906861.html