Apache Ranger是大数据领域的一个集中式安全管理框架,目的是通过制定策略(policies)实现对Hadoop组件的集中式安全管理。用户可以通过Ranger实现对集群中数据的安全访问。
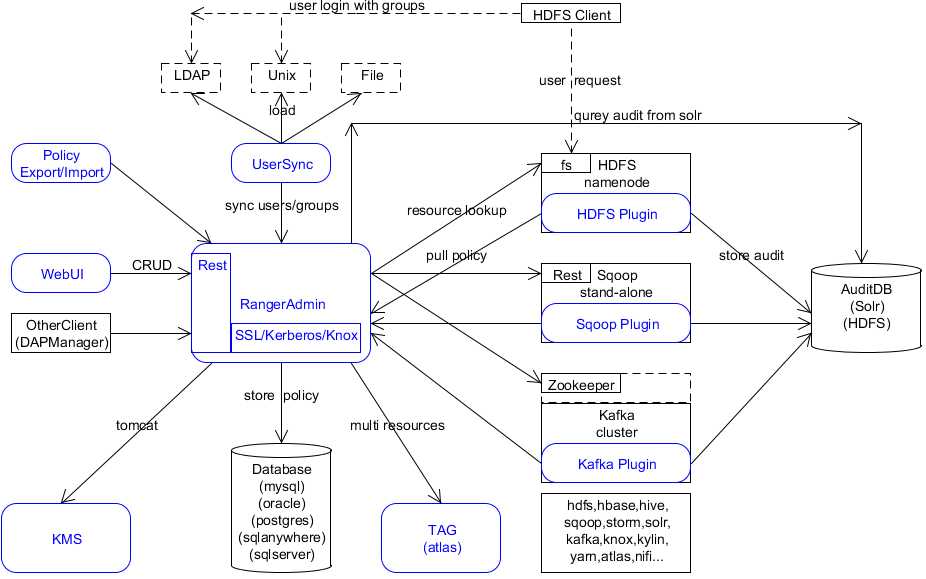
Ranger由三个模块组成:Ranger内部组件、依赖组件、扩展性组件。
包含的内部组件如下:
注:Apache atlas 是Hadoop社区为解决Hadoop生态系统的元数据治理问题而产生的开源项目,它为Hadoop集群提供了包括数据分类、集中策略引擎、数据血缘、安全和生命周期管理在内的元数据治理核心能力。
HDFS、HBASE、HIVE、YARN、KNOX、STORM、SOLR、KAFKA、NIFI、KYLIN、NIFI-REGISTRY、SQOOP、ATLAS、ELASTICSEARCH、PRESTO、OZONE
Ranger官网源码包最新版本是2.0.0,不提供二进制安装包,故需要maven编译。目前测试使用的版本为:
| ranger版本 | 2.0.0 |
| hadoop版本 | 2.7.3 |
| hbase版本 | |
| hive版本 | 2.1.0 |
| postgres版本 | 11 |
| python版本 | 2.7 |
# wget http://mirrors.tuna.tsinghua.edu.cn/apache/ranger/2.0.0/apache-ranger-2.0.0.tar.gz
编译安装需要使用到maven,下载如下:
# wget http://mirrors.tuna.tsinghua.edu.cn/apache/maven/maven-3/3.6.2/binaries/apache-maven-3.6.2-bin.tar.gz
解压,并添加环境变量,同时修改maven的Java堆内存最大值,避免编译内存溢出
# tar -zxvf apache-maven-3.6.2-bin.tar.gz

# vim /etc/bashrc
export MAVEN_HOME=/opt/app/apache-maven-3.6.2
export PATH=$PATH:$MAVEN_HOME/bin

MAVEN_OPTS=-Xmx2048m
export JAVA_HOME MAVEN_HOME MAVEN_OPTS JAVA_BIN PATH CLASSPATH
修改maven源为阿里源或其他源
# pwd
/opt/app/apache-maven-3.6.2/conf
# vim settings.xml
<mirrors>
   <mirror>
     <id>nexus-aliyun</id>
     <mirrorOf>central</mirrorOf>
     <name>Nexus aliyun</name>
     <url>http://maven.aliyun.com/nexus/content/groups/public</url>
   </mirror>

   <mirror>
     <id>CN</id>
     <name>OSChina Central</name>
     <url>http://maven.oschina.net/content/groups/public/</url>
     <mirrorOf>central</mirrorOf>
   </mirror>

   <mirror>
     <id>alimaven</id>
     <mirrorof>central</mirrorof>
     <name>aliyun maven</name>
     <url>https://maven.aliyun.com/nexus/content/repositories/central/</url>
   </mirror>

   <mirror>
     <id>jboss-public-repository-group</id>
     <mirrorof>central</mirrorof>
     <name>JBoss Public Repository Group</name>
     <url>https://repository.jboss.org/nexus/content/groups/public</url>
   </mirror>
</mirrors>
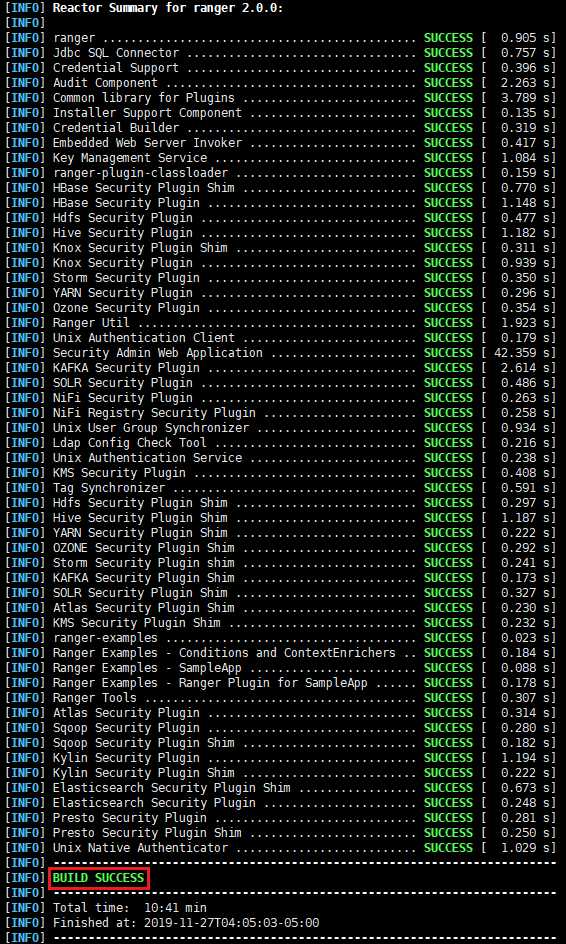
首次编译ranger,需要时间比较长,时间主要用于maven下载相应的依赖包,时间快慢取决于机器网络带宽。
# pwd
/opt/app/apache-ranger-2.0.0
# mvn clean compile package assembly:assembly install -DskipTests -Drat.skip=true
编译完成如下:
编译完成后,在当前目录下的target会生成相应的tar包文件,如下:
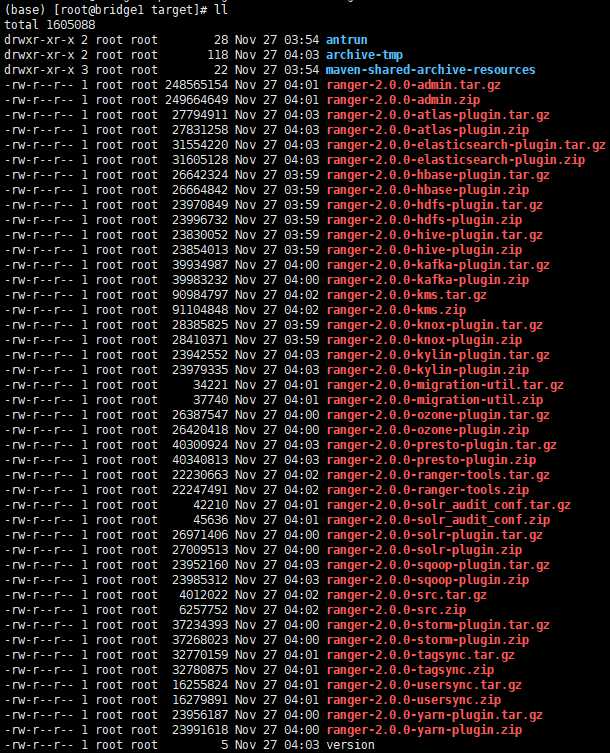
接下来就可以使用这些编译完成二进制tar文件。
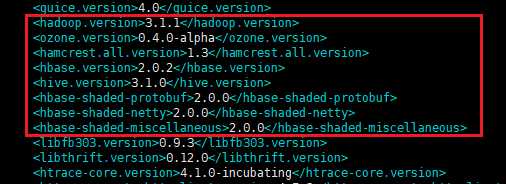
注:如果在编译安装的时候,需要对Hadoop、HBase、Hive等相应的版本有要求,那么可以在下载的源代码目录下pom.xml文件里面,修改Hadoop组件的相应版本,否则会导致后面使用的时候,出现版本兼容性问题。
# pwd
/opt/app/apache-ranger-2.0.0
# vim pom.xml
安装ranger-admin的机器可以不在Hadoop集群内部,可以是随便一台。
# python
Python 2.7.5 (default, Aug  4 2017, 00:39:18)
[GCC 4.8.5 20150623 (Red Hat 4.8.5-16)] on linux2
Type "help", "copyright", "credits" or "license" for more information.
>>>

如果没有检测到python2,则执行下面的命令
# yum -y install python
请自行百度安装,在postgres安装目录 data下修改pg_hba.conf文件,使postgres可以被远程服务器访问,修改为如下:
# Allow replication connections from localhost, by a user with the
# replication privilege.
#host    replication     all             127.0.0.1/32            md5
#host    replication     all             ::1/128                 md5
host      all             all             0.0.0.0/0               md5
从maven源库下载,https://repo1.maven.org/maven2/org/postgresql/postgresql/42.2.8/
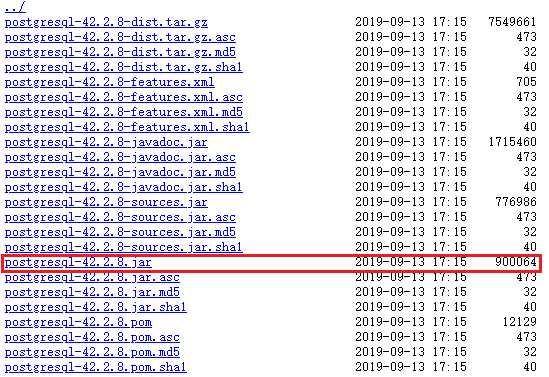
把postgresql-42.2.8.jar下载,并创建 /usr/share/java/ 目录,最后转移到该目录下
# wget https://repo1.maven.org/maven2/org/postgresql/postgresql/42.2.8/postgresql-42.2.8.jar
# mkdir -p /usr/share/java
# mv postgresql-42.2.8.jar /usr/share/java/
# pwd
/opt/app/apache-ranger-2.0.0/target
# tar -zxvf ranger-2.0.0-admin.tar.gz
# pwd
/opt/app/apache-ranger-2.0.0/target/ranger-2.0.0-admin
# vim install.properties
修改install.properties文件,这里使用的数据库是postgres,不安装solr服务
1)数据库配置
DB_FLAVOR=POSTGRES #指明使用数据库类型
SQL_CONNECTOR_JAR=/usr/share/java/postgresql-42.2.8.jar #数据库连接驱动
db_root_user=postgres        #数据库root用户名
db_root_password=postgres #数据库主机
db_host=192.168.1.33:5432 #数据库密码

# 以下三个属性是用于设置ranger数据库的
db_name=ranger          #数据库名
db_user=postgres        #管理该数据库用户
db_password=postgres    #密码

# 不需要保存,为空,否则生成的数据库密码为‘_‘
cred_keystore_filename=

2) 审计日志, 如果没有安装solr,对应的属性值为空即可
audit_store=

audit_solr_urls=
audit_solr_user=
audit_solr_password=
audit_solr_zookeepers=

3)策略管理配置,配置ip和端口,默认即可
policymgr_external_url=http://localhost:6080

4) 配置hadoop集群的core-site.xml文件,把core-site.xml文件拷贝到该目录
hadoop_conf=/etc/hadoop/conf

5) rangerAdmin、rangerTagSync、rangerUsersync、keyadmin密码配置。默认为空,可以不配,对应的内部组件该属性也要为空
rangerAdmin_password=
rangerTagsync_password=
rangerUsersync_password=
keyadmin_password=
# pwd
/opt/frame-tools/apache-ranger-2.0.0/target/ranger-2.0.0-admin
# ./setup.sh
初始化结果如下则成功:

接着,运行set_globals.sh
# ./set_globals.sh
usermod: no changes
[2019/11/27 21:54:32]:  [I] Soft linking /etc/ranger/admin/conf to ews/webapp/WEB-INF/classes/conf
# ranger-admin start
或者
# ./ews/ranger-admin-services.sh start
Ranger的默认端口是6080,如图,则表明程序正常启动

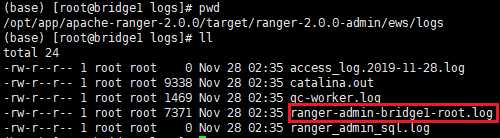
查看Ranger Admin Server运行的日志情况,日志路径默认为 ews/log , 软链接到 /var/log/admin ,如下:
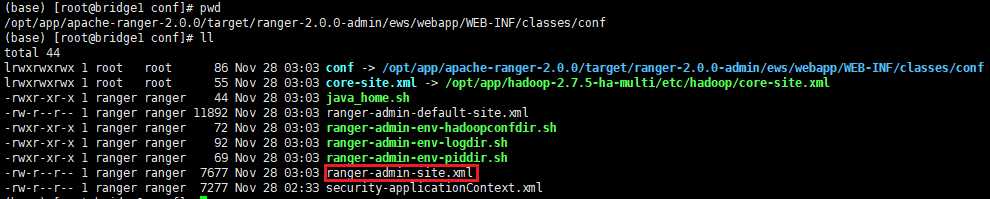
Ranger Admin Server的具体配置文件为 ranger-admin-site.xml ,如下:
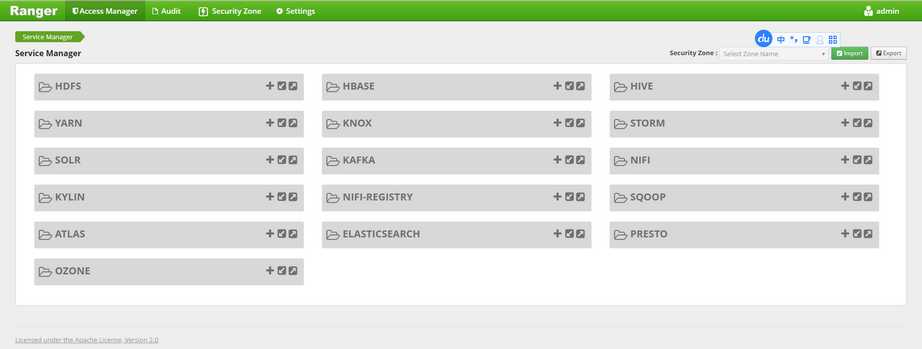
浏览器连接测试:http://192.168.1.10:6080,登录界面用户名和密码为:admin/admin,登录进去界面如下:
# pwd
/opt/frame-tools/apache-ranger-2.0.0/target
# tar -zxvf ranger-2.0.0-usersync.tar.gz
# pwd
/opt/app/apache-ranger-2.0.0/target/ranger-2.0.0-usersync
# vim install.properties

配置ranger admin的地址
POLICY_MGR_URL = http://localhost:6080

同步源系统类型
SYNC_SOURCE = unix

同步间隔时间
SYNC_INTERVAL = 1

usersync程序运行的用户和用户组
unix_user=usersync
unix_group=usersync

修改rangerusersync用户的密码。注意,此密码应与Ranger admin中install.properties的rangerusersync_password相同。此处可以为空,同样Ranger admin的也要为空
rangerUsersync_password=

配置hadoop的core-site.xml路径
hadoop_conf=/etc/hadoop/conf

配置usersync的log路径
logdir=logs
# pwd
/opt/app/apache-ranger-2.0.0/target/ranger-2.0.0-usersync
# ./setup.sh
执行结果:

# ranger-usersync start
或
# pwd
/opt/frame-tools/apache-ranger-2.0.0/target/ranger-2.0.0-usersync
# ./ranger-usersync-services.sh start
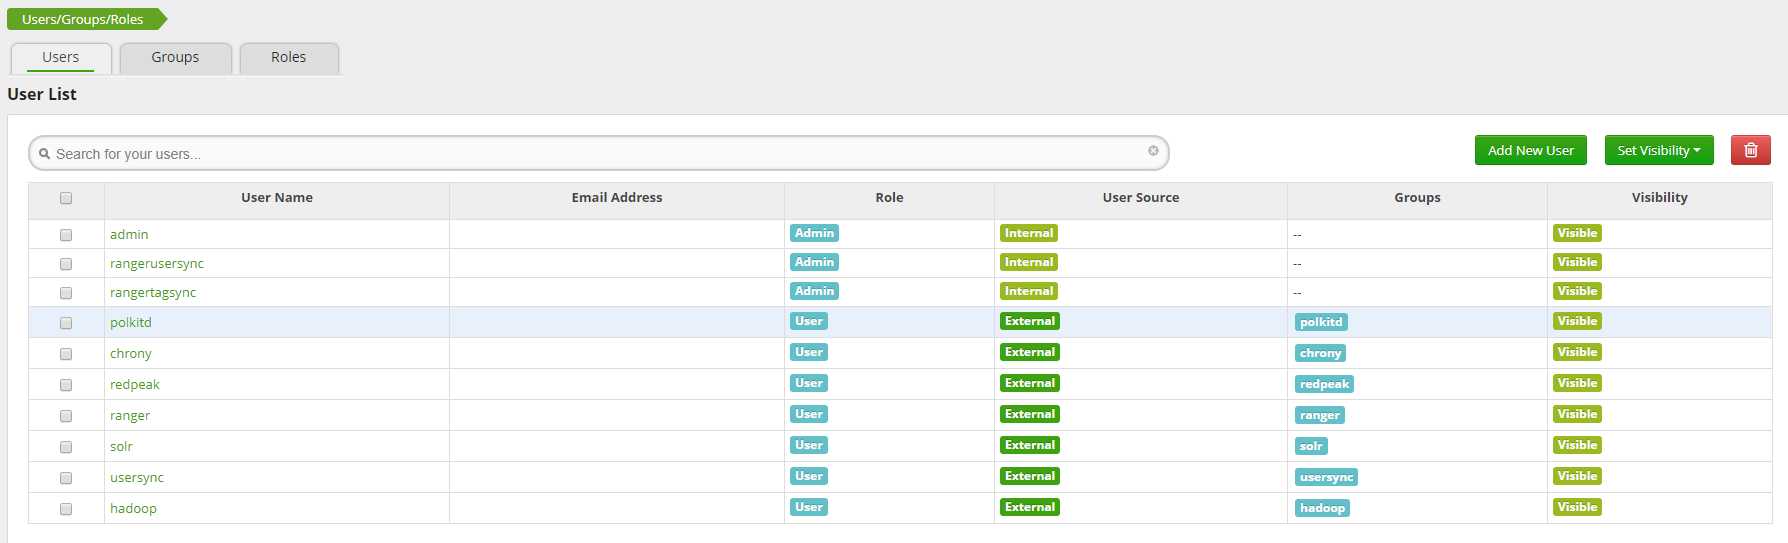
验证是否安装成功,如图则成功:

【参考资料】
https://yaooqinn.github.io/spark-authorizer/docs/install_plugin.html
https://github.com/yaooqinn/spark-ranger
https://blog.csdn.net/sudaxhh/article/details/52135184
https://blog.csdn.net/w609392362/article/details/89959445
https://www.cnblogs.com/xiaolang8762400/p/7449489.html
https://help.aliyun.com/document_detail/66411.html
https://www.cnblogs.com/yjt1993/p/11837398.html
https://www.lagou.com/lgeduarticle/7838.html
https://www.jianshu.com/p/d0bf6e77bb8f
https://www.cnblogs.com/taojietaoge/p/10808534.html
原文:https://www.cnblogs.com/swordfall/p/11887317.html