地址:https://www.cnblogs.com/suye916/p/11989336.html点击链接查看「Maven安装及配置」,或复制链接用石墨文档 App 打开
地址:https://www.cnblogs.com/suye916/p/11989366.html点击链接查看「jenkins在Windows环境下的简单搭建」,或复制链接用石墨文档 App 打开
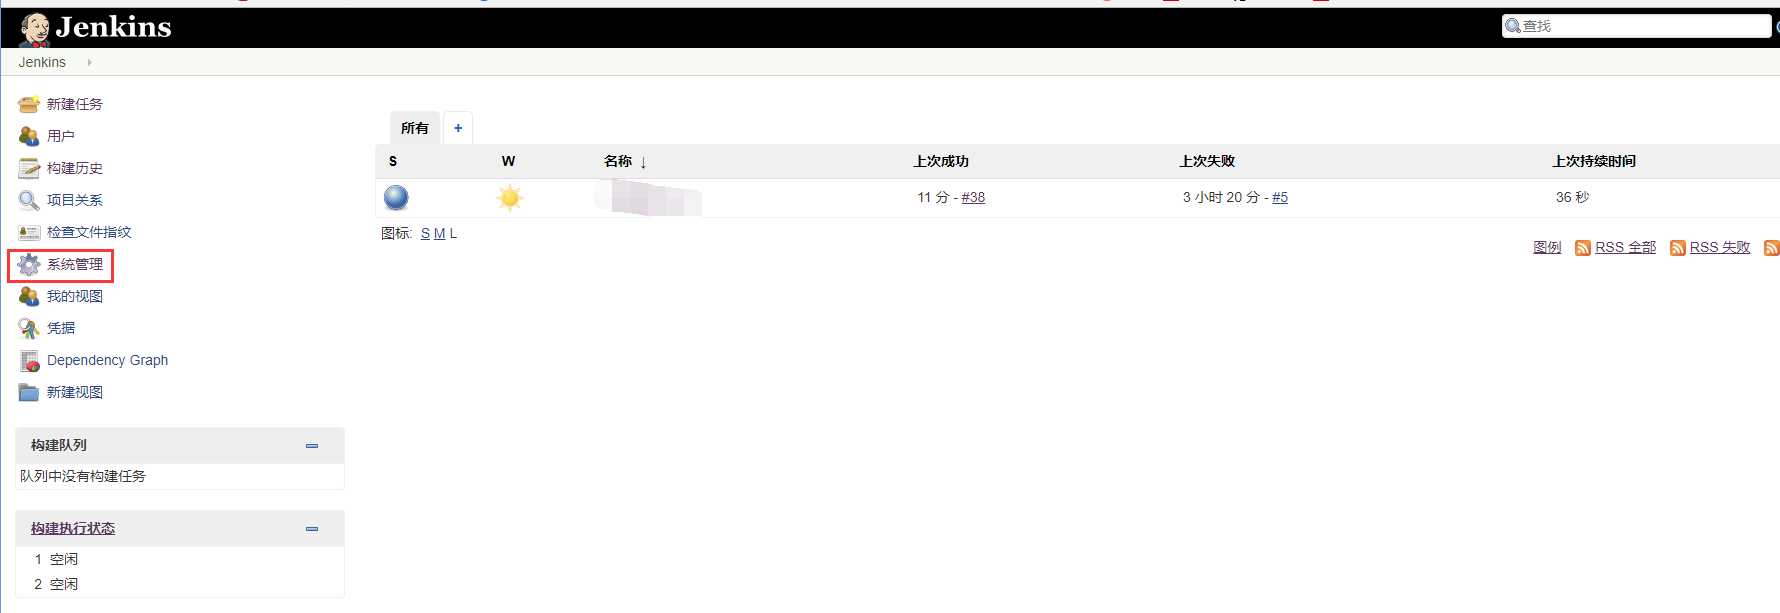
jenkins主页>>系统管理>>全局工具配置
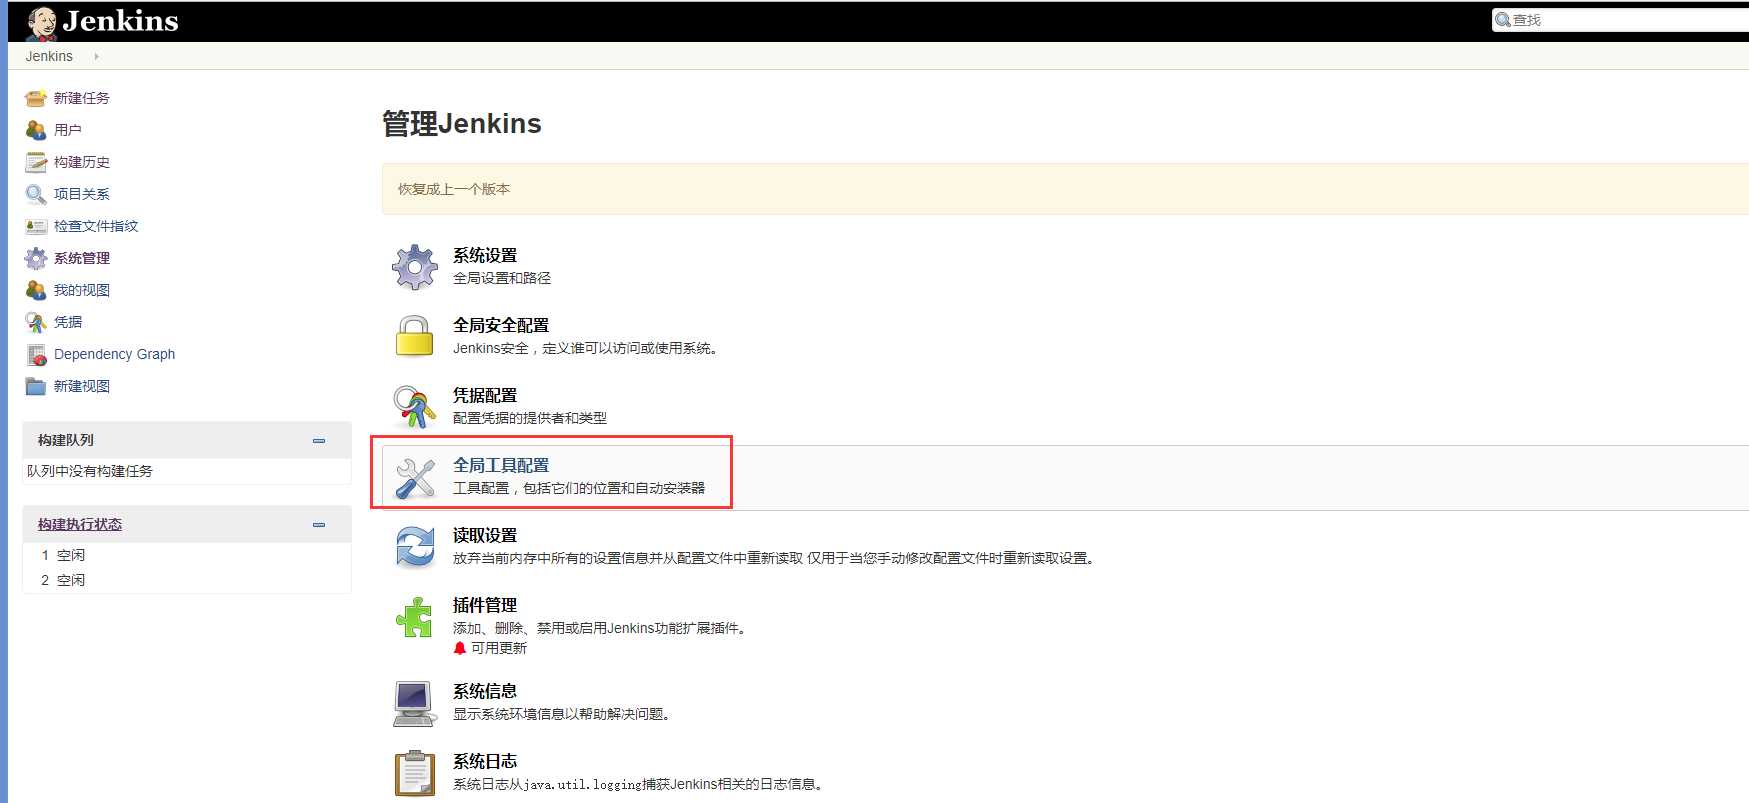
点击JDK安装

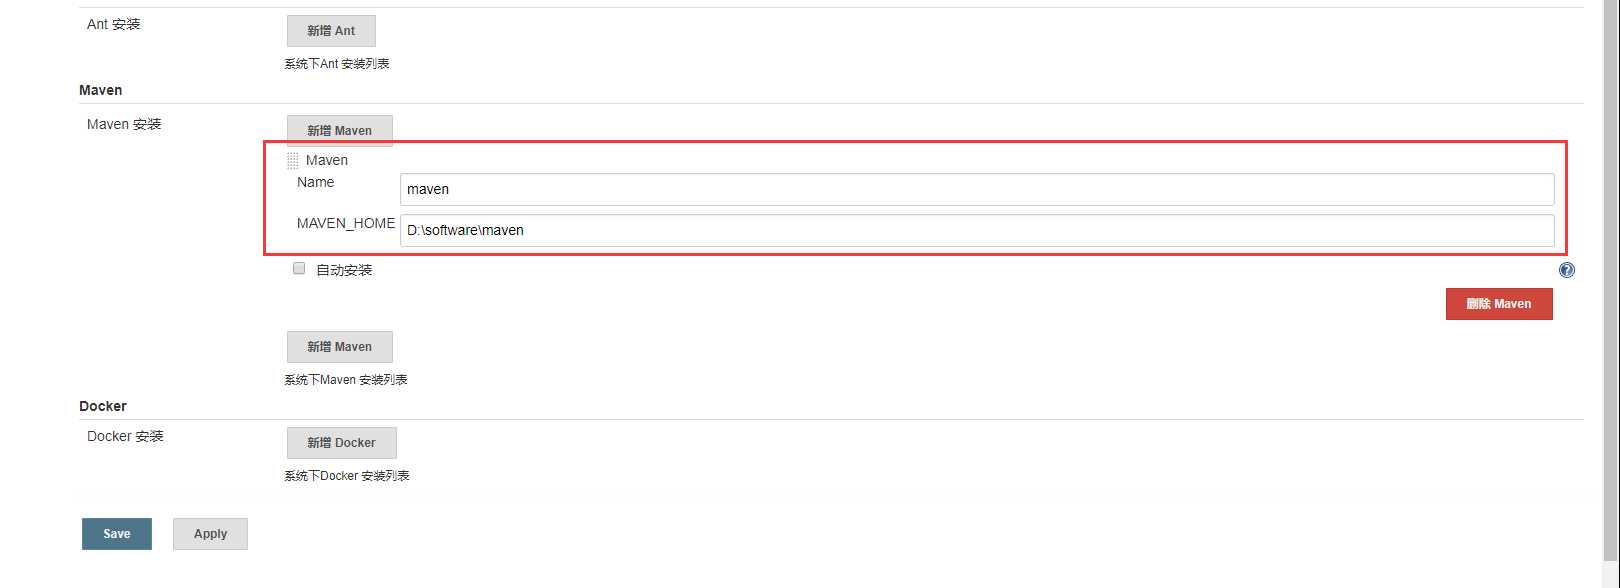
系统设置>>全局工具配置>>Maven安装
输入Maven的安装路径
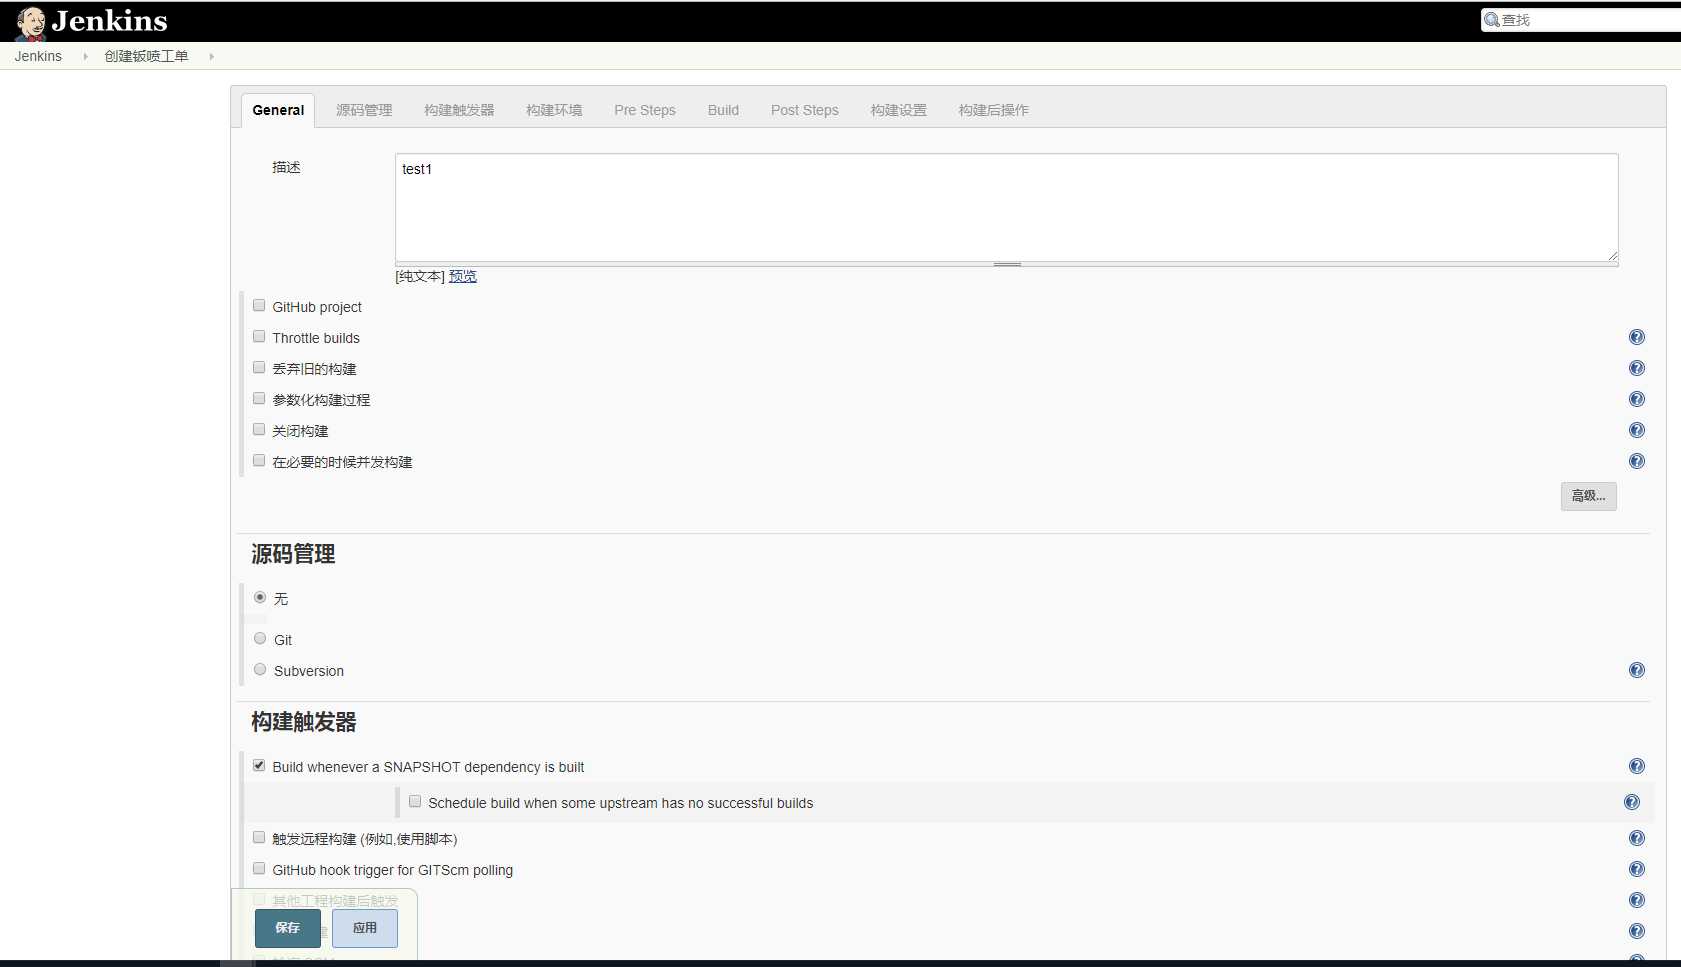
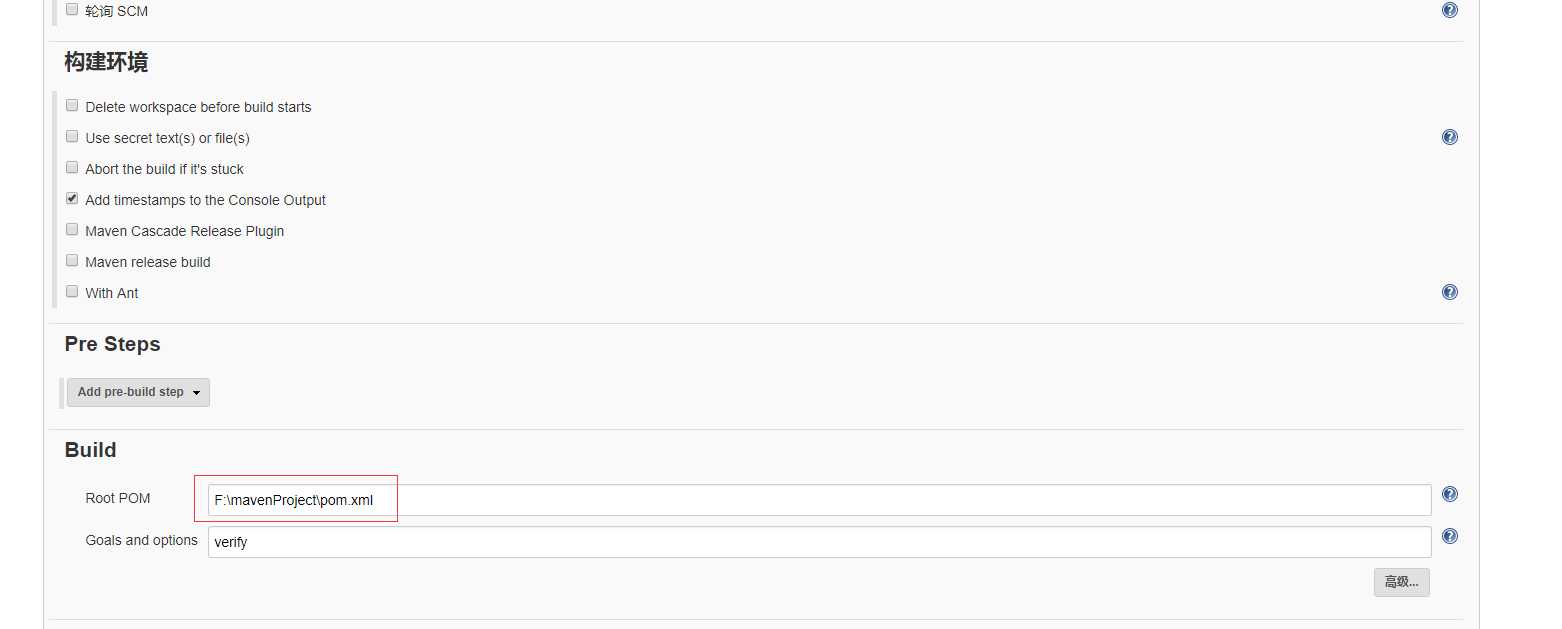
构建maven项目并点击确认

以下暂时如下
pom.xml文件即是本地电脑创建的pom.xml文件路径
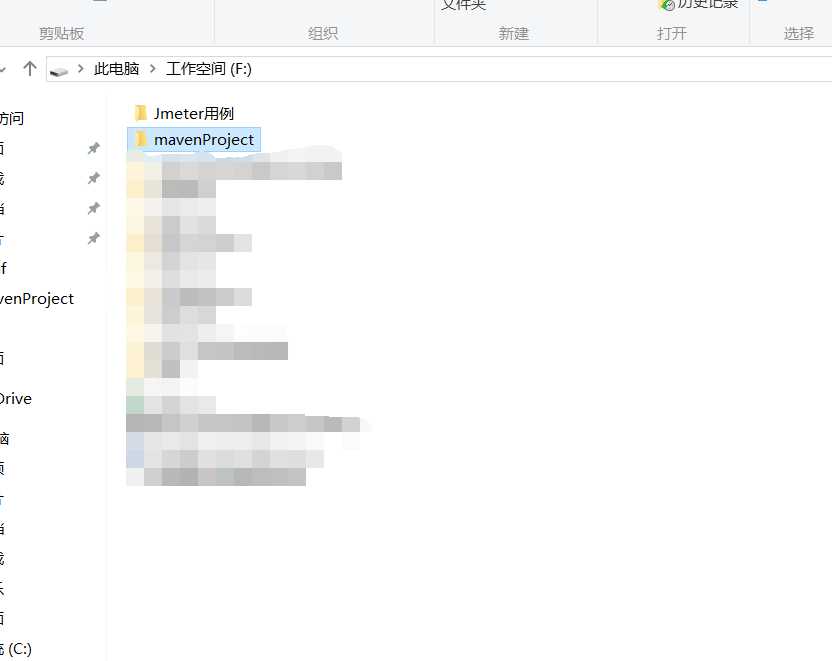
创建maven项目文件夹
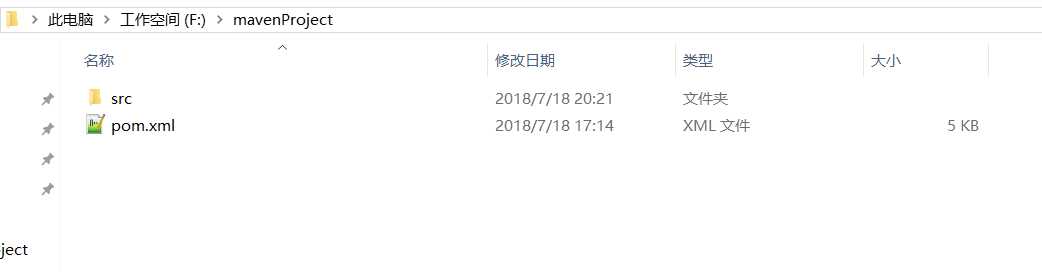
内部创建src文件夹和pom.xml文件
pom.xml文件内容如下:
<project xmlns="http://maven.apache.org/POM/4.0.0" xmlns:xsi="http://www.w3.org/2001/XMLSchema-instance"
    xsi:schemaLocation="http://maven.apache.org/POM/4.0.0 http://maven.apache.org/xsd/maven-4.0.0.xsd">
    <modelVersion>4.0.0</modelVersion>

    <groupId>com.performance.test</groupId>
    <artifactId>PerformanceTest</artifactId>
    <version>0.0.1-SNAPSHOT</version>
    <packaging>jar</packaging>

    <name>报告名称</name>
    <url>http://maven.apache.org</url>

    <properties>
        <project.build.sourceEncoding>UTF-8</project.build.sourceEncoding>
        <jmeter.result.jtl.dir>${project.build.directory}\jmeter\results</jmeter.result.jtl.dir>
        <jmeter.result.html.dir>${project.build.directory}\jmeter\html</jmeter.result.html.dir>
        <jmeter.result.html.dir1>${project.build.directory}\jmeter\html1</jmeter.result.html.dir1>
        <ReportName>TestReport</ReportName>
    </properties>

    <dependencies>
		<dependency>
            <groupId>org.uncommons</groupId>
            <artifactId>reportng</artifactId>
            <version>1.1.4</version>
            <scope>test</scope>
            <exclusions>
                <exclusion>
                    <groupId>org.testng</groupId>
                    <artifactId>testng</artifactId>
                </exclusion>
            </exclusions>
        </dependency>
        <dependency>
            <groupId>junit</groupId>
            <artifactId>junit</artifactId>
            <version>3.8.1</version>
            <scope>test</scope>
        </dependency>
    </dependencies>

    <build>
        <plugins>
            <plugin>
                <groupId>com.lazerycode.jmeter</groupId>
                <artifactId>jmeter-maven-plugin</artifactId>
                <version>2.1.0</version>
                <executions>
                    <execution>
                        <id>jmeter-tests</id>
                        <goals>
                            <goal>jmeter</goal>
                        </goals>
                    </execution>
                </executions>
            </plugin>
            <plugin>
                <groupId>org.codehaus.mojo</groupId>
                <artifactId>xml-maven-plugin</artifactId>
                <version>1.0-beta-3</version>
                <executions>
                    <execution>
                        <phase>verify</phase>
                        <goals>
                            <goal>transform</goal>
                        </goals>
                    </execution>
                </executions>
                <configuration>
                    <transformationSets>
                        <transformationSet>
                            <dir>${jmeter.result.jtl.dir}</dir>
                            <stylesheet>src\test\resources\jmeter.results.shanhe.me.xsl</stylesheet>
                            <outputDir>${jmeter.result.html.dir}</outputDir>
                            <fileMappers>
                                <fileMapper
                                    implementation="org.codehaus.plexus.components.io.filemappers.FileExtensionMapper">
                                    <targetExtension>html</targetExtension>
                                </fileMapper>
                            </fileMappers>
                        </transformationSet>
                        <transformationSet>
                            <dir>${jmeter.result.jtl.dir}</dir>
                            <stylesheet>src\test\resources\jmeter.results.shanhe.me.xsl</stylesheet>
                            <outputDir>${jmeter.result.html.dir1}</outputDir>
                            <fileMappers>
                                <fileMapper
                                    implementation="org.codehaus.plexus.components.io.filemappers.FileExtensionMapper">
                                    <targetExtension>html</targetExtension>
                                </fileMapper>
                            </fileMappers>
                        </transformationSet>
                    </transformationSets>
                </configuration>
                <!-- using XSLT 2.0 -->
                 <dependencies>
                   <dependency>
                   <groupId>net.sf.saxon</groupId>
                   <artifactId>saxon</artifactId>
                   <version>8.7</version>
                   </dependency>
               </dependencies>
            </plugin>
        </plugins>
    </build>
</project>
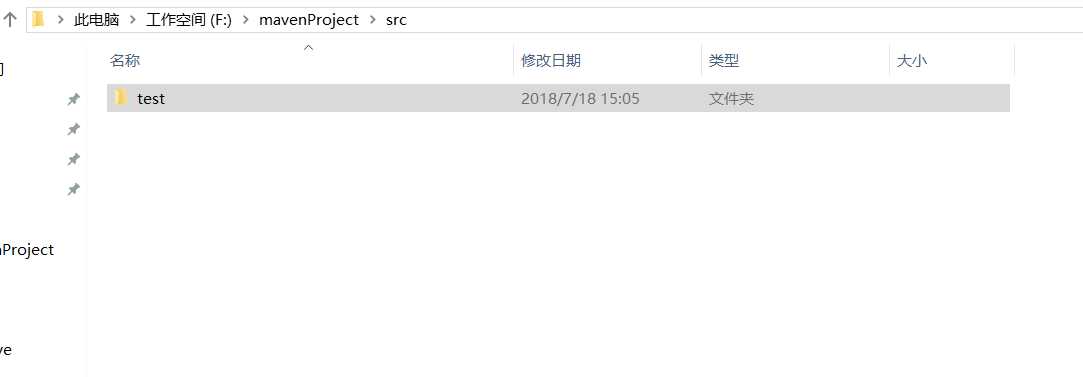
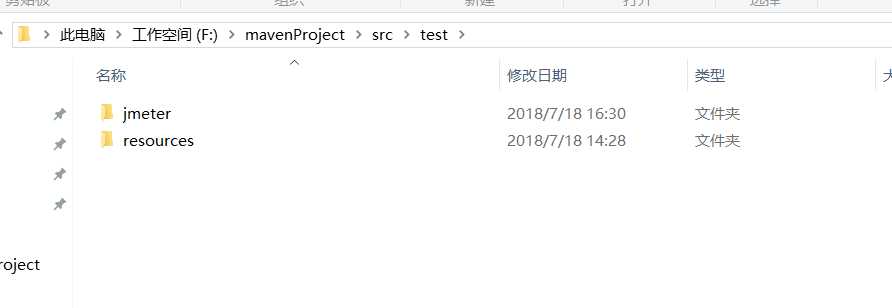
src内部创建自定义文件名,此处我使用的是test
test内部创建jmeter和resources两个文件夹
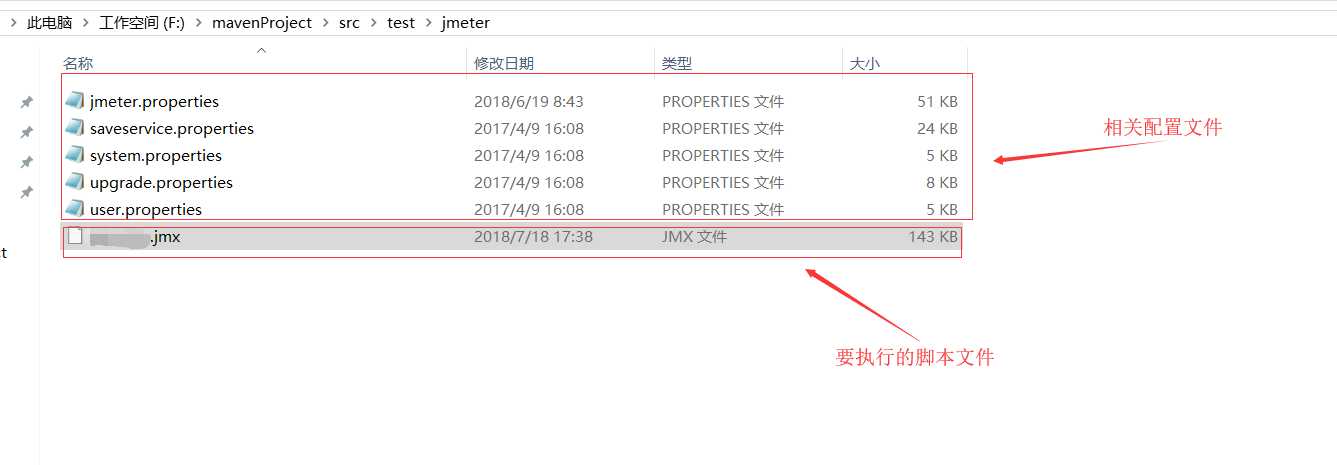
jemter文件夹内部放置要执行的jmeter脚本文件和相关配置文件(配置文件从安装的jmeter\bin目录下复制获取)
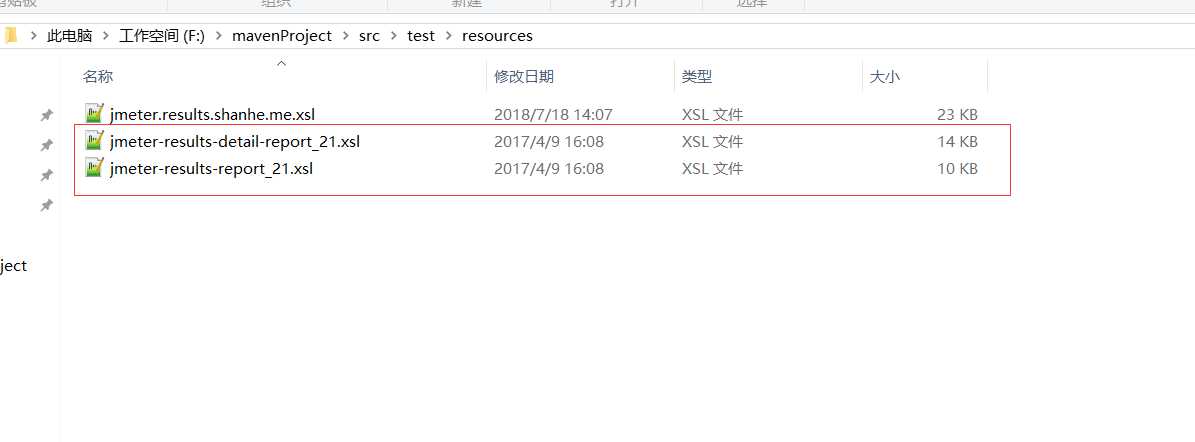
resources文件内放置测试报告的模板(红框内的文件从jmeter\extras中获取)
原文:https://www.cnblogs.com/suye916/p/11989417.html