全局异常处理指的是在一处配置之后,对于控制层所有类的所有方法的指定异常都可以处理
1,基于注解的全局异常处理
具体实现:
在类上加@ControllerAdvice注解
在方法上加@ExceptionHandler注解
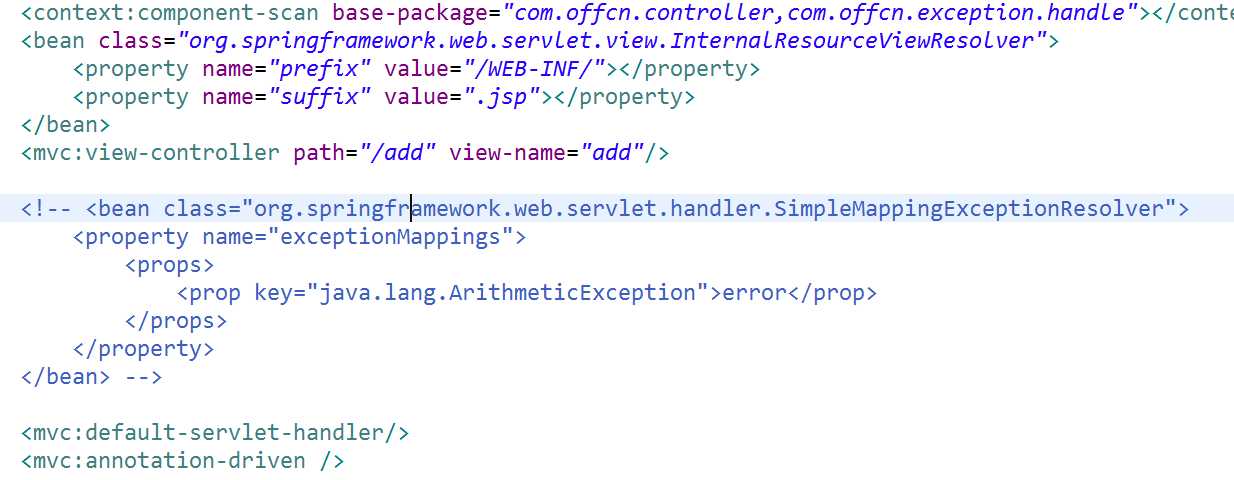
在springmvc.xml文件中配置<mvc:annotation-driven/>
代码:

@Controller
@RequestMapping("/user")
public class UserController {
    @RequestMapping("test01")
    public ModelAndView test01(@RequestParam("i") Integer i) {
        int num = 10/i;
        ModelAndView mv = new ModelAndView();
        mv.setViewName("error");
        return mv;
    }
}
@ControllerAdvice
public class MyExceptionHandler {
    @ExceptionHandler(value= {ArithmeticException.class})
    public ModelAndView exception(Exception ex) {
        ModelAndView mv = new ModelAndView();
        mv.setViewName("error");
        mv.addObject("msg", ex.getMessage());
        return mv;
    }
}
<%@ page language="java" contentType="text/html; charset=UTF-8"
    pageEncoding="UTF-8"%>
<!DOCTYPE html>
<html>
<head>
<meta charset="UTF-8">
<title>Insert title here</title>
</head>
<body>
    <h3>来到页面</h3>
    错误信息为:${msg }
</body>
</html>

2.基于xml文件配置全局异常处理
在springmvc配置文件中配置一个SimpleMappingException
<bean class="org.springframework.web.servlet.handler.SimpleMappingExceptionResolver">
      <!-- 指定异常信息在域对象中的键 -->
       <property name="exceptionAttribute" value="ex"></property>
       <property name="exceptionMappings">
         <props>
           <!-- key指定异常类的全类名,值:逻辑视图名 -->
           <prop key="java.lang.ArithmeticException">error</prop>
         </props>
       </property>
</bean>
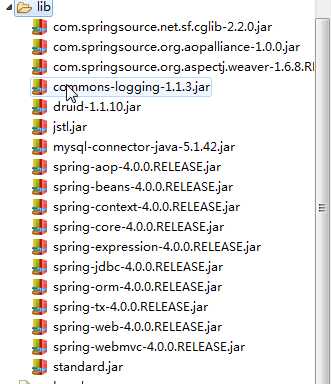
1.导包
2.在web.xml中配置spring的ContextLoaderLister和 Springmvc的前端控制器和两个filter
<?xml version="1.0" encoding="UTF-8"?>
<web-app xmlns:xsi="http://www.w3.org/2001/XMLSchema-instance" xmlns="http://java.sun.com/xml/ns/javaee" xsi:schemaLocation="http://java.sun.com/xml/ns/javaee http://java.sun.com/xml/ns/javaee/web-app_3_0.xsd" id="WebApp_ID" version="3.0">
  <display-name>springmvc04_01</display-name>

  <!-- 指定spring的配置文件的路径和名称  -->
    <context-param>
        <param-name>contextConfigLocation</param-name>
        <param-value>classpath:applicationContext.xml</param-value>
    </context-param>

    <listener>
        <listener-class>org.springframework.web.context.ContextLoaderListener</listener-class>
    </listener>

    <!-- springmvc的前端控制器 -->
    <servlet>
        <servlet-name>springDispatcherServlet</servlet-name>
        <servlet-class>org.springframework.web.servlet.DispatcherServlet</servlet-class>
        <init-param>
            <param-name>contextConfigLocation</param-name>
            <param-value>classpath:springmvc.xml</param-value>
        </init-param>
        <load-on-startup>1</load-on-startup>
    </servlet>

    <servlet-mapping>
        <servlet-name>springDispatcherServlet</servlet-name>
        <url-pattern>/</url-pattern>
    </servlet-mapping>

    <!-- 配置处理post请求乱码的过滤器 -->
    <filter>
      <filter-name>CharacterEncodingFilter</filter-name>
      <filter-class>org.springframework.web.filter.CharacterEncodingFilter</filter-class>
      <init-param>
         <param-name>encoding</param-name>
         <param-value>UTF-8</param-value>
      </init-param>
    </filter>

    <filter-mapping>
      <filter-name>CharacterEncodingFilter</filter-name>
      <url-pattern>/*</url-pattern>
    </filter-mapping>

    <!-- 将POST请求转换为PUT或者Delete请求 -->
    <filter>
      <filter-name>HiddenHttpMethodFilter</filter-name>
      <filter-class>org.springframework.web.filter.HiddenHttpMethodFilter</filter-class>
    </filter>

    <filter-mapping>
      <filter-name>HiddenHttpMethodFilter</filter-name>
      <url-pattern>/*</url-pattern>
    </filter-mapping>

</web-app>
3.创建springmvc.xml,并配置
4.创建applicationContext.xml,并配置
<context:component-scan base-package="com.offcn.service,com.offcn.dao"></context:component-scan>
     <context:property-placeholder location="classpath:jdbc.properties"/>
     <bean id="dataSource" class="com.mchange.v2.c3p0.ComboPooledDataSource">
         <property name="user" value="${jdbc.userName}"></property>
         <property name="password" value="${jdbc.password}"></property>
         <property name="jdbcUrl" value="${jdbc.jdbcUrl}"></property>
        <property name="driverClass" value="${jdbc.driverClass}"></property>
     </bean>
     <bean class="org.springframework.jdbc.core.JdbcTemplate">
         <property name="dataSource" ref="dataSource"></property>
     </bean>
     <bean id="transactionManager" class="org.springframework.jdbc.datasource.DataSourceTransactionManager">
         <property name="dataSource" ref="dataSource"></property>
     </bean>
     <tx:annotation-driven transaction-manager="transactionManager"/>
扫描包说明:
让springmvc扫描控制层,Spring扫描service层和dao层:
第一种解决方案:
 Springmvc.xml  扫描 <context:component-scan base-package="com.offcn.controller"/>
   Beans.xml <context:component-scan base-package="com.offcn.service,com.offcn.dao"/>
第二种解决方案:
Springmvc.xml
   <context:component-scan base-package="com.offcn" use-default-filters="false">
      <context:include-filter type="annotation" expression="org.springframework.stereotype.Controller"/>
      <context:include-filter type="annotation" expression="org.springframework.web.bind.annotation.ControllerAdvice"/>
   </context:component-scan>
applicationContext.xml
  <context:component-scan base-package="com.offcn">
      <context:exclude-filter type="annotation" expression="org.springframework.stereotype.Controller"/>
      <context:exclude-filter type="annotation" expression="org.springframework.web.bind.annotation.ControllerAdvice"/>
   </context:component-scan>
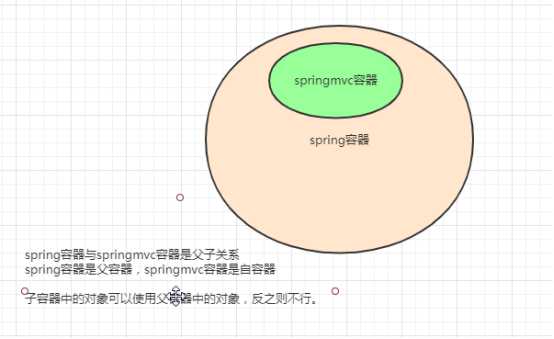
Springmvc的容器和spring容器的关系:
如何将get请求转换为DELETE请求?
借助于js和一个空的form表单
代码实现增删改查
bean层
package com.offcn.bean;

public class Book {
    private int bid;
    private String bname;
    private String author;
    private double price;
    private String type;
    public int getBid() {
        return bid;
    }
    public void setBid(int bid) {
        this.bid = bid;
    }
    public String getBname() {
        return bname;
    }
    public void setBname(String bname) {
        this.bname = bname;
    }
    public String getAuthor() {
        return author;
    }
    public void setAuthor(String author) {
        this.author = author;
    }
    public double getPrice() {
        return price;
    }
    public void setPrice(double price) {
        this.price = price;
    }
    public String getType() {
        return type;
    }
    public void setType(String type) {
        this.type = type;
    }
    @Override
    public String toString() {
        return "Book [bid=" + bid + ", bname=" + bname + ", author=" + author + ", price=" + price + ", type=" + type
                + "]";
    }

}
dao层
package com.offcn.dao;

import java.util.List;

import org.springframework.beans.factory.annotation.Autowired;
import org.springframework.beans.factory.annotation.Qualifier;
import org.springframework.jdbc.core.BeanPropertyRowMapper;
import org.springframework.jdbc.core.JdbcTemplate;
import org.springframework.stereotype.Repository;

import com.offcn.bean.Book;

@Repository
public class BookDao {
    @Autowired
    JdbcTemplate jdbcTemplate;
    public List<Book> getList() {
        String sql = "select * from book";
        return jdbcTemplate.query(sql, new BeanPropertyRowMapper<Book>(Book.class));
    }
    public void add(Book book) {
        String sql = "insert into book values(null,?,?,?,?)";
        jdbcTemplate.update(sql, book.getBname(),book.getAuthor(),book.getPrice(),book.getType());
    }
    public void delete(Integer bid) {
        String sql="delete from book where bid=?";
        jdbcTemplate.update(sql, bid);
    }
    public Book selectOne(Integer bid) {
        String sql = "select * from book where bid=?";
        return jdbcTemplate.queryForObject(sql, new BeanPropertyRowMapper<Book>(Book.class),bid);
    }
    public void update(Book book) {
        String sql = "update book set bname=?,author=?,price=?,type=? where bid=?";
        jdbcTemplate.update(sql, book.getBname(),book.getAuthor(),book.getPrice(),book.getType(),book.getBid());
    }

}
service层
package com.offcn.service;

import java.util.List;

import org.springframework.beans.factory.annotation.Autowired;
import org.springframework.stereotype.Service;

import com.offcn.bean.Book;
import com.offcn.dao.BookDao;

@Service
public class BookService {
    @Autowired
    BookDao bookDao;
    public List<Book> getList() {
        return bookDao.getList();
    }
    public void add(Book book) {
        bookDao.add(book);
    }
    public void delete(Integer bid) {
        bookDao.delete(bid);
    }
    public Book selectOne(Integer bid) {
        return bookDao.selectOne(bid);
    }
    public void update(Book book) {
        bookDao.update(book);
    }

}
Controller层
package com.offcn.service;

import java.util.List;

import org.springframework.beans.factory.annotation.Autowired;
import org.springframework.stereotype.Service;

import com.offcn.bean.Book;
import com.offcn.dao.BookDao;

@Service
public class BookService {
    @Autowired
    BookDao bookDao;
    public List<Book> getList() {
        return bookDao.getList();
    }
    public void add(Book book) {
        bookDao.add(book);
    }
    public void delete(Integer bid) {
        bookDao.delete(bid);
    }
    public Book selectOne(Integer bid) {
        return bookDao.selectOne(bid);
    }
    public void update(Book book) {
        bookDao.update(book);
    }

}
show.jsp
<%@ page language="java" contentType="text/html; charset=UTF-8" pageEncoding="UTF-8"%> <%@taglib uri="http://java.sun.com/jsp/jstl/core" prefix="c"%> <!DOCTYPE html> <html> <head> <meta charset="UTF-8"> <title>Insert title here</title> <script type="text/javascript" src="${pageContext.request.contextPath }/static/js/jquery-1.7.2.js"></script> </head> <body> <form id="f" action="" method="post"> <input type="hidden" name="_method" value="delete"> </form> <table border="2px" align="center" width="70%" cellspacing="0px"> <tr> <th>编号</th> <th>书名</th> <th>作者</th> <th>价格</th> <th>类型</th> <th>操作</th> </tr > <c:forEach items="${list }" var="book"> <tr align="center"> <td id="bid">${book.bid }</td> <td>${book.bname }</td> <td>${book.author }</td> <td>${book.price }</td> <td>${book.type }</td> <td><a href="${pageContext.request.contextPath }/book/selectOne/${book.bid}">修改</a> <a id="del_${book.bid }" href="${pageContext.request.contextPath }/book/delete/${book.bid }">同步删除</a> <a id="down_${book.bid }" href="${pageContext.request.contextPath }/book/json?bid=${book.bid}">异步删除</</a></td> </tr> </c:forEach> <tr align="center"> <td colspan="6"><a href="${pageContext.request.contextPath }/add">添加图书</a></td> </tr> </table> <script type="text/javascript"> $("a[id ^= del]").click(function(){ var href=$(this).attr("href"); var bname = $(this).parent().parent().find("td:eq(1)").text(); if(confirm("确定要删除《"+bname+"》图书吗?")){ $("#f").attr("action",href).submit(); } return false; }); $("a[id ^= down]").click(function(){ var bid = $(this).parent().parent().find("td:eq(0)").text(); $.ajax({ type:"GET", url:"${pageContext.request.contextPath}/book/json", data:{"bid":bid}, success:function(obj){ alert(obj); } }) }) </script> </body> </html>
add.jsp
<%@ page language="java" contentType="text/html; charset=UTF-8"
    pageEncoding="UTF-8"%>
<!DOCTYPE html>
<html>
<head>
<meta charset="UTF-8">
<title>Insert title here</title>
</head>
<body>
    <h3 align="center">添加图书</h3>
    <form action="book/add" method="post" align="center">
        书名:<input type="text" name="bname"><br>
        作者:<input type="text" name="author"><br>
        价格:<input type="text" name="price"><br>
        类型:<input type="text" name="type"><br>
        <input type="submit" value="添加">
    </form>


</body>
</html>
update.jsp
<%@ page language="java" contentType="text/html; charset=UTF-8"
    pageEncoding="UTF-8"%>
<!DOCTYPE html>
<html>
<head>
<meta charset="UTF-8">
<title>Insert title here</title>
</head>
<body>
    <h3 align="center">添加图书</h3>
    <form action="book/add" method="post" align="center">
        书名:<input type="text" name="bname"><br>
        作者:<input type="text" name="author"><br>
        价格:<input type="text" name="price"><br>
        类型:<input type="text" name="type"><br>
        <input type="submit" value="添加">
    </form>


</body>
</html>
MyBatis相对于原生Jdbc、JdbcTemplate、Hibernate的优势【必问】
势【必问】
1.MyBatis本身是一个框架,除了可以对数据表中的数据进行增删改查之外,还有缓存、字段映射等机制。
2.MyBatis支持动态SQL(根据你传过来的不同参数,拼接不同的SQL语句)
3.MyBatis支持将Java代码和SQL语句分离开来。
4.MyBatis支持将表的关联关系直接映射为POJO对象的关联关系
5.MyBatis是一个半自动化【手写SQL】的ORM框架
案例:
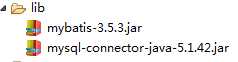
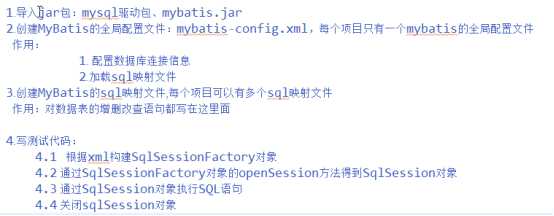
导入mysql驱动包、mybatis的jar包
创建mybatis的全局配置文件
<configuration>
    <environments default="development">
      <!--1. 配置数据库连接信息 -->
        <environment id="development">
            <transactionManager type="JDBC" />
            <dataSource type="POOLED">
                <property name="driver" value="com.mysql.jdbc.Driver" />
                <property name="url" value="jdbc:mysql://localhost:3306/test" />
                <property name="username" value="root" />
                <property name="password" value="1129" />
            </dataSource>
        </environment>
    </environments>

    <!-- 2.加載sql映射文件 -->
    <mappers>
        <mapper resource="aaa.xml" />
    </mappers>
</configuration>
创建mybatis的sql映射文件
<mapper namespace="org.mybatis.example.BlogMapper">

    <select id="selectBlog" resultType="com.offcn.bean.Book">
        select * from book where id = #{id}
    </select>

</mapper>
编写测试代码
public void test01() throws IOException {
        //1.根据xml构建SqlSessionFactory对象
        String resource = "mybatis-config.xml";
        InputStream inputStream = Resources.getResourceAsStream(resource);
        SqlSessionFactory sqlSessionFactory =new SqlSessionFactoryBuilder().build(inputStream);
        //2.通过SqlSessionFactory对象的openSession方法得到SqlSession对象
        SqlSession openSession = sqlSessionFactory.openSession();
        //3.通过SqlSession对象执行SQL语句
        Book blog = openSession.selectOne("org.mybatis.example.BlogMapper.selectBlog", 2);
        System.out.println(blog);
        //4.关闭sqlSession对象
        openSession.close();
    }
流程梳理:
原文:https://www.cnblogs.com/bai3535/p/12093428.html