在Spring Security -- Spring Boot中开启Spring Security一节中我们简单搭建了个Spring Boot + Spring Security的项目,认证的用户名和密码都是由Spring Security生成。Spring Security支持我们自定义认证的过程,如处理用户信息获取逻辑,使用我们自定义的登录页面替换Spring Security默认的登录页及自定义登录成功或失败后的处理逻辑等。这里将在上一节的源码基础上进行改造。
自定义认证的过程需要实现Spring Security提供的UserDetailService接口,该接口只有一个抽象方法loadUserByUsername,源码如下:
package org.springframework.security.core.userdetails;

/**
 * Core interface which loads user-specific data.
 * <p>
 * It is used throughout the framework as a user DAO and is the strategy used by the
 * {@link org.springframework.security.authentication.dao.DaoAuthenticationProvider
 * DaoAuthenticationProvider}.
 *
 * <p>
 * The interface requires only one read-only method, which simplifies support for new
 * data-access strategies.
 *
 * @see org.springframework.security.authentication.dao.DaoAuthenticationProvider
 * @see UserDetails
 *
 * @author Ben Alex
 */
public interface UserDetailsService {
    // ~ Methods
    // ========================================================================================================

    /**
     * Locates the user based on the username. In the actual implementation, the search
     * may possibly be case sensitive, or case insensitive depending on how the
     * implementation instance is configured. In this case, the <code>UserDetails</code>
     * object that comes back may have a username that is of a different case than what
     * was actually requested..
     *
     * @param username the username identifying the user whose data is required.
     *
     * @return a fully populated user record (never <code>null</code>)
     *
     * @throws UsernameNotFoundException if the user could not be found or the user has no
     * GrantedAuthority
     */
    UserDetails loadUserByUsername(String username) throws UsernameNotFoundException;
}
loadUserByUsername方法返回一个UserDetails对象,UserDetails也是一个接口,包含一些用于描述用户信息的方法,源码如下:
/**
 * Provides core user information.
 *
 * <p>
 * Implementations are not used directly by Spring Security for security purposes. They
 * simply store user information which is later encapsulated into {@link Authentication}
 * objects. This allows non-security related user information (such as email addresses,
 * telephone numbers etc) to be stored in a convenient location.
 * <p>
 * Concrete implementations must take particular care to ensure the non-null contract
 * detailed for each method is enforced. See
 * {@link org.springframework.security.core.userdetails.User} for a reference
 * implementation (which you might like to extend or use in your code).
 *
 * @see UserDetailsService
 * @see UserCache
 *
 * @author Ben Alex
 */
public interface UserDetails extends Serializable {
    // ~ Methods
    // ========================================================================================================

    /**
     * Returns the authorities granted to the user. Cannot return <code>null</code>.
     *
     * @return the authorities, sorted by natural key (never <code>null</code>)
     */
    Collection<? extends GrantedAuthority> getAuthorities();

    /**
     * Returns the password used to authenticate the user.
     *
     * @return the password
     */
    String getPassword();

    /**
     * Returns the username used to authenticate the user. Cannot return <code>null</code>.
     *
     * @return the username (never <code>null</code>)
     */
    String getUsername();

    /**
     * Indicates whether the user‘s account has expired. An expired account cannot be
     * authenticated.
     *
     * @return <code>true</code> if the user‘s account is valid (ie non-expired),
     * <code>false</code> if no longer valid (ie expired)
     */
    boolean isAccountNonExpired();

    /**
     * Indicates whether the user is locked or unlocked. A locked user cannot be
     * authenticated.
     *
     * @return <code>true</code> if the user is not locked, <code>false</code> otherwise
     */
    boolean isAccountNonLocked();

    /**
     * Indicates whether the user‘s credentials (password) has expired. Expired
     * credentials prevent authentication.
     *
     * @return <code>true</code> if the user‘s credentials are valid (ie non-expired),
     * <code>false</code> if no longer valid (ie expired)
     */
    boolean isCredentialsNonExpired();

    /**
     * Indicates whether the user is enabled or disabled. A disabled user cannot be
     * authenticated.
     *
     * @return <code>true</code> if the user is enabled, <code>false</code> otherwise
     */
    boolean isEnabled();
}
这些方法的含义如下:、
实际中我们可以自定义UserDetails接口的实现类,也可以直接使用Spring Security提供的UserDetails接口实现类org.springframework.security.core.userdetails.User。
说了那么多,下面我们来开始实现UserDetailService接口的loadUserByUsername方法。
首先创建UserDetails接口的实现类User,用于存放模拟的用户数据(实际中一般从数据库获取,这里为了方便直接模拟):
package com.goldwind.entity;

import com.fasterxml.jackson.annotation.JsonIgnore;
import lombok.Data;
import lombok.NoArgsConstructor;
import org.springframework.security.core.GrantedAuthority;
import org.springframework.security.core.userdetails.UserDetails;
import org.springframework.security.crypto.bcrypt.BCryptPasswordEncoder;
import org.springframework.security.crypto.password.PasswordEncoder;

import java.util.*;

/**
 * @Author: zy
 * @Description: 用户实体类
 * Spring Security框架提供了一个基础用户接口UserDetails,该接口提供了基本的用户相关的操作,比如获取用户名/密码、
 * 用户账号是否过期和用户认证是否过期等,我们定义自己的User类时需要实现该接口。
 * @Date: 2020-2-9
 */
@Data
@NoArgsConstructor
public class User implements UserDetails {

    private static final PasswordEncoder PASSWORD_ENCODER = new BCryptPasswordEncoder();

    private String id;

    /**
     * 用户登录名
     */
    private String username;

    /**
     * 用户真实姓名
     */
    private String realName;

    /**
     * 用户登录密码,用户的密码不应该暴露给客户端
     */
    @JsonIgnore
    private String password;

    /**
     * 用户创建者
     */
    private int createdBy;

    /**
     * 创建时间
     */
    private Long createdTime = System.currentTimeMillis();

    /**
     * 该用户关联的企业/区块id
     */
    private Map<String, Object> associatedResources = new HashMap<>();

    /**
     * 用户关注的企业列表
     */
    private List<String> favourite = new ArrayList<>();

    /**
     * 用户在系统中的角色列表,将根据角色对用户操作权限进行限制
     */
    private List<String> roles = new ArrayList<>();


    /**
     * 设置密码
     * @param password
     */
    public void setPassword(String password) {
        this.password = PASSWORD_ENCODER.encode(password);
    }

    /**
     * 权限集合
     */
    private Collection<? extends GrantedAuthority> authorities = null;

    /**
     * 账户是否未过期
     */
    private boolean accountNonExpired = true;

    /**
     * 账户是否未锁定
     */
    private boolean accountNonLocked= true;

    /**
     * 用户凭证是否没过期,即密码是否未过期
     */
    private boolean credentialsNonExpired= true;

    /**
     * 用户是否可用
     */
    private boolean enabled= true;
}
PasswordEncoder是一个密码加密接口,而BCryptPasswordEncoder是Spring Security提供的一个实现方法,我们也可以自己实现PasswordEncoder。不过Spring Security实现的BCryptPasswordEncoder已经足够强大,它对相同的密码进行加密后可以生成不同的结果。
接着创建CustomUserDetailService实现UserDetailService:
package com.goldwind.service;

import com.goldwind.entity.User;
import org.springframework.beans.factory.annotation.Autowired;
import org.springframework.context.annotation.Configuration;
import org.springframework.security.core.authority.AuthorityUtils;
import org.springframework.security.core.userdetails.UserDetails;
import org.springframework.security.core.userdetails.UserDetailsService;
import org.springframework.security.core.userdetails.UsernameNotFoundException;
import org.springframework.security.crypto.password.PasswordEncoder;

/**
 * @Author: zy
 * @Description: 自定义用户信息Service配置类
 * @Date: 2020-2-9
 */
@Configuration
public class CustomUserDetailService implements UserDetailsService {

    @Autowired
    private PasswordEncoder passwordEncoder;
    /**
     * 点击登录时会调用该函数、并传入登录名
     * @param username:登录用户名
     * @return
     * @throws UsernameNotFoundException
     */
    @Override
    public UserDetails loadUserByUsername(String username) throws UsernameNotFoundException {
        //模拟一个用户 替代数据库获取逻辑
        User user = new User();
        user.setUsername(username);
        user.setPassword(passwordEncoder.encode("123456"));
        // 输出加密后的密码
        System.out.println(user.getPassword());

        return new org.springframework.security.core.userdetails.User(user.getUsername(),
                user.getPassword(),
                user.isEnabled(),
                user.isAccountNonExpired(),
                user.isCredentialsNonExpired(),
                user.isAccountNonLocked(),
                AuthorityUtils.commaSeparatedStringToAuthorityList("admin"));
    }
}
这里我们使用了org.springframework.security.core.userdetails.User类包含7个参数的构造器,其还包含一个三个参数的构造器User(String username, String password,Collection<? extends GrantedAuthority> authorities),由于权限参数不能为空,所以这里先使用AuthorityUtils.commaSeparatedStringToAuthorityList方法模拟一个admin的权限,该方法可以将逗号分隔的字符串转换为权限集合。
这时候重启项目,访问http://localhost:8080/login,便可以使用任意用户名以及123456作为密码登录系统。我们多次进行登录操作,可以看到控制台输出的加密后的密码如下:
$2a$10$QWhO2OtA6/o0c6P2/KIwzOIlS5xGpPHrYxbeVc8AvAf0LfmZaLCfq
$2a$10$3A6L/hDeb9OeM/5KzUMfHufwZtqTuV5gyi2vHN6N2w8U7TrA9GQa2
$2a$10$gWzh2cqGqYg4qzH8lmYlUeHWc8epTyh6.gMyVdW4xZDJLNU4s1pnW
可以看到,BCryptPasswordEncoder对相同的密码生成的结果每次都是不一样的。
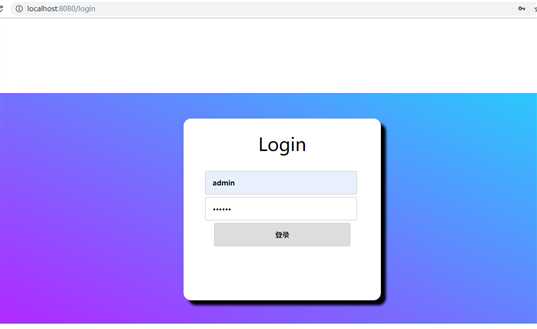
默认的登录页面过于简陋,我们可以自己定义一个登录页面
pom文件引入依赖包:
<!--   引入freemarker的依赖包   -->
<dependency>
     <groupId>org.springframework.boot</groupId>
     <artifactId>spring-boot-starter-freemarker</artifactId>
</dependency>
在src/main/resources/创建一个templates文件夹,并创建login.ftl文件:

<!DOCTYPE html>
<html>
<head>
    <meta charset="utf-8">
    <title></title>
    <style type="text/css">
        * {
            margin: 0px;
        }

        #content {
            margin: 150px auto;
            width: 100%;
            height: 460px;
            border: 1px transparent solid;
            background-color: #21D4FD;
            background-image: linear-gradient(243deg, #21D4FD 0%, #B721FF 100%);
            background-image: -webkit-linear-gradient(243deg, #21D4FD 0%, #B721FF 100%);
            background-image: -moz-linear-gradient(243deg, #21D4FD 0%, #B721FF 100%);
            background-image: -o-linear-gradient(243deg, #21D4FD 0%, #B721FF 100%);
        }

        #box {
            margin: 50px auto;
            width: 30%;
            height: 360px;
            background-color: #fff;
            text-align: center;
            border-radius: 15px;
            border: 2px #fff solid;
            box-shadow: 10px 10px 5px #000000;
        }

        .title {
            line-height: 58px;
            margin-top: 20px;
            font-size: 36px;
            color: #000;
            height: 58px;
        }

        #box:hover {
            border: 2px #fff solid;
        }

        .input {
            margin-top: 20px;
        }

        input {
            margin-top: 5px;
            outline-style: none;
            border: 1px solid #ccc;
            border-radius: 3px;
            padding: 13px 14px;
            width: 70%;
            font-size: 14px;
            font-weight: 700;
            font-family: "Microsoft soft";
        }

        button {
            margin-top: 20px;
            border: none;
            color: #000;
            padding: 15px 32px;
            text-align: center;
            text-decoration: none;
            display: inline-block;
            font-size: 16px;
            border-radius: 15px;
            background-color: #CCCCCC;
        }
        button:hover{
            background-color: #B721FF;
            color: #fff;
        }
    </style>
</head>
<body>
    <div id="content">
        <div id="box">
            <div class="title">Login</div>
            <div class="input">
                <form name="f" action="/login" method="post">
                    <input type="text" id="username" name="username" value="" placeholder="用户名" />
                    <br>
                    <input type="password" id="password" name="password" placeholder="密码" />
                    <br>
                    <input type="submit" value="登录" onclick="getuser()"/>
                </form>
            </div>
        </div>
    </div>

    <script type="text/javascript">
        function getuser() {
            var username = document.getElementById("username").value;
            var password = document.getElementById("password").value;
            var password1 = document.getElementById("password1").value;
            testing(username, password,password1)
            //alert("username:"+username+"\n"+"password:"+password);
        }

        function testing(username, password, password1) {
            var tmp = username && password;
            if (tmp == "") {
                alert("请填写完整信息");
                return 0;
            }
            if (username.length < 6 || username.length > 16) {
                alert("用户名长度为:6-16位")
                return 0;
            }
            if (password<6)
            {
                alert("密码长度错误");
            }
        }
    </script>
</body>
</html>
在src/main/resources下新建freemarker配置文件application.yml:
spring:
  ## Freemarker 配置
  freemarker:
    ##模版存放路径(默认为 classpath:/templates/)
    template-loader-path: classpath:/templates/
    ##是否生成缓存,生成环境建议开启(默认为true)
    cache: false
    ##编码
    charset: UTF-8
    check-template-location: true
    ##content-type类型(默认为text/html)
    content-type: text/html
    ## 设定所有request的属性在merge到模板的时候,是否要都添加到model中(默认为false)
    expose-request-attributes: false
    ##设定所有HttpSession的属性在merge到模板的时候,是否要都添加到model中.(默认为false)
    expose-session-attributes: false
    ##RequestContext属性的名称(默认为-)
    request-context-attribute: request
    ##模板后缀(默认为.ftl)
    suffix: .ftl
在com.goldwind.controller包下创建LoginController.java:
package com.goldwind.controller;

import org.springframework.stereotype.Controller;
import org.springframework.web.bind.annotation.RequestMapping;

/**
 * @Author: zy
 * @Description: 登陆页面
 * @Date: 2020-2-9
 */
@Controller
public class LoginController {

    /**
     * 自定义登录页面
     * @return
     */
    @RequestMapping("/login")
    public String login(){
        return "/login";
    }

}
要怎么做才能让Spring Security跳转到我们自己定义的登录页面呢?很简单,只需要在BrowserSecurityConfig的configure中添加一些配置:
    /**
     * 配置拦截请求资源
     * @param http:HTTP请求安全处理
     * @throws Exception
     */
    @Override
    protected void configure(HttpSecurity http) throws Exception {
        http.authorizeRequests()    // 授权配置
                .anyRequest()       // 任何请求
                .authenticated()    //都需要身份认证
                .and().
                formLogin()         // 或者httpBasic()
                .loginPage("/login")  // 指定登录页的路径
                .loginProcessingUrl("/login")  // 指定自定义form表单请求的路径
                // 必须允许所有用户访问我们的登录页(例如未验证的用户,否则验证流程就会进入死循环)
                // 这个formLogin().permitAll()方法允许所有用户基于表单登录访问/login这个page。
                .permitAll()
                .and()
                .logout()
                .permitAll()
                .and()
                //默认都会产生一个hiden标签 里面有安全相关的验证 防止请求伪造 这边我们暂时不需要 可禁用掉
                .csrf().disable();
面代码中.loginPage("/login")指定了跳转到登录页面的请求URL,.loginProcessingUrl("/login")对应登录页面form表单的action="/login",.permitAll()表示跳转到登录页面的请求不被拦截,否则会进入无限循环。
这时候启动系统,访问http://localhost:8080/,会看到页面已经被重定向到了http://localhost:8080/login:
参考文章:
[1] Spring Security自定义用户认证
Spring Security -- 自定义用户认证(转载)
原文:https://www.cnblogs.com/zyly/p/12286426.html
