templates简介:

市面上的模板引擎有:JSP、Velocity、Freemarker、Thymeleaf;
之前开发用jsp当摸吧引擎,但是springboot的特殊机制,使得springboot不支持jsp页面,但这样会有很多开发上的不方便,所以他支持了Thymelead模板引擎。
我这里就不详细介绍templates的原理,百度上面一大堆,这主要讲讲templates的用法。
首先是maven的依赖:
    <!-- 模板引擎 thymeleaf的依赖-->
         <dependency>
            <groupId>org.springframework.boot</groupId>
            <artifactId>spring-boot-starter-thymeleaf</artifactId>
        </dependency>
然后在application.properties的配置项里面配置:
#配置项,
#这里主要配置模板引擎的数据

#thymeleaf配置
#模板的模式,支持如:HTML、XML、TEXT、JAVASCRIPT等
spring.thymeleaf.mode=HTML5
#编码,可不用配置
spring.thymeleaf.encoding=UTF-8
#内容类别,可不用配置
spring.thymeleaf.servlet.content-type=text/html
#开发配置为false,避免修改模板还要重启服务器
spring.thymeleaf.cache=false
#配置模板路径,默认就是templates,可不用配置
spring.thymeleaf.prefix=classpath:/templates/
配置项好之后,那么就剩下实现了。
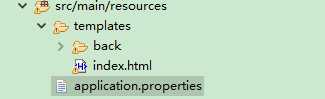
而模板文件时要放到tempates里面的,所以要先在类路径下面创建这个文件夹,然后在说其他的。如下:
接下来写写怎么呈现集成成功。
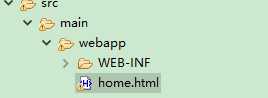
这个是home.html,放在webapp下面,因为都可以通过项目来跳级访问资源,所以放在templates下面的那些模板文件可以和这互相访问。
以下是home.html的实现:
<html>
<head>
<meta http-equiv="Content-Type" content="text/html; charset=UTF-8"/>
<title></title>
</head>
<body>
<p>在webapp下面的资源可以访问到templates下面的资源,原因是webapp在加载的时候会放到classpath下面去</p>
<p>所以可以进行交互,互相访问</p>
    <a href="templates/index">index</a>
    <a href="templates/back">more</a>
</body>
</html>
controller的代码:
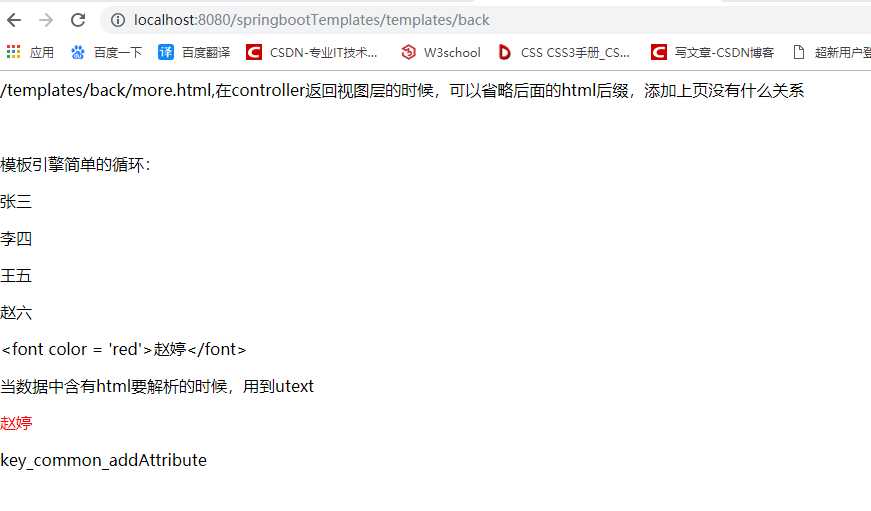
package start.controller;

import org.springframework.stereotype.Controller;
import org.springframework.ui.ModelMap;
import org.springframework.web.bind.annotation.RequestMapping;
import org.springframework.web.bind.annotation.ResponseBody;
import org.springframework.web.bind.annotation.RestController;

/**
 * 控制类
 * @author 徐金仁
 *
 */
@Controller
@RequestMapping("templates")
public class Controller_ {

    @RequestMapping("index")
    public String showIndex(ModelMap map){
        map.addAttribute("username", "蘑菇头");
        map.addAttribute("password", "123456789");
        map.put("tes", "你好");
        return "index";
    }


    /**
     * 关于模板引擎的注解,如果要返回一个视图层的话就不能使用@ResponseBody注解,
     * 使用@ResponseBody注解的话,会将返回的视图当做字符串来处理返回,就起不到模板引擎的效果
     * 还有,上面控制类的注解:@Controller和@RestController这两个注解要区分开来
     * @RestController = @Controller + @ResponseBody
     * @param map
     * @return
     */
    /*@ResponseBody*/
    @RequestMapping("back")
    public String showback(ModelMap map){

        map.put("key1", "/templates/back/more.html,在controller返回"
                + "视图层的时候,可以省略后面的html后缀,添加上页没有什么关系");

        map.put("arr", new String[]{"张三","李四","王五","赵六"});

        map.put("name", "<font color = ‘red‘>赵婷</font>");

        //ModelMap中的put和addAttribute同样是添加数据,那么有什么区别?

        //map.put(null, "null_put");

        //map.addAttribute(null,"null_addAttribute");

        //结果证明:put方法是能添加空值的,而addAttribute是不能添加空值的

        //当put和addAllAttribute方法添加了相同的key值,会出什么问题。

        map.put("key_common", "key_common_put");

        map.addAttribute("key_common","key_common_addAttribute");

        //结果显示,会存在相同key会覆盖的问题,后面添加的数据会将前面一个key值的数据覆盖掉

        return "/back/more.html";
    }

}
index.html如下:
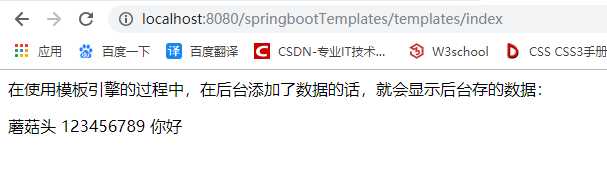
<html  xmlns:th="http://www.thymeleaf.org"  lang="zh-CN">
<head>
<meta http-equiv="Content-Type" content="text/html; charset=UTF-8"/>
<title></title>
</head>
<body>
<p>在使用模板引擎的过程中,在后台添加了数据的话,就会显示后台存的数据:</p>
    <span th:text = "${username}"></span>
    <span th:text = "${password}"></span>
    <span th:text="${tes}"></span>
</body>
</html>
more.html如下:
<html xmlns:th="http://www.thymeleaf.org" lang="zh-CN">
<head>
<meta http-equiv="Content-Type" content="text/html; charset=UTF-8"/>
<title></title>
</head>
<body>
    <p th:text="${key1}"></p>
    <br/>
    <p>模板引擎简单的循环:</p>
            <p  th:each = "item : ${arr}" th:text="${item}"></p>

    <p th:text="${name}"></p>
    <p>当数据中含有html要解析的时候,用到utext</p>
    <p th:utext="${name}"></p>

    <p th:text="${null}">1</p>
    <p th:text="${null}">2</p>
    <p th:text="${key_common}"></p>
</body>
</html>
结果如下:
思路来源:https://blog.csdn.net/qq_29726359/article/details/88043652
https://blog.csdn.net/ignorewho/article/details/80692094
原文:https://www.cnblogs.com/1998xujinren/p/12352855.html