下载地址:https://cdn.mysql.com//Downloads/MySQL-5.7/mysql-5.7.29-linux-glibc2.12-x86_64.tar.gz
下载完成之后将文件传输到/opt目录里面。
1,直接拖拽文件到/opt
2,rz命令
没装lrzsz安装包,则无法使用rz和sz命令:
yum install -y lrzsz
tar -zxvf mysql-5.7.29-linux-glibc2.12-x86_64.tar.gz
mv mysql-5.7.29-linux-glibc2.12-x86_64 /usr/local/mysql
groupadd mysql
useradd -r -g mysql mysql
mkdir -p  /data/mysql              #创建目录
chown mysql:mysql -R /data/mysql   #赋予权限
vim /etc/my.cnf
[mysqld]
bind-address=0.0.0.0
port=3306
user=mysql
basedir=/usr/local/mysql
datadir=/data/mysql
socket=/tmp/mysql.sock
log-error=/data/mysql/mysql.err
pid-file=/data/mysql/mysql.pid
#character config
character_set_server=utf8mb4
symbolic-links=0
explicit_defaults_for_timestamp=true
cd /usr/local/mysql/bin/
./mysqld --defaults-file=/etc/my.cnf --basedir=/usr/local/mysql/ --datadir=/data/mysql/ --user=mysql --initialize
如果有如下报错:
./mysqld: error while loading shared libraries: libnuma.so.1: cannot open shared object file: No such file or directory
是缺少文件:
yum -y install numactl
如果出现如下错误:
[ERROR] --initialize specified but the data directory has files in it. Aborting.
进行如下处理:
因为我们/etc/my.cnf中datadir=/data/mysql这样配置的,且报的错是mysql中的data目录已经有数据了。因此我们cd / /data/mysql
[root@VM_0_8_centos mysql]# ll
total 110656
-rw-r----- 1 mysql mysql       56 Mar 19 22:23 auto.cnf
-rw------- 1 mysql mysql     1676 Mar 19 22:23 ca-key.pem
-rw-r--r-- 1 mysql mysql     1112 Mar 19 22:23 ca.pem
-rw-r--r-- 1 mysql mysql     1112 Mar 19 22:23 client-cert.pem
-rw------- 1 mysql mysql     1680 Mar 19 22:23 client-key.pem
-rw-r----- 1 mysql mysql      185 Mar 19 22:44 ib_buffer_pool
-rw-r----- 1 mysql mysql 12582912 Mar 19 22:44 ibdata1
-rw-r----- 1 mysql mysql 50331648 Mar 19 22:44 ib_logfile0
-rw-r----- 1 mysql mysql 50331648 Mar 19 22:17 ib_logfile1
-rw-r----- 1 mysql mysql    23540 Mar 19 22:44 mysql.err
-rw------- 1 mysql mysql     1680 Mar 19 22:23 private_key.pem
-rw-r--r-- 1 mysql mysql      452 Mar 19 22:23 public_key.pem
-rw-r--r-- 1 mysql mysql     1112 Mar 19 22:23 server-cert.pem
-rw------- 1 mysql mysql     1676 Mar 19 22:23 server-key.pem
确实有数据
因此我们要么直接删掉/data里面的mysql文件夹,要么配分一下
cd /data
mv mysql/ mysql.bak
cd /usr/local/mysql/bin/
./mysqld --defaults-file=/etc/my.cnf --basedir=/usr/local/mysql/ --datadir=/data/mysql/ --user=mysql --initialize
这样就不会报错了!
[root@VM_0_8_centos bin]# cat /data/mysql/mysql.err
2020-03-19T14:50:13.279609Z 0 [Warning] InnoDB: New log files created, LSN=45790
2020-03-19T14:50:13.418087Z 0 [Warning] InnoDB: Creating foreign key constraint system tables.
2020-03-19T14:50:13.492982Z 0 [Warning] No existing UUID has been found, so we assume that this is the first time that this server has been started. Generating a new UUID: f06c7917-69f0-11ea-a39f-525400074b77.
2020-03-19T14:50:13.496862Z 0 [Warning] Gtid table is not ready to be used. Table ‘mysql.gtid_executed‘ cannot be opened.
2020-03-19T14:50:13.843658Z 0 [Warning] CA certificate ca.pem is self signed.
2020-03-19T14:50:14.412825Z 1 [Note] A temporary password is generated for root@localhost: TvWyskDcM3=l
先将mysql.server放置到/etc/init.d/mysql中
cp /usr/local/mysql/support-files/mysql.server /etc/init.d/mysql
启动命令
[root@VM_0_8_centos bin]# service mysql start
Starting MySQL. SUCCESS!
查看进程
[root@VM_0_8_centos bin]# ps -ef|grep mysql
root      4625     1  0 22:51 pts/0    00:00:00 /bin/sh /usr/local/mysql/bin/mysqld_safe --datadir=/data/mysql --pid-file=/data/mysql/mysql.pid
mysql     4852  4625  0 22:51 pts/0    00:00:00 /usr/local/mysql/bin/mysqld --basedir=/usr/local/mysql --datadir=/data/mysql --plugin-dir=/usr/local/mysql/lib/plugin --user=mysql --log-error=/data/mysql/mysql.err --pid-file=/data/mysql/mysql.pid --socket=/tmp/mysql.sock --port=3306
root      6352 27089  0 23:02 pts/0    00:00:00 grep --color=auto mysql
到这里,说明MySQL已经安装成功。
登录MySQL
[root@VM_0_8_centos bin]# ./mysql -u root -p
Enter password:
Welcome to the MySQL monitor. Commands end with ; or \g.
Your MySQL connection id is 2
Server version: 5.7.29
Copyright (c) 2000, 2020, Oracle and/or its affiliates. All rights reserved.
Oracle is a registered trademark of Oracle Corporation and/or its
affiliates. Other names may be trademarks of their respective
owners.
Type ‘help;‘ or ‘\h‘ for help. Type ‘\c‘ to clear the current input statement.
mysql>
再执行下面三步操作,然后重新登录:
SET PASSWORD = PASSWORD(‘123456‘);
ALTER USER ‘root‘@‘localhost‘ PASSWORD EXPIRE NEVER;
FLUSH PRIVILEGES;
mysql> SET PASSWORD = PASSWORD(‘123456‘);
Query OK, 0 rows affected, 1 warning (0.00 sec)

mysql> ALTER USER ‘root‘@‘localhost‘ PASSWORD EXPIRE NEVER;
Query OK, 0 rows affected (0.00 sec)

mysql> FLUSH PRIVILEGES;
Query OK, 0 rows affected (0.00 sec)

mysql>
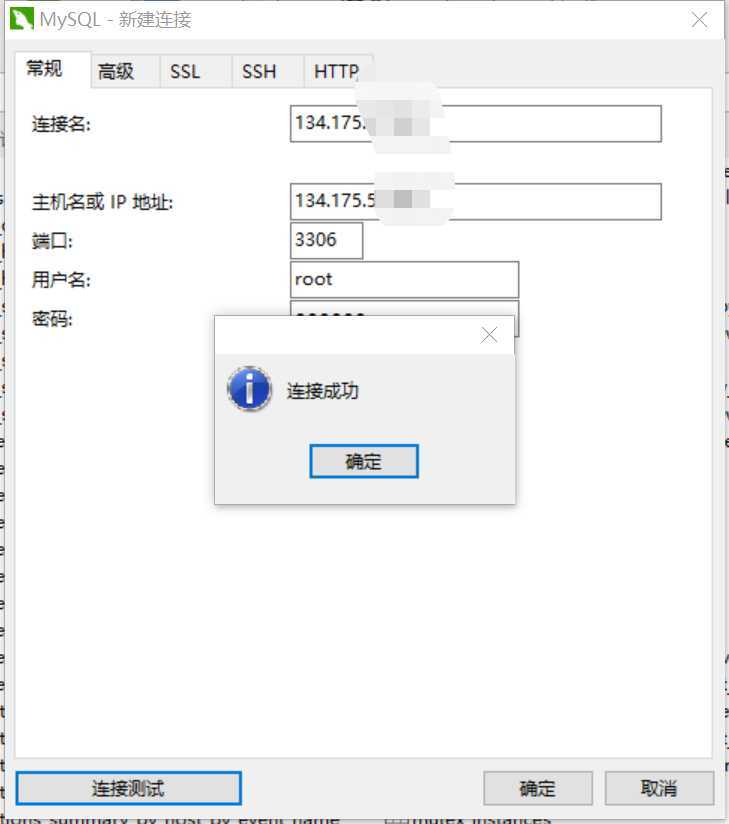
这时候你如果使用远程连接……你会发现你无法连接

这里主要执行下面三个命令(先登录数据库):
use mysql                                            #访问mysql库
update user set host = ‘%‘ where user = ‘root‘;      #使root能再任何host访问
FLUSH PRIVILEGES;                                    #刷新
mysql> use mysql                                            #访问mysql库
Reading table information for completion of table and column names
You can turn off this feature to get a quicker startup with -A

Database changed
mysql> update user set host = ‘%‘ where user = ‘root‘;      #使root能再任何host访问
Query OK, 1 row affected (0.00 sec)
Rows matched: 1  Changed: 1  Warnings: 0

mysql> FLUSH PRIVILEGES;                                    #刷新
Query OK, 0 rows affected (0.00 sec)

接下来配置软链接:
ln -s /usr/local/mysql/bin/mysql /usr/bin
这样在任何目录下都可以登录MySQL了。
感谢https://blog.csdn.net/qq_37598011/article/details/93489404
我是根据这篇博客安装的,一遍成功。但是在初始化的时候一直出错,出错没关系,不需要重新安装,只需要根据报的错进行相应处理,这个过程肯定要去百度的。
结束!
原文:https://www.cnblogs.com/aaronthon/p/12520757.html